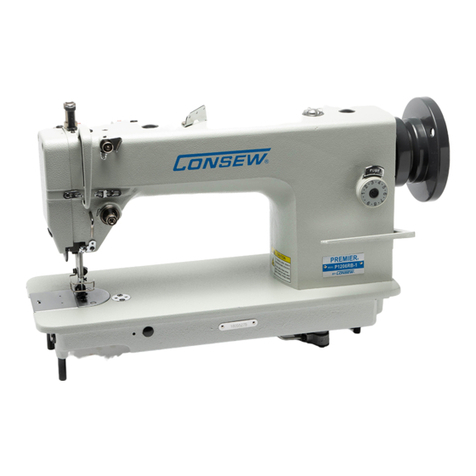
Consew 733R-5 Use and care manual

LDNSEIN
OPERATING
INSTRUCTIONS,
PARTS LIST
MAINTENANCE
PROCEDURES
CONSOLIDATED SEWING
MACHINE
CORP.
Model
733R-5
EXTRA
HEAVY
DUTY
LONG
ARM
SINGLE
NEEDLE
DROP
FEED
ALTERNATING
PRESSER
FEET
LOCKSTITCH
MACHINE
CONSOLIDATED
SEWING MACHINE
CORP.
COPYRIGHT (01989
CONSOLIDATED
SEWING MACHINE
CORPORATION
From the library of: Superior Sewing Machine & Supply LLC

INTRODUCTION
-CONSEWMODEL
733R-5
ConsewModel733R-5 is a single needle,flatbed,type 301 stitch,reverse feed,industrial
sewing machine usedis the fabrication andrepair
of
aerial delivery equipment.
ConsewModel 733R-5 is capable
of
sewingfabrics thatrange from heavy cotton and
nylonduckto multiple layers
of
heavywebbing.
ConsewModel 733R-5 is able to fabricate and install
personnel-,cargo-and
extraction-parachutes,
bridle loops,locking stowloops,harnesses and multiple layer
heavywebbing splices.
Preventive Maintenance
Machines should
be
keptcoveredwhennot in operationto preventdust and dirt
accumulationwhich,when allowedto buildup,mixes with oil and becomes cakedonthe
machine.
Afteruse, sewingmachines should
be
wipeddownwithoil anda soft clothbefore
covering.
Once a weekthe inside
of
the machine andthe motor should
be
blownoutwith shop air
if
available.Ifshop airis not available, cleanwith a softbristle
brush.
CAUTION: USE EYE PROTECTION WHENUSING SHOP AIR.
Once a yearthe machine shouldbe cleanedwith a solvent such as Freon, then
immediatelyoiledthoroughly to preventrustand corrosion.
CAUTION: ENSURE GOODVENTILATION WHENUSING SOLVENTS.
Whenthe machines are
in
constantuse theyshould
be
oiledatleast twice daily.
Usingtheproperoil is
of
utmostimportance. For lubrication
of
the machine,onlygood
quality sewingmachine oil shoud
be
used.
a.
Oilingpoints are shownin figures 10 and 11.
b.
Use one drop at each oilingpoint.
From the library of: Superior Sewing Machine & Supply LLC

SECTION
I1
OPERATING INSTRUCTIONSAND
MAINTENANCE PROCEDURES
Characteristics and Capacity
The CONSEW Model 733R-5 singleneedle,extraheavy duty lockstitch machine is
designed for sewing canvas,tents,sails,hamesses,safetybelts,webbing and similar
products.
It
is equipped with altematingpressers,drop feed and a long-beakoscillating shuttle on a
horizontal axis.It has a
cleanceof25.4mm(l"
)under the presser foot. Clearance,on
bed,at right
of
needle is413mm(16
t;4'
)and length
ofbcd
655mm(25-3/4")
The machine is equippedwitha stitching reverse lever whichalso regulates stitches in
length from 3 to 13mm(2to 8 stitches perinch).
From the library of: Superior Sewing Machine & Supply LLC

Alternating pressers consist ofavibrating presser
foot
and
alifting presser
foot
working
in
combination.In operation,the pressers alternately press
down
on
the
material,the
vibrating presser working
in
unison with
the
feed,
so
that there
is
no
slipping of
the
two
or
more
plies ofmaterial which
are
being
sewn.
Additional features include pedal
operated presser foot lift
and
reverse.The
maximum
operating speed
is
550
stitches per
minute.
The
balance wheel
always
rotates towards the operator.
THREAD
AND
NEEDLE
SELECTION
THREAD
Left twist thread should
be
used
in
the
needle. For
the
bobbin,either right twist
or
left
twist
can
be
used.
Fig.1
How
to
determine
the
twist
Hold
the
thread
as
shown
in
Fig.1
.
Turn
the
thread over toward
you
between
the
thumb
and
forefinger ofthe right
hand
.Ifleft twist,
the
strands will
wing
tighter.Ifright twist,
the
strands will unravel.
NEEDLE
Needles recommended
for
Consew
machine
Model
733R-5
are
as
follows;
For Cloth
Schmetz-1
000
Series available
in
sizes 230,250,280,and
300
Schmetz-1000H Series available
in
sizes 160,200,230,
250,280,300,330
For Leather(Special orders only)
From the library of: Superior Sewing Machine & Supply LLC

Schmetz- J.003D Series,triangularpoint,available
in
sizes 230,250,280
Schnietz- 1
OOODB
1Series-
wide
diamond point available in sizes
280
Schmetz-
lOOOLL
Series,narrow twist point,available in sizes 250,280
Schmetz-
J.OOOLR
Series,narrowreverse twist point,available in sizes
300
Schmetz
lOOO.Q
Series,square point,available
in
sizes 280,300
The
size
of
the needle
to
be
used depends upon the size
of
the
thread which must pass
freely through the
eye
ofthe needle.
Do
not use rough
or
uneven thread or thread which passes with difficulty through the
needle eye,as such thread will interfere with the successful use
of
the machine.
TO
REMOVE
THE
BOBBIN
Rotate
the
balance wheel bringing
the
needle bar
to
its lowest position.Then with the
curved part
of
the shuttle cylinder opener t35225,which should conform
to
the curve of
the should,
as
shown in Fig.2,insert the small
end
of
the shuttle cylinder opener into Slot
Ain the spring latch under
the
shuttle cylinder(Fig.2).
Fig.2 use
of
Shuttle Cylinder Opener(35225)
4.
WINDING
BOBBINS
From the library of: Superior Sewing Machine & Supply LLC

The bobbinwinder ismounted
on
the tabletop as showninFig.3
with
its pulley
in
front
of
the driving
belt
so that the pulleywill separate from thebelt after the bobbinhas been
wound with sufficientthread.
Push the bobbin
on
the bobbin spindle
{l,Fig.3)as
far as
itwill
go.Pass the threadfrom
thread stand downward throughthe eye
in
thetension bracket.Then betweenandaround
the back
of
thetension discs,bring the threadforward toward the bobbinandwind from
below
in
clockwise directionseveral times around thebobbin.Push bobbinwinder lever
{3,Fig.3)downwarduntil the wheel{2,Fig.3)contactsthe drive belt andstartthe
machine.
Afterbobbin is filledwith thread,release will causethe wheel to disengagefrom the belt
andwinding will stop.
Cutthe thread andremove the bobbin fromthe bobbin spindle.
The adjustment screw{S,Fig.3)can
be
turned in
or
outto increase
or
decreasethe
amount
of
the threadwound onthe bobbin.
When fine thread iswound
on
bobbins,use lighttension.ltis regulated
by
turning the
knurlednut{6,Fig.3)on the tensionbracket at the rear
of
the bobbinwinder.
Bobbincan
be
woundwhile the machine issewing.
If
the thread does
not
wind
evenly onbobbins,loosen the screw(4,Fig.3)andmovethe
bracketto the right
or
left as required,thentighten the screw.
6
3
Fig.3,winding Bobbins
From the library of: Superior Sewing Machine & Supply LLC

5.TO REPLACE THE BOBBINAND THREADTHE SHUTTLE
Hold the bobbinbetweenthe thumb and indexfinger
of
the lefthand,atthe sane timethe
thread is drawing offfrom the undersidetoward the right as shown
in
Fig.4.Place the
bobbin
in
the cylinderas far as
it
will go,draw the threadinthe slot
B,Fig.4in
the
cylinder and under thetension spring,then into thedelivery eyeA.Fig.4,thenpushthe
cylinderbackuntil
it
is locked
by
thespring latch,and allow about3 inches
of
threadto
hang free from theshuttle Fig.S so that
it
canbe drawnup through the throatplate,as
noted in Fig.
8.
Fig.4 BobbinReplacement andThreading the Shuttle
From the library of: Superior Sewing Machine & Supply LLC

Fig.5 Bobbinreplaced andShuttle thread
6.TO SETTHE NEEDLE
Rotate the balance wheeluntil the needle
bar
has reached its highestpositon.Loosen the
set screw
in
theneedle clamp and placethe needle up intothe clamp as faras it will go.
The long groove
of
the needle mustbefacing left and theeye
in
line withthe arm
of
the
machine.Then tighten the setscrew.
7
.TO THREAD THENEEDLE
With operatorfacing front
of
machine,
tum
balance wheel,until the threadtake-up lever,
(Fig.6)reaches its highest position.
From the library of: Superior Sewing Machine & Supply LLC

Fig.6 Threading theneedle
Openthe lid
ofCup
C;pass the threadfrom the cotton standdownward through the hole
in the right side
of
cup,thenthrough thethread post 1 undesthe lid ,then throughthe hole
in the left
sideofcup.Then
close thelid and pass thethread through the threadguide 2,
over from righttoleftbetween the threadretainer discs 3,down underand from thread
guide
13
to letaround the tension wheel4,into the
loop
of
the threadtake-up spring S,underthestaple 6,Figs.6 and
7,upand
from backto
front through the hole7,inthe threadtake-uplever,down throughthe thread guide
8,
Fig.7 into the slot9
in
the vibratingpresser bar,intothread guide 10 onthe needle
clamp,and from lefttoright through the eye
of
the needle
11
thenpass thethread down
through the hole inthe lifting presser foot 12. Draw about fourinches
of
threadthrough
the hole
of
thelifting presser foot withwhich to pull upthe bobbin thread as shown
in
Fig.8.
Note:Ifthread
lubrication isnotrequired,omit thread fromcup C Fig.6 andstsrt
threading machine atthread guide 2(Fig.6.)
From the library of: Superior Sewing Machine & Supply LLC

7
Fig.7 Threading theNeedle
B.
TO PREPARE
FOR
SEWING
With the
left
hand
hold
the
end
of
the needlethread,leaving it slack fromthe
hand
to the
needle.
Turn
the
balance
wheel
until theneedle moves down
and
up again to itshighest
position,thus catching
the
bobbinthread;draw
up the needle
thread
and
the
bobbin
thread
will
come
up
with
it
through
thehole
in
the throatplate(see Fig.8)Lay
both
threads
back
under thepresser feet.
From the library of: Superior Sewing Machine & Supply LLC

Fig.
8
Drawing
up
the
Bobbin
Thread
9.
TO
COMMENCE
SEWING
Place
the
material
beneath
the
presser
feet,lower
the
presser
feet
and
turn
the
balance
wheel
over
toward
you
to
begin
sewing.
10
•
TO
REMOVE
THE
WORK
Stop
the
machine
with
the
thread
take-up
lever
at
rest
in
its
highest
position;draw
about
three
inches
of
thread
through
the
thread
retaining
discs,raise
the
presser
feet,draw
the
work
back
and
cut
the
threads
close
to
the
goods.
Leave
the
ends
of
the
threads
under
the
presser
feet.
From the library of: Superior Sewing Machine & Supply LLC

11.
REGULATING
THE
THREAD
TENSIONS
A.
For
ordinary
stitching,the
tension
of
the
needle
and
bobbin
threads
should
be
equal
so
as
to
lock
both
threads
in
the
center
of
the
fabric.If
the
tension
on
either
thread
is
stronger
than
on
the
other,imperfect
stitching
will
be
the
result.
If
the
tension
on
the
needle
thread
is
greater
than
that
on
the
lower
thread,it
will
be
straight
along
the
upper
surface
of
the
fabric.
If
the
tension
on
the
bobbin
thread
is
greater
than
that
on
the
needle
thread,the
bobbin
thread
will
lie
straight
along
the
underside
of
the
fabric.
Fig.9
The
tension
the
needle
thread
is
regulated
by
the
thumb
nut
H
Fig.11
at
the
front
of
the
thread
retaining
discs
and
the
thumb
nut
J
Fig.11
at
the
front
of
the
tension
wheel.The
tension
on
the
thread
retaining
discs
should
be
only
enough
to
cause
the
tension
wheel
to
turn
when
the
thread
is
taken
from
the
spool.
From the library of: Superior Sewing Machine & Supply LLC

B. The tension
on
the bobbin threadis regulated
by
thescrew C Fig.5 whichholds the
tension spring to thecylinder.To increase the tension,tumthe screw to theright.To
decrease the tension,
tum
thescrew to the left.
12.TO REGULATE THE LENGTHOF STITCHAND REVERSE LEVER
The length
of
stitchis regulated
by
looseningthe serrated nut
on
the reverse leverGFig.
10 inthe slot
on
the front
of
the uprightpart
of
the arm.
To
lengthen the stitch,movethe
lever downward.
To
shortenthe stitch,movethe lever upward andthen tighten the nut.
When making reverse stitchmove the leverupwardas far as itwill go.
13.TO REGULATE THE PRESSURE
ON
THE MATERIAL
The pressure onthematerial is regulated bymeans
of
the hexagonhead screw D,Fig.lO.
Loosen the hexagon locknut,E, F
g.l
0 and
tum
the screw 1)tothe right to increasethe
pressure orto theleft to decrease thepressure.When the desired pressurehas been
obtained,holdthe screw
Dwith
a wrenchtokeep
it
from turningwhile the locknut(E)is
beingtightened against thebracket(F).
Thepressure should
be
only heavy enoughtoenable the feed tomove the work along
evenly,andto preventthe workfrom rising with theneedle.
Fig.
10
Oiling
Points
at
front
of
Machine
From the library of: Superior Sewing Machine & Supply LLC

14.TO OILTHE MACHINE
Toinsure easy running andpreventunnecessary wear
of
the machine,oil all partswhich
are inmovable contact.Whenthe machine is incontinuous use,oil should
be
applied
frequently.Theplaces where the machineshould
be
oiled areindicated in Figs
.1
0 and
11
by arrows pointing tothe oil holes
andbearings.Important
Note: The oilholes on the
machine are indicated
by
a red circle aroundthe oil hole.Oil should
be
regularly applied
to the shuttle race.
Fig.11 OilingPoints at Back ofMachine
On the
back
ofthe
arm is acover,fastened
by
two knurled screws loosenthe screws and
remove cover.Careshoula
be
taken to see that all themoving parts inside aresufficiently
lubricated.Replace coverinto positionand tighten the twoscrews.
From the library of: Superior Sewing Machine & Supply LLC

SECTION III
BASICADJUSTMENTS
l.TO
SETTHE NEEDLE
BAR
When the shuttlepointis at the cener
of
the needle,the top
of
the needle eyeshould be
approximately(0.8m.m)l/32,below the point
ofthe
shuttle.
Fig.12 Setting the NeedleBar
Toadjust,loosen the two setscrews
"0"
Fig.12 and move theneedle har up
or
down as
required,then securelytighten theset screws.
NOTE- This setting
of
the needle
bar
may be varied slightlydepending upon the size
of
the needle and thethread being used.
From the library of: Superior Sewing Machine & Supply LLC

2.
TO
SETTHE SHUTTLE WITHRELATION TOTHENEEDLE
The shuttle can
be
adjusted for proper clearancebetweenthe shuttle pointand the needle.
If
a change ismade from a verysmall needle to amuch larger one,theshuttle point will
perhaps pass too closeto the needle,or toofar away from it,ifthe change is froma large
to a much smallerneedle.
Fig.13
Setting
the
shuttle
with
Relation
to
the
Needle
In such cases,loosen theclamping screw(P),Fig.l3 beneaththemachine bed,and move
the shuttle race slightlyto right
or
leftto suit the needlebeing used,then securely tighten
the clamping screw(P).
3.TO TIME THEFEED
Forgeneral sewing conditions,thefeed do shoula beso timed that
it
will have completed
its feeding action atapproximately the same time that the take-uplever N Fig.12
completes its upward stroke.
Whenthe machines leavethe factoryt THEYARE PROPERLY TIMED,ANDNO
ADJUSTMENT IS MECESSARY UNLESSTHE POSITION OFTHE FEED CAM
HAS BEEN DISTURBED.
If
adjustment shoula
be
considered necessary,remove the arm sidecover at the rearside
of
the machine arm.Thefeed cam is easilyaccessible with the armside cover removed.
From the library of: Superior Sewing Machine & Supply LLC

This cam is providedwith two screws.Loosen thesetwo screws and setthe cam for
earlier
or
latermovement
of
the feed dog,asrequired,by turning the camabout the arm
shaft to the requiredposition,then securely tighten thetwo screws
in
thecam.
4.
HOWTOSETHANDWHEEL
The handwheel(35008)is packed separaelyandmust be positioned
on
main shaftprior
to operating the machine.
Remove the two screws(35009)andslide
off
thebushing that is
seton
the shaft.Then set
the handwheel ontheshaft using the twobushing screws 35009.See Fig.14.
hand
wheel
Fig
.14
Setting
the
Handwheel
..
')
From the library of: Superior Sewing Machine & Supply LLC

SECTION
IV
TROUBLE
SHOOTING
This
section
contains
trouble-shooying
information
which can be
of
help
in
determining
and removing
the
causes
of
trouble
that
may
develop
in
the
machine.When
the
troubles
covered by
this
section
develop,
they
can be
conveniently
tracked
down
and
readlly
correctedbu
consulting
the
following
tabulation:
SYMPTOM
CAUSE
REMEDY
Needle
breakage.
Needle
is
loose
in
Tighten
needle
clamp.
needle
clamp.
Needle
of
incorrect
class
Compare
needle
with
one
and
style
is
being
used.
of
correct
type.
Presser
foot
is
loose
or
Straighten
and
align
out
of
line.
presser
foot;tighten
securely.
Needle
is
too
light
for
Select
the
correct
needle.
material
being
sewn.
Operator
is
pulling
the
DO
NOT
assist
machine
in
material
being
sewn.
feeding
of
material.
Thread
breakage
(Needle).
Thread
is
too
heavy
for
Select
and
inaert
a
thicker
needle
being
used.
needle.
Right
twist
thread
is
Only~
twist
thread
being
used.
is
to
be
used.
Damp
or
defective
thread
Use new,
dry
and
smooth
is
being
used.
thread
of
correct
size.
Machine
is
incorrestly
Follow
threading
diagram
thread.
as
shown.
Needle
is
incorrectly
Set
the
needle
with
the
set.
short
groove
closest
to
the
loop
taker(shuttle).
Upper
tension
is
too
Adjust
for
correct
stitch
tight.
balance.
Thread
take-up
spring
Adjust
to
proper
position.
is
out
of
adjustment.
From the library of: Superior Sewing Machine & Supply LLC

s
(
SYMPTOM
Thread
breakage
(Needle)
(Continued)
:
Thread
breakage
(Bobbin)
ippinng
ship
atitches)
D
rawing
of
Seam.
s
0
titches
uneven
r
piled
up.
CAUSE
Needle
is
rubbing
against
presser
foot.
Needle
is
defective,
blunt
or
bent
at
point.
:·
Sharp
edge
on
the
loop
taker
(shuttle),bobbin
case
or
tension
contollers.
Damp
or
defective
thread
being
used.
Bobbin
thread
tension
is
too
tight.
Bonnin
shuttle
case
is
incorrectly
threaded.
Bobbin
is
wound
too
full
to
revolve
freely.
Rounds
of
thrad
on
the
bobbin
are
lapped
over
one
another.
Bobbin
case
is
sticky
with
gummy
oil
and
lint.
Shrap
eage
on
shuttle,
bobbin
case,bobbin
or
needle.
The
needle
thread
fails
to
catch
the
bobbin.
The
threads
draw
or
pucker
the
seam.
Stitches
pile
up
in
one
place
REMEDY
Re-align
and
tighten
presser
foot.
Replace
with
new
needle.
Smooth
with
fine
emery
paper
and
polish
with
rouge
cloth.
Use
new,dry
and
smooth
thread
of
correct
size.
Adjust
for
correct
stitch
balance.
Follow
threading
instruction
as
described.
Remove
excess
thread
to
the
rim
of
the
bobbin.Adjust
bobbin
winder
accordingly.
Unwind
bobbin
manually
and
rewind
evenly
and
uniformly.
Clean
bobbin
case,shutte
and
shuttle
race
with
kerosene
or
naphtha,then
lubricate
with
a
few
drops
of
oil.
Smooth
with
fine
emergy
paper
and
polish
with
rouge
cloth.
Reset
the
needle
har
and
needle
as
described.
Adjust
tensions
for
correct
stj
tch
balance.
Adjust
stitch
regulation
for
longer
stitch.
Increase
presser
foot
pressure.
From the library of: Superior Sewing Machine & Supply LLC

1
'\
Casting
mechanism
30
8
4
--~=--::::.<1----2
3
~~--22
From the library of: Superior Sewing Machine & Supply LLC
Other manuals for 733R-5
1
Table of contents
Other Consew Sewing Machine manuals

Consew
Consew 333RB-3 User manual

Consew
Consew 206RB-5 User manual

Consew
Consew 227r-2 Guide

Consew
Consew P1206RB Technical manual

Consew
Consew 522 Operation manual

Consew
Consew 318RK-2 Datasheet

Consew
Consew 104-10T User manual

Consew
Consew P2339RB Technical manual

Consew
Consew 28 User manual

Consew
Consew 104-1T User manual
Consew
Consew 18 Use and care manual

Consew
Consew 315R-2 Parts list manual
Consew
Consew 175 Manual

Consew
Consew 227r-2 Guide

Consew
Consew 223R-2 User manual

Consew
Consew DLS600 User manual

Consew
Consew 230 Manual

Consew
Consew P1541S-CC Technical manual

Consew
Consew 332 User manual

Consew
Consew 146RBL-1A User manual