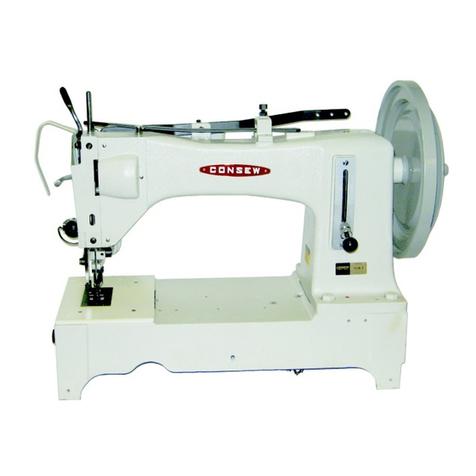
Consew 345-3 User manual

®
CONSOLIDATED
SEWING
MACHINE
CORP.
MODEL
345-3
345-3P
PARTS
BOOK
From the library of: Superior Sewing Machine & Supply LLC

CONTENTS
(FE:ATUREs:)
.....................................................................................................................
1
(s'eECIFIC.ATIONS)
......................................................................................................
2
(
t~t:l,LE
QF/$1"/l.NDAao
,GAVGE)
······
...............
···
.....
····
...........................
·········
···
2
(l~s~J;;ALLl~~)
..................................................................................................................
3
1IJ
Installing
the
Machine
Head
..·
..
·..····..·..·
..
·······..··..·....·
..
····..·..·····....·
.................
·
...........
·
..
·...
·........
3
121
Installing
the
Treadle and Chain ......··......·
................
·..·
..........
·....·
................................
·
..
·......·.....
~
~
Installing
the
Motor
Pulley ·········....··.. ·..·..·
..
·..····..····..·..···......·..·
..
·
..
·..·......·........·........···
..
·...·······.. 4
[4]
Belt Tension.adjustment ..·
..
·······
..
·
..
·
..
···········....·
..
··········
..
·..··..···.....·
......................................
·...... 4
151
Installing
the
Pulley Cover ···
..
··
..
·
..
··········....·..·····....·......·..·..·
..........
·
........
·
..
·.....·
...........
·......·....··.. 4
12]
Motor
and
Motor
Pulley ..·..····
..
··....·..··········
..
·..·..····
..
·....··..·
..
··....·
..
··
...................
·........··
..
·..···...... 4
1Z1
Spool
Stand
..··....··....····..····..·
..
····....·····..·····
..
·
..
···..····..·······
..
·
..
··....·..·..·
..
·
.........
···........·...·....·..·... 4
..................................................................
4
IIl
Lubrication ·....·..·
..
··....·..·······..··
..
···..·······..·..··....··....··
..
······
..
····
·.
·....··
..............
·..·......·..
·.
·...·....·.
·.
4
121
Running In ·
..
···
..
········..···
..
·
..
·..··..·······
......
········
..
·....···
..
··..··..····.....···......·........·
...........
·
..
·.....·
..
·... 5
..........................................................................................
5
IIl
Needles
and
Threads
.....................................................................................................................
5
121
Installing
the
Needles ..·..····
..
·
..
···
..
··....···..···..·..·······
..
·
..
·
..
····
..
·..·
..........................................
··...·... 5
~
Upper
Threading
·
..
·
..
·
..
·..··········....·..·······..·
..
····.. ····.. ·
..
·..····..····
...........................
'
...............
·........
6
[4]
Lower
Threading
........................................................................................................................
6
151
Installing the Lap
per·
....·..·
..
··
..
·......·..·..··....··
..
·..··
..
········
..
·..··
..............
·.....··........·........·.·.·....
·........
7
12]
Sewing ···..·..·..········
..
·....··....·....··..·
..
····..·····
..
·
..
···..·..·
..
·....··..·..··...··..·
..............
·
..................
·....··.. 7
1Z1
Thread
Tension ···
..
·..····
..
·....······..·....·..··......··..·..··..···..····..·..··....·..·
........
·
..........................
···...·..· 7
!§] Presser
Foot
Pressure Adjustment
................................................................................................
8
~
Stitch Length Adjustment ·........··..·..··..·....··
..
····..·..·.. ·..···..··
..
··
.................................................
··.. 8
I!Ql
Puller Feed Adjustment
.................................................................................
8
..............................................................................
10
IIl
Needle and Looper
Timing
Adjustment
..........................................................................................
10
121
Needle
Bar
Height Adjustment ......··...·...·
...........
···
..
·
..
·.....·.....·...·.·
..
·
................................
·
............
10
~
Looper Timing for Avoiding Contact with Needles
...........................................................................
n
[4]
Needle Guard Adjustment
............................................................................................................
11
151
Feed Dog Height Adjustment ....·..··..·..·..·····....·....···..·····
............
·.....·..·.....··
.................
······.. ·..··....
-12
12]
Puller Height Adjustment ..·..···..·........·..··..·..·
..
·..·....··........·..·.....·.. ·..··....·
..
·..
-12
1Z1
Installing
the
Spacer (For the demm specifications)
........................................................................
·--13
!§] Upper
Thread
Take-up
Thread
Guide Adjustment
.......................................................................
----13
~
Thread
Release Lever Adjustment ..·..·····....·
..
········
..
·..·········..···..··
..
·
.................
·..·......······.··....··..·13
I!Ql
Thread
Release
Shaft
Adjustment........·······
....................................................................................
14
[]]
Upper
Thread
Nipper Adjustment ···
.............................................................................................
14
11Z1
Lower
Thread
Take-up Timing Adjustment ·.....·······........······
..
·
..
··
............
··
................
···
..
·..····..·....
-14
fil Puller Device Timing Adjustment
...........................................................
14
( TROUBLESH00TING)································································································I5
From the library of: Superior Sewing Machine & Supply LLC
*Model
-345"
Double Chain
Stitch
Feed-off-the-arm Machine is most suitable for sewing tubes of medium
and
heavy
materials,
such
as
those of jackets, denim trousers, fatigue clothes
and
work
trousers.
*Machines
made
to the puller
and
denim specifications employ a presser foot, a needle plate, and feed dogs
that
have
steps
to
prevent
sewing irregularity and
assure
easy sewing of
materials
which
may
be different in thickness.
*Machines
made
to the puller and the denim specifications employ a movable needle
guard
which
makes
them
ideal for sewing
heavy materials.
*Machines
made
to
the puller and the denim specifications have independent loopers
for
ease
of adjustment.
*Machines
made
to the puller specifications employ a proximity puller system which
assures
outstanding feeding
performance
for a wide
range
of
materials
from medium heavy
to
heavy.
- 1 -
From the library of: Superior Sewing Machine & Supply LLC
Model
345-3
345-ZP
/345<5P
34~
~z
DP/34f-3DP
Stitch
pattern
3-line
2-line
3-line
2-line
3-line
parallel
sewing parallel
sewing
parallel
sewing
parallel
sewing
parallel
sewing
--
Sewing
speed 3,600
spm
St
itch Iength
1.4~4.2mm
2~4.2mm
No.
of
Needle 3 2 3 2 3
f l/g
l/g
(6
.4mm)
Needle gauge
YMJG4(5.6mm)·
Ys
Ys<6.4mm)
}'JG(4.8mm)
%z%CB.Omm)
1,;4(6.4mm)
l/g
l/g
(6.4mm)
7Jz%z(8.0mm).
fJGYJ6(9.6mm)
Y4
(6.4mm)
%:}'j6(9.6mm) %z%z(8
.Omm)
Needle bar
stroke
33.4mm
35mm
Minimum
tube
size
190mm
Puller
device
None
Equipped Equipped Equipped
,_
Equipped
Specification
Needle Needle Needle Presser Feed
dog
Looper
Lap
per
gauge
clamp
Plate
foot assembly
y64
y64 y64 y64 y64 y64 y64
y64
y64
y64
y64
y64
VJzMH
VJzH
%%
%%
%%
YsYs
%% %%
Y4MH
Standard
345'·3
%H
Specification
%%
%di2
%2
%2
%2%
5
42%
%
%z
%MH
%H
%%
%% %%
%%
%%
%%
%MH
%H
--
%%
Ys%
Ys%
%%
%%
%%
%XL
Denim
34S'/P
%2%
%%
%2
%2 %2
%z
%
%z
%2
%2
%XL
Specification
%%
%%
%% %%
%%
Jl6%
%XL
- 2
~
From the library of: Superior Sewing Machine & Supply LLC
[l]
Installing
the
Machine
Head
1.
Install pulley
cover
base
~
on
machine bed 0
with
two hexagonal
bolts
~-
2.
Insert
bar
cushions 0 into the holes
in
the
bottom
of the bed.
3.
Place the machine head on the table, adjust its position
in
forward
and
backward
directions by aligning it
with
the hole
for
presser
bar
lifter
chain
0.
and
in
sidewise directions by aligning it with belt hole
().
4.
After
fastening cushions @ to the machine bed
and
pulley
cover
base with set
screws
(i). fix them to
the
table
with
screws
0.
[g)
Installing
the
Treadle and Chain
1.
Fasten
connecting lever
bearing
0
to
the
beam
in the upper
part
of the
table
legs with nut
~-
2.
Slide connecting lever L 0
onto
connecting
lever
shaft
~.
fit it
to
connecting lever
bearing
0.
and
secure
it
with
connect·
ing lever
shaft
collar
0.
3.
Set
connecting lever L 0
in
line
with
the
clutch
lever hole.
and
tighten it with
square
head bolts
().
4.
Hook
connecting rod
f)
to
the
clutch lever
and
connecting lever L
0.
5.
Slide
another
connecting lever L 0 onto connecting lever
shaft
~.
and
fix
it with
square
head bolts
().
6.
Fasten
treadle
shaft
(i) onto the lower beam
across
the
table
legs with
hexagonal
bolts
@).
7.
Slide pedal stopper
419
and
presser
foot lifter pedal (D onto
treadle
shaft
0.
and
fasten it with pedal
stopper
4JY.
8.
Slide
treadle
stopper
f)
and
treadle
® onto
treadle
shaft
«i},
and
fasten
treadle
stopper
fl
in such a way
that
treadle
f)
will move lightly.
9.
Slide treadle·
support~
onto the end
of
treadle
shaft
0.
turn
it until
treadle
shaft
0 is parallel
with
the
floor,
and
fasten it.
10.
Hook
one end of connecting rod
f)
to connecting lever L
0.
and
hook
the
other
end
of
it to
treadle
f).
11.
Hook
one end of chain
(I
to the presser foot
lifter
lever, pass
the
other
end
through
the
hole
in
presser
f~ot
lifter
pedal (D,
and
adjust
the
chain length so
that
the pedal will be
at
the
same
height
as
treadle
4J).
From the library of: Superior Sewing Machine & Supply LLC
@]
Installing
the
Motor
Pullsy
With
motor
shaft
key
way
0 up, insert
key
f)
into
the
key
way, slide
motor
pulley 8 onto
the
motor
shaft,
and
fasten
it with
nut
e.
~
Belt
Tension
Adjustment
Place belt 8 on machine pulley 0
and
motor
pulley
$.
and
adjust
the
belt ten·
sion with tension
regulator
e so
that
the
belt
sags
about
25
to
30
mm when it
is
pressed
with
the
thumb
at
the
center
point between the pulleys.
[ZJ
Spool
Stand
~
Installing
the
Pulley
Cover
Install pulley
cover
0
on
the pulley
cover
base
with two
set
screws
$.
!§]
Motor
and
Motor
Pulley
1. Use
the
motor
specified
below
Three-phase
200
V 2-pole,
400
W
motor
Assemble spool
stand
0
as
shown below,
and
install it
at
the
right
frontal
corner
of
the
table
with screws.
2.
Motor
Pulley
Use
the
correct
motor
pulley suitable to the frequency of
your power supply
as
specified below.
Frequency Sewing speed
Motor
pulley Belt size
3,100
85
M-45
50Hz 3,600
95
M-46
3,100
70
M-44
60Hz
3,600
80
M-45
[I)
Lubrication
Be
sure
to oil
the
following points before using your sewing machine.
l.
After
setting up the machine, remove adjusting
cover
screw
0.
and
pour oil in up to
the
reference line on oil
gauge
$.
2.
Turn
the pulley until oil
cap
8 is up, remove oil
cap
8 and
pour
oil into oil
tank
0 until it is full.
If
the
oil in the oil
tank
decreases below
tank
center
line @1
the
oil will
not
be
drawn
into
the
upper shaft, causing imperfect lubrication. Be
sure
to
keep
the oil in the oil
tank
above oil
tank
center
line
4!).
3.
Pour
about 5
drops
of
oil weekly_ into three oil cups
@,
upper
thread
nipper tension
bracket
oil hole
8.
and
needle
bar
bush·
ing oil hole
0.
4.
Remove oil
drain
screw 0 from time
to
time
to
discharge the used oil which
has
collected
in
the
front bed oil sump.
5.
Wipe
arm
jaw
4@
and
rear
bed oil sump
4D
from time
to
time to remove oil from them.
*Use
white spindle oil.
-
4-
From the library of: Superior Sewing Machine & Supply LLC

i~)
Running
In
1_
i'dotor
:<\\·itdi
en.
clcpre:os
tlw
treadle,
and
make
sure
that
the
[Hille,-
runs
in
the
arrow
direction.
If
the
pulley
runs
in
the
opposite
direction.
remove
the
piLI>~-
;uHi
H'CO!liH·ci
two
of
the
three
\\·ires
(but
nut
the
earth
wire)
of
the
:l
phase
cord.
''
To
run
in
your
machine.
operate
it
at
about
3.100
sprn
for
tlw
first
3
or
4 clays.
[IJ
Needles
and
Threads
The
needle
and
threads
to
be
used
vary
depending
on sew-
ing
conditions.
Select
the
correct
ones
by
referring
to
the
table
below.
Needle
Thread
Upper
thread
lower
thread
:lJ:
16
j:j:50
Cotton
+1:60
i
:It
19
Cotton
j:j:
30
Cotton
rt
50
:
c-~-
::t22
Cotton
:!i:20
Cotton
+t30
s -
LZl
Installing
the
Needles
0-----
e-------
~----
l.
Turn
the
pulley
until
needle
holder
0 is
raised
to
the
highest
position.
2.
Loosen
needle
set
screws
@, hold
needles
8
with
their
long
grooved
side
facing
front,
insert
them
into
needle
holder
0 all
the
way,
and
fasten
the
needle
with
needlP
set
screws
@.
From the library of: Superior Sewing Machine & Supply LLC

[aJ
Upper
Threading
~
Lower
Threading"'
6 -
From the library of: Superior Sewing Machine & Supply LLC
Installing
the
Lapper
'
!
)
,r----
Presser
foot
.-·---
Lapper
;{-/----~~~-
·
.--·--Oblong
groove
=::::!Ji
--~~0
J
J-
__
/
=----'=jK~;====
~~~,_
=----
Ill
'" '
" ,
'·
·
Lapper
guide
plate
_____
.!)
···,<··
...
_____
Bring
it
into
full
contact
rf1}
· .
Needle
plate
Insert
the
hlpper
guide
plate
into
the
oblong
groo\'e
Ill
the
forward
feed
arm,
and
fit
the
lapper
into
place
in
such
a
way
thaL
its
tip
will
not
touch
the
pre~ser
foot.
i<C
If
the
lapper
is too
hard
to move.
or
fails
to
reach
the
correct
position.
loosen
set
sere\\'
0
slightly
and
adjust
the
lapper
position.
IQ]
Sewing
1.
Switch
the
power
on,
step
down
on
presser
foot
lifter
pedal
0.
place
a
fabric
under
the
presser
foot,
and
release
presser
foot
lifter
peda
I
0.
2.
Depress
treadle
8
to
start
the
machine.
3.
After
sewing
the
work,
keep
sewing
until it
reaches
thread
cutter~-
and
then
cut
the
threads
with
thread
cutter
~-
CZl
Thread
Tension
Thread
tension
differs
with
sewing
conditions.
Adjust
it
to
suit
your
particular
sewing
conditions.
r -.. _
Less
------------------
(-~~----
Less
tension
i!l.
More
tension
'"""'----~
---
----
1
Go~
Lower
thread
Loose.
bad
stitches
Lower
thread
Upper
thread
1.
Adjust
the
upper
thread
tension
properly
by
turning
upper
thread
adjusting
screw
0.
2.
Adjust the lo'A·er thread tensiop properly
by
turning lo\ver thread adjusting screw
f).
7
From the library of: Superior Sewing Machine & Supply LLC

raJ
Presser
Foot
Pressure
Adjustment
Adjust
the
presser
foot
pressure
by
turning
wing
nut
0
to
such
a level
that
it is
just
enough
to
keep
the
work
from
slipping.
*In
case
of
Model
,
the
puller
pressure
can
be
adjusted
as
appropriate
to
the
work
by
loosening
adjusting
thumbscrew
nut
f)
and
turning
presser
ad-
justing
screw
@
~
Stitch
length
Adjustment
l.
Remove
adjusting
cap
screw
0.
·>
Turn
the
pulley
toward
yourself
until
set
screw
f)
comes
to
the
position
of
the
adjusting
cap
screw
hole.
3.
Loosen
set
screw
f)
with
a
screwdriver.
turn
the
pulley
again
by
about
one-quarter
of a
turn
in
the
same
direction
to
bring
horizontal
eccentric
adjusting
screw
~
to
the
position
of
the
adjusting
cap
screw
hole.
4.
Stitch
length
will
decrease
when
horizontal
eccentric
adjusting
screw~
is
turned
clockwise
with
the
screwdriver.
and
increase
when
it is
turned
counter-clockwise.
5.
After
the
adjustment.
tighten
set
scncw @
securely.
*In
case
of
Model ,
readjust
the
needle
guard
after
adjusting
the
stitch
pitch.
In
case
of
Model
-7
A
and
-8/\,
read-
just
the
needle
guard
and
puller
feed.
:IQ]
Puller
Feed
Adjustment
1.
After
adjusting
the
STITCH
LENGTH,
you
have
to
readjust
the
PULLER
FEED
again.
2.
Loosen
the
nut.
0,
you
can
get
more
feed
toward
outside,
get
less
toward
inside.
3.
After
adjusting,
tighten
the
nut
0.
- 8
Less
tension
L . 0 -
--
.
---:::::>More
tension
ess
tens10n
=X'~
:--
rf··~l·or.ete~:
~-
..
--,1
iL
,
-·
,-
~-------
/!
'
~
.. r
J
From the library of: Superior Sewing Machine & Supply LLC

*The
table
below shows
samples
of stitches
made
with a highly
elastic
fabric and a fabric which is
not
so elastic.
Adjust
the
puller feed by
referring
to
this table.
Puller feed
Fabric
with high elasticity
Fabric
with
low elasticity
Correct
Neither non-alignment
nor
sewing wrinkles.
Neither
non-alignment
nor
sewing wrinkles.
Insufficient
Non-aligned, and wrinkled. Non-aligned,
and
wrinkled.
Excessive
Non-aligned,
and
very wavy. Non-aligned,
and
very
wavy.
From the library of: Superior Sewing Machine & Supply LLC

I]]
Needle
and
looper
Timing
Adjustment
(
,
. >
:r
/ ,
/_,.jf..--;:/1 ' ' /
Model
s4<;.-
3
2-3
5
mm
j~)
1
Model
~
4
S/f'
3.0-3.2
mm
;Jr
/
Model
34f·3
Make
an
adjustment
so
that,
when needles 0
come
down
to
the
lowest
position.
loopers
f)
will
be
at
the
end
of
their
backward
travel
and
that
the
distance
between
the
centers
of
the
needles
and
the
tips
of
the
loopers
will
be
somewhere
from
3.2
to
3.5 mm.
Model
3A'S'"/
P
Make
an
adjustment
so
that,
when needles 0
come
down
to
the
lowest position,
loopers
@ will
be
at
the end
of
their
backward
travel
and
that
the
distance
between
the
centers
of
the
needles
and
the
tips of
the
loopers
will
be
somewhere
from 3.0 to
3.2
mm.
{Adjusting
Method}
1.
Remove the
presser
foot, needle
plate
and feed dogs.
2.
Loosen
two
set
screws
0
and
cap
screw
0 on
lower
belt
wheel
@.
3.
Turn
the
pulley
toward
yourself until needles 0
come
down
to
the
lowest posi·
tion.
4.
Turn
the
lower-shaft
until
loopers
f)
reach
the
end
of
their
backward
travel.
5.
Tighten
cap
screw
0
and
two
set
screws
0
securely
.
.
6.
Loosen
set
screw
(i),
move
looper
holder
0 in
the
arrow
direction
until
the
distance
between
the
needle
center
and
the
looper
tip
is 3.2
to
3.5 mm.
and
retighten
set
screw
0 securely.
*In
case
of
machines
made
to
the
denim specifications,
the
individual
loopers
must
be
adjusted
because
they
are
independent
of
one
another.
[2]
Needle
Bar
Height
Adjustment
Looper
forward
travel
Looper
backward
travel
The looper
of
standard specification
The looper
of
denim specification
Adjust
the
needle
bar
height
so
that
the
looper
thread
eyes
will
match
the
needle
eyes
in
the
forward
and
backward
travels
of
the
loopers.
(Adjusting
Method)
1.
Turn
the
pulley
toward
yourself until
the
loopers
move
forward
from
the
rightmost
position
to
a
point
where
the
looper
thread
eyes
are
in line
with
the
needles eyes.
2.
Open
face
plate
O.
loosen needle
bar
clamp
screw
@,
and
move
needle
bar
8
up
or
down
until
the
looper
thread
eyes
are
in line with
the
needle
eyes.
3.
Retighten
needle
bar
clamp
screw
f)
securely.
4.
After
the
adjustment,
turn
the pulley
toward
yourself
and
make
sure
that
the
looper
thread
eyes
match
the
needle
eyes
in the
forward
and
backward
travels
of
the
loopers.
-
10
-·
From the library of: Superior Sewing Machine & Supply LLC

l:2l
LVUJJtH
•unutg
tor
M.vommg \..onl:aci
wnn
Neea~es
0.2mm
Push needle '
~r
Nee~dle
®
0-0.05mm
Model
34-S'
Model
345'-;3
locus
of
looper
0.2-0.3mm
Model,
M'S'/ P
Make
an
adjustment
so
that
there
will be a
clearance
of
0 to 0.05 mm between
the
needles
and
the loopers
in
the
forward
and
backward
movemt>nts
of
the
loopers.
Model
345'/P
In
the
forward
movement
of
the loopers, push needles by loopers by
0.2
mm.
In
the
backward
movement
of
the
loopers, adjust
that
the
clearance
between the loopers
and
the
needles will be
0.2
to
0.3
mm.
{Adjusting
Method)
l.
Remove
forward
feed
arm
cover
O.
and
turn
the pulley
toward
yourself until the longitudinal
eccentric
wheel
stop
screw
shows
itself
at
adjusting hole
f).
2.
Loosen
the
longitudinal
eccentric
wheel stop
screw
until it hardly
comes
out
of
the
surface
of the wheel.
turn
the
pulley again
toward
yourself.
and
loosen
the
other
stop
screw.
3.
With
the
screwdriver
holding the
stop
screw.
turn
the pulley
to
adjust the
clearance
between
the
needles
and
the
loopers.
4.
After
the
adjustment.
retighten
the
two
stop
screws
and
the
forward
feed
arm
cover
screw.
14]
Needle
Guard
Adjustment
Model
347-3
Make
an
adjustment
so
that,
when
the
loopers
meet
the
needles in
their
forward
movement,
there
will be a
clearance
of
0.1
to
0.2 mm between the needles
and
the needle
guard.
(Adjusting
Method)
l.
Turn
the pulley
toward
yourself until the needles come down
to
the
lowest position.
2.
Loosen
stop
screw
0 from the underside of the
tip
of
the
forward
feed arm.
3.
Adjust the
clearance
between needles
f)
and
needles
guard
8 to somewhere from
0.1
to
0.2 mm by
moving
needle
guard
8
4.
After
the adjustment,
retighten
stop
screw
0 securely.
-11
From the library of: Superior Sewing Machine & Supply LLC
Model
.:4
5'/f'
~--~---------------------
The
clearance
between
the
needles
and
the
tips of
the
loopers will be
'0.05
mm, pushing
the
needles by needle
guard
0.
(Adjusting
Method)
1.
Turn
the
pulley
toward
yourself until
the
needles
come
down
to
the
lowest position.
2.
Loosen
stop
screw
0.
and
raise
or
lower needle
guard
0
so
that
the
bottom
ends
of
the
needle
eyes
will
be
about
0.5
mm
above
the
bottom
of needle
guard
0.
3.
Turn
the
pulley
toward
yourself
again
until
the
tips
of
the
loopers
come
to
the
centers
of
the
needles.
4.
Loosen
stop
screw
0.
move needle
guard
0 to
the
left
or
to
the
right,
and
adjust
so
that
the
clearance
between
the needles
and
the
tips
of
the
loopers will
be
0.05 mm, pushing needle
points
by
needle
guard
0.
At
this
time, please
make
sure
that
the
clearance
between
the
loopers
and
the
needles is 0.2·-0.3
mm
in
the
backward
movement
of the loopers.
~
Feed
Dog
Height
Adjustment
Model
34'S-
3
Make
an
adjustment
so
that,
when feed
dog
0 is
at
the
highest
position,
the
feed
dog
will
be
0.8
mm
above
the
top
surface
of
the
needle plate.
Model
.;45"/P
Make
an
adjustment
so
that
the highest
part
of
the
feed
dog
will
be
1.2
nun
above
the
top
surface
of
the needle plate.
{Adjusting
Method)
Adjusting the feed dog height by
turning
feed
base
eccentric
shaft
f).
!§] Puller
Height
Adjustment
Adjust
the
height of puller 0 so
that
it is
0.1
to 0.2 mm high
from
the
top
of
the
needle plate.
(Adjusting
Method}
Loosen
set
screw
f),
and
move
puller
support
@ up
or
down
until
puller 0 is
0.1
to
0.2 mm
above
the
top
of
the
needle plate.
-·
12-
~+2mm
0.05
mm-·-t-t+-f--0.2
-0.3
mm
-f)
____
j
From the library of: Superior Sewing Machine & Supply LLC
[Z]
Installing
the
Spacer
(For
the
denim specifications)
If
stitch
irregularities develop in sewing very heavy materi-
als, adjust
the
sub-feed dog
to
the
correct
height by spacer_
(Adjusting
Method)
1.
Remove
set
screw
0 and sub-feed dog
f).
2.
Placer
spacer
~
under sub-feed dog
f)
and retighten set
screw
0-
*
The
spacer
is in the
parts
box.
~
Thread
Release
lever
Adjustment
!a]
Upper
Thread
Take-up
Thread
Guide
Adjustment
--
'--y;:-;_~~Thread
-f)
" (
-Jt
il
guide
Upper
thread
W
take-up
Model
~4s-~
Model
34S-
3
Model
Yi.S(f
Make
an
adjustment
so
that,
when the needle
bar
is
down
at
the lowest position, the
top
of
the
upper
thread
take-up
thread
hole meets the
bottom
of
the
thread
guide.
Model
34S/P
Please adjust
the
distance between the
center
of
the upper
thread take-up and the top of the
thread
guide will be
7-8mm.
(Adjusting
Method)
l.
Turn the pulley
toward
yourself until the needle
bar
is
down
at
the lowest position.
2.
Loosen
set
screw
O.
and
move upper
thread
take-up
thread
guide 8 up
or
down until
its
bottom
meets
the
top of the upper
thread
take-up 'thread hole.
*The
higher
the
upper
thread
take-up
thread
guide$,
the
greater
will be
the
upper
thread
loops.
Make
an adjustment so that, when the needle
bar
is down
at
the lowest position, the
thread
release lever
thread
hole meets
the thread hole in upper
thread
tension
bracket
~-
(Adjusting
Method)
1.
Turn
the pulley until the needle
bar
is down
at
the
lowest position.
2.
Loosen
set
screw
0.
and raise
or
lower
thread
release lever 8 until its
thread
hole meets the
thread
hole in upper
thread
tension
bracket
~-
*The
higher the thread release lever, the
tighter
will be
the
stitches.
-
13-
From the library of: Superior Sewing Machine & Supply LLC
llQI
Thread
Release
Shaft
Adjustment
Make
an
adjustment so
that
the
thread
tension discs will
loosen when
the
presser foot is raised,
and
tighten when
the
presser foot is lowered.
{Adjusting
Method)
1.
Loosen
stop
screw
0.
2.
Make
an
adjustment by turning
thread
release
shaft
f)
so
that
the
thread
tension discs will begin
to
loosen when
the
presser foot is raised 4 mm above
the
top
surface
of
the needle plate.
3.
After
the adjustment, retighten
stop
screw 0 securely.
jgJ
lower
Thread
Take-up
Timing
Adjustment
Make
an
adjustment so that, when
the
loopers begin
to
move
backward,
lower
thread
take-up
0 will rise
about
5
to
7
mm
above lower
thread
take-up
bracket
f).
{Adjusting
Method)
1.
Insert
a
screwdriver
into the adjusting hole
in
the
bed,
and
loosen two
stop
screws$.
2.
Raise lower
thread
take-up 0 5
to
7 mm above
thread
take-up
bracket
f).
3.
After
the adjustment, retighten
two
stop
screw
$.
~
Puller
Device
Timing
Adjustment
1.
With
3mm
wrench
to
loosen
the
screw
0 &
~
2.
The
timing
of
the
feed
will
be
starting
when
the
needle
is
away
from
the
needle
plate
about
5
or
6mm,
and
stoping
at
lOmm.
3.
After
adjusting
the
timing,
retighten
the
screw
0 &
~.
[j]
Upper
Thread
Nippf:}r
Adjustment
Adjust the
clearance
between the upper
thread
nipper ten-
sion
bracket
and
tension plates
to
somewhere between
0.8 mm and I
.0
mm.
(Adjusting
Method}
1.
Loosen
stop
screw
0.
and move upper
thread.nipper
ten-
sion
bracket
f)
in
or
out until the clearance between it
and tension plates $
is
somewhere from
0.8
to
1.0
mm.
*iStitch tightness can be improved by narrowing
the
clear-
-
14
-
ance between upper thread nipper tension
bracket
8 and
the arm.
From the library of: Superior Sewing Machine & Supply LLC

Trouble
Thread breaks.
Needles break.
·-------------'
Stitches skip.
Upper threads loose.
Needles damaged.
Needles hit loopers.
Needles hit needles guard.
Looper points
are
dull.
Needle and looper timing
Clearance between needles
and loopers too
great.
Lower thread take-up
timing wrong.
Upper
thread
nipper does
not tighten upper threads.
Inspection
Lower
thread
tension.
Thread
release lever
position.
Needle size and
thread
count.
Clearance between needles
and loopers.
---------'
Direction of long groove.
Clearance between needles
and needles guard.
Needle size and
thread
count.
Direction of long groove.
Needle and looper timing.
Clearance between needles
and loopers.
Lower
thread
take-up
timing.
Upper
thread
tension.
Lower
thread
tension.
Tension plate clearance.
-
15-
Remedy
Refer
to
instructions for
needle installing.
_
____,_____!
~
-~-~J
Adjust looper timing
to
avoid
contact
with needles.
Refer
to
instructions for
needle installing.
Adjust needles guard.
Refer
to
the section on
"Needle~
and
Threads".
Refer
to
instructions for
needle installing.
Adjust upper
thread
nipper.
From the library of: Superior Sewing Machine & Supply LLC
Trouble
!Machine
does
not
feed
~rk.
Non-alignment and
wrinkles
(Model-:
~4S"'-
-5
Non-alignment and
wrinkles
1Modei-~$4VP
Remedy
dog height. dog height.
Pre~ser'foot
pre~:ure.
[_\AdJust
presser foot l S \
_f
~sure.
______
__:'_J
Feed dog
worn
out.
Presser
foot floats and
doeSll------
not fully press work.
_j
I Feed
dog
and
presser
foot
1-------'---------------ll
Have
serviceman
check
work
on one side only. them.
L--------~-~
Sub
feed dog height
incorrect.
Feed
dog
height incorrect.
~ullertimingw
__
r_on_g_.
__
~
Sub
feed dog height. Adjust sub feed dog height.
Adjust presser foot
pressure.
-------~--{
Ajust feed
dog
height.
12
I
l...---------~ust
P~_device
timing.,
14
I
-
16-
-----t--{Adjust
puller feed. 8
foot pressure. Adjust
presser
pressure.
}--~
Adjust feed
dog
height.
12
From the library of: Superior Sewing Machine & Supply LLC
CONTENTS
1.
CO-
MACHINE BODY
2.
Cl-
UPPER SHAFT MACHANISM
3.
C2- NEEDLE BARMECHANISM
-FEED MECHANISM
4.
C3=
PULLY MECHANISM
5.
C4- PRESSER BAR MECHANISM
6.
C5- LOOPER MECHANISM
cr.
7.
C6- UPPER THREADING MECHANISM
8.
C7
...
LOWER THREADING MECHANISM
9.
C8- LOWER SHAFT MECHANISM
-GAUGE PARTS
10
C9- GAUGE PARTS(
F)
11. CIO- GAUGE PARTS(DP)
12.
Cll-
PULLER DEVICE MECHANISM
13.
C12- ACCESSORIES
From the library of: Superior Sewing Machine & Supply LLC
11
-~
15
-~
I
---~
~
I
10
12
4
I
I
L,~
C0-2
co
From the library of: Superior Sewing Machine & Supply LLC
This manual suits for next models
4
Table of contents
Other Consew Sewing Machine manuals

Consew
Consew P1255RBL-18 Technical manual

Consew
Consew 277RFS-3 Datasheet

Consew
Consew 333RB-3 User manual

Consew
Consew Sewing Machine User manual

Consew
Consew 227r-2 Guide

Consew
Consew CN2053R-1A User manual

Consew
Consew 206RBL User manual

Consew
Consew 347R-1A-WS User manual

Consew
Consew 222 User manual

Consew
Consew 7360RA TCWL (E) User manual

Consew
Consew 146RBL-1A User manual

Consew
Consew 261B Manual

Consew
Consew 7360R Parts list manual

Consew
Consew SK 2R Manual

Consew
Consew 223R-2 User manual

Consew
Consew 744R10-1 User manual

Consew
Consew CP206R User manual

Consew
Consew 315R-2 Parts list manual

Consew
Consew 7360R-1 User manual

Consew
Consew 318RK-2 Datasheet