CONTENTS
1.
Application
..................................................................
1
2.
Secure operation
.........................................................
1
3.
Caution before operation
................................................
1
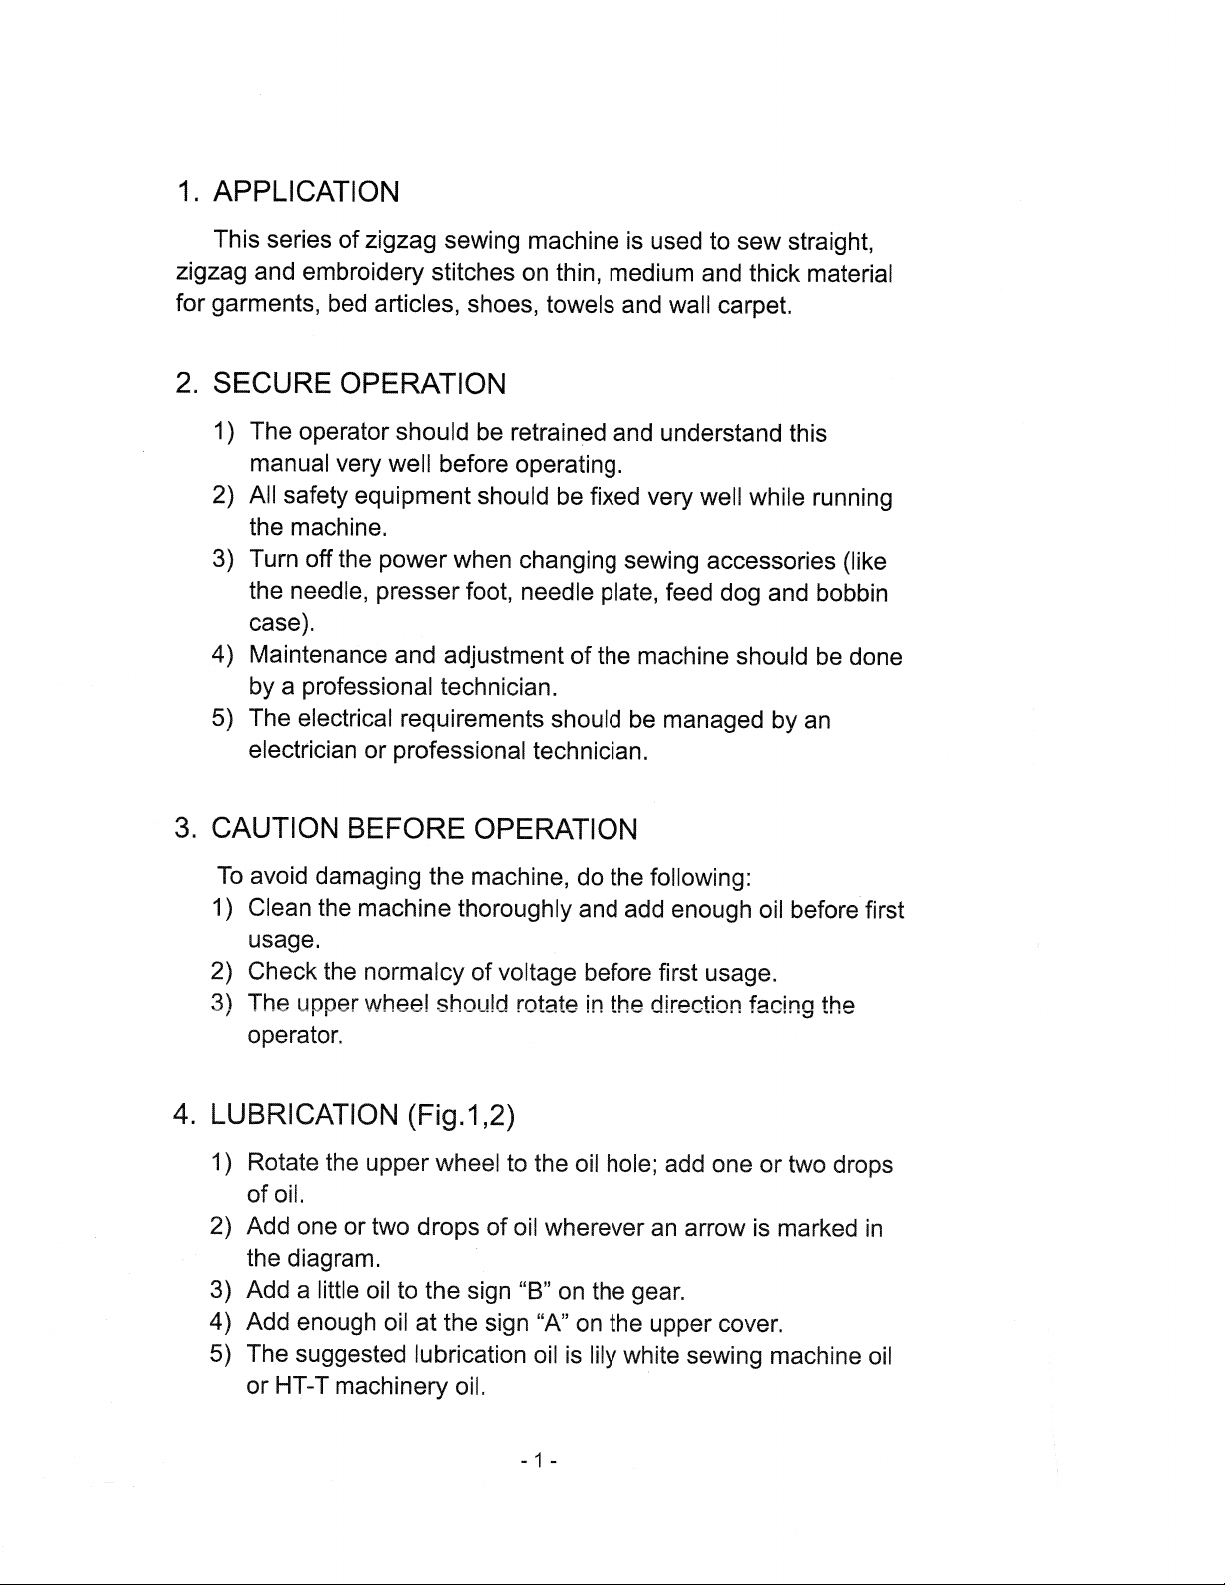
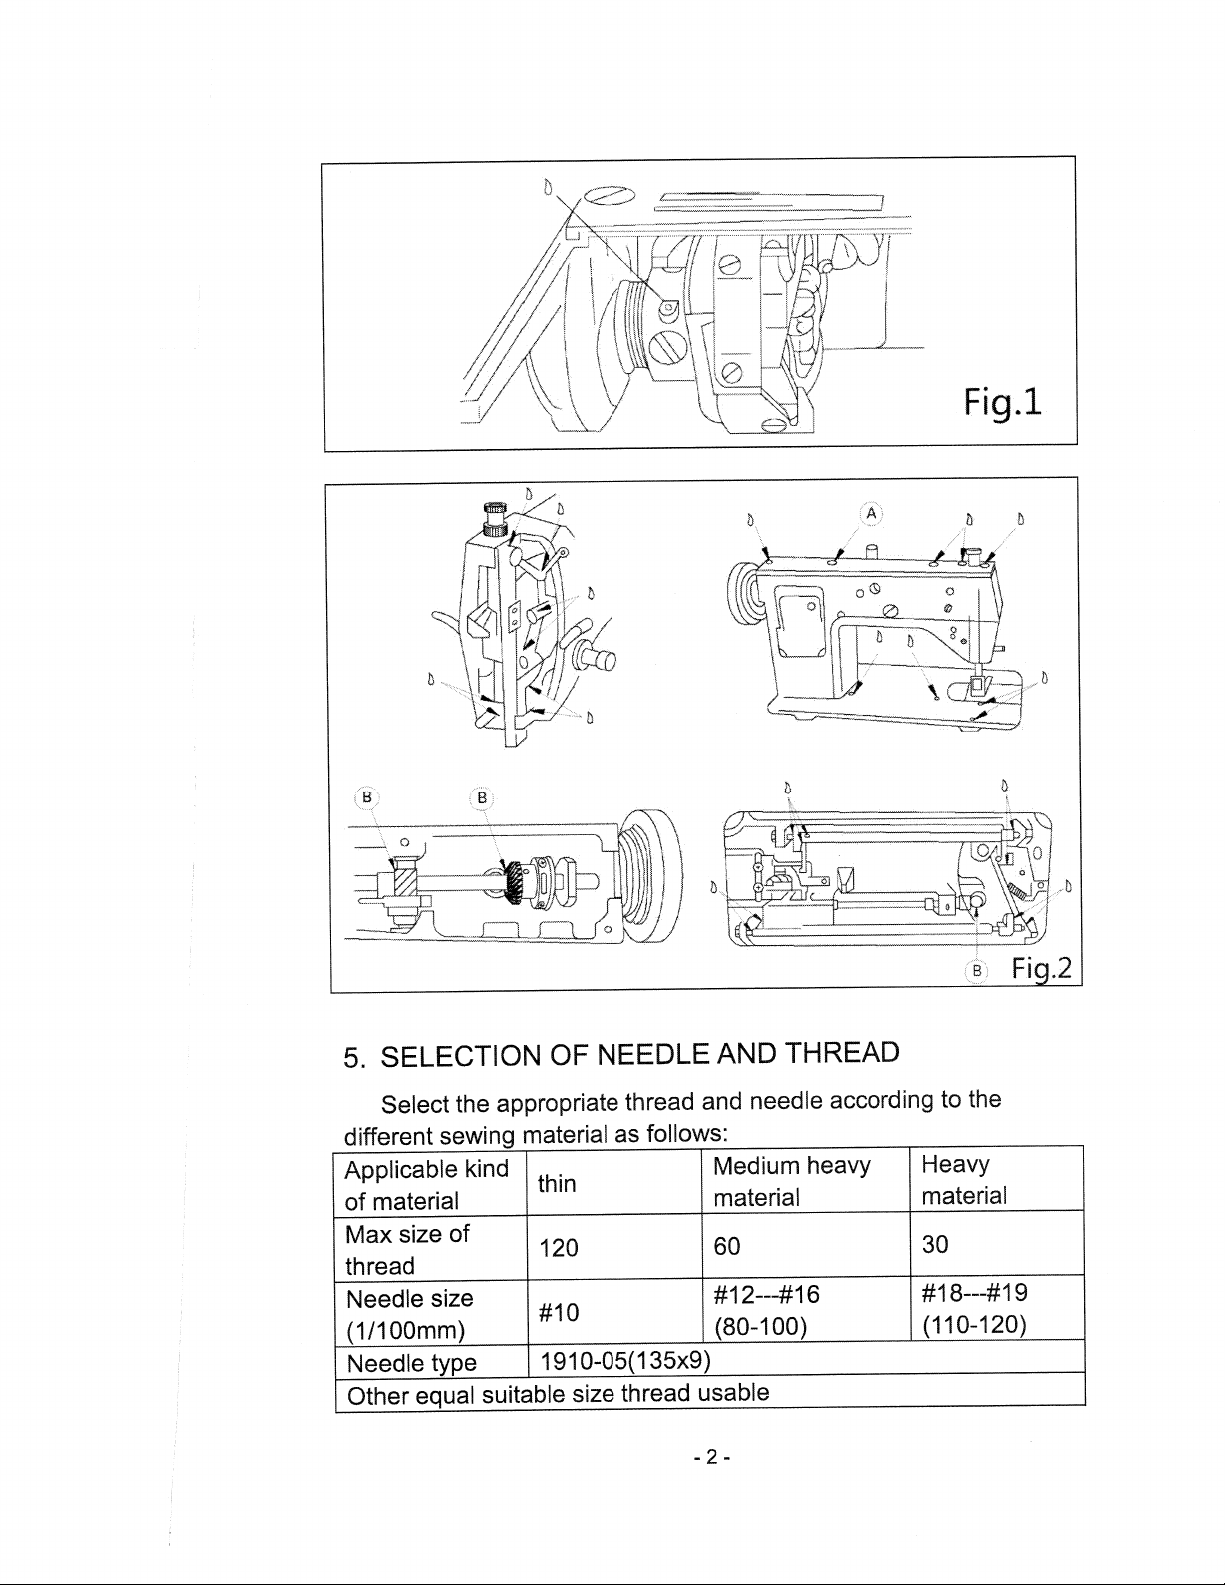
4. Lubrication
..................................................................
1
5.
Selection of needle and thread
.......................................
2
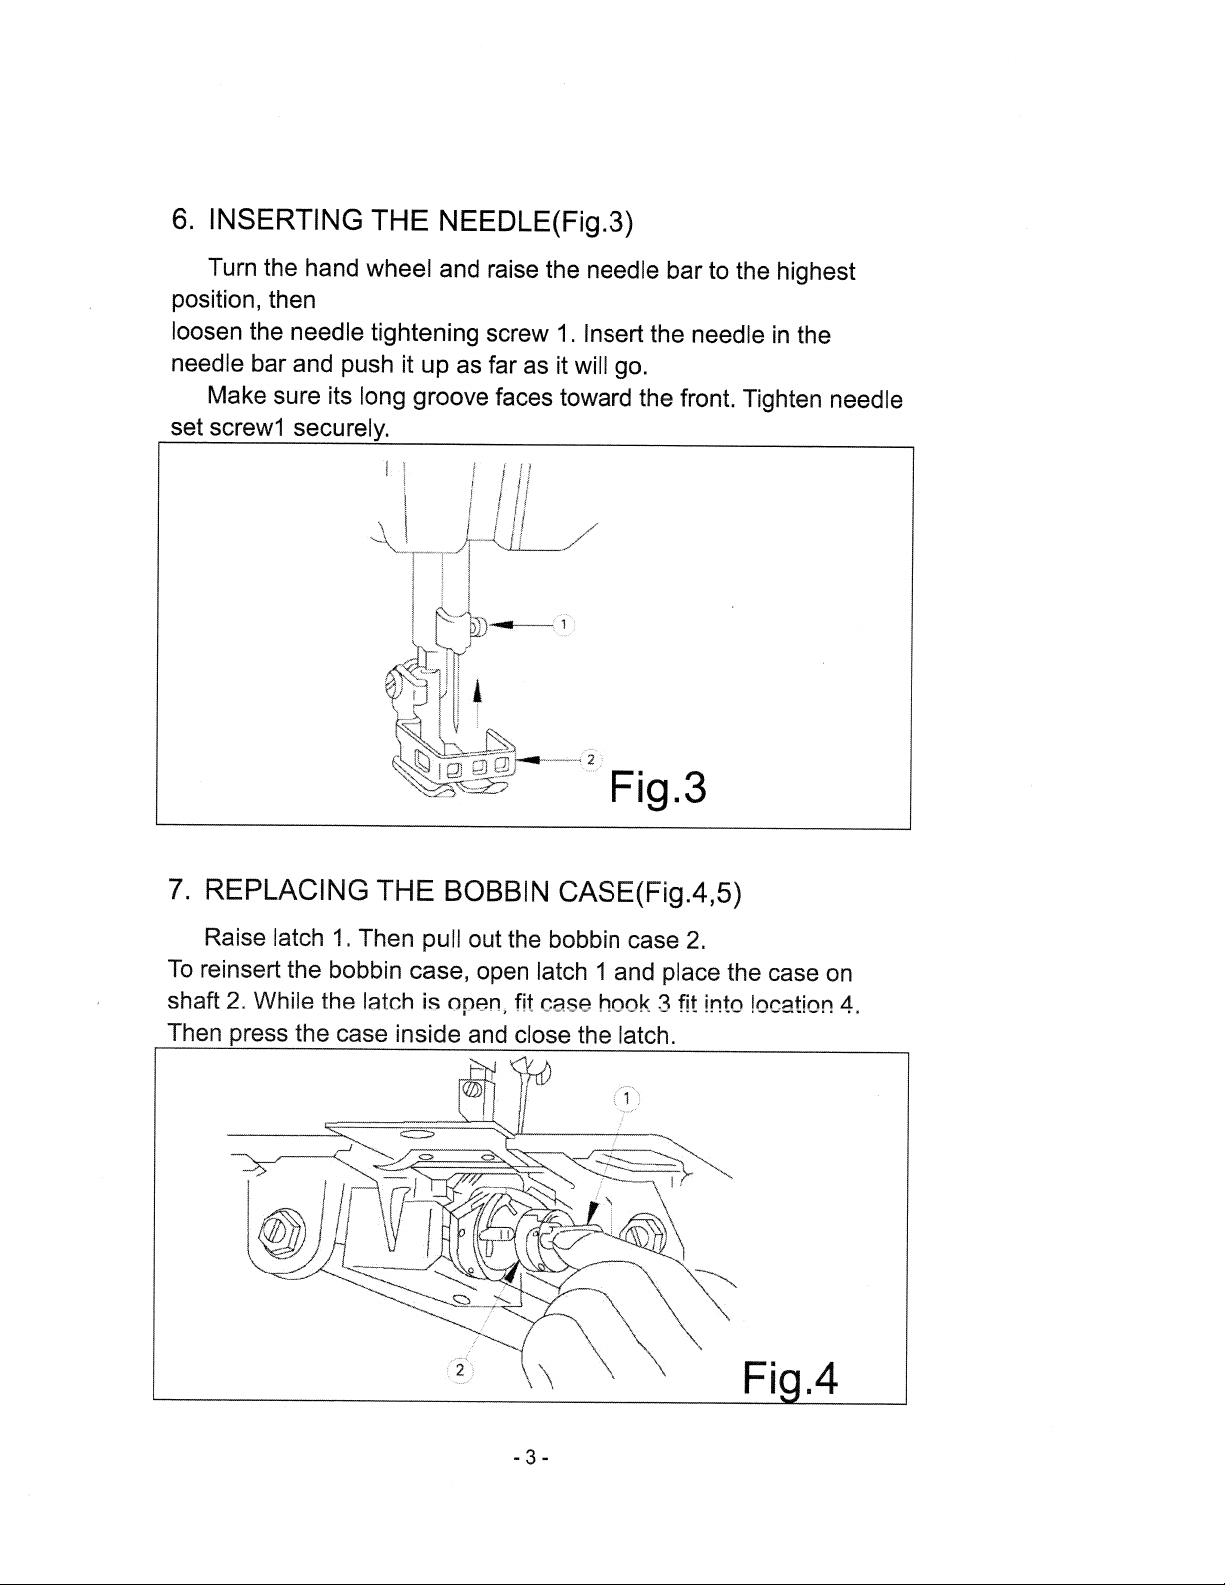
6.
Inserting the needle
......................................................
3
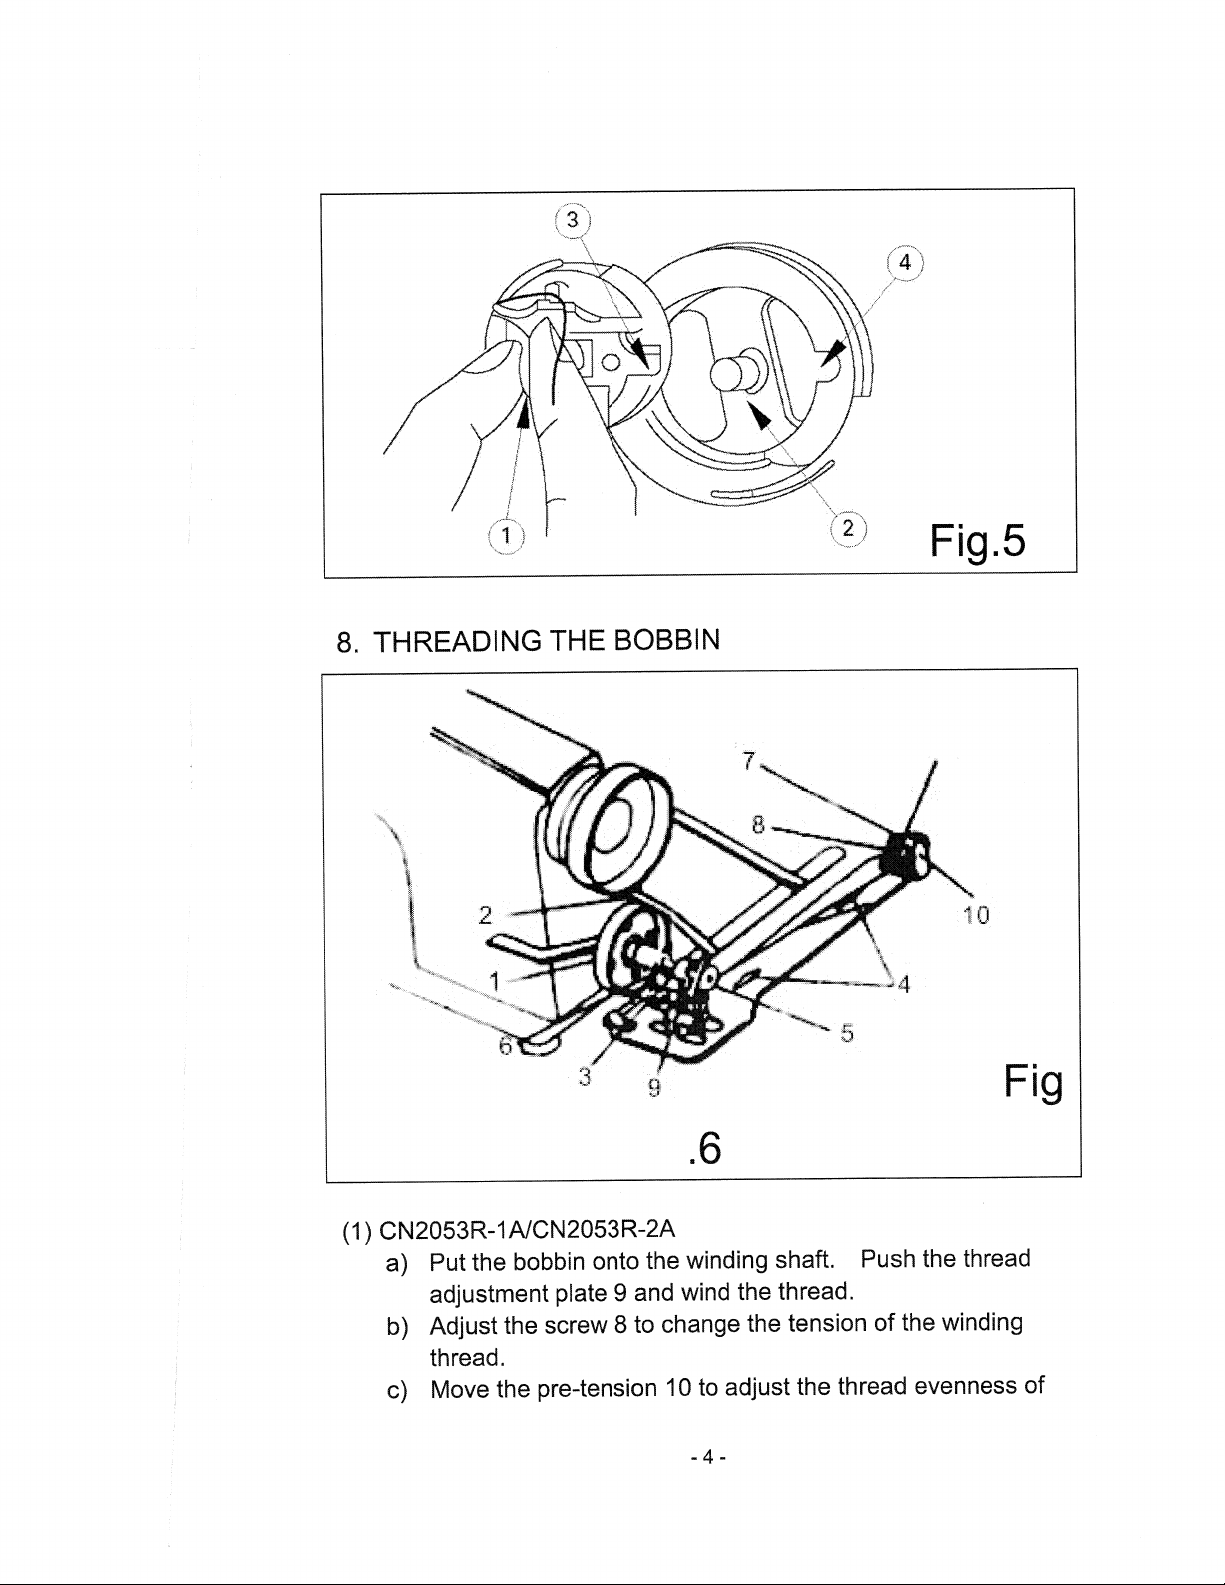
7.
Replacing the bobbin case
.............................................
3
8.
Threading the bobbin
...................................................
4
9.
The installation
of
bobbin ........................................................6
10.Threading the machine...........................................................7
11.
Adjusting stitch length.............................................................?
12.Adjusting presser foot pressure..............................................8
13.Adjusting needle thread tension .............................................8
14. Regulate the length and tension
of
the take-up spring............9
15.Adjusting bobbin thread tension .............................................9
16.Adjusting needle position......................................................10
17.Adjusting the stitch width ......................................................
11
18.Locking unit for linear stitching .............................................
11
19.Assembling the belt cover.....................................................12
20. Mount knee lifter...................................................................13
21. Modes
of
sewing...................................................................14
22. Maintenance
of
the machine ................................................18
23. Main specification .................................................................18
- I -


 User manual")