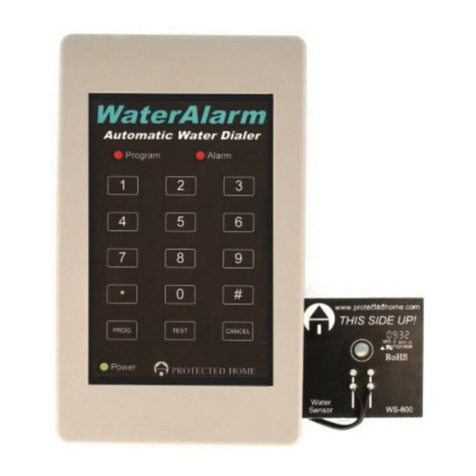
Control Products WA-1000 User manual

Wireless WaterAlarm
User Manual for Wireless WaterAlarm (WA-1000)
Thank you for purchasing our Wireless WaterAlarm. This instruction manual covers
installation for model WA-1000.
General Description
The Wireless WaterAlarm automatically calls up to three phone numbers when water is
detected by one of the wireless water sensors. It also calls if the power fails for a
period of time or if the back-up batteries in either the Base Station or any one of the
sensors require replacing. You can remotely check the status of your Wireless
WaterAlarm and their sensors as well as check if the power is on, simply by calling
your Wireless WaterAlarm from any phone in the world. The Wireless WaterAlarm
uses a series of menu options that are accessible by pressing the buttons on your Touch-
Tone phone. All menus are in English.
The Wireless WaterAlarm can be programmed by either plugging a standard, single
line telephone into the front program jack or remotely programming it from an outside
telephone or cell phone.The Wireless WaterAlarm retains all programmed phone
numbers, wireless sensor connections and security code information even when the
power is out or the back-up battery is either dead or removed.
WHAT’S INCLUDED IN THIS PACKAGE:
•BASE STATION: This is the device that plugs into your existing telephone
line and calls you if alarm conditions are detected at your monitored location.
The Base Station communicates with the wireless water sensors and will alert
you if one of the WaterSiren sensors detects water, if the battery in the sensor
requires replacing or if the sensor has lost communication with the Base
Station.
•ONE (1) WIRELESS WATERSIREN™ SENSOR: The Wireless
WaterSiren™ sensor has a detachable sensor pad. When water crosses the two
little metal pads on the sensor, the WaterSiren will sound a 90 decibel alarm
and via wireless communications, trigger the Base Station to call your
programmed phone numbers to alert you of a water emergency. The sensor
also communicates the battery and communication status to the Base Station.
You can add up to nine additional water sensors to the system.
•AC POWER ADAPTER: This is the power cord for the Base Station. It plugs
into any 110 VAC outlet.
•TELEPHONE CORD: A telephone cord is supplied to connect the Base
Station to a telephone wall jack at your monitored location.
WHAT YOU NEED TO SUPPLY:
•One (1) nine volt alkaline or lithium battery for the Base Station.
•Two (2) AA size alkaline or lithium batteries for the Water Sensor.
•A telephone connection. See Section 1.3 for information on other phone line
options.

2
For easy future reference during technical support and service, it is recommended that
you write your purchase date and the serial number of the unit in the spaces below. The
serial number can be found on the bottom instruction label on the Wireless WaterAlarm
Base Station unit. You will also need a four digit security code. This is used to
prevent unauthorized remote access to your Wireless WaterAlarm. The factory default
security code is 9999. You may keep this or change it to your own unique code. Your
security code must contain four numeric digits.
Purchase Date:___________________
Serial Number: __________________
Security Code: ___________________
Technical Support: Monday-Friday, 8am to 5pm, Central Time
Phone: 952-361-4101
Fax: 952-361-9420
Email: techsupport@protectedhome.com
Web: www.protectedhome.com
Wireless WaterAlarms are made in the United States by Control Products for Protected
Home. Protected Home is a division of Control Products, Inc. of Chanhassen,
Minnesota, USA.
Every effort has been made to ensure the information in this user manual is complete,
accurate and up-to-date. Control Products, Inc. assumes no responsibility for results of
errors in this manual nor can it guarantee that changes in equipment made by other
manufacturers and referred to in this manual will not affect the operation or intended
use of the Wireless WaterAlarm.
Copyright © 2010 by Control Products, Inc., d.b.a. Protected Home™
Document 42420051A – Revision A - 021410
WaterAlarm, FreezeAlarm and MiniAlarm are trademarks of Control Products, Inc.
Touch Tone® is a registered trademark of AT&T
This manual may not be reproduced, modified
or distributed without permission from Control Products, Inc.

3
TABLE OF CONTENTS:
1.0 Initial Set-Up
1.1 Operating Environment.....................................................................................4
1.2 What You Need Before You Start.....................................................................4
1.3 Use of a DSL, Cable or other Digital Phone Service ........................................5
1.4 Getting to Know Your Wireless WaterAlarm ..................................................5
1.5 Dip Switches and Their Functions ....................................................................6
1.6 Connecting Cords, Sensor and Battery..............................................................7
2.0 Programming
2.1 Explanation of Program Menu Options.............................................................9
2.2 Programming Your Wireless WaterAlarm Locally: .......................................12
2.3 Programming Your Wireless WaterAlarm Remotely: ...................................13
2.4 Placing Wireless WaterSiren Sensors………………………………………..14
2.5 Testing Your Wireless WaterAlarm................................................................15
3.0 Operation of Your Wireless WaterAlarm
3.1 Standby Mode .................................................................................................15
3.2 Calling In to Your Wireless WaterAlarm to Check Status and Change Program
Settings............................................................................................................16
3.3 Use of an Answering Machine or Voice Mail at the Monitored Location......17
3.4 What Happens During an Alarm.....................................................................17
3.5 How to Cancel the “Alarm Call-Out” and Reset Your Wireless WaterAlarm18
3.6 Replacing the Back-Up Battery.......................................................................20
3.7 Disconnecting the Wireless WaterAlarm for Seasonal Storage......................21
4.0 Adding and Deleting Wireless Sensors:
4.1 Adding New Wireless WaterSiren Sensors.....................................................21
4.2 Deleting Wireless WaterSiren Sensors............................................................22
5.0 Other Installation Notes
5.1 Answering Machines at the “Call-to” Location ..............................................22
5.2 Extending the Phone Cord Length ..................................................................22
5.3 Back-Up Battery Options................................................................................23
6.0 Commonly Asked Questions..................................................................................23
7.0 Trouble Shooting...................................................................................................24
8.0 Warranty and Repair Information
8.1 Contacting Us..................................................................................................25
8.2 Limited Warranty............................................................................................25
8.3 Repair and Service ..........................................................................................26
9.0 Certification Statements........................................................................................27
Appendices
Program Menu........................................................................................................29
Call-In Menu ..........................................................................................................30
Call-Out Menu........................................................................................................31

4
1.0 INITIAL SET-UP:
BEFORE YOU PROCEED - Please read the entire warranty statement in this manual.
1.1 Operating Environment
The Wireless WaterAlarm Base Station should be located in a dry, clean area that is
near an AC power outlet and a telephone wall-jack. The Wireless WaterAlarm is
designed to operate in temperatures from 20° to 140°F (-7° to 60°C). You should not
install the Wireless WaterAlarm in areas where there is strong electrostatic,
electromagnetic or radioactive fields. Do not install the Wireless WaterAlarm in an
area with high humidity, chemical fumes or corrosive vapors. Never install or connect
your Wireless WaterAlarm during a lightning storm!
1.2 What you need before you start
Before proceeding, make sure you have the following ready:
1. One 9 volt alkaline or lithium battery for back-up power for the base station.
2. Two AA alkaline batteries for the wireless water sensor.
3. Recommended, but not required is a high quality surge suppressor that protects
the power line as well as the telephone connections. These are available from
all hardware stores, department stores and directly from Protected Home.
4. Three phone numbers the Wireless WaterAlarm will dial during a water,
power or battery emergency. These phone numbers are referred to as call-to
telephone numbers throughout this manual. You do not need to program three
phone numbers if desired. You can program one or two phone numbers or
even program the same phone number in all multiple positions if desired.
5. You will need access to a single line telephone jack. The Wireless
WaterAlarm will not interfere with the normal use of your telephone line. The
Wireless WaterAlarm will operate with all standard telephone systems that
accept either pulse or tone dialing. Some business telephone systems or PBX
telephone systems may not work with the Wireless WaterAlarm. In those
cases, a dedicated, single telephone line will be required. Consult the supplier
of your phone system if you encounter problems or have questions. The
Wireless FreezeAlarm cannot be used on a party line or a pay telephone line.
It is extremely important that you test your Wireless WaterAlarm as
outlined in Section 2.5.
6. You will need a standard telephone to program your Wireless WaterAlarm
using the front Programming Phone jack. Most cordless phones will work, but
if you encounter problems, use a wired phone or program your Wireless
WaterAlarm remotely by dialing into it using a cell phone or a phone from
another location. After programming is completed, unplug this phone from
the Wireless WaterAlarm.
7. If you wish to use one telephone jack for both the Wireless WaterAlarm and a
regular telephone, you will need to purchase a dual telephone jack line splitter.
This will turn a single telephone jack on your wall into two separate telephone
jacks to plug in both the Wireless WaterAlarm and a regular single line
telephone. These are available from any hardware or discount department
store or directly from Protected Home.

5
1.3 Use of a DSL or other Digital Phone Services:
If you have a DSL phone line or a phone line through your cable company, you
should install the appropriate filters on the phone line. Please note that the
Wireless WaterAlarm is designed to work with and is certified by the FCC to
operate on a standard, analog “POTS” telephone line provided by your local
telephone company. Most DSL, Cable or Digital phone services are compatible
with the Wireless WaterAlarm. If you have questions or problems using one of
these types of phone services, contact your phone service provider.
1.4 Getting to Know Your Wireless WaterAlarm:
Front of the Wireless WaterAlarm Base Station
Back of the Wireless WaterAlarm Base Station
Descriptions of all the buttons and connections follow on the next two pages.
IMPORTANT:During power failures, many alternative phone services such
as VOIP and Cable provided phone service DO NOT WORK. These phone
services require that power be on in the premises for the phones to operate. In
some cases, the phone service provide will provide a battery back-up system to
keep the phone working for a short period of time when power is out. The
Wireless WaterAlarm will NOT be able to call out if the power is out when
utilizing these phone services. If you have a standard, land line telephone
service, power is supplied to this line by the telephone company and is usually
not affected if power is out at the monitored location.

6
Standby/On Switch
Toggle switch for either STANDBY mode or ON
for normal operation mode.
Power Indicator Light
This light is on if the power transformer is
plugged in and there is power to the unit. It is not
on if the unit is operating on battery power only.
Alarm Indicator Light
This light will FLASH if the unit is in the
STANDBY mode. During normal operation with
no alarms present, this light will not be on. This
light will remain ON and not flash if the unit is in
ALARM mode, meaning one of the alarm
conditions exists or the alarm call-out has not been
canceled.
Program Phone Jack
Plug in a phone here to either locally program
your Wireless WaterAlarm or to locally check
status or cancel alarm call-outs. For normal
operation, you will not have a phone plugged
into this jack.
Phone Jack
Plug in the supplied telephone cord here. The
other end plugs into your telephone wall jack (or
through a surge suppressor if used). See the
“connections” section later in the manual for more
details.
Dip Switches
There are four dip switches that are used to select
various features and functions of your Wireless
WaterAlarm.
9 Volt Battery Connection
This is where you will plug in your 9 volt lithium
battery.
+12VDC Power Connection
This is where you will plug in the AC Power
Adaptor that is included with your Wireless
WaterAlarm.
1.5 Dip Switches and Their Functions:
All of the dip switches are set at the factory in the “down’ position (most popular),
but you may change them if desired.
1. DO NOT plug in the power cord or battery until instructed to do so.
2. Make sure the toggle switch on the front of the Wireless WaterAlarm is on the
STANDBY position for programming. The ALARM light on the front of the
unit will flash when in STANDBY mode.
3. Ignore the ON or OFF labels on the dip switches themselves. Use the
following table for explanation of each dip switch setting. UP means the
switch is pointing towards the top of the case and DOWN means the switch is
pointing towards the bottom of the case.
4. Select the dip switch options per the Dip Switch Menu found on the next
page.

7
Dip Switch Menu
#
Description
Settings
1
Pulse or Tone Dial Out. Select for Pulse Dialing
only if you do not have Touch-Tone™ dialing
capability at the monitored location.
UP =
pulse dialing DOWN =
tone dialing
2
Power Alarm Monitoring – you can turn this
feature off or on with this switch. If you do not
wish to receive an alarm phone call related to a
power failure, put switch in the UP position.
UP =
Power alarm
monitoring is
OFF
DOWN =
Power alarm
monitoring is
ON
3
Call Out Frequency. When the Wireless
WaterAlarm goes into alarm mode and begins
calling out, it will call the three programmed
phone numbers. If no one cancels the alarm call-
out, it will begin the sequence again in either 15
minutes or in 1 hour according to the setting
selected.
UP =
1 hour call
out frequency
DOWN =
15 minute
call out
frequency
4
10 or 3 Ring Call-Out. If the Wireless
WaterAlarm received no answer when calling a
phone number, this switch determines how many
times the phone will ring before the Wireless
WaterAlarm hangs up the call and moves on to the
next programmed number. This feature allows
you to save on long distance charges by not having
the answering machine or voice mail pick up
alarm calls. Select the 3 ring option
if the
Wireless WaterAlarm
is calling an answering
machine set to answer on 4 or more rings. the
Wireless WaterAlarm
will hang up before the
answering machine answers.
UP =
3 rings DOWN =
10 rings
1.6 Connecting Cords, Sensor and Battery:
1. Connect the AC Power Adaptor to the Power connection on the back of the
unit. Plug the other end into an AC power outlet or into your surge suppressor
power strip (purchased separately).
2. Insert a 9-volt battery to the battery connection on the back of the unit. Do not
install the AA batteries in the wireless water sensors until instructed to do so.
3. Connect one end of the supplied telephone cord to the “OUT TO
WALLJACK” connection on the back of the Wireless WaterAlarm, and the
other end into your telephone jack on the wall or into surge protector (if used).
A surge protector is
highly recommended, but
not required. The figure
at the right shows these
connections to the back
of the Wireless
WaterAlarm base station.
If not using a surge
protector with phone line

8
This phone will only be used to
program your Wireless WaterAlarm
locally or for locally checking current
status of your Wireless WaterAlarm.
It is important to UNPLUG this phone
from the front after you are done
programming or making any changes.
protection, the phone cord should go from “OUT TO WALL JACK” to the
telephone jack on the wall.
4. Plug in your standard, single line telephone to the “PROGRAM PHONE” jack
on the front of your Wireless WaterAlarm. See Figure below.
2.0 PROGRAMMING:
Once the Wireless WaterAlarm is set up, you will need to make sure the included
wireless sensor and any additional sensors are “joined” to the base station. In addition,
you must program at least one phone number for the Wireless WaterAlarm to call
should there be a temperature emergency, a power loss or a low battery condition.
You can program your Wireless WaterAlarm using your home telephone or you can
remotely access your Wireless WaterAlarm and program it using a mobile/cellular
phone or a phone at another location. Most first time users program their Wireless
WaterAlarm at the location where the Wireless WaterAlarm is located by using a
regular home telephone. A standard, home telephone with a wired handset is the best
option for local programming, although most cordless phones will also work. If you
feel comfortable with the menus, you can follow the Quick Start Guide supplied with
your Wireless WaterAlarm. You can also skip to section 2.2 to “Program your
Wireless WaterAlarm Locally” or section 2.3 to “Program your Wireless WaterAlarm
Remotely.
Factory Default Settings:
A number of the menu settings have factory defaults that can be changed if desired.
Each of these factory defaults is discussed in detail later in the manual.
Security Code.........................................................................................................9999
Number of rings before the unit answers (incoming ring count)........................5 rings
Number of minutes the power should be out before calling with a power alarm ......60
Greeting Message: ......................“Hello, this is your Protected Home Alert System.”
Alarm Message: ..........................“Hello, this is your Protected Home Alert System.”

9
2.2 Program Menu Options:
Each of the programming options is explained in detail below. Review this before
attempting to program your Wireless WaterAlarm.
Menu Option 1
Review or Program Telephone Numbers
Program your call-to phone numbers here. You can also review or change any existing
phone numbers here if needed. The Wireless WaterAlarm can dial up to three phone
numbers with each phone number consisting of up to 60 digits. You can include pauses
and the star key (*) as part of your phone number to accommodate calling cards,
different phone features and pager systems. These phone numbers are referred to
throughout the rest of this manual as “call-to phone numbers”.
To program a star key (*) in your phone number, press the (*) key on your keypad as
part of the phone number. To enter a two second pause in a call-to phone number,
press the (*) key twice. This will count as two digits of your total 60 allowed for that
number. You can combine (*) keys in a phone number to add both a two second pause
and a dialed (*) by having three (*) in your phone number sequence. Three (*) equal a
2 second pause followed by a dialed (*). Four (*) equal a four second pause in the
dialing sequence.
Menu Option 2
To Review or Program Sensors
The wireless water sensor included with your Wireless WaterAlarm package was
“joined” at our factory to communicate with your Base Station. No further
programming is required. To join additional sensors, use this menu option and follow
the menu prompts.
This menu option also allows you to review your “joined” sensors and delete sensors if
desired. Sensors are given a number as they are “joined” to the Base Station. When the
Base Station calls to alert you of a problem, you will be told which sensor number is
reporting the alarm condition.
Menu Option 3
Review or Program the Security Code
The security code is used for two functions by the Wireless WaterAlarm:
1. Password Protection to prevent unauthorized persons from accessing your Wireless
WaterAlarm remotely. The factory set security code is 9999. We highly
recommended that you change and record the new security code on the front of this
manual, and keep in a safe place at your call-to locations. Security codes must
have four numeric digits.
2. Location Identifier. The security code also provides a location code to the person
answering an alarm call from the Wireless WaterAlarm. The Wireless
WaterAlarm will note that there is a specific alarm condition “at location ####”.
This allows a service or monitoring company to quickly identify which location is
calling so they can dispatch service personnel to your monitored location most

10
efficiently. This is also an easy way to hear what your security code is if you have
forgotten the code.
If you have forgotten your security code, there is no way to remotely change the code.
You will need to go to the monitored location, plug a phone into the front of the
Wireless WaterAlarm, go to menu option 3 in the programming menu and review or
change the security code at that time. If you are receiving calls from your Wireless
WaterAlarm, the unit will tell you the security code during the alarm message.
Menu Option 4
Review or Program the Number of Rings Before the Unit Answers
This is also referred to as the “incoming ring count”. When you call your Wireless
WaterAlarm from a remote location, the Wireless WaterAlarm will be waiting to hear a
specified number of rings before it picks up. You can select the number of rings you
wish the Wireless WaterAlarm to hear before it will pick up. Through this menu
option, you can select to have the Wireless WaterAlarm answer after from 1 to 30 rings
have been counted by the Wireless WaterAlarm. The factory default incoming ring
count is set at five (5) rings.
This feature is provided for several reasons:
1. If you have an answering machine or voice mail at the monitored location, you
generally want people calling that location to be able to leave a message. If the
Wireless WaterAlarm answers before your message system answers it will override
the answering machine or voice mail. You can program the Wireless WaterAlarm
to answer on a number of rings that is greater than that of your message system and
still have people leave messages for you. To gain access to your Wireless
WaterAlarm instead of the message system, follow the procedures outlined in
Section 3.3, Use of Answering Machines or Voice Mail at the Monitored Location.
2. When you are visiting your monitored location, you may receive frequent phone
calls from outside callers. With a smaller incoming ring count selected, there is the
possibility the Wireless WaterAlarm could answer if several callers called within a
three and a half minute period of time. If you normally receive many calls at the
monitored location, you may wish to set the incoming ring count to a higher
number.
Menu Option 5
Review or Program the Number of Minutes the Power is Out Before Calling with a
Power Alarm
The Wireless WaterAlarm has the ability to call you if the power to the Wireless
WaterAlarm has failed. In this menu option, you can select the number of minutes that
the power is out before it calls you with a power out alarm. You can select any number
of minutes from 0 to 120. The power will have to be out continuously for the number
of minutes selected before calling you. For example, if you have the power out timer
set at 60 minutes and the power goes out for 40 minutes and then comes back on for a
brief moment and then goes off again, the timer resets to zero. The Wireless
WaterAlarm will keep track of the number of minutes the power is out and tell you

11
during an alarm call how long the power has been out and if the power is currently on
or off. The factory default for the power out timer is 60 minutes.
Menu Option 6
To Review or Record Messages
You can record both a greeting and an alarm message on your Wireless WaterAlarm.
Each message can be 20 seconds long.
Greeting Message:
This message is played whenever you call your Wireless WaterAlarm from a remote
location. If there is no answering machine or voice mail, you may record a message
that indicates this machine does not accept messages and requests the caller to try back
later. If you do not record a personal Greeting Message, the factory default message is:
“Hello, this is your Protected Home Alert System.”
Alarm Message: This message is played whenever the Wireless WaterAlarm calls out
upon an alarm condition. It will precede the factory alarm messages and can be
programmed to contain personal information such as your name, address, etc. The
factory default message is: Hello, this is your Protected Home Alert System.
Reinstating the Factory Default Message:
If you record a custom Greeting or Alarm Message but decide you would rather have
the factory default message instead, you can reinstate the factory default alarm or
greeting message.
1. Select the menu option 6 to record messages
2. Press 1: To Review or Program the Alarm (or Greeting)Message
3. Press 0 so you can change the Alarm or Greeting Message
4. The Wireless WaterAlarm will begin playing the menu prompt below.
“Begin Recording after the tone.
When you have finished recording, press the pound (#) key”
5. While this message is playing, press the # key. The menu prompt will stop
and the Wireless WaterAlarm will reinstall the factory default greeting or
alarm message.
2.3 Programming Your Wireless WaterAlarm Locally:
1. Place the toggle switch on the front of the Wireless WaterAlarm in the
STANDBY position for programming. The ALARM light on the front of the
unit will begin flashing
2. Plug a single line telephone into PROGRAM PHONE connector on the front
of the unit. This will be referred to as your Programming Phone. NOTE:
After programming is completed, unplug the Programming Phone from the
PROGRAM PHONE jack on the front of the Wireless WaterAlarm. If you
want to share a phone with your Wireless WaterAlarm in the same wall jack,
you will need a telephone jack line splitter. See Section 1.6, Connecting
Cords, Sensor and Battery for more information.

12
3. Using the Programming Phone, listen to and follow the voice prompts.
Main Menu:
You are in the main menu.
For current status, press 1
To review sensor status, press 2
For the programming menu, press 3
Current Status: Provides the current status at the base station and the
condition of the various sensors. If no alarm conditions exist, you’ll hear:
There are no alarm conditions to report at this time.
Currently, the base station power is on (or off). The base
station battery is at X.XX volts. There are XX sensors joined.
Program Menu: The Wireless WaterAlarm is programmed here. Earlier in
the manual, each menu option is explained in detail. In addition, Appendix
A has a flow chart showing the menu layout.
IMPORTANT: When programming is complete, move the
STANDBY/ON switch to the ON position.
2.4 Programming Your Wireless WaterAlarm Remotely
1. Make sure the ON/STANDBY switch on the front of the unit is in the ON
position.
2. Ensure that all connections have been made according to section 1.6. You do
not need to plug a phone into the “PROGRAM PHONE” jack on the front of
the unit to program it remotely.
3. Using an outside phone or a mobile/cell phone, call the telephone number of
your monitored location. The Wireless WaterAlarm will answer after hearing
the programmed number of incoming rings (default is five rings). If you have
an answering machine or voice mail at the monitored location, you may need
to place two or more calls to the monitored location to circumvent the
answering machine or voice mail. For more details on this topic, see Section
3.3, Answering Machines and Voice Mail.
4. When the Wireless WaterAlarm answers, you will hear the following:
Hello, this is your Protected Home Alert System
(or a custom greeting message if recorded earlier)
If no alarm conditions are present, you will hear:
To access the main menu, enter your security code followed by
the pound (#) key.
If alarm conditions do exist when you call your Wireless WaterAlarm, the
Wireless WaterAlarm will play any alarm conditions present at that time
instead of the above message. See the section 3.4 What Happens During An

13
Alarm for more details on what to do if this message is playing. You can still
remotely program the unit even if alarm conditions are present.
5. Enter your four digit security code followed by # on your telephone key pad.
If the security code is correct, the main menu will play:
Main Menu:
You are now in the main menu.
For current status, press 1
To review sensor status, press 2
For the Programming Menu, press 3
Current Status: Provides the current status of the Base Station and the
Wireless WaterSiren sensor(s).
Program Menu: This is where you will program your Wireless
WaterAlarm. Earlier in the manual, each menu option is explained in detail.
In addition, Appendix A has a flow chart showing the menu layout.
2.5 Placing the Wireless WaterSiren Sensor
The Wireless WaterSiren Sensor that came with the Wireless WaterAlarm package is
already “joined” to the Base Station. Place the sensor in the desired location and press
the “test” button on the sensor. If the indicator light is “green”, the sensor is
communicating properly with the Base Station. If the indicator light flashes “red”, you
will need to reposition the sensor or move the Base Station closer to the sensor(s).
Notes About Positioning the Sensor:
The sensor pad on the bottom of the WaterSiren sensor can be detached and placed
remotely (6’/1.8m wire included). This allows the audible alarm to be positioned in a
vertical orientation for maximum sound. This also allows the round WaterSiren to be
positioned for strongest signal to the Base Station.
IMPORTANT WARNING! After Programming, you
must return the STANDBY/ON switch to the ON
position or the Wireless WaterAlarm will not call you
if an alarm condition occurs and you will be unable to
call into your Wireless WaterAlarm remotely!

14
2.6 Testing Your Wireless WaterAlarm
It is important to test your Wireless WaterAlarm to ensure you have programmed all the
telephone numbers correctly and to make sure the Wireless WaterAlarm is working
properly with your telephone line. Before you start the test, make sure the
STANDBY/ON switch is in the ON position.
The easiest test is to simply place the water sensor on a wet surface. The WaterSiren
will alarm and the dialer will begin dialing your programmed phone numbers. To
complete the test, do not cancel the alarm call-out during any of the calls until the last
number has been dialed. When you cancel the alarm call-out before the other numbers
have been dialed, the Wireless WaterAlarm will stop calling the rest of the phone
numbers.
After you have verified the programmed call-to phone numbers have been called
successfully, you must still cancel the alarm call-out and correct the alarm condition.
Remove the sensor from the wet surface and dry with a cloth.To cancel the alarm call-
out and reset the Wireless WaterAlarm, move the STANDBY/ON switch to the
STANDBY position, and then again back to the ON position. The red alarm light on
the front of the Wireless WaterAlarm will go out in a few moments. Your Wireless
WaterAlarm is now ready for normal operation.
3.0 OPERATION OF YOUR WIRELESS WATERALARM
3.1 Standby Mode:
On the front of your Wireless WaterAlarm is a toggle switch with two positions,
STANDBY or ON. The STANDBY position is primarily used for programming
purposes. The switch should be in the ON position once programming is completed.
With the switch in the STANDBY position, you can access the main and programming
menus. Important: if the switch is left in the STANDY position after programming
is complete, you cannot remotely dial into your Wireless FreezeAlarm and the
system will not call out if an alarm condition occurs!
Some users may want to temporarily flip the switch to the STANDBY mode if they are
visiting the monitored location and don’t want the possibility of an incoming call being

15
picked up by the Wireless WaterAlarm. We do not recommend the STANDBY mode
for this scenario. Instead, we suggest that you change your incoming ring count
selection to a higher number so virtually all incoming callers will either go to your
answering machine/voice mail or you have sufficient rings to allow you to get to the
call well before the Wireless WaterAlarm answers.
3.2 Remote Status Check and Programming:
One of the important features of the Wireless WaterAlarm is the ability to remotely
check the status of your monitored location simply by calling your Wireless
WaterAlarm from anywhere in the world. You can even remotely change any of the
program menu settings, including the call-to phone numbers. If you have an answering
machine or voice mail at the monitored location, make sure you read the section “Use
of an Answering Machine or Voice Mail at the Monitored Location” in section 3.3
before proceeding. The following is the procedure for remotely accessing your
Wireless WaterAlarm to check current conditions or change program menu options. In
the following example, it is assumed there are no alarm conditions present.
To Check Current Conditions at your Monitored Location:
1. Call the telephone number of the monitored location where the Wireless
WaterAlarm is located
2. When the unit answers, you will hear the following:
Hello, this is your Protected Home Alert System (Or you will hear your custom
greeting message)
There are no alarm conditions to report at this time.
Currently, the base station power is (on/off). The base station battery is at
X.XX volts. There are (0 to 10) sensors joined.
To access the main menu, enter security code followed by the pound “#” key.
3. You can either hang up or go into the main menu by entering your four digit
security code.
To Remotely Change any Program Menu Settings, Including Call-To Phone
Numbers:
1. Call the telephone number of the monitored location where the Wireless
WaterAlarm is located
2. When the unit answers, you will hear the factory greeting message or your custom
greeting message. This will be followed by the current status of the base station
and sensors at your monitored location.
3. Enter your four digit security code followed by # to access the main menu.
NOTE: If you leave your Wireless WaterAlarm in
the STANDBY mode, the Wireless WaterAlarm will
not call you if there is an alarm and you will be
unable to call into your Wireless WaterAlarm from
a remote location.

16
4. Press 2 to access the Program Menu.
5. Press the number of the menu option you wish to change and follow the prompts.
See menu option explanations in Section 2.2 or refer to the menu flow charts in
Appendix A.
3.3 Use of an Answering Machine or Voice Mail at the Monitored Location:
If you have an answering machine or voice mail at the monitored location where your
Wireless WaterAlarm is located, there is an easy way to still use your answering
machine or voice mail and access the Wireless WaterAlarm to check current status or to
cancel the alarm call-out.
The Wireless WaterAlarm will answer after it hears the programmed number of rings.
This number of rings is the “incoming ring count” selection described in the
programming section. The Wireless WaterAlarm can count incoming rings over
multiple calls to the Wireless WaterAlarm.The multiple calls must be made within
three and a half minutes of the first call. This allows incoming calls to go to the user’s
answering machine or voice mail service prior to the Wireless WaterAlarm answering.
The factory default incoming ring count is five rings.
Example:
1. During Programming, set your Wireless WaterAlarm to answer on a specified
number of incoming rings. Set your answering machine or voice mail to answer on
a number of rings that is less than the number of rings your Wireless WaterAlarm
requires before answering. For example, if your Wireless WaterAlarm is set to
answer on 5 rings, set your answering system to answer on four rings or less.
2. If you wish to call your Wireless WaterAlarm, place two calls to your monitored
location.
a. On the first call, let the phone ring two or three times and then hang up before
your answering system answers.
b. Make a second call within one to two minutes and your Wireless WaterAlarm
will before your answering machine or voice mail. If you have your Wireless
WaterAlarm set to answer after a high number of rings, you may need to place
three calls in order to have the Wireless WaterAlarm answer.
Note: If you receive many incoming calls to your monitored location, you should set
your incoming ring counter to a high number.
3.4 What Happens During an Alarm:
The Wireless WaterAlarm will call out if an alarm condition has occurred. It will
continue to call you every 15 minutes or two hours (depending upon dip switch #3’s
position), even if the alarm condition has been corrected. Only after you “cancel” the
alarm call-out will the Wireless WaterAlarm stop calling you for that particular alarm
condition. Canceling the alarm call-out does not “disable” or stop the Wireless
WaterAlarm from monitoring your location. It simply stops the unit from calling out
for the specific alarm condition that is occurring at the time.

17
Alarm Call-Out Sequence:
The Wireless WaterAlarm will continue to call all programmed call-to phone numbers
until someone acknowledges the alarm and cancels the alarm call-out.
The Wireless WaterAlarm will call the first call-to telephone number and play its alarm
message. If it gets a busy signal, no answer or a person who doesn’t know how to
cancel the alarm call-out, it will immediately start calling the second number. If the
alarm call-out isn’t canceled by the second call-to person, it will immediately move to
the third number. If no one at that call-to number cancels the alarm call-out, the unit
will wait either 15 minutes or two hours and then start the sequence all over again.
The unit will continue to call until the call-out is cancelled over the phone, or the switch
on the front of the unit is manually moved to the STANDBY position. The Wireless
FreezeAlarm will continue to call out, even if the alarm condition has corrected itself.
Multiple Alarms
It is possible to receive multiple alarm calls from your Wireless WaterAlarm even if
you believe you have canceled one of the alarms. Here are some examples:
Example 1:
If you receive a power out alarm and cancel that alarm call-out, your Wireless
WaterAlarm Base Station will be running on back-up battery power until the power is
restored. It is possible that the base station battery could drop below 7.0 volts and
begin calling out again, but this time with a battery alarm. You will need to cancel this
alarm call separately from the earlier power out alarm. If the power outage continues,
you could also receive additional alarm calls due to water problems that were caused by
the prolonged power failure (frozen pipes, overflowing sump baskets due to sump
pump failure, etc.) These alarm calls would also need to be canceled separately.
Example 2:
Assume you have received a power out alarm and have canceled the alarm call-out. A
short time later, you receive another power out alarm. What may have happened is that
your power was restored after you canceled the first alarm call-out and the power out
alarm was automatically reset. A short time later, the power went out again (not
unusual in remote areas). This would cause the Wireless WaterAlarm to initiate
another power out alarm and begin calling your call-to phone numbers again.
3.5 How to Cancel the “Alarm Call-Out” and reset your Wireless WaterAlarm
Two things must occur in order to reset the Wireless WaterAlarm. The alarm call-out
must be canceled and the alarm condition needs to be corrected. Once both of these
conditions are met, the Wireless WaterAlarm will automatically reset.
You can cancel the alarm call-out in one of three methods:
1. If you answer a call from the Wireless WaterAlarm, the Wireless WaterAlarm will
give you an opportunity to enter the four digit security code which will cancel the
alarm call-out.

18
2. If the Wireless WaterAlarm has left alarm messages on your answering machine or
voice mail, you can remotely call into the Wireless WaterAlarm and cancel the
alarm call-out by following the prompts.
3. Go to the monitored location and if the Wireless WaterAlarm is still dialing out to
the call-to phone numbers, you can simply switch the front toggle switch to
STANDBY mode. The red ALARM light will flash. If you move the switch back
to the ON position and the alarm conditions still remain, the unit will begin calling
again because the alarm assumes a new alarm condition has occurred. You must
first correct the alarm conditions and then turn the unit back to the ON position to
prevent the unit from calling you again.
Canceling the Alarm Call-Out during a call from the Wireless WaterAlarm:
When the Wireless WaterAlarm calls you, you will initially hear either the factory
recorded alarm message or your custom alarm message that you recorded during the
programming section.
Hello, this is your Protected Home Alert System. (Or you will hear your
custom alarm message)
The following alarms currently exist or have occurred recently at location
####.
The “####” represents your four digit location/security code. This message
will be followed by one or more alarm messages indicating the specific alarms
occurring and which sensors are reporting the alarm. The alarm messages will
be followed by:
To repeat alarm messages, press the star key. To cancel the alarm call-out,
enter security code followed by the pound “#” key.
You will be given two chances to enter the correct security code. If incorrect
two times, the Wireless WaterAlarm will say “Incorrect Security Code, good-
bye” and hang up. If you enter the correct security code, the Wireless
WaterAlarm will respond with:
The alarm call-out has been canceled. To access the main menu, press 1.
Otherwise, hang up.
Calling into your Wireless WaterAlarm to Cancel the Alarm Call-Out:
If you received calls from your Wireless WaterAlarm and know there is an alarm at
your monitored location, you can call into your Wireless WaterAlarm from any phone
in the world and remotely cancel the alarm call-out without having to wait for another
call from your Wireless WaterAlarm. If you have an answering machine or voice mail
at the monitored location, read the section Use of an Answering Machine or Voice Mail
at the Monitored Location, section 3.3 before proceeding. Once your Wireless
WaterAlarm answers, the procedure detailed above will be the same to cancel the alarm
call-out.

19
If the Alarm Call-Out Has Been Canceled By Someone Else:
Since the Wireless WaterAlarm can call multiple phone numbers, there is a chance that
a person at one of the other call-to locations may have canceled the alarm call-out prior
to your phone call to the Wireless WaterAlarm. If this occurs, you will still hear the
current status and all the alarm conditions when you call into the Wireless WaterAlarm,
but you will not be given the option to cancel the alarm call-out. Instead, the Wireless
WaterAlarm will ask for your four digit security code to access the main menu. You
can either enter your security code to check current conditions again, or hang up and
determine the steps needed to correct the alarm conditions.
It is even possible that one of your other call-to people has canceled the alarm call-out
and the alarm conditions have improved at your monitored location. If this has
occurred, you will not hear any alarm conditions. Instead, you will be given a current
status and then an opportunity to enter the main menu.
3.6 Replacing the Back-Up Batteries/Battery Life
How Long Will Batteries Last?
If the power is out, a fresh 9V lithium battery in the Base Station will provide
approximately 6 to 8 hours of power to the Wireless WaterAlarm even if the Base
Station is calling out every 15 minutes to all three phone numbers. An alkaline battery
will provide approximately 2 and 4 hours of backup.
Once a low battery alarm has been reported by the Base Station, you may only receive
1 to 2 hours of additional life from the battery before the Base Station shuts down. If
power is restored, the unit will reset and check conditions and begin calling you with
any alarm conditions that remain. If a power out alarm occurs, it is highly
recommended that you replace the back-up battery.
In the Wireless WaterSiren sensors, the two alkaline AA batteries should provide at
least one year of service.
Replacing the Battery in the Base Station:
When the battery requires replacing, we highly recommend a 9 volt lithium battery.
Follow this procedure to change the back-up battery.
1. Move the front toggle switch to the STANDBY position.
2. Remove the old battery and insert the new battery.
3. Move the front toggle switch back to the ON position.
Replacing Batteries in the Wireless WaterSiren Sensors:
1. Move the front toggle switch to the STANDBY position.
2. Remove the old AA batteries in the sensor and replace with fresh AA batteries.
3. Move the front toggle switch back to the ON position.
4. Press the “TEST” button on the sensor to verify that communication with the Base
Station is still good. It may take a minute or two before communication is restored
with the Base Station.

20
3.7 Disconnecting the Wireless WaterAlarm for Seasonal Storage:
Your Wireless WaterAlarm can provide year round protection, but if desired, it can be
safely stored for seasonal use. To store your Wireless WaterAlarm, disconnect all
cables and wires and remove the batteries in the Base Station and all Wireless
WaterSiren sensors. If you leave a battery in your Wireless WaterAlarm Base Station,
the battery will be dead the next time you are ready to use your Wireless WaterAlarm.
Storing electrical devices with batteries in place is not recommended. Store your
Wireless WaterAlarm in a dry place with no excessive temperatures.
The Wireless WaterAlarm will indefinitely retain all programmed call-to phone
numbers and other programmed settings, even if the power cord is disconnected and the
batteries have been removed.
4.0 JOINING AND DELETING WIRELESS SENSORS
4.1 Joining New Wireless WaterSiren Sensors:
To join additional sensors, follow this procedure:
1. Put the base station in “STANDBY” mode by moving the toggle switch
on the front of the Base Station to STANDBY.
2. Place two AA batteries in the new sensor. The sensor’s indicator light
will at first flash red and green, then stay red. This indicates that this
sensor is waiting to be joined to a Base Station.
3. Plug a phone into the “Program Phone” jack on the front of the Base
Station.
4. Pick up the handset of the program phone and press 2 to access the
Programming Menu.
5. From the Programming Menu, press 2 to “Review or Program Sensors”.
6. Press 1 to “Join a New Sensor”.
7. The Base Station will look for a new sensor and will play the message:
“Looking for a new sensor. Please press the JOIN button on the sensor”.
At this time, press the JOIN button on the new sensor. The indicator light
will flash red and green for several seconds. If it finds the Base Station,
the indicator light will light green for several seconds and then go out.
8. On the Programming Phone, you will hear the message: “Sensor Number
XX joined”. The XX represents the next sequential number available for
new sensors.
9. Repeat this procedure to add more sensors.
10. Move toggle switch back to the ON position.
If the sensor is not found by the Base Station, you will hear “Sensor not found” on the
Programming Phone. You will then be returned to the Sensor Menu where you can try
again to join the sensor by following the same procedure above, starting with step 6.
If you continue to have difficulty joining a sensor, consider the following
troubleshooting tips:
1. Move the sensor closer to the Base Station and/or change the orientation of the
sensor.
2. Make sure the batteries in the sensor are properly seated or try new batteries.
Table of contents
Languages:
Other Control Products Security System manuals

Control Products
Control Products Deluxe FreezeAlarm FA-D2 User manual

Control Products
Control Products PROTECTED HOME WaterAlarm User manual

Control Products
Control Products MA-D User manual

Control Products
Control Products waterAlarm WA-01 User manual

Control Products
Control Products VD-6100-TM User manual

Control Products
Control Products FreezeAlarm FA-DX User manual

Control Products
Control Products PhoneAlarm Series User manual

Control Products
Control Products MiniAlarm Plus User manual

Control Products
Control Products miniAlarm User manual

Control Products
Control Products miniAlarm MA-S01 User manual