Control Products MiniAlarm Plus User manual

1
MiniAlarm Plus Model MA-5000
Thank you for purchasing the MiniAlarm Plus. We are confident this product
will provide you with the peace of mind and protection you expect. If you
should ever have any questions or concerns about this product, feel free to
contact us. Our phone number, web sites and email addresses are listed at the
back of this instruction manual.
GENERAL DESCRIPTION
The MiniAlarm Plus is designed to alert you by telephone if an intruder is
detected by the included motion sensor. The product consists of three
components:
1) The Dialer – This component connects to your existing telephone line to
make continuous phone calls every 15 minutes (or 2 hours) if an alarm condition
exists.
2) The PIR Motion Sensor – This component is what actually detects motion
and sounds a 130 decibel alarm. The Motion Sensor is connected to the Dialer
via a 25 foot (7.6m) wire. This wire can easily be extended up to 1,000 feet
(304m). You can add additional wired motion sensors to cover multiple
locations within a home, cabin or business.
3) The Remote Control – This component allows you to easily arm and disarm
the alarm with a touch of the button. You may purchase additional remotes to
use with one unit.
FEATURES
•Automatically dials to one telephone number when motion is detected by
the wired motion sensor. The MiniAlarm can call any telephone number
including a cell phone, calling card number, or international number.
•Plays a pre-recorded voice alarm message in English. The message is “This
is your mini alarm security system. There is an alarm condition at your
monitored location. Please check conditions at your monitored location.”
The MiniAlarm will repeat the message for a full minute, allowing it to be
recorded on an answering machine or voice mail if desired.
•Continues to call your programmed telephone number until the alarm call
out is canceled by calling back to the MiniAlarm from any phone in the
world.
•Enter and change the “call-to” telephone number easily. Special memory
keeps the phone number stored forever even if the battery goes dead or is
removed.
•Call-to telephone number can be up to 40 digits long including the “*” key
if required.
•Dialing indicator light
•Option to add additional motion sensors (part number MA-S01)
•Operates on Touch Tone™ telephone lines only.
•FCC Approved
2
TABLE OF CONTENTS:
General Description & Features .......................................................................1
Installation & Programming.............................................................................2
Programming and Changing the “Call-To” phone number .......................4
Installing batteries in the Motion Sensor...................................................6
Learning and Changing the Remote Control Code....................................6
Mounting the Motion Sensor.....................................................................7
Extending the wires of the various components........................................8
Testing your MiniAlarm Plus...........................................................................8
Operation
Arming and Disarming the MiniAlarm.....................................................9
During an alarm.........................................................................................9
Canceling the Alarm Call-Out...................................................................9
Resetting your MiniAlarm.......................................................................10
Use with Answering Machines and Voice Mail......................................10
Changing batteries...................................................................................11
Troubleshooting..............................................................................................12
Commonly Asked Questions..........................................................................13
Specifications..................................................................................................14
FCC Statement................................................................................................14
Contacting Us and Technical Support............................................................14
Warranty and Return Information...................................................................15
INSTALLATION & PROGRAMMING
IMPORTANT
•Read the warranty information on page 14 and the FCC statement on page
13 before using this product.
•The performance of local and long distance telephone lines vary from
location to location and may affect operation of the MiniAlarm. Therefore,
it is important that the MiniAlarm be fully tested after installation to
confirm telephone compatibility. Please see the Testing your MiniAlarm
on page 6 for further instructions.
•Caution - To ensure proper operation, this equipment must be installed
according to the enclosed installation instructions. To verify that the
equipment is operating properly and can successfully report an alarm, this
equipment must be tested immediately after installation, and periodically
thereafter, according to the enclosed test instructions.
•Caution – This equipment cannot report an alarm when other equipment
(telephone, answering system, computer modem, etc.) connected to the
same phone line is in use.
•Important – Do not program emergency phone numbers for the police, fire
or other emergency personnel or departments unless you have specific
approval from such agencies. This model of MiniAlarm does not identify
the location that is calling and therefore cannot provide an audible
notification of what address this phone call originated from.

3
A. What You Will Need:
1. One 9-volt battery and 4 AA batteries (not included). An alkaline
battery will work fine, but a lithium battery is highly recommended.
2. Phillips screwdriver (not included)
3. A single line telephone jack. This does not need to be a dedicated
phone jack; a phone can share the jack with the MiniAlarm through the
use of a telephone line splitter (not included). These are available at
most hardware, electronics or discount stores. You must have Touch-
Tone® telephone service for the MiniAlarm to properly operate. The
MiniAlarm will not work on pulse or rotary dialing telephone systems.
B. Installation of the Dialer:
1. On the Dialer Component, remove the four screws from the back cover.
2. Clip the battery terminals to your 9V battery and place in battery
compartment.
3. With the cover still removed, locate the four little “dip” switches on the
circuit board.
What the switches do:
Switch # What it does OFF Position ON
Position Default
Position
1 FACTORY USE ONLY – Do not
change NA NA OFF
2 Pick Up Ring Count. When you
call your monitored location,
should the MiniAlarm pick up
after 5 rings or 10 rings?
10 rings 5 rings ON for 5 rings
3 Call out frequency during an
alarm. How often should the
MiniAlarm call the pre-
programmed telephone number?
Every 15
minutes Every 2
hours ON for every 2
hours
4 Normally Open or Normally
Closed Alarm Input Position. The
motion sensors connected to the
Dialer require the Normally Open
position.
Normally
Closed
Position
Normally
Open
Position
ON for the
Normally
Open Position
4
Switch Explanation:
Switch #1: Factory set to OFF. Do not change the setting of this
switch.
Switch #2: Pick Up Ring Count: This is the number of rings at which
your MiniAlarm will answer so you can cancel the alarm call out. The
default setting is to answer after five rings. If you have an answering
machine or voice mail, you want to be sure the answering machine or
voice mail answers on less rings than what you have this set for. For
more information on this feature, see the section titled Answering
Machines/Voice Mail at Monitored Location under the
OPERATION section.
Switch #3: Call out Frequency: Your MiniAlarm can call your
programmed telephone number every 15 minutes or every 2 hours.
This is default set at every 2 hours.
Switch #4: The Dialer has the capability of dialing out if the sensors
either close an alarm contact or open an alarm contact. For the
MiniAlarm, the included sensor is normally open and will close when
motion is detected. Therefore, this switch must be left in the “ON”
position, or Normally Open position.
4. Replace the back cover. Be careful to ensure the cover goes on the
correct way as the telephone jack on the Dialer and the battery may not
sit correctly if replaced incorrectly.
5. Plug one end of the supplied telephone cord into the Dialer. Plug the
other end of the telephone cord into the wall jack of your single line
telephone. CAUTION: The Dialer requires a single line telephone, but
does not require this line to be dedicated for the Dialer use only. The
Dialer may not be compatible with some PBX or other multi-line
business telephone systems. Connecting the Dialer to a commercial
telephone system may cause internal damage to both systems. The
Dialer can share a wall phone jack with a telephone. A dual plug
adapter or “splitter” (not included), is required and is available at most
hardware or electronics stores. The adapter allows both the Dialer and
the telephone to share the same phone line through connection of a
single wall jack.
C. Programming or Changing the “Call-To” Telephone Number:
The Call-To telephone number is the number you want your MiniAlarm to
call if motion is detected in your remotely monitored location. Once you
program the phone number into your MiniAlarm, it is
stored indefinitely. It will not be lost even if you
disconnect the battery and the phone line. The maximum
number of digits you can have in a phone number is 40
digits. Eligible digits include any of the number keys and
the “star” (*) key. All digits and the star (*) key are part
of the 40 digit total.

5
You will be using the (#), (*) and number keys in the programming and
testing of the MiniAlarm Plus. Before programming, make sure your phone
line is connected to the MiniAlarm and the other end is plugged into your
wall telephone jack.
1. Press and hold the pound (#) key on the keypad.
2. While CONTINUING TO HOLD the (#) key, use the keypad to enter
the telephone number of the location you want the MiniAlarm to call.
Remember! Keep holding down the (#) key until the entire phone
number is entered! Enter the telephone number exactly as you would
if you were to dial that location on the telephone. In other words, enter
a “1” and/or the area code if required.
NOTE: Do not program phone numbers of emergency fire, police or
ambulance services into the MiniAlarm. There is no audible
notification of the location that is calling so the agency will not be
able to identify the address of the problem.
3. Release the (#) key after entering all the digits of the “call-to”
telephone number. The maximum number of digits in the telephone
number is 40. Eligible digits include any of the number keys and the
“star” (*) key. All digits and the star (*) key are part of the 40 digit
total.
4. Users can enter a five second pause in the phone number by pressing
the “star” (*) key twice. This will count as two digits of the total phone
number. For every two star keys entered, there will be a five second
pause. If three star keys are entered in succession, the first two will be
noted as the 5 second pause and the third star key will be the actual (*)
key played as part of the phone number. If four star (*) keys are
entered, the MiniAlarm would pause the dialing sequence for 10
seconds.
5. To change the phone number, simply repeat the process with a new
phone number and the old number will be erased.
6. The “Call-To” phone number is retained in memory even if the battery
is removed and the phone cord is unattached.
____________________________________________________________
IMPORTANT TIPS ON ENTERING CALL-TO PHONE NUMBER
•LONG DISTANCE: Make sure you enter the phone number exactly
like you would if you were to pick up the phone and call that person. Use
a “1” and/or the proper area code if required.
•AREA CODES: Don’t forget to change your “call-to” telephone number
if the area code changes. Your WaterAlarm will continue to call-out to
an incorrect phone number and you may incur a great deal of long
distance charges if you do not change area codes appropriately.
6
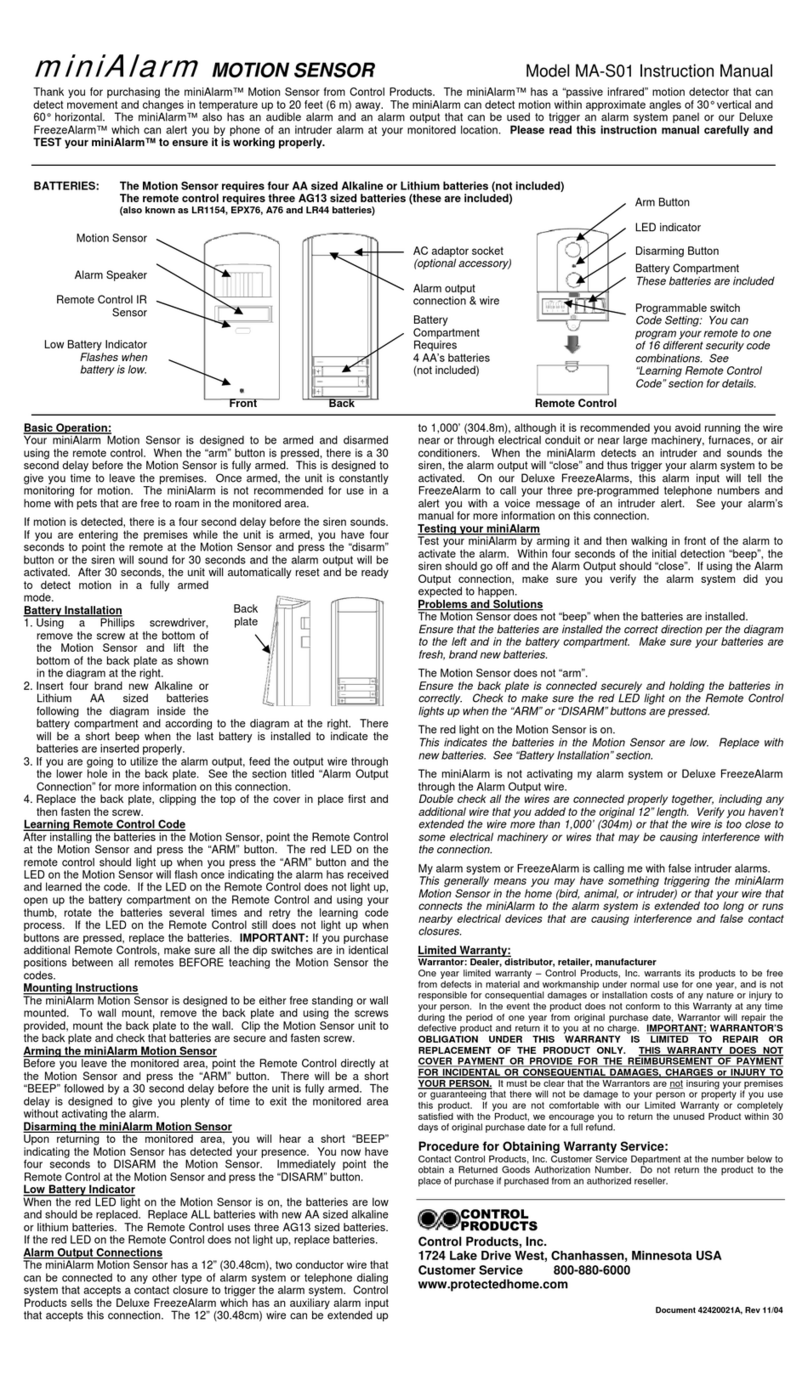
Motion Sensor
Alarm Speaker
Remote Control IR
S
ensor
Low Battery Indicator
Flashes when
battery is low.
•DIALING “9”: Some phone systems require that you dial a “9” before
the rest of the telephone number in order to get an outside line. Simply
include the “9” at the beginning of the phone number. You may need to
add a pause after the “9” so the WaterAlarm can wait for a dial tone.
•Do not program phone numbers of emergency fire, police or ambulance
services into the WaterAlarm. There is no audible notification of the
location that is calling so the agency will not be able to identify the
address of the problem.
•TEST YOUR WATERALARM: It is critical that you test your “call-
to” number as indicated in the section, “Testing your WaterAlarm” on
page 8.
D. Installing Batteries in the Motion Sensor:
1. Using a Phillips screwdriver, remove the screw at the bottom of the
Motion Sensor and lift the bottom of the back plate as shown in the
diagram on the previous page.
2. Insert four, brand new Alkaline or Lithium AA sized batteries
following the diagram inside the battery compartment and according to
the diagram above. There will be a short beep when the last battery is
installed to indicate the batteries are inserted properly.
3. Replace the back plate, clipping the top of the cover in place first and
then fasten the screw.
4. Low Battery Indicator: When the red LED light on
the Motion Sensor is on, the batteries are low and
should be replaced. Replace ALL batteries with new
AA sized alkaline or lithium batteries.
5. Remote Control Batteries: The Remote Control uses
three AG13 sized batteries. These are included with
the remote control. If the red LED on the Remote
Control does not light up, replace batteries.
E. Learning Remote Control Code:
If you wish to change the code settings from their factory

7
settings, make those changes BEFORE teaching the remote control code to
the Motion Sensor. The code and button batteries on the remote control are
accessible by opening the small cover on the remote control as shown in the
diagram.
After installing the batteries in the Motion Sensor (if needed), point the
Remote Control at the Motion Sensor and press the “ARM” button. The red
LED on the remote control should light up when you press the “ARM”
button and the LED on the Motion Sensor will flash once indicating the
alarm has received and learned the code. If the LED on the Remote Control
does not light up, open up the battery compartment on the Remote Control
and using your thumb, rotate the batteries several times and retry the
learning code process. If the LED on the Remote Control still does not light
up when buttons are pressed, replace the batteries.
IMPORTANT: If you purchase additional Remote Controls, make sure all
the dip switches are in identical positions between all remotes BEFORE
teaching the Motion Sensor the codes. DO NOT CHANGE ALARM
CODES ONCE THEY HAVE BEEN SET.
Changing the Remote Control Code: On the remote control, there are
four small dip switches. You can move those to any position BEFORE you
teach the motion sensor what the code is. Once you have changed the
learning code, point the remote control at the motion sensor and follow the
instructions as discussed above.
F. Mounting the Motion Sensor:
The miniAlarm Motion Sensor is designed to be either free standing or wall
mounted. To wall mount, remove the back plate and using the screws
provided, mount the back plate to the wall. Clip the Motion Sensor unit to
the back plate and check that batteries are secure and fasten screw. The
motion sensor can detect motion up to about 20 feet (6m) away and in an
angle that is vertically 30° up and down and from 60° side to side
(horizontally).
Tips on Where to Install the Motion Sensor:
1. It is recommended you install the motion sensor no more than 8 feet
(2.4m) off the ground, but no less than 3’ (.91m) from the ground. It is
best if motion would most likely pass in front of the sensor versus
coming towards it.
2. Do not install the motion sensor facing an outside window or near a
heating or cooling vent.
3. The wire between the motion sensor and the dialer may be extended if
desired. See instructions below.
8
E. Extending the Wire Between
the Dialer and the Motion
Sensor:
There is a 25’ (7.6m) wire
supplied between the alarm
dialer and the motion sensor.
This can be extended using any
2 conductor wire (26 AWG or
larger). You can safely extend
this up to 1,000’ (304m). The
phone cord may also be
extended up to 1,000’ (304m).
TESTING YOUR MINIALARM
There are two tests you can perform to ensure your MiniAlarm is operating
properly. It is important that a person be at the “call-to” location to receive the
test call from the MiniAlarm. Both tests assume the MiniAlarm has batteries
installed, the phone line is connected and a “call-to” phone number has been
programmed per the instructions.
A. Testing if the phone number was programmed correctly. Press the star
(*) key once until you see the red indicator light up and then release the star
key. The MiniAlarm will call this number and play our pre-recoded water
alarm message for 1 minute to either the person or answering machine at the
call-to location and then hang up. You do not need to cancel the alarm call
out for this test procedure as this function should only call the programmed
number once and then complete the test.
B. Testing Alarm Call-Out if Motion Is Detected.
Many people like to test that the motion sensor and Dialer are working
properly together. Test your miniAlarm by arming the motion sensor and
then walking in front of it to activate the alarm. Within four seconds of the
initial detection “beep”, the siren should go off and initiate the alarm call-
out. Verify the call went through to the “call-to” phone number. Since this
is a test of the full function of the MiniAlarm, you will need to cancel the
alarm call-out by following the procedure outlined in the Operation section
below, “Canceling the Alarm Call Out”.
C. If either test fails. If either test fails, try reprogramming the phone number
and repeat the test(s). Check to see the wire between the motion sensor and
the dialer is not damaged or disconnected. If it continues to not operate
properly, refer to the Troubleshooting section on page 11.

9
OPERATION
A. Arming and Disarming the Motion Sensor:
1. Arming - Before you leave the monitored area, point the Remote
Control directly at the motion sensor and press and hold the “ARM”
button. There will be a short “BEEP” followed by a 30 second delay
before the unit is fully armed. The delay is designed to give you plenty
of time to exit the monitored area without activating the alarm.
2. Disarming - Upon returning to the monitored area, you will hear a
short “BEEP” indicating the Motion Sensor has detected your presence.
You now have only four seconds to DISARM the motion sensor.
Immediately point the Remote Control at the Motion Sensor and press
and hold the “DISARM” button. If you fail to DISARM the motion
sensor and the alarm goes off, the Dialer component will begin calling
your programmed phone number. You can either call the phone
number of your monitored location from a mobile phone or another
location to cancel the alarm call out or you can unplug the phone cord
from the dialer and remove the battery and then put the battery back in
and plug in the phone cord and the unit will be reset.
B. During an Alarm:
If motion is detected by the sensor at the monitoring location, your
MiniAlarm will begin to call out to the telephone number you programmed
and play the MiniAlarm’s pre-programmed alarm message. The MiniAlarm
will continue to call either every 15 minutes or every 2 hours, depending
upon the position of switch #3 (see Installation in Step A). The MiniAlarm
will continue to call until the alarm call out is canceled.
The message the receiving party will hear is “This is your mini alarm
security system. There is an alarm condition at your monitored location.
Please check conditions at your monitored location.”
C. Canceling the Alarm Call out:
1. After you have received an alarm call, call the monitored location
where the MiniAlarm is located and let the phone ring 5 or 10 times
(number of rings is determined by the position of switch #2 for the
“Call-In Ring Count”). After 5 or 10 rings, the MiniAlarm will
automatically answer and begin playing the pre-recorded alarm
message that you heard when it called you with an alarm. Simply by
calling your MiniAlarm and listening to the alarm message, you have
successfully canceled the alarm call out. You will not receive any more
calls for this particular alarm emergency. If motion continues to be
detected by the sensor, the MiniAlarm unit will remain in “alarm”
mode, but it will not continue to call if the alarm call-out has been
canceled.
10
2. IMPORTANT: If no motion is detected after 30 seconds, the unit
will automatically reset and be ready to detect motion in a fully
armed mode.
D. Resetting Your MiniAlarm:
The MiniAlarm automatically resets to normal monitoring mode if no
motion has been detected after 30 seconds.
Note: It is possible for ANYONE to accidentally cancel the alarm call-out
simply by calling your monitored location while the MiniAlarm is in an
alarm condition. To help avoid this, you should either set the incoming ring
count selection to 10 rings (see Installation section) or have an answering
machine or voice mail take incoming calls first making it difficult for any
person to accidentally cancel the alarm call-out.
If the MiniAlarm answers after 8 rings and you hear the audible message,
the call out feature has been disabled by a previous call. The fact that you
hear the alarm message only means that the motion sensor was tripped, but
it does not mean intruders still remain in the home. Maintain caution
whenever approaching your home or business after receiving an alarm call
as intruders may still be in the location.
E. Answering Machines/Voice Mail at Monitored Location:
If you have an answering machine or voice mail at the monitored location
where your MiniAlarm is located, there is an easy way for you to still utilize
your answering machine or voice mail and access the MiniAlarm during an
alarm condition to cancel the alarm call out.
The MiniAlarm has a built-in feature whereas the unit can count incoming
rings over multiple calls to the MiniAlarm. This allows most incoming
calls to go to the user’s answering machine or voice mail service prior to the
MiniAlarm answering. All calls to the unit must be made within a 3 minute
time period that starts from the moment the MiniAlarm hears the first ring.
How This Works (an example):
1. Your MiniAlarm was set up in the Installation Section to answer on
either five (5) or ten (10) rings. You need to set up your answering
machine or voice mail to answer on a number of rings less than what
your MiniAlarm is set to answer at. For example, if your MiniAlarm is
set to answer on 5 rings, set your answering system to answer on four
rings or less.
2. When your monitored location receives an incoming call, it will go to
the answering system first because that is set to answer on four or less
rings while your MiniAlarm is set to answer on five rings.

11
3. If you wish to call your MiniAlarm to either check the alarm condition
or to cancel the alarm call out, you will need to place two calls to your
monitored location.
a. On the first call, let the phone ring two or three times and then
hang up before your answering system answers. The
MiniAlarm will remember those first two or three rings in
memory for the next three minutes.
b. On your second call, let the phone ring another two or three
times. Your MiniAlarm will answer first because it
remembered the first two or three rings and with the second
set of rings, it accumulated a total of five rings and now
answers before your answering machine or voice mail. If you
have your MiniAlarm set to answer on ten rings, you may
need to place more calls to get the MiniAlarm to eventually
answer.
4. Note that with every call to your monitored location, the three minute
timer resets. This means that if your monitored location receives a
number of calls in quick succession, it is possible for any person to
accidentally cancel the alarm call out. If you know your location will
receive a large number of calls regularly, you may wish to set your
incoming ring count on your MiniAlarm to 10 rings.
F. Answering Machines & Voice Mail at the Call-To Location:
If you have an answering machine or voice mail message system at the call-
to location, the alarm message can be recorded by such systems. This will
not cancel the alarm call-out and the MiniAlarm will continue to leave
messages until the alarm call-out is canceled. Some answering machines
and voice mail systems, however, are not compatible with our alarm
message and for some reason do not allow the message to be recorded.
G. Changing Batteries
Dialer: The Dialer requires a 9V lithium or alkaline battery. The dialer
will not call out if the battery is low and it will not call or go into alarm
mode if the battery requires replacing. You should make a note to replace
this annually or after any alarm occurrence where the dialer had to call out.
Motion Sensor: The Motion Sensor’s red LED indicator light will blink if
the batteries are low. Replace all batteries in the motion sensor with four
lithium or alkaline AA batteries.
Remote Control: The remote control comes with a set of three button
batteries. If the red LED light does not light up, rotate the batteries with
your thumb and see if they produce a positive result. If not, replace the
button batteries with new AG13 sized batteries. These batteries are also
known as LR1154, EPX76, A76 and LR44 batteries.
12
TROUBLESHOOTING
•The Motion Sensor does not “beep” when the batteries are installed.
Check to see that the batteries are installed in the correct position. Make sure
your batteries are fresh. Try new batteries if necessary.
•The Motion Sensor does not “ARM”.
Check to see if the red LED light on the Remote Control is lighting up when
you press it. You will need to press the ARM button for a few seconds, so
hold it longer until you hear the “BEEP”. If the red LED on the remote is not
lighting up, open the batter compartment and rotate the batteries with your
thumb and retry or change the batteries in the remote control. The batteries in
the motion sensor may also be low. If the LED light on the Motion Sensor is
blinking, change the batteries. Even if it is not blinking, this may be a sign the
batteries are totally dead in the motion sensor and they should be replaced.
Check to see if the back plate of the motion sensor is secured properly. If not,
it may not hold the batteries in properly.
•The red LED light on the Motion Sensor is on or flashing.
This indicates the batteries in the Motion Sensor are low. Replace with new
batteries.
•The MiniAlarm is not calling out during the Test Call-Out or during an
alarm condition.
Reprogram your call-to phone number and try again. Check phone
connections. If you are using a telephone line splitter or running the phone
line through some type of surge suppressor, disconnect and try it directly
connected to the wall phone jack. If you know you have an alarm condition,
but the alarm is not calling out, batteries may be low in the motion sensor or
the dialer or phone service may be down. If the MiniAlarm is connected to a
commercial phone system, our MiniAlarm may not be compatible with this
phone system. Take a regular home telephone and connect it to the phone
jack where you plugged in the MiniAlarm. If you do not get a dial tone using
a regular phone, it is unlikely the MiniAlarm will function properly.
•I cannot cancel the alarm call-out.
Verify you have dialed the correct number of the monitored location. There
could also be trouble with the phone service in the area, preventing your
incoming call to go through. Check with your phone company if you suspect
this problem. If you believe the phone service is working properly, it is
possible the dialer’s batteries are dead.
•I am receiving False Alarms.
The MiniAlarm may have something triggering the Motion Sensor in the
home. A bird, animal, intruder, balloon, or an object that has fallen down
could possibly trigger the motion sensor. The wire between the motion sensor
and the dialer could be damaged causing the dialer to think the motion sensor
is detecting an intruder. Check the wire and replace if necessary. If you have
extended the wire between the motion sensor and the dialer, there may be a
problem with the wire going past electrical conduit or it may be receiving

13
electrical noise from other electrical appliances. You may need to shield the
extended wire to reduce or eliminate this problem.
•The alarm call-out has been canceled, but the MiniAlarm continues to
call.
Most likely, you received an initial alarm, canceled the alarm call-out and then
the intruder either came back through the area or returned after the alarm had
reset.
COMMONLY ASKED QUESTIONS
1. The MiniAlarm is not calling the correct “call-to” location. Why?
This may be due to entering an incorrect “call to” telephone number or
a dead battery. Check or replace the battery and double check the
“call to” telephone number. Did you enter a “1” before a long
distance phone number? Check to see if your area code has changed
and re-program the “call to” number with the correct area code.
2. If I unplug the MiniAlarm or take out the battery, will I have to re-enter the
“call-to” telephone number?
Once your MiniAlarm is programmed, the “call-to” number will be
retained in memory indefinitely whether the MiniAlarm is plugged in or
not or if the battery goes dead or is taken out. You can always
program a new “call-to” telephone number at any time.
3. Do I need a dedicated telephone line for my MiniAlarm?
No. The MiniAlarm uses any existing single line telephone line. In
some cases, if you have two phone lines coming into a home, the
MiniAlarm may work on any of those telephone jacks as well. The
MiniAlarm can also share a telephone line with a telephone, modem or
fax machine, provided you purchase a dual plug adapter or a line
splitter. Those are available at most stores or directly from Control
Products.
4. Can I change the alarm message that is played during an alarm?
No. The alarm message is pre-recorded at our factory and cannot be
changed.
5. Will the MiniAlarm work on multi-line business phone systems, PBX
systems or digital telephone systems?
No. The MiniAlarm is designed to work only with a single telephone
line, found in most residential homes. Sharing a phone line with a
telephone, fax machine, or computer modem is acceptable as long as
they are sharing a single telephone line. Some PBX systems simply
require a “9” to be dialed before calling the regular call-to number.
The MiniAlarm should be able to dial the “9” and the rest of the
number. You may need to enter a pause after the 9 to wait for the dial
tone before the rest of the number is dialed by the Dialer.
14
SPECIFICATIONS
Power Requirements: Four AA and one 9-volt alkaline or lithium batteries (not included)
MAKE SURE YOU REPLACE BATTERY ANNUALLY OR REMOVE WHEN THE UNIT
IS NOT IN USE!
Operating Ambient Temperature Range: 20° to 140°F (-7° to 60°C)
Humidity: 90% non-condensing
REN (Ring Equivalence Number): 0.1B
FCC Statement:
This equipment complies with Part 68 of the FCC rules and the requirements adopted by the ACTA.
On the back of your MiniAlarm is a label that contains, among other information the FCC
registration number for this product. If requested, this number must be provided to the telephone
company.
A plug and jack used to connect this equipment to the premises wiring and telephone network must
comply with the applicable FCC Part 68 rules and requirements adopted by the ACTA. A compliant
telephone cord and modular plug is provided with this product. It is designed to be connected to a
compatible modular jack that is also compliant. See installation instructions for details.
The REN is used to determine the number of devices that may be connected to a telephone line.
Excessive REN’s on a telephone line may result in the devices not ringing in response to an
incoming call. In most but not all areas, the sum of REN’s should not exceed five (5.0). To be
certain of the number of devices that may be connected to a line, as determined by the total REN’s,
contact your local telephone company. The REN for this product is shown above and is also
identified as part of the FCC product identifier shown on the label on the back of your MiniAlarm.
The REN for other devices will be identified on a label on the product in the FCC product identifier
or listed separately. If there is a product identifier number, it will be in a format as
US:AAAEQ##TXXXX. The ## is the REN number shown without a decimal point (e.g., 03 is a
REN of 0.3).
If this MiniAlarm causes harm to the telephone network, the telephone company will notify you in
advance that temporary discontinuance of service may be required. But if advance notice isn’t
practical, the telephone company will notify the customer as soon as possible. Also, you will be
advised of your right to file a complaint with the FCC if you believe it is necessary.
The telephone company may make changes in its facilities, equipment, operations or procedures that
could affect the operation of the equipment. If this happens, the telephone company will provide
advance notice in order for you to make necessary modifications to maintain uninterrupted service.
If trouble is experienced with your MiniAlarm, for repair or warranty information, please contact
Control Products at 952-448-2217. Other contact numbers and information can be found at the end
of this instruction manual. If the equipment is causing harm to the telephone network, the telephone
company may request that you disconnect the equipment until the problem is resolved.
If your home has specially wired alarm equipment connected to the telephone line ensure the
installation of your MiniAlarm does not disable your alarm equipment. If you have questions about
what will disable alarm equipment, consult your telephone company or a qualified installer.
CONTACTING US
For Sales or Technical Support, contact Customer Service:
Protected Home/Control Products, Inc. Phone: 952-448-2217
1724 Lake Drive West Fax: 952-361-9420
Chanhassen, MN 55317 Email: customerservice@protectedhome.com
Online: www.protectedhome.com

15
Model Number Information:
The actual model number of your unit can be found on the back of the MiniAlarm.
MA-5000
Additional Sensors: MA-S01
When calling or writing for customer support or service, it is a good idea to have the following
information readily available. Please write this information down in the space provided below for
future reference.
DATE CODE/MO# from the back of your MiniAlarm:_______________
Where the unit was purchased_____________________________________________
Date of purchase:____________________
Custom Design and Modifications:
Since 1985, Control Products, Inc. has been designing and manufacturing unique, exciting and
technologically advanced electronic control circuits for both commercial and consumer use. We can
modify one of our many standard products or our in-house engineering staff and state-of-the-art
manufacturing can build a project from the ground up.
Please contact our customer service department to arrange a personal visit from one of our
representatives, posted in facilities through the United States, or visit our website at
www.controlproductsinc.com.
WARRANTY
Warrantor: Dealer, Distributor, Retailer, Manufacturer
Warranty and Remedy:
We believe the MiniAlarm is a superior product. Although we take extreme pride in producing and
testing a product that will function properly, we cannot guarantee that there will never be a defective
unit or that a unit will function on all the thousands of phone lines and communication equipment in
existence. For this reason, it must be clear that the Warrantors are not insuring your premises or
guaranteeing that there will not be damage to your person or property if you use this Product. If you
are not comfortable with our Limited Warranty, or completely satisfied with the Product, we
encourage you to return the unused Product for a full refund within 30 days of purchase. Thank you
for your understanding.
One Year Limited Warranty - Control Products, Inc. warrants its product to be free from defects in
material and workmanship under normal use for one year, and is not responsible for consequential
damages or installation costs of any nature. In the event that the Product does not conform to this
Warranty at any time during the period of one year from original purchase date, Warrantor will
repair the defect and return it to you at no charge. IMPORTANT: The Warranty is limited to
replacement of the Product ONLY. Secondly, because every phone line differs, we strongly
encourage you to fully test this Product in its actual application. This should include a full test,
involving the Product actually dialing to its designated locations and someone verifying the proper
response.
This Warranty shall terminate and be of no further effect at the time the Products is 1) damaged by
extraneous causes such as fire, water, power surge or spike, lightening, etc., or not maintained as
reasonable and necessary; 2) modified; 3) improperly installed; 4) repaired by someone other than
the Warrantor; 5) used in a manner or purpose for which the Product was not intended.
WARRANTORS’ OBLIGATION UNDER THIS WARRANTY IS LIMITED TO REPAIR OR
REPLACEMENT OF THE PRODUCT ONLY. THIS WARRANTY DOES NOT COVER
PAYMENT OR PROVIDE FOR THE REIMBURSEMENT OF PAYMENT FOR INCIDENTAL
OR CONSEQUENTIAL DAMAGES.
16
It must be clear that the Warrantors are not insuring your premises or guaranteeing that there will not
be damage to your person or property is you use this Product. The Warrantors shall not be liable
under any circumstances for damage to your person or property or some other person or that
person’s property by reason of the sale or use of this Product, or its failure to operate in the manner
in which it is designed. The Warrantors’ liability, if any, shall be limited to the original cost of the
Product only. Use of this product is at your own risk.
Procedures for Obtaining Performance for Warranty:
In the event that the Product does not conform to this Warranty, the Product should be shipped or
delivered freight prepaid to Warrantor with evidence of original purchase. If in any way you’re not
comfortable with this product or its Limited Warranty, we encourage you to return it, unused within
30 days of original purchase date with evidence of the purchase date.
To return a product to Control Products, Inc.:
All products being returned to Control Products, Inc. must have a valid Returned Goods
Authorization Number (RGA #) from Control Products, Inc., regardless of why the product is being
returned. Warranty returns will be honored only with a RGA #. Ship warranty return products
prepaid to Control Products, Inc., 1724 Lake Drive West, Chanhassen, MN 55317. Control
Products, Inc. will, at its option, either repair or replace the product free of charge and return the
repaired unit or replacement unit at the lower cost shipping prepaid. Products returned for credit are
subject to a 25% restocking charge. Returns resulting from errors by the seller are not subject to this
charge. All returns must include evidence of original purchase, showing purchase date. The RGA #
should be clearly marked on the outside of the package containing the product.
To request an RGA #, call Control Products, Inc. at 952-448-2217 and ask for Customer Service.
Failure to have an RGA # may result in lost product or significant delays in handling your return.
Products without an RGA # clearly marked on the outside of the package are not the responsibility
of Control Products, Inc.
© 2005, Control Products, Inc.
This manual may not be reproduced, modified
or distributed without permission from Control Products, Inc.
Document # 42420025A, Revised 10-03-05

This manual suits for next models
1
Table of contents
Other Control Products Security System manuals

Control Products
Control Products miniAlarm MA-S01 User manual

Control Products
Control Products MA-D User manual

Control Products
Control Products BD-5000 User manual

Control Products
Control Products waterAlarm WA-01 User manual

Control Products
Control Products FreezeAlarm FA-DX User manual

Control Products
Control Products Deluxe FreezeAlarm FA-D2 User manual

Control Products
Control Products VD-6100-TM User manual

Control Products
Control Products PROTECTED HOME WaterAlarm User manual

Control Products
Control Products PhoneAlarm Series User manual

Control Products
Control Products miniAlarm User manual