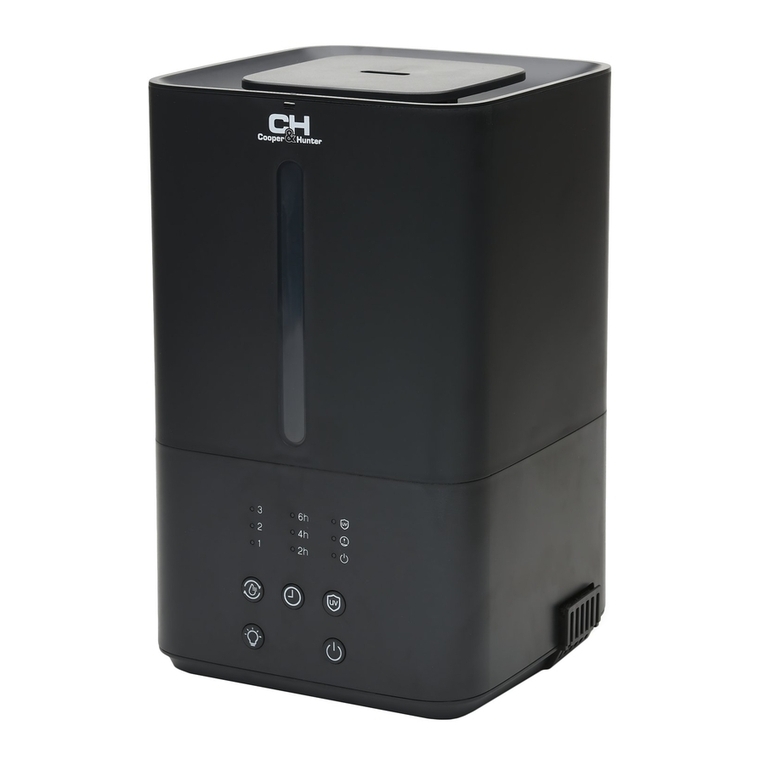
Cooper & Hunter MALDIVES Series User manual


Модел/Model:
Ultrasonic air
humidifier
CH-3040
Instruction manual
Outlook of devices, aslo colour scores can be revised without any special advance
notices.
.

2
Dear customer!
Thank you for your good choice and purchase of a
Cooper&Hunter humidifier. It will serve you for a long time!
To improve product quality, its design, scope of delivery or manufacturing
process can be revised without advance notice.
The text and digital notations in this manual may have misprints.
Should you have any questions on the functioning and operation of the device,
please refer to the seller or a specialized service center to receive clarification.
Use the device only for purposes, stated in this manual.
The air humidifier is intended to automatically maintain the preset level of relative
humidity indoors and for air purification. Comfortable conditions are achieved at
relative humidity ranging from 40 to 60%.
Insufficient air humidity results in drying of mucous membranes, which in its turn
is the reason for decrease in immunity, headache, lip cracking, «sandpaper»
in the eyes, it also enables infection spreading and respiratory tract diseases,
causes fatigue, results in increased eye fatigue and worsening of attention
focusing, it has a negative effect on the condition of pets and house plants,
causes increase of dust generation and, increase of electrostatic charge of
synthetic fabrics, as well as carpets and synthetic floor coatings, it causes
damage of wooden furniture and especially parquet floors, it negatively affects
tuning of musical instruments.
Read all instructions carefully prior to using the device for the first time. To
avoid electric shock or injury when using this device, always observe key safety
precautions including the following ones:
• Make sure that the operating voltage, specified in the device’s passport,
1. Important information
2. Safety measures
3. Technical characteristics
4. Description of the unit
5. Scope of delivery
6. Operation of the unit
7. Cleaning and maintenance of the unit
2
2
3
4
6
6
7
1. IMPORTANT INFORMATION
2. SAFETY MEASURES
CONTENTS

3
• The inner ultrasonic transducer is highly sensitive. Do not touch it with bare
fingers or scrape it with metal tools, or it will reduce mist output. When cleaning
this area please use asmall cleaning brush, cotton swab or toothbrush. Do not
use hot water as it may damage the missing parts.
.• Children should be supervised to ensure that they do not play with the
appliance.
• To prevent interference and damage to other electronic devices, this
machine should be placed at least 1meter away from acomputer, television,
radio or other electronic equipment.
The manufacturer reserves the right to change the set-list of the device
(including liquid and powder components) for different supplies without prior
notice. The changes either in no way influence the basic technical parameters
of the device or may improve them, and also not violate the legislation or quality
standards of the countries of manufacture, transit and selling.
The changes in the set-list may result in changing of the weight and dimensions
of the device, but not more than by +\- 5-20% (depending on the product
category)
3. TECHNICAL CHARACTERISTICS
Table 1
Discription Unit Value
Capacity of humidity ml/h
Power supply V/Hz 220-240~/50
Water tank l 4.0
Rated power consumption W 25
Noise level dB(А) 37
Protection class - IP2O
Class protection against electric shock -
Device dimensions mm 175x290x285
Net weight kg 2.72
Service area m230-40
matches the voltage of your electric mains.
• Prior to using the device, read operation guidelines carefully.
• Do not use in areas where flammable or explosive materials are stored.
• Do not place this device in direct sunlight or near objects that generate high
temperature heat. The heat may cause deformation or warping of the outer
casing. Do not operate the unit without water in the basin.
• Do not insert foreign objects into the device. Do not touch the transducer or
the lower water basin when the unit is operating. Do not scratch the transducer.
• Do not submerge this device in water. Water or cleaning liquids may only
be used on parts to be cleaned according to the cleaning and maintenance
instructions.
• Only use lime scale remover or vinegar to clean mineral deposits
from the basin or transducer. Do not use any harsh detergents that
may damage the unit.
• If you smell an abnormal odour please turn off and unplug the unit and call
Cooper&Hunter technical support.
• Do not use fabrics or other materials to cover this device. Obstructed air
inlets and outlets will result in improper operation of this unit and may result in
fire or other damage.
• Do not plug in or pull out the power cable with wet hands. Do not
disassemble the base unit. Before cleaning and maintenance, the appliance
must be disconnected from the main supply. Do not touch water and
components in the water basin when the unit is working.
• Do not allow children to play with any product packaging, such as plastic
bags.
• To avoid fire hazard, NEVER put the cord under rugs, near heat registers,
radiator, stoves, or heaters.
• Do not attempt to refill humidifier without first unplugging the unit from its
electrical outlet.
• DO NOT operate any appliance with adamaged cord or plug, after the
appliance malfunctions, or if it has been dropped or damaged in any manner.
Return appliance to manufacturer for examination, electrical or mechanical
adjustment, or repair.
• Use appliance only for intended household use. DO NOT use outdoors.
• Humidifier should be unplugged when not in use.
• DO NOT attempt to repair or adjust any electrical or mechanical functions
on this unit. Doing so will void your warranty. The inside of the unit contains no
user serviceable parts. All servicing should be performed by qualified personnel
only.
5. Water tank 10. Power cord
11. Air outlet
300±20%

www.cooperandhunter.com
4
4. DESCRIPTION OF THE UNIT
Working Principle
Ultrasonic Humidifier uses the ultrasonic high-frequency oscillator
to break up water into tiny water particles with the diameter of
about 1-5um.The ventilation system blows out this water into the
dry air where they evaporate to give the required humidity. The
clearly visible smooth and even fog can be seen out of the unit.
FRONT PANEL AND LED DISPLAY
4
Fig. 1 Device
6
8
7910
1. Handle for carrying tank
2. Steam sprayer
3. Water tank
4. Display
5. Base
6. Float to determine the water level
7. Highlighting windows
8. Misting diaphragm
9. Hole for air blowing fan
10. Hole for overflow
Fig. 3 Control panel

DESCRIPTION OF FRONT PANEL AND LED DISPLAY
Directions for use
Prior to the first use, especially if outdoor temperature is below zero, let the
device heat up at room temperature for 1 hour. It is recommended to use
the device at temperature ranging from 5°C to 40°C, and relative humidity
not more than 80%. Use only clean water with temperature not more than
30°C. Prior to a switching the device off for a long time (more than 2 days),
drain water from the water tank. Read instructions how to clean the
humidifier in section «Recommendations on maintenance of the device».
5
When first pressed, the “OL” indication will appear - this means that the
humidity limit has not been set, and the device will work until the water
runs out. On the second press, the hygrostat sets the desired humidity
limit to 40%. Each subsequent press increases the limit by 10% until “OL”
appears on the display. If within 5 seconds you do not perform any
actions, the device will perceive the selected humidity level as desired, and
the Hygrometer will again show the current humidity in the room.
You can see which humidity was set earlier by pressing this button once -
the previously set desired humidity level flashes on the display. If you want
to change it, click the button again.
When the desired level of humidity is reached, the device will continue to
operate with minimum evaporation rate. If the desired humidity level is not
reached, the device continues to operate at the intensity specified by the
“Manual / Evaporation Rate” button.
When choosing the desired humidity, keep in mind that the humidity in the
immediate vicinity of the device is always higher.
Control panel
1. Maximum evaporation rate
2. The average evaporation rate
3. Minimum evaporation rate
4. Hygrometer
5. Low water indicator
6. On / off tank illumination (night light)
7. Off Timer (1 - 12 hours)
8. Manual setting of the humidity level
9. On / off device
10. On / off ionization mode
11. Night mode
12. Kid / Auto mode
13. Manual Mode / Evaporation Rate
•
On / Off Button (9):
If the device is plugged in, the “On / Off” indication on the device
display automatically lights up. To turn on the device, press the
“On / Off” button. The hygrometer of the device will show the
current humidity in the room, and the device will start working with
the Average evaporation rate by default. Press this button to turn
off the instrument
•Setting the humidity level in manual mode (Hygrostat function) (8)
This button only works in Manual mode. Press this button to set the
desired level of humidity in the room. The hygrometer on the
instrument display will flash.
CONTROL OF THE DEVICE
• Button for setting the timer operation time (7):
This button allows you to set the duration of the device operation in the
range from 1 to 12 hours. Press this button to select the duration of the
instrument. The hygrometer on the display will be replaced by flashing
timer numbers. Set the desired duration of work by successively pressing
the “Timer 1-12 hours” button. If within 5 seconds you do not perform any
actions, the device will set the timer to the selected duration, and the
Hygrometer will be displayed again. When you select the duration of the
work “00” timer is off. In Night mode, the timer is preset for 8 hours, so
when you press the Night mode button, the device will automatically turn
off after 8 hours if you have not specified a different duration of operation.
If the timer is set, but you have chosen a different mode of operation or
the water has expired, the timer is automatically reset.
• Tank light (6):
Press this button to turn on the tank under-light. Pressing it again will turn
off the backlight. The function is available regardless of the amount of
water in the tank.
• Manual Mode / Evaporation Rate (13):
It is a button for selecting one of four mutually exclusive modes of
operation. When you turn on the device Manual mode is the default
operation mode. Pressing this button takes the device to Manual
mode, canceling the settings of other modes and automatically setting
the device to the minimum evaporation rate.

6. OPERATION OF THE UNIT
6
Pressing this button again sets the device to an average evaporation
rate — the second concentric circle lights up at the top of the display.
To set the maximum evaporation rate, press the button a third time.
Pressing it again will return you to the minimum level of evaporation. The
button “Setting the humidity level in the manual mode” works only when
the Manual mode is selected.
1. Air humidifier - 1 pc.
2. Brush for cleaning membranes - 1pc.
3. Operation manual - 1 pc.
4. Filter - 1 pc.
5. SCOPE OF DELIVERY
• Automatic mode /Child mode (12):
It is a button for selecting one of four mutually exclusive modes of
operation. Press this button to switch the instrument to Automatic
mode. The evaporation rate in this mode is presented in Table 2.
Repeated pressing of this button takes the device to Children’s mode
with a preset humidity of 55%, recommended for young children. If you
want to return to Automatic mode, click this button again.
Humidity Evaporation rate
before 40% Maximum
40%-60% Average
over 60% Minimum
Table 2
• Night mode (11):
It is a button for selecting one of four mutually exclusive modes of
operation. Press this button to reset the instrument.
went to the SMART night mode. If within 5 seconds after pressing this
button you do not perform any actions, the device switches to Night
mode, the display of the device turns off, and only the corresponding
indication remains on. In this mode, the timer will automatically turn on,
set to 8 hours. The evaporation rate in this mode is shown in Table 2. If
any button is pressed in the SMART Night mode, except “On / Off”, the
Hygrometer will show the current humidity in the room, then after 5
seconds the Display will turn off again. Double pressing of the button
“Manual mode / Evaporation rate” or “Automatic mode / Child mode”
will activate another mode. Pressing the “On / Off” button will turn off the
instrument. When you turn on the settings again, you will need to set it
again.
• Ionization (10)
This button includes an ionizer that compensates for the lack of
negatively charged ions (anions) in the air.
Anions strengthen the nervous and circulatory systems, improve lung
function and provide protection against respiratory diseases (such as
pneumonia and asthma).
• Automatic shutdown in case of insufficient water level (5):
This indication lights up when water is running out in the device. To
avoid overheating of the ultrasonic membrane, the device shuts off
automatically.
1. Holding the handle, remove the water tank from the device (see fig. 1)
2. Turn the water tank upside down and unscrew the tank lid by turning it
counterclockwise.
NOTE:
The filter cartridge is attached to the water tank cap. If you
are not going to use the filter, you should remove it by
turning it counterclockwise.
3. Pour clean water into the tank. For this model it is recommended to
use demineralized water. Do not over-fill the tank! After filling, close the
tank cap, turning it clockwise.
4. Place the tank back into the device.
NOTE:
Do not pour water into the base of the device - it may fall
into the hole for overflow, and the surface under the device
becomes wet.
An overflow hole is provided in order to eliminate the risk of
water entering the electronic components of the device
through an air-blowing hole (Fig.2).

7. CLEANING AND MAINTENANCE OF THE UNIT
IMPORTANT!
Always switch off and unplug the unit before
cleaning
We recommend the following:
1) Use cold boiled water or distilled water.
2) Clean the transducer, water tank and basin unit every week.
3) Change the water in water tank more often to keep it fresh.
4) Make sure to pull out the water from the water tank and dry the water
basin before you store the unit unused for a long period of time.
5) Clean the whole unit and make sure that all parts of the unit are
dried completely before unused for longer period of time.
How to clean the transducer:
1) Put 5-10 drops of cleaning abluent on the surface of the transducer,
wait for 2-5 minutes.
2) Brush off the scale from the surface.
3) Rinse the transducer with clean water.
4) Never use sharp or solid objects for cleaning the transducer.
How to clean the basin unit:
1) Clean the water basin with soft cloth .if there is excess film on
the surfaces, then soak the cloth with vinegar and repeat the
process.
2) If there is a film in any of the depressions along the basin ,drop a
bit of vinegar into depression and clean it out with a brush.
3) Rinse the water basin with clean water.
Failure to comply with the rules of the section
“Cleaning and servicing the device” can lead to the
development of micro-organisms, bacteria inside the
pan. That will lead to unpleasant smells and violation
of hygienic norms.
Use as much as possible pure water! Water often
contains calcium salts, rust particles and other chemical
elements. Such elements are able to settle on the internal
surfaces of the device, which can lead to breakdown or
difficulties during routine maintenance of the instrument.
IMPORTANT!
If your water is hard, containing high concentrations of calcium and other
minerals, then over a period of time white dust will start to deposit on
the various surfaces in the room. A white, film-like substance will also
start to develop in the water basin, on the transducer and on the
inner surface of the water tank. This white film will impede the proper
function of the transducer and the operation of the machine.
7
You can ensure many years of trouble free operation of your humidifier
by following a few simple maintenance procedures.
Never run the unit when there is no water in water basin
IMPORTANT!
5. Insert the power cord into the socket, and use the buttons on the front
panel to operate the device.
The functions and meanings of the buttons can be found in the “Control of
the device” section.
When moving the humidifier, always hold the device by
the base (Fig. 1), in order to avoid the fall of the part of
the device, with the main electronic components. If there
is water in the device, in order to avoid its entry into the
electronic units through the air outlet (Fig. 2), keep it
horizontal.
IMPORTANT!

8
ЗМ
8
9
10
11
13
13
14
15
16
1.
2.
3.
4.
5.
6.
7.
8. ’
9.
!
Cooper&Hunter
,
,
.Cooper&Hunter
,
.
,
.
,
.
!
1. ВАЖЛ
ИВА
НФОРМАЦЯ
-
,
.
. -
, -
’.
, -
.
-
. -
40 60%.
,
, ,
, ,
, ,
,
,
,
,
,
,
. ,
.
.
220-240
~ / 50.
.

9
2. ЗАПОБ
.
, :
• ,
.
• .
.
.
•
. ,
. .
• ,
. ! ,
.
• , ,
, .
• .
« ».
• ;
.
.
• .
• , .
.
.
• ,
30 ° C.
• ,
. ,
.
• ,
. , ,
.
•
.
.
• ,
,
.
• (
) ,
,
,
.
• .
• ,
.
• , .
• .
• ,
.
• ,
( ,
, ..).
• .
• , ,
. ,
.
• ,
.

1.
2.
3.
4.
5.
10
Мал. 1 Будова приладу
Мал. 2 Основа приладу
6
8
7910
6.
7.
8.
9.
10.
3. ТЕХН ХАРАКТЕРИСТИКИ
Таблиця 1
мл/г
В/Гц 220-240~/50
л4.0
Вт 25
д(А) 37
- IP20
- II
мм 175x290x285
кг 2,72
м230-40
300±20%
. .
(./. )
,
\ \
.
,
+ \ - 5-20% (
).
4. ОПИС ПРИЛАДУ

11
1.
2.
3.
4.
5.
6. / ()
7. (1 - 12 )
8.
Управління приладом
30 ,
.
5 40 °
80%.
9. /
10. /
11.
12. /
13. /
•
/ (9):
,
« / » .
, « / ».
,
. ,
.
• (
) (8).
.
, .
.
Мал. 3 Панель управління
Принцип роботи приладу
“ ”. ,
,
. ,
,
.
ПРИМ:
Кнопки режим
,
, .
.
.
.

12
’ «OL» - ,
,
, .
40%. 10%
, «OL».
5 ,
,
.
, ,
-
.
, .
,
. ,
,
« / ».
,
.
• (7):
1 12 . ,
.
.
« 1-12 ».
5 ,
,
.
«00» .
8 , ,
« »
8 ,
. ,
.
• (6):
, .
.
.
• / (13):
.
.
,
.
-
.
,
.
. «
» .
• / (12):
. ,
.
2.
55%,
.
, .
Вологість Інтенсивність випаровування
до 40% Максимальна
40%-60% Середня
вище 60% Мінімальна
2
• (11):
. ,
SMART. 5
,
, ,
.

https://climagroup.com.ua/brands/ch 13
1. - 1 .
2. - 1.
3. - 1 .
4. - - 1 .
1. , (. . 1).
2.
,
,
8 .
2.
SMART - , « /
», ,
5 .
« /
» « / »
. « /
» .
.
УВАГА!
Не додавайте аромамасла в резервуар з водою, це
може привести до поломки ульразвукової мембрани.
• (10):
,
() .
,
(
)
•
(5):
, .
.
ПРИМ:
Фільтр-картридж приєднаний до кришки бака для води.
Якщо Ви не збираєтеся використовувати фільтр, його
слід видалити, повернувши проти годинникової стрілки
(див. «Заміна фільтра-картриджа» на мал.4).
3. .
.
! ,
.
4. .
ПРИМ:
Не наливайте воду в основу приладу - вона може
потрапити в отвір для переливу, і поверхня під
приладом намокне.
Отвір для переливу передбачено для того, щоб
виключити ризик потрапляння води в електронні вузли
приладу через отвір для видування повітря
вентилятором (мал.2).
УВАГА!
При переміщенні зволожувача завжди тримайте
прилад за основу (рис. 1), для уникнення падіння
частини приладу, з основними електронними
вузлами. Якщо в приладі є вода, щоб уникнути її
потрапляння в електронні вузли через отвір для
видування повітря (рис. 2), тримайте його гори-
зонтальним.
6. ЕКСПЛУАТАЦ
5. КОМПЛЕКТАЦЯ

, .
, ,
’ ,
.
.
14
:
1) ’ .
2) ,
.
3) , .
4) ’ ,
.
.
1) 5-10
, 2-5 .
2) .
3) .
4)
.
.
1) ’ .
2)
,
1 2
.
3) .
:
• ,
,
30 .
• 5 °
40 ° , 80%.
• ,
30 ° .
• ( 2 ) ,
.
.
.
.
ПРИМ:
7. ЧИСТКА ТА ОБСЛУГОВУВАННЯ ПРИЛАДУ
УВАГА!
Перед очи
.
ПРИМ:
, ,
, .
-,
.

15
-.
. 4 -.
Зволожувач укомплектований фільтром-картриджем з іонообмінною
смолою. Фільтр використовується для очищення води від
мінеральних речовин і знищення бактерій.
Заміну фільтра рекомендується проводити кожні 3-4 місяці або якщо
бак для води заповнювався більш 80 раз.
УВАГА!
«
»
,
.
.
!
,
.
,
.
8. ГАРАНТ ’
,
’,
.
,
,
.
’
/ . ,
/
.
’
,
() .
- ,
- .
,
’
.
’
.
.
.
12 () .
.
,
,
.

ппп
https://climagroup.com.ua/brands/ch
16
9. ПППооошшшуууккк ттт ааа ууусссууунннееенннннняяя нннееессспппрррааавввннноооссстттеееййй
Можлива причина Спосіб усунення
•
• (
)
•
•
•
•
•
•
• , ,
12
•
’ • •
•
•
•
•
• ,
•
•
• ,
•
•
• •
•


This manual suits for next models
1
Table of contents
Languages:
Other Cooper & Hunter Humidifier manuals

Cooper & Hunter
Cooper & Hunter CH-3545 User manual

Cooper & Hunter
Cooper & Hunter Antigua Series User manual

Cooper & Hunter
Cooper & Hunter CH-700-1 User manual

Cooper & Hunter
Cooper & Hunter CH-2828 User manual

Cooper & Hunter
Cooper & Hunter COMO Series User manual

Cooper & Hunter
Cooper & Hunter Barbados Series User manual

Cooper & Hunter
Cooper & Hunter Cayman Series User manual

Cooper & Hunter
Cooper & Hunter Java Series User manual

Cooper & Hunter
Cooper & Hunter CH-2940T User manual

Cooper & Hunter
Cooper & Hunter MALTA CH-2835 User manual