Instruction Manual | 7
6.0 Cleaning
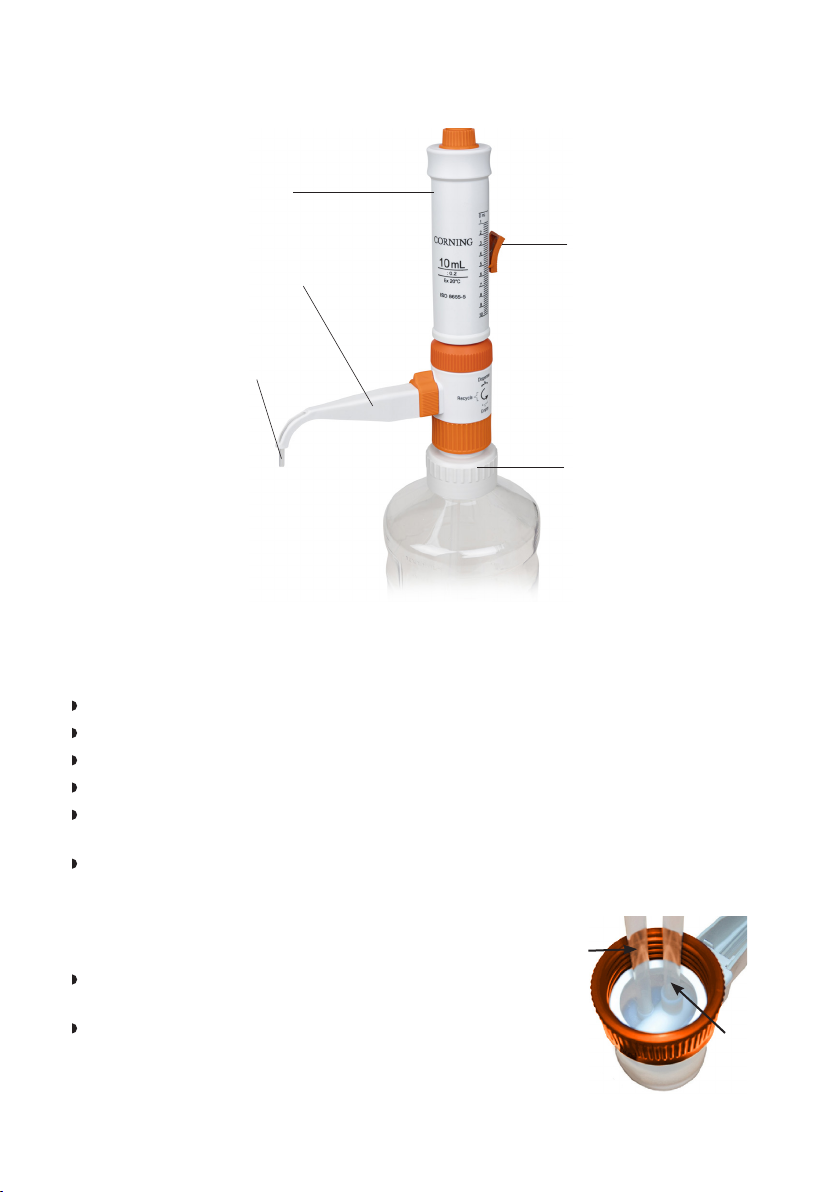
Before cleaning, follow these steps to remove all liquid without any loss of reagent from
the Corning® Bottle Top Dispenser:
Turn the discharge tube to 180°, and let the remaining reagent from the discharge tube
owbackintothereagentbottle.
Screw off the dispenser from the bottle.
Drain the telescopic tube by slightly tapping inside the reagent bottle.
Turn the discharge tube from 180° to 90°, and remove all of the remaining liquid from
the cylinder back into the reagent bottle.
NOTE: Cleaning is necessary if you want to use the dispenser for another chemical
solution or if not in use for a long period of time.
For cleaning, follow these steps:
Fill the bottle with distilled water or alcohol.
Attach the telescopic tube, and screw the dispenser on to the bottle.
Turn the discharge tube to “Dispense” mode.
Dispense multiple times until the dispenser is cleaned.
If necessary, disassemble the dispenser and clean all components. The dispenser should
be cleaned daily if used with the following chemicals:
Solutions with a tendency to build crystals (e.g., salts)
Inorganic oxidizing solutions (e.g., biuret reagent)
6.1 Sterilization
Afterremovalofthereuxtubeandtelescopictube,thedispensercanbesteam-
sterilized (121°C, 2 bar, 15 minutes) according to EN 285.
NOTE: The telescopic tube is not autoclavable.
Place the dispenser on a cloth, and avoid contact with hot metal surfaces. The discharge
tube has to be attached to the protective sleeve.
In order to prevent loss of adjustment due to heat expansion of the different materials,
the quick lock knob has to be set to a minimum 2/10 of its maximum volume. Before
you use the dispenser, let it reach room temperature (about 2 hours cooling time).
Afterautoclaving,checkallscrewttingsfortightnessandallpartsfordeformations
or other changes. The dispenser must be checked and recalibrated if necessary.
NOTE: Do not use any deformed or leaking parts. In case of deformation, please contact
your local Corning representative.