manuals.online logo
Brands
  1. Home
  2. •
  3. Brands
  4. •
  5. Cortelco
  6. •
  7. Telephone
  8. •
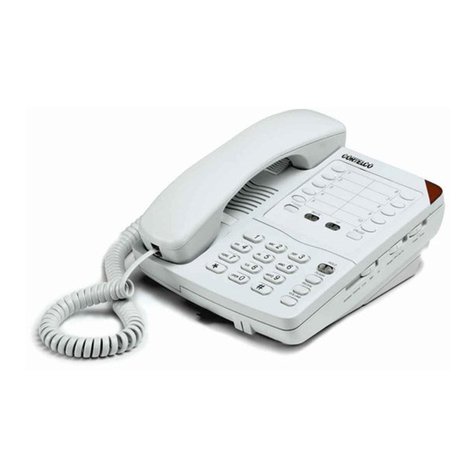
  9. Cortelco COLLEAGUE 2220 User manual

Cortelco COLLEAGUE 2220 User manual

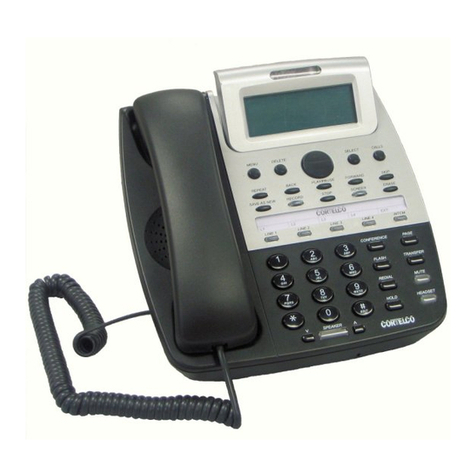
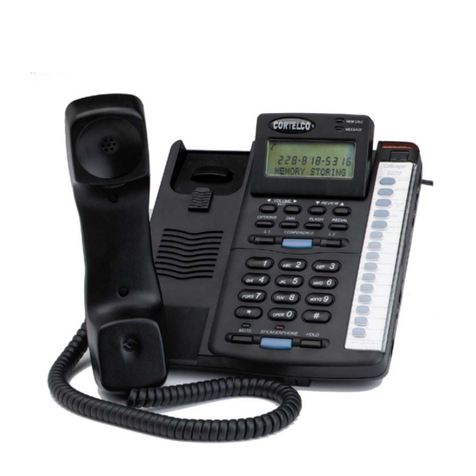
Your phone comes from Telecommunications with the large Message Waiting Light configured to work with our Voicemail
System. It will also flash when your phone is ringing. The green light labeled “MESSAGE” has no function. But since it’s
purpose is to work with other voicemail systems, you may occasionally see it flash as it looks for data.
The L1 and L2 lights are “Line In Use” indicators for your main and second line. L1 will light when you pick up the phone,
or if someone you share the same number with is on their phone. It will also flash when your phone rings. The L2 light
works in the same fashion, except that you will need to select it to call out on that line. If a call rings in on L2 you don’t
need to press it to answer, you will automatically connect to it when you pick up. The L1 and L2 buttons do not “lock”, so
after selecting L2 and hanging up, your phone will default back to L1.
The “CONFERENCE” button between L1 and L2 allows you to “bridge” parties on both lines within your phone. It is also
non-locking and once your conference call is over your phone will default back to L1 operation. Please note that using this
function requires that you stay on the line throughout the entire conference, and it ties up both your lines! If you do not
intend to be the conference “leader”, then it may be preferred to use the 3-party conferencing capabilities of the UTM
telephone system. This is done by having one party already on the line, pressing the “FLASH” button, getting a second
dialtone, calling the second party and pressing “FLASH” again to connect both parties and yourself. Using this method you
only use the one phone line, plus you can hang up and the other parties will still be connected.
IF THE POWER GOES OUT:
Since your phone uses a plug-in transformer instead of batteries, if the power goes out the display will go blank, and no
lights except the Message Waiting Light will work. You can still receive and make calls using the handset.
When the power is off, your speed dial buttons won’t work, but they will remain in memory when power returns. Calls
received while the power is out will not be stored in the Caller ID memory, but records of calls prior to the power failure will
remain when power returns.
THE CORTELCO COLLEAGUE 2220 PHONE
UTM SPECIFIC INSTRUCTIONS
Voicemail Message
Waiting Light
No function
New call - Caller ID
Info stored
REVIEW
UP
VOLUME
UP REVIEW
DOWN
VOLUME
DOWN
DISPLAY
ON THE SIDE:
Ringer #1 Off/Hi/Lo switch
(your preference)
Ringer #2 Off/Hi/Lo switch
(your preference)
Headset On/Off (see below)
Headset jacks (see below)
L1
12 3
45 6
9
78
0#
*
HANDSET
HOLDSPEAKER
REDIAL
DIAL
L2CONF
FLASH
OPTIONS
CONTRAST
DIRECTORY
CALLER LIST
SAVE
DELETE
MUTE
AFTER A POWER FAILURE:
When power is restored the display will flash alternately between “SELECT LANGUAGE” and “1.ENG 2.ESP” for about 10
seconds then return to the normal “TOTAL:XX NEW:XX” (XX being the number of calls in the caller ID list). Your date and
time will not show back up until the next call comes in and is captured by the caller ID. From then on it will be set and
remain on the display.
CALLER ID INFORMATION:
Caller ID information comes in between the first and second rings. If you answer your phone before the caller ID info gets
there you may hear a “screech” similar to a fax or modem tone. That’s the caller ID data.
The red light labeled “NEW CALL” lets you know someone called - even if they didn’t leave a message. Press the
“CALLER LIST” button on the right and then the “REVIEW” up or down buttons to scroll through the list of incoming calls.
Once the entire list has been reviewed, the “NEW CALL” light will go out. New calls will reactivate the red light, and will
need to be reviewed before it will turn off again.
If you want to return a call to a number on the list:
ON CAMPUS (4 digit) numbers: Pick up the handset (or press “SPEAKERPHONE”), scroll to the number and press
“DIAL”.
OFF CAMPUS NUMBERS: You will have to inset the 9 and whatever other numbers (1, 731, etc.) you would normally dial
that are not displayed when you scroll to the number in the Caller ID list. After entering the proper extra
digits, you can scroll to the number you want to return and press “DIAL”.
If you want to delete a number on the list, press the “DELETE” button twice and the number will be erased. If you want to
delete all listings, press and hold the “DELETE” button until you see “DELETE ALL?” in the display, release the “DELETE”
button and press it again.
Voicemail Message
Waiting Light
No function
New call - Caller ID
Info stored
REVIEW
UP
VOLUME
UP REVIEW
DOWN
VOLUME
DOWN
DISPLAY
ON THE SIDE:
Ringer #1 Off/Hi/Lo switch
(your preference)
Ringer #2 Off/Hi/Lo switch
(your preference)
Headset On/Off (see below)
Headset jacks (see below)
L1
12 3
45 6
9
78
0#
*
HANDSET
HOLDSPEAKER
REDIAL
DIAL
L2CONF
FLASH
OPTIONS
CONTRAST
DIRECTORY
CALLER LIST
SAVE
DELETE
MUTE
USING THE SPEAKERPHONE, HANDSET AND HEADSET:
Loudness for all three is controlled by the “VOLUME” pushbuttons. It has multiple steps and remains at the same setting
after hanging up.
If you have a headset, it plugs into either the 2.5mm jack (Chameleon headsets) or handset-type jack (Plantronics
headsets) labeled on the right side of the phone. The “HEADSET ON/OFF” switch on the right side selects whether the
“SPEAKERPHONE” button will activate the internal speaker (off position) or your headset (on position).
The “MUTE” button will disable the microphone of whatever you are using… handset, speaker or headset. When selected
its light will be red and the display will show “MIC MUTED”. It will return to normal when you press the “MUTE” button
again or hang up.
PROGRAMMING THE SPEED DIAL BUTTONS:
There are 10 gray speed dial buttons on the right side of the phone under the “DELETE” button. You can program any
frequently dialed numbers you’d like on them. Suggestions are “#4” for call pickups or the numbers you frequently forward
calls to. To program a button follow these steps:
1. Press and hold the “SAVE” button until the display says “SAVE TO?”.
2. Press the gray button you wish to put the number on. The display will then say “ENTER NUMBER”.
3. Dial the number you want stored. (Remember to enter the 9 for outside calls!)
4. Press “SAVE” again. The display will then say “ENTER NAME”.
5. Use the dial to enter a name using the letters associated with the numbers.
6. Press “SAVE” again. The display will say "MEMORY STORING” and then return to normal.
You can use the “FLASH” button to enter a F(lash) , and the “REDIAL” button to enter a P(ause) in step 3. If you need to
add a space or edit a mistake, use the “VOLUME (EDIT)" buttons.
EXAMPLE: You can program one of these buttons to dial Voicemail and then your security code. To do this, in step 3,
enter 7590, press the “REDIAL” button twice , then enter your security code. Follow steps 4 through 6 to finish.
To dial a programmed number, simply lift the handset (or press “SPEAKERPHONE”) and press the gray button you want to
use.
Your "DIRECTORY" button lets you program in 99 names and numbers to speed dial. To program, follow these steps:
1. Press and hold the “SAVE” button. The display will say “SAVE TO?”.
2. Press the “DIRECTORY” button. The display will say “ENTER NUM”.
3. Dial the number you want stored. (Remember to enter the 9 for outside calls!)
4. Press “SAVE” again. The display will then say “ENTER NAME”.
5. Use the dial to enter a name using the letters associated with the numbers.
6. Press “SAVE” again. The display will say "SAVED IN THE DIR” and then return to normal.
To dial one of these numbers, press “DIRECTORY” and use the “REVIEW” buttons to search through the list. You can
press the numbers associated with the first letter of a name to jump to those listings. When you find the one you want, lift
the handset (or press “SPEAKERPHONE”) and press the “DIAL” button.
OPTIONS BUTTON:
This button enters the phone’s Programming Mode. The options are all factory default except the Area Code, which is 731
and has been programmed by Telecommunications before your phone is delivered. If you accidentally hit the “OPTIONS”
button and see “SELECT LANGUAGE”, simply lift the handset and the display will return to normal. In the event of a
problem, please contact us.
MORE INFO?
Just let us know and we’ll answer your questions! If you would like the manufacturer’s manual for your phone we will be
glad to email one to you.
QUESTIONS? PROBLEMS? CALL THE UTM HELP DESK AT 7900!

Other manuals for COLLEAGUE 2220

3

Other Cortelco Telephone manuals

Cortelco 8599 Setup guide

Cortelco

Cortelco 8599 Setup guide

Cortelco 2005 Setup guide

Cortelco

Cortelco 2005 Setup guide

Cortelco Patriot II 2192 Setup guide

Cortelco

Cortelco Patriot II 2192 Setup guide

Cortelco COLLEAGUE 2220 Setup guide

Cortelco

Cortelco COLLEAGUE 2220 Setup guide

Cortelco ITT-9150-ASH User manual

Cortelco

Cortelco ITT-9150-ASH User manual

Cortelco 8782 User manual

Cortelco

Cortelco 8782 User manual

Cortelco COLLEAGUE 2220 Setup guide

Cortelco

Cortelco COLLEAGUE 2220 Setup guide

Cortelco Tel-Flash 2554 User manual

Cortelco

Cortelco Tel-Flash 2554 User manual

Cortelco Tel-Flash 2500 Setup guide

Cortelco

Cortelco Tel-Flash 2500 Setup guide

Cortelco Patriot 2193 Setup guide

Cortelco

Cortelco Patriot 2193 Setup guide

Cortelco Margate 4405 User manual

Cortelco

Cortelco Margate 4405 User manual

Cortelco VR16SS Setup guide

Cortelco

Cortelco VR16SS Setup guide

Cortelco 2705 Setup guide

Cortelco

Cortelco 2705 Setup guide

Cortelco Colleague 2210 User manual

Cortelco

Cortelco Colleague 2210 User manual

Cortelco 6150 User manual

Cortelco

Cortelco 6150 User manual

Cortelco Colleague 2201 Setup guide

Cortelco

Cortelco Colleague 2201 Setup guide

Cortelco Patriot II Setup guide

Cortelco

Cortelco Patriot II Setup guide

Cortelco 2554XX-VBA-20MT Setup guide

Cortelco

Cortelco 2554XX-VBA-20MT Setup guide

Cortelco Tel-Flash 2500 Setup guide

Cortelco

Cortelco Tel-Flash 2500 Setup guide

Cortelco 2720 Setup guide

Cortelco

Cortelco 2720 Setup guide

Cortelco Medallion 3220 Setup guide

Cortelco

Cortelco Medallion 3220 Setup guide

Cortelco 1203 Setup guide

Cortelco

Cortelco 1203 Setup guide

Cortelco 3693 Setup guide

Cortelco

Cortelco 3693 Setup guide

Cortelco Colleague 2205 Setup guide

Cortelco

Cortelco Colleague 2205 Setup guide

Popular Telephone manuals by other brands

ESI IVX X-Class user guide

ESI

ESI IVX X-Class user guide

Topcom ALLURE 200 user guide

Topcom

Topcom ALLURE 200 user guide

jWIN JT-P87 Owner's Manual and Operating Instructions

jWIN

jWIN JT-P87 Owner's Manual and Operating Instructions

Logic SR3 quick guide

Logic

Logic SR3 quick guide

Aastra IntelliGate 630d user guide

Aastra

Aastra IntelliGate 630d user guide

Cleod9 Wildix W-AIR 150 user guide

Cleod9

Cleod9 Wildix W-AIR 150 user guide

Skanti MF DSC Operator's manual

Skanti

Skanti MF DSC Operator's manual

ideus ITCAB400 user guide

ideus

ideus ITCAB400 user guide

Jacob Jensen Telephone 3 user manual

Jacob Jensen

Jacob Jensen Telephone 3 user manual

Meeteasy MVOICE 3000-B manual

Meeteasy

Meeteasy MVOICE 3000-B manual

Samsung DCS Quick reference guide

Samsung

Samsung DCS Quick reference guide

Samsung OfficeServ SMT-I5220 Setup guide

Samsung

Samsung OfficeServ SMT-I5220 Setup guide

Panasonic KX-TCA175 operating instructions

Panasonic

Panasonic KX-TCA175 operating instructions

Cisco 6900 Series reference guide

Cisco

Cisco 6900 Series reference guide

Memorex MPH601 operating instructions

Memorex

Memorex MPH601 operating instructions

Euroset 5020 quick guide

Euroset

Euroset 5020 quick guide

Hubbell GAI-TRONICS 227-003 manual

Hubbell

Hubbell GAI-TRONICS 227-003 manual

Norstar Compact 616 DR5 Installer's guide

Norstar

Norstar Compact 616 DR5 Installer's guide

manuals.online logo
manuals.online logoBrands
  • About & Mission
  • Contact us
  • Privacy Policy
  • Terms and Conditions

Copyright 2025 Manuals.Online. All Rights Reserved.