manuals.online logo
Brands
  1. Home
  2. •
  3. Brands
  4. •
  5. Cozzia
  6. •
  7. Massager
  8. •
  9. Cozzia CG-5000 Manual

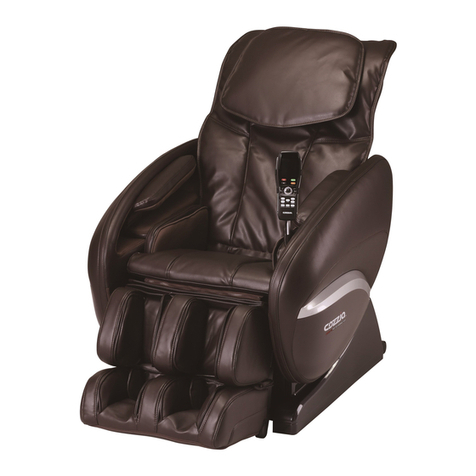
Cozzia CG-5000 Manual

Maintenance service manual
Model: CG-5000
Catalog
1: Guidance of change the pad.
2: Guidance of change the remote control.
3: Guidance of change the main PCB.
4: Guidance of change the actuator.
5: Guidance of change the frame.
6: Guidance of change the side board.
1: Guidance of change the pad.
A: Locate the zipper head at the back of the chair. Unzip it to the end. Then we detach the pad from the
backrest frame. Then rest the pad as the picture show. ( As pictures below show )
B: Under the pad there is a zipper. Unzip it to then end and we can find a 4-way air hose connecter.
Disconnect it. Mean while use a diagonal pliers get rid off the cable tie which fasten the heater wire
and actuator wire. ( As pictures below show )
C: At the back of the seat there is a wire connecter (black), Use diagonal pliers get rid of the cable tie
which secure the connecter, then disconnect the wire connecter. Now we can detach the pad from the
chair.
Locate the zipper head.
Zipper had been unzipped.
The pad has been
rested onto seat pad.
Locate the zipper head.
Locate the 4-way air
hose connecter.
Locate the cable tie.
Locate the wire connecter
of the pad.
The pad has been detached.
2: Guidance of change the remote control
A: Locate the remote control on the inner side of the side board. With help of a knife, peel off the overlay
of the remote control.
B: Use screw driver slacken and remove the four screws which secure the remote control, Then we can
detach the remote control form the side board.
C: Disconnect the wire connecter, then the remote control can be take off.
D: Get a new remote control, connect the wire connecter and fix it onto the side board. Then stick a new
overlay.
Locate the remote
control.
Overlay has been peeled off.
Locate the 4pcs screws .
Locate the wire connecter.
3: Guidance of change the main PCB.
A: Locate the zipper head at the back of the chair. Unzip it to the end. Then we can find the main PCB
box.( As pictures below show )
B: Use screw driver slacken and remove the 3pcs screws which secure the main PCB cover. Then open it.
( As pictures below show )
C: Locate the main PCB. Pull the main PCB out of the box. Disconnect all the connecters and we can take
it off. ( As pictures bellowing show )
Locate the main PCB box.
Locate the 3pcs screws.
Main PCB box has been open.
Locate the connecters.
Main PCB has been detached.
4: Guidance of change the actuator
A: Locate the zipper head at the back of the chair. Unzip it to the end. Then we detach the backrest pad
from the backrest frame. Then rest the pad as the picture show. ( As pictures below show )
B: Under the seat pad there is a zipper. Unzip it to the end. Use a diagonal pliers get rid off the cable tie
which fasten the heater wire and actuator wire. ( As pictures below show )
C: Locate the actuator wire connecter at the back of the seat. Pull the wire out. Then use diagonal pliers
to get rid off the cable tie which secure the connecter. Then disconnect it.
Locate the zipper head.
Zipper had been unzipped.
Backrest pad has been
rested onto seat pad.
Locate the zipper head.
Locate the cable tie.
Locate the actuator
wire connecter.
The wire has been
pulled out.
Locate the actuator wire
connecter.
D: Locate the two screws which secure the actuator onto the frame. Use Allen Key slacken and remove
the two screws. (As pictures below show)
E: Locate the cotter pin and the bolt which fixing the end of the actuator. Take off the cotter pin first, then
remove the bolt. Now we can detach the actuator from the chair.
Locate the two screws.
Locate one of the 2pcs screws.
Locate the cotter pin and
bolt.
Locate the end of the
actuator.
5: Guidance of change the frame.
A: Locate the zipper head at the back of the chair. Unzip it to the end. Then we detach the pad from the
backrest frame. Then rest the pad as the picture show. ( As pictures below show )
B: Under the seat pad there is a zipper. Unzip it to then end and we can find a 4-way air hose connecter.
Disconnect it.
C: Use diagonal pliers get rid off the cable tie which fastens the heater wire and actuator wire. Also get rid
off the cable tie which secures the remote control wire connecter. Then disconnect it.( As pictures
below show )
Locate the zipper head.
Zipper had been unzipped.
Backrest pad has been
rested onto seat pad.
Locate the cable ties.
Locate the zipper head.
Locate the 4-way air
hose connecter.
Locate the remote
control wire connecter.
D: At the back of the seat there is a wire connecter (black), Use diagonal pliers get rid of the cable tie
which secure the connecter, then disconnect the wire connecter. Now we can detach the pad from the
chair. ( As pictures below show )
E: Locate the two screws which secure the actuator onto the frame. Use Allen Key slacken and remove the
two screws. (As pictures below show)
F: Locate the bottom of backrest frame there are two plastic covers. Slacken and remove the 3pcs screws
which secure the plastic cover. Then take it off. ( As pictures below show )
Locate the two plastic cover.
Locate the 3pcs screws that
secure the plastic cover.
The plastic covers has been
removed.
Locate the two screw bolts.
Locate one of the 2pcs screws.
Locate the wire connecter of the pad.
The pad has been
detached.
G: Use Allen key slacken and remove the screw bolt which secure the bearing cover. ( As pictures below
show )
H: Locate the 8pcs screws which secure the footrest. Use Allen key slacken and remove them. ( As
pictures below show )
I: Locate the 2pcs screw bolts at inner side boards. Use Allen key slacken and remove them. Then we can
detach the backrest frame. ( As pictures below show )
Locate the screw bolt.
The screw bolt has been
removed.
Locate the 8pcs screws.
Locate the two screw bolts.
Locate one of the 2pcs screw
bolts.
The backrest frame has been
detached.
6: Guidance of change the side board
A: Detach the backrest frame. ( Refer to Guidance of change the backrest frame. )
B: Locate the 6pcs screws which secure the side board. Slacken and remove these screws then we can
detach the side board.
Locate the 6pcs screws that secure the
side board.

Other Cozzia Massager manuals

Cozzia CZ-322 User manual

Cozzia

Cozzia CZ-322 User manual

Cozzia CZ-711/Qi SE User manual

Cozzia

Cozzia CZ-711/Qi SE User manual

Cozzia EC-360D User manual

Cozzia

Cozzia EC-360D User manual

Cozzia CZ-730/Qi User manual

Cozzia

Cozzia CZ-730/Qi User manual

Cozzia Renew Instruction Manual

Cozzia

Cozzia Renew Instruction Manual

Cozzia Qi SE User manual

Cozzia

Cozzia Qi SE User manual

Cozzia EC-618B User manual

Cozzia

Cozzia EC-618B User manual

Cozzia 16019 Manual

Cozzia

Cozzia 16019 Manual

Cozzia ZEN CZ-641 User manual

Cozzia

Cozzia ZEN CZ-641 User manual

Cozzia AC520 User manual

Cozzia

Cozzia AC520 User manual

Cozzia CZ-730/Qi User manual

Cozzia

Cozzia CZ-730/Qi User manual

Cozzia CZ-629 User manual

Cozzia

Cozzia CZ-629 User manual

Cozzia CZ-357 User manual

Cozzia

Cozzia CZ-357 User manual

Cozzia EC-360D Manual

Cozzia

Cozzia EC-360D Manual

Cozzia CZ-420 User manual

Cozzia

Cozzia CZ-420 User manual

Cozzia BK-750 Manual

Cozzia

Cozzia BK-750 Manual

Cozzia ZEN 3D PRO User manual

Cozzia

Cozzia ZEN 3D PRO User manual

Cozzia EC-326G-CO Manual

Cozzia

Cozzia EC-326G-CO Manual

Cozzia CZ-641 User manual

Cozzia

Cozzia CZ-641 User manual

Cozzia CZ-681 User manual

Cozzia

Cozzia CZ-681 User manual

Cozzia CZ-710 Manual

Cozzia

Cozzia CZ-710 Manual

Cozzia 16028 User manual

Cozzia

Cozzia 16028 User manual

Cozzia CZ-630 User manual
Cozzia

Cozzia CZ-630 User manual

Cozzia EC-363C Manual

Cozzia

Cozzia EC-363C Manual

Popular Massager manuals by other brands

iRest A389-2 Operation instructions

iRest

iRest A389-2 Operation instructions

Therabody TheraCup user manual

Therabody

Therabody TheraCup user manual
iZen Shiatsu instruction manual

iZen

iZen Shiatsu instruction manual

Osaki OS-4000XT instruction manual

Osaki

Osaki OS-4000XT instruction manual

HoMedics THERA-P NMS-230-THP Instruction manual and  warranty information

HoMedics

HoMedics THERA-P NMS-230-THP Instruction manual and warranty information

Ogawa KEVATOUCH OL0359 user manual

Ogawa

Ogawa KEVATOUCH OL0359 user manual
HoMedics DESTRESS FM-CRTL Instruction manual and  warranty information

HoMedics

HoMedics DESTRESS FM-CRTL Instruction manual and warranty information

Merra ORC-R001-BR user manual

Merra

Merra ORC-R001-BR user manual

Hutech Q9 user manual

Hutech

Hutech Q9 user manual

Fujiiryoki Cyber-Relax EC-1700 user manual

Fujiiryoki

Fujiiryoki Cyber-Relax EC-1700 user manual

Maximex 9937620500 Instructions for use

Maximex

Maximex 9937620500 Instructions for use

Human Touch NOVO Assembly guide

Human Touch

Human Touch NOVO Assembly guide

Fujiiryoki SKS-1850 user manual

Fujiiryoki

Fujiiryoki SKS-1850 user manual

TRIGGERPOINT IMPACT quick start guide

TRIGGERPOINT

TRIGGERPOINT IMPACT quick start guide

HoMedics FMS-150H Instruction manual and warranty

HoMedics

HoMedics FMS-150H Instruction manual and warranty

Ogawa OG5020 user manual

Ogawa

Ogawa OG5020 user manual

Wahl ZB343 instructions

Wahl

Wahl ZB343 instructions

Sanitas SEM 42 Instructions for use

Sanitas

Sanitas SEM 42 Instructions for use

manuals.online logo
manuals.online logoBrands
  • About & Mission
  • Contact us
  • Privacy Policy
  • Terms and Conditions

Copyright 2025 Manuals.Online. All Rights Reserved.