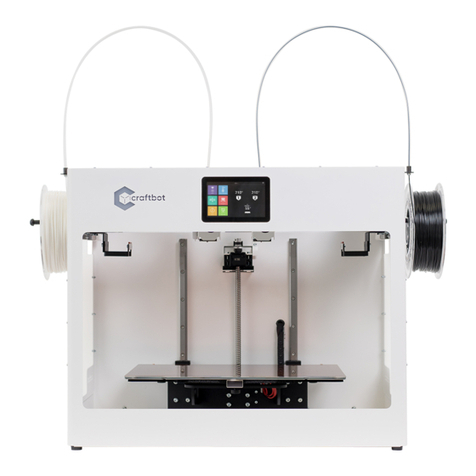
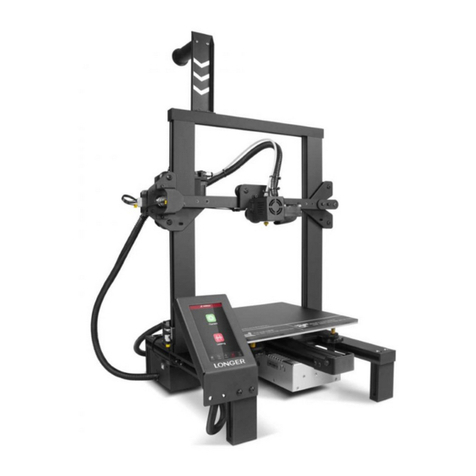
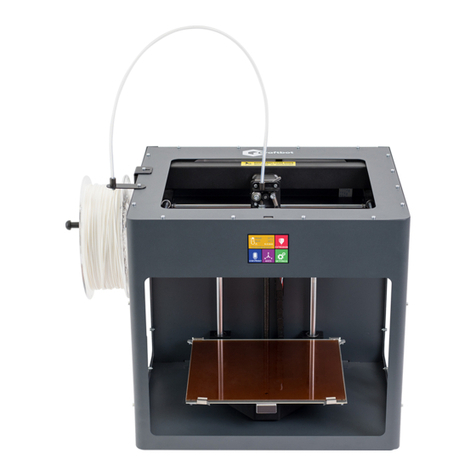
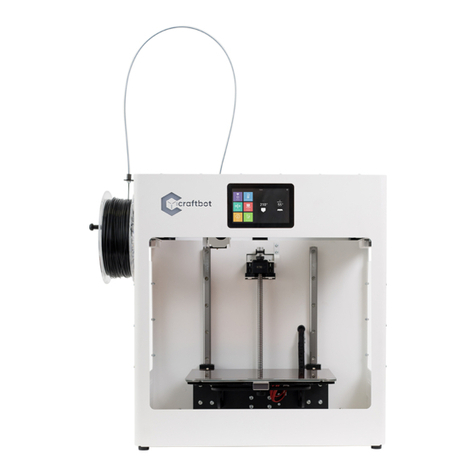
CraftBot CB4 FLOW Series User manual

V 1.0 2020. 01. 22.

3
TABLE OF CONTENTS
1. INTRODUCTION ............................................................................................................................................................................ 5
2. IMPORTANT.................................................................................................................................................................................. 6
2.1. WARNINGS...................................................................................................................................................................................... 6
3. THE PACK ...................................................................................................................................................................................... 8
3.1. UNPACKING THE 3D PRINTER .............................................................................................................................................................. 8
3.2. ACCESSORIES ................................................................................................................................................................................... 8
4. INTRODUCING THE CRAFTBOT 3D PRINTER................................................................................................................................... 9
................................................................................................................................................................................................................... 9
5. ASSEMBLING THE CRAFTBOT PRINTER ........................................................................................................................................ 10
5.1. CRAFTBOT FLOW /XL PRINTER .......................................................................................................................................................... 10
5.2. USING THE PRINETER ....................................................................................................................................................................... 11
5.3. LCD LAYOUT.................................................................................................................................................................................. 12
6. SETTINGS .................................................................................................................................................................................... 13
6.1. NETWORK ..................................................................................................................................................................................... 13
6.2. FANS/LIGHT/LOGO ........................................................................................................................................................................ 13
6.3. LANGUAGE/SOUND/TIME OPTIONS................................................................................................................................................... 14
6.5. CALIBRATION SETTINGS .................................................................................................................................................................... 16
6.6. FW UPGRADE MENU....................................................................................................................................................................... 19
7. PREPARING THE PRINTER............................................................................................................................................................ 20
7.1. HEATING UP THE PRINTER................................................................................................................................................................. 20
7.2. LOADING THE FILAMENT................................................................................................................................................................... 21
7.3. EXTRUDE MENU.............................................................................................................................................................................. 21
7.3.1. Extrude.................................................................................................................................................................................. 21
7.3.2. Removing the filament from the estruder............................................................................................................................. 22
7.3.3. Filament change.................................................................................................................................................................... 22
8. HOMING MENU .......................................................................................................................................................................... 23
9. USING THE CRAFTWARE.............................................................................................................................................................. 24
9.1. INSTALLING THE CRAFTWARE ............................................................................................................................................................ 24
9.2.
C
RAFT
W
ARE PROGRAM
........................................................................................................................................................... 24
10. PRINTING MENU ......................................................................................................................................................................... 26
10.1. PRINTING OBJECTS FROM USB FLASH DRIVE......................................................................................................................................... 26
10.2. NYOMTATÁS INDÍTÁSA A NYOMTATÓRÓL ............................................................................................................................................. 26
10.3. FILE MANAGEMENT......................................................................................................................................................................... 27
10.4. PRINTING OPTIONS.......................................................................................................................................................................... 28
10.5. PAUSE MENU ................................................................................................................................................................................. 29
10.6. STOP /END PRINTING ...................................................................................................................................................................... 29
11. USING THE MYCRAFTBOT ........................................................................................................................................................... 30
4
11.1. LOGIN .......................................................................................................................................................................................... 30
11.2. MAINMENU................................................................................................................................................................................... 30
11.3. PRINTING OBJECTS FROM MYCRAFTBOT PLATFORM............................................................................................................................... 31
11.4. MYCRAFTBOT OPTIONS.................................................................................................................................................................... 32
11.4.1. Camera ............................................................................................................................................................................. 32
11.4.2. Temperature..................................................................................................................................................................... 32
11.4.3. Extrude ............................................................................................................................................................................. 33
11.4.4. Control.............................................................................................................................................................................. 33
11.4.5. Other settings................................................................................................................................................................... 33
12. CLEANING AND MAINTENANCE .................................................................................................................................................. 35
9.1.
CLEANING ..................................................................................................................................................................................... 35
9.2.
LUBRICATING ................................................................................................................................................................................. 35
12.1. AZ EXTRUDER ELTÖMŐDÉSÉNEK MEGAKADÁLYOZÁSA/JAVÍTÁSA................................................................................................................ 37
12.2. REMOVING THE NOZZLE ................................................................................................................................................................... 38
12.2.1. PARTS OF EXTRUDER................................................................................................................................................................... 38
13. APPLYING A NEW LAYER OF PROTECTIVE KAPTON SHEET TO YOUR BUILD PLATE....................................................................... 39
14. GARANTEE AND LIMITATION OF LIABILITY.................................................................................................................................. 40

5
1. INTRODUCTION
Congratulations on your purchase of the CraftBot Flow Generation printer and
welcome to the word of 3D crafting! At CraftUnique we believe that 3D printing opens
a new window to enhance creativity. It offers outstanding crafting experience even
without prior programming or 3D printing experience.
How does the printer work? The CraftBot 3D printer makes solid, three-
dimensional objects out of melted plastic filament. First you will have to have your
objects with the help of a 3D design program. Then you will need to use the
CraftWare program (downloadable from www.craftunique.com/craftware) to
transform your 3D design files into printing instructions for the CraftBot 3D printer.
Transfer your files to Your CraftBot 3D printer via USB drive or Wi-Fi. The CraftBot 3D
printer will melt plastic filaments and squeeze it out onto the building plate in thin
lines to print your object layer by layer.

6
2. IMPORTANT
Read this user manual carefully before you use the appliance, then save it for
future reference. All information in this user manual is subject to change at any time
without notice and is provided for convenience purposes only. CraftUnique, reserves
the right to modify or revise this user manual in its sole discretion and at any time. By
using the manual, you agree to be bound by any modification and/or revisions. For
up-to-date information contact the CraftUnique Service Support team.
2.1. WARNINGS
•
Check if the voltage indicated on the bottom of the appliance corresponds to the
local mains voltage before you connect the appliance.
•
Do not immerse cord, plug or main body in water or any other liquid. This may
cause electrical
•
shock.
•
Do not use the appliance if the plug, the mains cord or the appliance itself is
damaged or not operating properly.
•
If the mains cord is damaged, you must have it replaced in order to avoid hazard.
•
Only connect the appliance to grounded wall sockets.
•
Keep the mains cord away from hot surfaces.
•
Do not let the mains cord hang over the edge of the table or worktop on which the
appliance stands.
•
Keep the appliance and its cord out of the reach of children.
•
This appliance can be used by children aged from 8 years and above; and by
persons with reduced physical, sensory or mental capabilities or a lack of
experience and knowledge. These persons should be under supervision and given
adequate instruction concerning the use of the appliance in a safe way,
understanding the hazards involved. Cleaning and user maintenance shall not be
made by children.
•
Children can receive great educational benefits from designing 3D objects, but the
printing process should not be done by small children.
•
Do not touch moving parts or heated elements, it can cause injuries.
•
Never reach inside the machine when turned on. Different parts of the machine
(mainly the extruder and heated build plate) operate at very high temperatures and

7
can cause severe burns.
•
Never leave the CraftBot 3D printer unattended while it is plugged in, and is in
operation.
•
Make sure that the power supply is off and that the power cord is disconnected
before servicing. Allow at least 5 minutes for the device to cool down after
unplugging it before reaching inside to service.
•
Always turn off the printer and disconnect from the computer when it is not being
used.
•
Make sure to level the build plate properly before use.
•
Make sure not to force anything, whether it be during unpacking, setup, operation
or service.
•
Service and oil the suggested parts as often as recommended. Only use only
substances recommended by CraftUnique.
•
The CraftBot 3D printer melts plastic during printing. Plastic odors/gases are
emitted during this operation. Make sure to set up the CraftBot 3D printer in a
well-ventilated area.

8
3. THE PACK
3.1. UNPACKING THE 3D PRINTER
1.
Place the CraftBot box on the ground on a level surface. Make sure that there is a
lot of open space around you.
2.
Open the box with care, not to damage the contents if using a blade. Be careful and
watch out for the printer as well.
3.
Remove the protective foam insert. You will find the Quick Starter Guide located
within the top protective foam insert.
4.
There is a Box inserted, which contains the accessories (including a pendrive with a
copy of the CraftBot user manual). Remove the Box with care as it supports the
extruder during shipping.
5.
Now you will find the CraftBot 3D printer itself completely enclosed in a protective
plastic bag. Open the plastic covering.
6.
Firmly grasp the frame of the CraftBot. Consider its weight. Request physical help
if needed.
7.
Make sure not to touch the extruder or the electronic panel inside the appliance!
8.
Place the CraftBot 3D printer on a stable and level surface with sufficient space
surrounding around it.
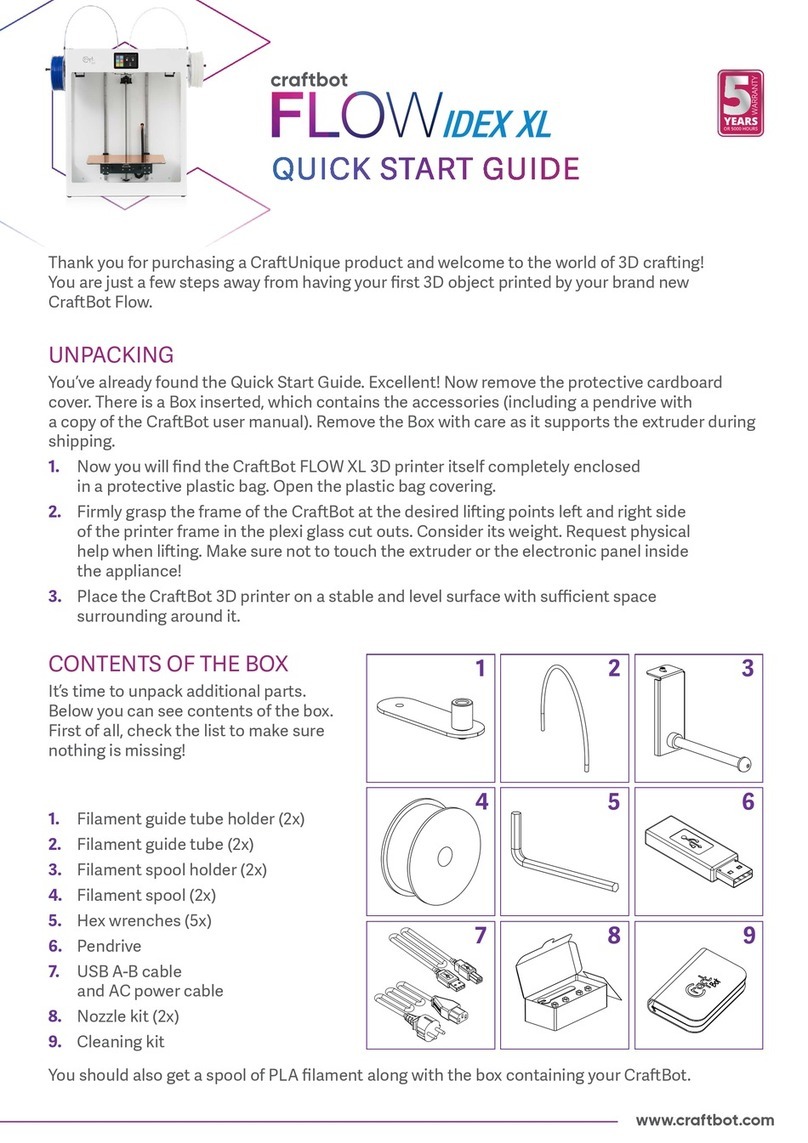
3.2. ACCESSORIES
Below you can see con-
tents of the box. First of all, check the list to make sure nothing
is
missing!
•
Filament guide tube holder (2x)
•
Filament guide tube (2x)
•
Filament spool holder (2x)
•
Filament spool (2x)
•
Hex wrenches (5x)
•
Pendrive
•
USB A-B cable and AC power cable
•
Nozzle kit (2x)
•
Cleaning kit

9
4. INTRODUCING THE CRAFTBOT 3D PRINTER
4.2. CraftBot Flow IDEX/XL printer
1.
Filament guide tube
2.
Touchschreen LCD display
3.
Hotend
4.
Build plate
5.
Z axis rod
6.
USB-A for flash drive
7.
Extruder
8.
Filament guide tube
holder
9.
Filament spool
10.
Filament spool holder
11.
On/off switch
12.
AC power cable
13.
USB-B socket

10
5. ASSEMBLING THE CRAFTBOT PRINTER
5.1. CRAFTBOT FLOW /XL PRINTER
•
Installing the filament guide tube holders
Select the desired position for filament guide holders. Choose their position so
that the filament spool bracket fits beside them.
Plug the connectors at the ends of the filament guide holder cables into the
encoder ports.
•
Installing the filament guide tubes
Locate the filament guide tube.
Insert one end of the filament guide tube into the filament guide tube holder
on top of the CraftBot appliance.
Push the other end into the hole on the top of the extruder.
•
Installing the filament spool holders
Locate the filament spool holder.
Using a hex wrench, install the filament spool holder next to the filament guide
tube holders.
•
Mounting the filament spools
Fit the filament spool onto the filament spool holder so that the lead end keeps
its course when the filament is fed into the filament guide tube holder.
•
Attaching the powercord
Ensure that the power switch on the CraftBot is set to the OFF position.
Find and then insert the AC power cord into the power input on the back of the
CraftBot.

11
5.2. USING THE PRINETER
Switch on CraftBot by the ON/OFF button located on the back part of the
appliance.
The LCD panel on the front will light up.
Navigation on the touch screen is possible by touching icons.
On the main screen, you can preheat the head to a preset temperature by
pressing the print head or buildplate icon.
In the top bar we can see
•HMI version number
•the IP address if the printer is connected to a network,
•The WiFi icon when the printer is connected to a Wi-Fi network
•the flash drive icon if there is a flash drive in the machine

12
5.3. LCD LAYOUT
Start menu
Print
New folder
Operation
Print
Settings
Temp
Speed
Light
Encoder
Camera
Pause
Stop
Heating
Nozzle
Bed
Extrude
Load
Unload
Axes
Heads
X, Y axis
Z axis
X, Y, Z, XYZ homeMotor power off
Settings
Network/WiFi
Fan/Light
Language/Sound/Time
Upgrade
Mode
Calibrations
FMS
Bed leveling
Mesh bed leveling
Offset
Info

13
6. SETTINGS
6.1. NETWORK
Select the Settings menu on the LCD screen and touch the Network icon.
•
Network
•
Select the Ethernet or the Wifi network. The printer
can be on the Ethernet or the WiFi. If you select the
Wifi option the printer will turn off the ethernet
and vice versa.
•
If you selected the WiFi menu, please go to the WiFi
menu.
•
Statik or DHCP options. If DHCP is selected, printers
must be configured.
•
Wifi
•
The Searching button will list WiFi resources. Select a
suitable one and if you have a password you can
enter it by using the keyboard shortcut.
6.2. FANS/ LIGHT/ LOGO
Select the Settings menu on the LCD screen and touch the Fan/ Light icon.
•
Fan:
•
Multiple sliders are displayed on the new
screen to control the power of the fans.
•
There are 3 type of fan:
•
Object fan
•
Extruder fan
•
Case fan

14
•
Light:
•
Touch the second button (Light) in the top
submenu and a multi-slider screen will
appear.
•
Move the slider from left to the right to
vary the brightness of the light.
•
There are two types of fan:
•
the interion LED lighting
•
LCD display backlighting
•
Logo color
•
Touch the third button (Logo) in the top
submenu and a multi-slider screen will
appear.
•
Here you can adjust the backlighting of the
CraftBot logo on the printer.
•We can set the lighting in 4 states
•
Stand by
•
Error
•
Printing
•
Success
6.3. LANGUAGE/ SOUND/ TIME OPTIONS
Select the Settings menu on the LCD screen and touch the Language/time icon.
•
Language / temperature unit
•
From the drop down bar, find and select
the appropriate language.
•
You can adjust the temperature in Celsius
/ Fahrenheit during language selection.

15
•
Sound
•
After touching the second button (Sound)
in the top submenu, a new screen appears
again.
•
In the menu, you can turn the volume on
or off and the slider to adjust the volume.
•
Time
•
After touching the third button (Time) in
the top submenu, a new screen appears
again.
•
Set the time of the zone to determine
the current time.
6.4.
Printing modes
Select the Settings menu on the LCD screen and touch the Mode icon.
•
Default mode: Gcode will determine whether the printer operates with one or two
printheads. If an object was sliced for a single head printer, but contains a support
struction, the CtaftBot 3 is able to print the object with normal filament while printing
the support with PVA filament. The advantage to this is that you don’t have to re-slice
the existing gcodes if you also wants to print with PVA.
•
Mirrored printing: If an object fits on half of the build platform, then there is the option
of printing two objects at once which will be mirror images of one another. This way,
two objects can be made in time it takes to print one object. For example, if printing a
hand, the printer can make a right and a left hand at the same time. If a symmetrical
object is being created (a heart, for example), both halves can be printed at once and
the entire object can be prepared in the time it takes to print half an object.
•
Parallel printing: If an object fits on half of the build platform, there is the option of
printing two objects at once that will be completely identical. This way, two objects
can be made in time it takes to print one object. The printer’s productivity is therefore
doubled.
•
Support printing: If a model has been sliced for a 1 headed printer and it contains
supports, then the printer will recognize the supports automatically and will print
them with the 2. head. With this mode you can print supports with soluble material
without re-slicing the model.

16
•
Inverted head: It swaps the 2 heads while printing ergo a part what should be printed
with the first head it will be printed with the second head and vice versa. You do not
have to replace the two filaments at the beginning of the print if they are swapped in
the two heads
•
Backup: It can be used when you print with 1 head. While printing, if the first head
jams, the second head will continue automatically thus the print won’t stop. When
using this mode it is recommended to use the same filament (or at least the same
color) in both heads so there won’t be any difference on the final printed model.
6.5. CALIBRATION SETTINGS
CraftBot has a leveling procedure which ensures that the extruder and the
heated build plate are at optimal distance and they must be leveled evenly. Smaller
gap or uneven levelling may lead to the damaging of the Kapton cover of the build
plate or the extruder.
Select the Settings menu on the LCD screen and touch the Calibrate icon.
•
There are several calibrations to choose from on the new screen. Drag the tabs to
the right next to the calibrations you want to run and launch them using the button
below.
There are 4 type of calibration:
•
Manual bed
•
Mesh bed
•
Extruder
•
Offset
•
For a successful calibration and printing, it is essential to start with Offset
calibration. This is a continuously defined Z, X and Y dimensions.
•
After all calibration options are started at the same time, the printer automatically
starts with Offset calibration, proceeds to Manual bed, Mesh bed calibration, and
then completes the full calibration with Extruder calibration.

17
There are a few important rules to follow before calibrating!
!
Heat up the nozzle and remove the filament from the extruder.
!
Clean the plate and the nozzle tip.
!
Make sure the metal plate is pushed back as far as it will go.
•
Offset Calibration
•
One of the calibrations that requires manual adjustment on the printer.
•
At the beginning of the calibration, the tray measures the limit switches
on the Z axis. This will be needed to continue printing.
•
After Z home, the left head measures the distance between the tray and
the nozzle, and then the right head is adjusted.
o
The tray moves downward and moves the right head over the tray
and stops.
o
Loosen the two screws on the left side of the heatsink through the
gap between the fan grilles and allow the nozzle to move out of
place.
o
Press the NEXT button. Moving the tray up will push up the moving
nozzle.
o
Tighten the loose screws and continue calibration.
•
After checking the two head levels, the X-Y calibration is automatic and
requires no intervention
•
Manual Bed Calibration
•
This is the only one of the calibrations that requires you to manually adjust the
build plate. It will be adjusted using the 3 knob screws at the bottom of the
build plate.
•
There are a few important rules to follow before calibrating!
!
Heat up the nozzle and remove the filament from the extruder.
!
Clean the plate and the nozzle tip.
!
Make sure the metal plate is pushed back as far as it will go.
•
At the front of the head, the printer gauges the gap between the build
plate and the nozzle tip at 3 points (There is one knob at the front in the
middle and two in the back left and right corners of the build plate). If
the distance is different from the optimum value, the calibration will

18
begin.
•
The print head begins to measure at the front in the middle point. At the
bottom of the screen, you can see the scale of the deviation.
•
If the deviation is large, the dashes are dense and several
arrows indicate which direction the knob under the
current position is rotated will result in a better reading.
•
For smaller deviations, the stripe is more scattered and
only one arrow indicates the rotateing direction.
•
To achieve optimum value, the meter should be wrapped
between two prominent lines.
•
After 3 optimal measurements, the NEXT button
appears. If one or more of the 3 measurements is out of range, the
calibration will not continue and will need to be adjusted on the button.
•
After pressing the NEXT button, the head is positioned above the back
right button and then above the back left button screw.
•
Repeat the procedure for the other buttons.
•
Mesh bed
•
Both calibrations are performed by the printer without external intervention or
adjustment.

19
•
There are a few important rules to follow before calibrating!
!
Heat up the nozzle and remove the filament from the extruder.
!
Clean the plate and the nozzle tip.
!
Make sure the metal plate is pushed back as far as it will go.
•
Extruder calibration
•
Both calibrations are performed by the printer without external intervention or
adjustment.
•
There are a few important rules to follow before calibrating!
!
Heat up the nozzle and fill the filament into the extruder.
!
Clean the plate and the nozzle tip.
!
Make sure the metal plate is pushed back as far as it will go.
6.6. FW UPGRADE MENU
•
Download the latest frilmware file at https://craftbot.com/firmware and upload
it to the root folder of a flash drive without unpacking.
•
Select the Settings menu on the LCD screen and touch the Upgrade
icon.
•In the upper right corner of the home screen, the flash drive will be whitened
and the flash drive will be detected. Wait for the flash drive to be detected.
•At the bottom of the screen, press the rescan button
and select UPDATE FROM PENDRIVE on the screen.
•Wait for the 10-part update to complete. Then,
when the update is complete, press OK in the pop-up
confirmation message.
•Wait 10 seconds after the upgrade. Do not turn off
the machine completely!

20
7. PREPARING THE PRINTER
7.1. HEATING UP THE PRINTER
Warming up, loading or removing filaments the head is essential for printing.
From the main menu screen, touch the element to be heated (head, build plate icons)
which will immediately warm up to a predefined temperature.
If you want to change the heating values, follow the instructions below.
•
In the main menu, press the blue Temperature icon .
•
In the upper part of the new window you can select the desired material (PLA,
ABS…) from the drop-down list.
•
If you want to print material with different temperature
values, you can change the values by selecting USER1 or
USER2. Adjust the sliders or the + and - marks to set the
desired values for the head or build plate.
•
Head temperature: 180-300 ° C
•
Build plate temperature range: 30-110 ° C
Other manuals for CB4 FLOW Series
1
This manual suits for next models
2
Table of contents
Other CraftBot 3D Printer manuals

CraftBot
CraftBot Flow User manual

CraftBot
CraftBot FLOWGENERATION FLOW User manual

CraftBot
CraftBot PLUS PRO User manual

CraftBot
CraftBot Flow User manual

CraftBot
CraftBot CB4 FLOW Series User manual

CraftBot
CraftBot FLOW IDEX DOME User manual

CraftBot
CraftBot FLOW WIDE XL User manual

CraftBot
CraftBot Plus User manual

CraftBot
CraftBot FLOW IDEX XL User manual

CraftBot
CraftBot PLUS PRO User manual