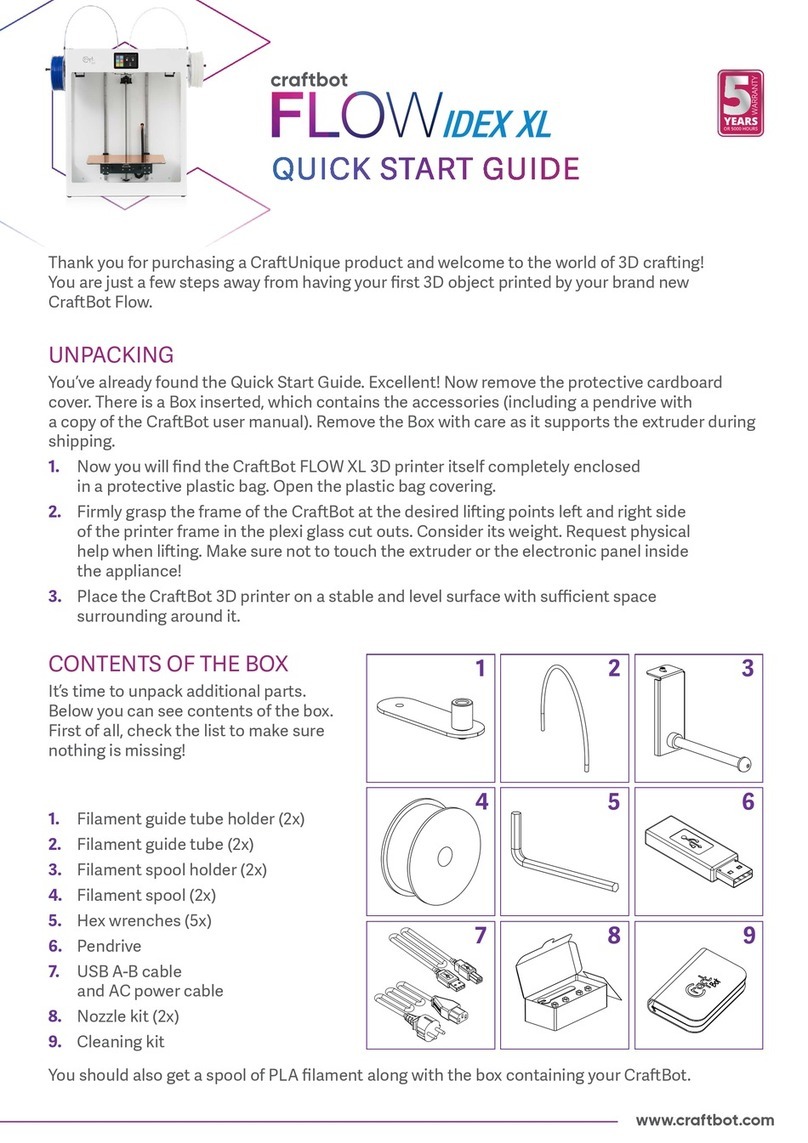
CraftBot FLOW GENERATION IDEX User manual

IDEX USER MANUAL

IDEX USER MANUAL
2
1. INTRODUCTION . . . . . . . . . . . . . . . . . . . . . . . . . . . . . . . . . . . . . . . . . . . . . . . . . . . . . . . . . . . . . .3
1.1. Crabot Flow / Flow XL printer components . . . . . . . . . . . . . . . . . . . . . . . . . . . . . . . . . . . . . . . . . . .4
1.2. Specifications . . . . . . . . . . . . . . . . . . . . . . . . . . . . . . . . . . . . . . . . . . . . . . . . . . . . . . . . . . . . . . .5
2. SAFETY . . . . . . . . . . . . . . . . . . . . . . . . . . . . . . . . . . . . . . . . . . . . . . . . . . . . . . . . . . . . . . . . . . . .6
2.1. Warnings . . . . . . . . . . . . . . . . . . . . . . . . . . . . . . . . . . . . . . . . . . . . . . . . . . . . . . . . . . . . . . . . . . .6
3. UNPACK AND ASSEMBLY. . . . . . . . . . . . . . . . . . . . . . . . . . . . . . . . . . . . . . . . . . . . . . . . . . . . . . . .7
3.1. Unpacking the printer . . . . . . . . . . . . . . . . . . . . . . . . . . . . . . . . . . . . . . . . . . . . . . . . . . . . . . . . . .7
3.2. Accessories . . . . . . . . . . . . . . . . . . . . . . . . . . . . . . . . . . . . . . . . . . . . . . . . . . . . . . . . . . . . . . . . .7
3.3. Assembling the Crabot Printer . . . . . . . . . . . . . . . . . . . . . . . . . . . . . . . . . . . . . . . . . . . . . . . . . . .8
4. First steps . . . . . . . . . . . . . . . . . . . . . . . . . . . . . . . . . . . . . . . . . . . . . . . . . . . . . . . . . . . . . . . . . .9
4.1. Printer wizard. . . . . . . . . . . . . . . . . . . . . . . . . . . . . . . . . . . . . . . . . . . . . . . . . . . . . . . . . . . . . . . .9
4.2. Welcome wizard- Calibration. . . . . . . . . . . . . . . . . . . . . . . . . . . . . . . . . . . . . . . . . . . . . . . . . . . . .10
4.3. The first print job . . . . . . . . . . . . . . . . . . . . . . . . . . . . . . . . . . . . . . . . . . . . . . . . . . . . . . . . . . . . 13
5. THE GRAPHICAL USER INTERFACE . . . . . . . . . . . . . . . . . . . . . . . . . . . . . . . . . . . . . . . . . . . . . . . . 14
5.1. Home menu . . . . . . . . . . . . . . . . . . . . . . . . . . . . . . . . . . . . . . . . . . . . . . . . . . . . . . . . . . . . . . . .14
5.2. Print menu. . . . . . . . . . . . . . . . . . . . . . . . . . . . . . . . . . . . . . . . . . . . . . . . . . . . . . . . . . . . . . . . .15
5.3. File management . . . . . . . . . . . . . . . . . . . . . . . . . . . . . . . . . . . . . . . . . . . . . . . . . . . . . . . . . . . . 15
5.4. The print menu . . . . . . . . . . . . . . . . . . . . . . . . . . . . . . . . . . . . . . . . . . . . . . . . . . . . . . . . . . . . . .16
5.5. In-print adjustments / pause menu . . . . . . . . . . . . . . . . . . . . . . . . . . . . . . . . . . . . . . . . . . . . . . . . 16
5.6. The heating menu . . . . . . . . . . . . . . . . . . . . . . . . . . . . . . . . . . . . . . . . . . . . . . . . . . . . . . . . . . . .18
5.7. The extrude menu. . . . . . . . . . . . . . . . . . . . . . . . . . . . . . . . . . . . . . . . . . . . . . . . . . . . . . . . . . . .19
5.8. Unloading the filament . . . . . . . . . . . . . . . . . . . . . . . . . . . . . . . . . . . . . . . . . . . . . . . . . . . . . . . . 19
5.9. Changing filaments . . . . . . . . . . . . . . . . . . . . . . . . . . . . . . . . . . . . . . . . . . . . . . . . . . . . . . . . . . .20
5.10. The axes menu . . . . . . . . . . . . . . . . . . . . . . . . . . . . . . . . . . . . . . . . . . . . . . . . . . . . . . . . . . . . . . 20
5.11. The info menu . . . . . . . . . . . . . . . . . . . . . . . . . . . . . . . . . . . . . . . . . . . . . . . . . . . . . . . . . . . . . . 21
5.12. Safe mode . . . . . . . . . . . . . . . . . . . . . . . . . . . . . . . . . . . . . . . . . . . . . . . . . . . . . . . . . . . . . . . . . 22
5.13. The seings menu. . . . . . . . . . . . . . . . . . . . . . . . . . . . . . . . . . . . . . . . . . . . . . . . . . . . . . . . . . . .23
6. USING THE WEB INTERFACE. . . . . . . . . . . . . . . . . . . . . . . . . . . . . . . . . . . . . . . . . . . . . . . . . . . . .32
6.1. Login . . . . . . . . . . . . . . . . . . . . . . . . . . . . . . . . . . . . . . . . . . . . . . . . . . . . . . . . . . . . . . . . . . . . 32
6.2. Main menu . . . . . . . . . . . . . . . . . . . . . . . . . . . . . . . . . . . . . . . . . . . . . . . . . . . . . . . . . . . . . . . . 32
6.3. Uploading files through the WEB interface. . . . . . . . . . . . . . . . . . . . . . . . . . . . . . . . . . . . . . . . . . . .32
6.4. Printing objects through the WEB interface . . . . . . . . . . . . . . . . . . . . . . . . . . . . . . . . . . . . . . . . . . . 33
6.5. Web interface seings . . . . . . . . . . . . . . . . . . . . . . . . . . . . . . . . . . . . . . . . . . . . . . . . . . . . . . . . . 33
6.6. Watching the camera image remotely. . . . . . . . . . . . . . . . . . . . . . . . . . . . . . . . . . . . . . . . . . . . . . .34
7. CLEANING AND MAINTENANCE. . . . . . . . . . . . . . . . . . . . . . . . . . . . . . . . . . . . . . . . . . . . . . . . . .35
7.1. Cleaning . . . . . . . . . . . . . . . . . . . . . . . . . . . . . . . . . . . . . . . . . . . . . . . . . . . . . . . . . . . . . . . . . . 35
7.2. Lubricating . . . . . . . . . . . . . . . . . . . . . . . . . . . . . . . . . . . . . . . . . . . . . . . . . . . . . . . . . . . . . . . . 35
7.3. Removing clogs from the extruder . . . . . . . . . . . . . . . . . . . . . . . . . . . . . . . . . . . . . . . . . . . . . . . . . 36
7.4. Replacing the fan set . . . . . . . . . . . . . . . . . . . . . . . . . . . . . . . . . . . . . . . . . . . . . . . . . . . . . . . . . .37
7.5. Replacing the fan set (cable version)*. . . . . . . . . . . . . . . . . . . . . . . . . . . . . . . . . . . . . . . . . . . . . . .37
7.6. Relocating the fan assembly to the extruder assembly . . . . . . . . . . . . . . . . . . . . . . . . . . . . . . . . . . . 38
7.7. Removing the nozzle . . . . . . . . . . . . . . . . . . . . . . . . . . . . . . . . . . . . . . . . . . . . . . . . . . . . . . . . . . 39
7.8. Removing the hotend . . . . . . . . . . . . . . . . . . . . . . . . . . . . . . . . . . . . . . . . . . . . . . . . . . . . . . . . . 39
7.9. Replace the hotend . . . . . . . . . . . . . . . . . . . . . . . . . . . . . . . . . . . . . . . . . . . . . . . . . . . . . . . . . . .40
7.10. Adjusting X belt tension . . . . . . . . . . . . . . . . . . . . . . . . . . . . . . . . . . . . . . . . . . . . . . . . . . . . . . . .41
7.11. Baery replacement . . . . . . . . . . . . . . . . . . . . . . . . . . . . . . . . . . . . . . . . . . . . . . . . . . . . . . . . . . 41
7.12. Applying a new Kapton sheet to your build plate. . . . . . . . . . . . . . . . . . . . . . . . . . . . . . . . . . . . . . . .41
7.13. The cleaning kit . . . . . . . . . . . . . . . . . . . . . . . . . . . . . . . . . . . . . . . . . . . . . . . . . . . . . . . . . . . . . 42
8. CRAFTWARE . . . . . . . . . . . . . . . . . . . . . . . . . . . . . . . . . . . . . . . . . . . . . . . . . . . . . . . . . . . . . . . 44
8.1. Installing CraWare. . . . . . . . . . . . . . . . . . . . . . . . . . . . . . . . . . . . . . . . . . . . . . . . . . . . . . . . . . .44
8.2. Using CraWare to generate .gcode files. . . . . . . . . . . . . . . . . . . . . . . . . . . . . . . . . . . . . . . . . . . . .44
9. GUARANTEE AND LIMITATION OF LIABILITY. . . . . . . . . . . . . . . . . . . . . . . . . . . . . . . . . . . . . . . . . .45
TABLE OF CONTENTS
IDEX USER MANUAL
3
1. INTRODUCTION
Congratulations on your purchase of the Crabot Flow Generation printer and welcome to the world of 3D craing!
We at CraUnique believe that 3D printing opens a new window to enhancing creativity. It offers an outstanding
craing experience even without a prior background in programming or 3D printing.
How does the printer work? The Crabot 3D printer makes solid, three-dimensional objects from melted plastic
filament. First you will have to design your objects with the help of a 3D design program. Then you will need to use
the CraWare program (downloadable from www.craunique.com/craware) to transform your 3D design files into
printing instructions for the Crabot 3D printer. Transfer your files to Your Crabot 3D printer via USB or Wi-Fi. The
Crabot 3D printer will melt plastic filaments and squeeze them out onto the building plate in thin lines to print your
object layer by layer.

IDEX USER MANUAL
4
1.1. Crabot Flow /XL printer components
The model displayed is the Crabot Flow IDEX.
The difference between the two models is the frame height.
See Specifications for the different dimensions.
1. Filament guide tube
2. Touchscreen LCD display
3. Hotend
4. Build plate
5. Z axis rod
6. USB connector for flash drive
7. Extruder
8. Filament guide tube holder
9. Filament spool holder
10. Filament spool
11. ON / OFF switch
12. AC power cable
13. LAN connection
14. Reset buon
1
2
1
3 3
4
5
6
7
7 99
88
1010
11
12
13
14

IDEX USER MANUAL
5
1.2. Specifications
PRINTING PROPERTIES FLOW IDEX FLOW IDEX XL
Printing technology Fused Filament Fabrication (FFF)
Printing heads Independent Dual Extruders (IDEX) with Filament Monitoring system (FMS)
Build volume X: 425mm x Y: 250mm x Z: 250mm X: 425mm x Y: 250mm x Z: 500mm
Theoretical precision X,Y: 4 microns, Z: 2 microns
Layer resolution For 0.4mm nozzle recommended 50-300 microns
Travel speed Up to 160mm/s
Print speed Up to 160mm/s
Build speed 0.4mm nozzle: up to 19.2 mm³/sec
Build plate Heatable, magnetic build plate, with removable spring steel build surface
Build plate temperature 40 - 110°C
Filament diameter 1.75mm
Supported materials PLA, ABS, HIPS, PET-g, Nylon, TPU, PVA, Moldlay (wax like), up to 300°C
Nozzle diameter Default: 0.4mm, supplied: 0.25mm, 0.4mm, 0.6mm, 0.8mm
Nozzle temperature 40 - 300°C
Hotend All metal hotend
Extruder Dual drive extruder, ratio: 5,06:1
CALIBRATION
Build plate calibration Assisted bed calibration
XY calibration Fully automatic, no intervention required
POWER REQUIREMENTS
Voltage range 90-264V
Frequency range 47-63Hz
Power factor PF>0.95/230VAC
Efficiency (Typ.) 94,5%
Power MAX 500W, 5.5A
OTHERS
Display 5 inch, active matrix color display 800 x 480 pixels
Connectivity Wi-Fi, LAN, USB, Flash drive
Internal storage 4GB, non removable
Wi-Fi IEEE 802.11b/g compatible
Monitoring IOT Web interface, Live camera
Camera resolution 5MP, Stream output 800 x 600
Operating noise level 50dBA
Optional accessories Glass door, ventilated PET-g dome
PHYSICAL
Frame All steel frame
Frame dimensions X: 635mm, Y: 450mm, Z: 530mm X: 635mm, Y: 450mm, Z: 780mm
Equipped with dome X: 635mm, Y: 450mm, Z: 680mm X: 635mm, Y: 450mm, Z: 930mm
Weight 32 kg 38 kg
Shipping weight 46 kg 52 kg
Available colors White, Grey
OPERATING CONDITIONS
Operating ambient temperature 10-35 °C
Humidity 10-90% RH, non-condensing
Storage temperature 0-35°C
SOFTWARE
Supplied soware CraWare, our free slicer soware
Supported OS Windows, macOS, Linux
Supported file types STL, OBJ, 3mf

IDEX USER MANUAL
6
2. SAFETY
Read this user manual carefully before you use the appliance, then save it for future reference. All information in this
user manual is subject to change at any time without notice and is provided for convenience purposes only.
CraUnique reserves the right to modify or revise this user manual in its sole discretion and at any time. By using
the manual, you agree to be bound by any modification and/or revisions. For up-to-date information contact the
CraUnique Service Support team (support@crabot.com).
2.1. Warnings
Check if the voltage indicated on the back of the appliance corresponds to the local mains voltage before you conect
the appliance.
• Do not immerse the cord, the plug or the main body in water or any other liquid. This may cause electrical shock.
• Do not use the appliance if the plug, the mains cord or the appliance itself is damaged or not operating properly.
• If the mains cord is damaged, you must have it replaced in order to avoid hazard.
• Connect the appliance to grounded wall sockets only.
• Keep the mains cord away from hot surfaces.
• Do not let the mains cord hang over the edge of the table or worktop on which the appliance stands.
• Keep the appliance and its cord out of the reach of children.
• This appliance can be used by children aged from 8 years and above and by persons with reduced physical,
sensory or mental capabilities or a lack of experience and knowledge. These laer persons should be under
supervision and given adequate instruction concerning the use of the appliance in a safe way, understanding the
hazards involved. Cleaning and user maintenance shall not be performed by children.
• Children can receive great educational benefits from designing 3D objects, but the printing process should not
be done by small children.
• Do not touch moving parts or heated elements: you may suffer injuries.
• Never reach inside the printer when it is turned on. Different parts of the unit (mainly the extruder and the heated
build plate) operate at very high temperatures and can cause severe burns.
• Never leave the Crabot 3D printer unaended while it is plugged in, and is in operation.
• Make sure that the power supply is switched off and that the power cord is disconnected before servicing. Allow
at least 5 minutes for the device to cool down aer unplugging it before reaching inside to service.
• Always turn off the printer and disconnect it from the computer when it is not being used.
• Make sure to level the build plate properly before use.
• Make sure not to force any parts of the unit, be during unpacking, setup, operation or service.
• Service and lubricate the suggested parts as oen as recommended. Use only substances recommended by
CraUnique.
• The Crabot 3D printer melts plastic during printing. Plastic odors/gases are emied during this operation. Make
sure to set up the Crabot 3D printer in a well-ventilated area.
• Do not change or adjust anything on the printer, unless the modification is authorized by the manufacturer.
• Do not store items in the printer.

IDEX USER MANUAL
7
7
24
8
3
6
1
9
5
10
1. AC Power cable according to your region (1x)
2. Filament guide tube holder (2x)
3. Filament guide tube (2x)
4. Filament spool holder (2x)
5. Filament spool (2x)
6. Hex wrenches (5x)
7. Flash drive (1x)
8. USB A-B cable (1x)
9. Nozzle kit (2x)
10. Cleaning kit (1x)
3. UNPACKING AND ASSEMBLY
3.1. Unpacking the printer
1. Please check the packaging for any damage. If you detect any damage please contact the reseller.
2. Place the Crabot box on the ground on a level surface. Make sure that there is plenty of open
space around you.
3. Open the box with care, not to damage the contents if you are using a blade. Be careful and
watch out for the printer as well.
4. Remove the strips and pull off the top box. If the strips are missing from the packaging, contact
your reseller.
5. Remove the protective foam insert. You will find the Quick Start Guide located inside the top
protective foam insert.
6. There is a box inserted which contains the accessories (including a flash drive with a copy of the
Crabot user manual). Remove the box with care as it supports the extruder during shipping.
7. Now you will find the Crabot 3D printer itself completely enclosed in a protective plastic bag.
Open the plastic covering.
8. You will notice 2 handle holes for picking up the unit. Firmly grasp the frame of the Crabot.
Consider its weight. Request physical help if needed.
9. Make sure you do not touch the extruder or the electronic panel inside the appliance.
10. Place the Crabot 3D printer on a stable and level surface with sufficient space surrounding around it.
3.2. Accessories
Below you can see the contents of the box. First of all, check the list to make sure nothing is missing.

IDEX USER MANUAL
8
3.3. Assembling the Crabot Printer
• Remove the X-rail clamps
- To ensure your product was delivered safely, there are two clamps on the
end of the X-rail. Safely remove these by using the hex key provided by
unscrewing the 2 screws on each clamp.
- Slide the clamps out by wiggling them from side to side.
• Install the filament guide tube holders
- Select the desired position for the filament guide holders. Choose their
position so that the filament spool holders fit beside them.
• Install the filament guide tubes
- Locate the filament guide tubes.
- Insert one end of the filament guide tubes into the filament guide tube
holder on top of the Crabot appliance.
- Push the other end into the hole on the top of the extruder.
• Install the filament spool holders
- Locate the filament spool holders.
- Using a hex wrench, install the filament spool holder next to the filament
guide tube holders.
• Mount the filament spools
- Fit the filament spools onto the filament spool holders so that the lead
end keeps its course when the filament is fed into the filament guide tube
holder.
• Aach the power cord
- Ensure that the power switch on the Crabot is set to the OFF position.
- Plug the AC power cord into the power input an the back
of the unit.
- Plug the power cord into a wall socket.

IDEX USER MANUAL
9
4. FIRST STEPS
4.1. The printer wizard
The first time you use the printer, the printer wizard
will appear. The wizard will walk you through the steps
needed to get the most out of your printer:
• Language
• Time zone
• Firmware update
• Network (LAN/Wi-Fi)
• Calibration
If you are unsure, you can always run the printer wizard
from the seing menu.
Language
1. Select your language from the list
2. Then press Next
Time zone
1. Select your time zone from the list
2. Then press Next
Firmaware update
1. Please don’t skip this step!
2. Download the latest Firmware for the FLOW 3D
printers at hps://crabot.com/firmware
3. Copy CRAFT_UPDATE.ZIP to a FAT32 formaed USB
drive
4. Plug the USB drive you found in the accessories box
into the HMI port
5. Wait for the firmware update to complete
Network setup
1. Please name your printer. This name will help you
identify the printer on the network.
2. Select the Ethernet or the WiFi network. The printer
can use either Ethernet or WiFi. If you select the WiFi
option the printer will turn off the Ethernet and vice
versa.
3. If you selected the WiFi menu, please go to the WiFi
menu.
4. Static IP or DHCP options: if DHCP is selected the
printer will restart. The Searching buon will list the
available WiFi networks. Make your choice and enter
the password using the keyboard shortcut.

IDEX USER MANUAL
10
4.2. Welcome wizard- Calibration
1. Please make sure that the bed is clean and there are
no residues / dirt on the nozzles. You can use the
metal brush to clean the nozzle.
2. Remove every object that may be blocking the bed
moving all the way down.
This process will take roughly 30 min. in total. Don’t
worry: most of it is automatic due to our mesh
leveling system.
3. Push Next on your screen.
4. In the first stage the printer will automatically check
the lowest point of the bed can reach and also heat
up the heads to PLA 215C° temperature. Press Next
to start the automatic process.
Offset calibration
The offset calibration requires manual adjustment on the
printer.
Please prepare the 2.5mm hex wrench supplied with your
printer and turn the build plate over with the Kapton foil
side facing DOWN.
This calibration process calibrates the following
parameters:
Z limit distance: Required for resuming a print job.
BL-Touch - nozzle offset: Required for the assisted bed
and mesh bed leveling.
Extruder 1 and Extruder 2 X-Y offsets: Required for dual
mode prints.
Extruder Z offset: Required for dual mode prints, to make
sure the heads at the same height.
This adjustment is requires user intervention:
• The build plate moves down and moves the right
head over the build plate and stops.
• Loosen the two screws on the le side of the heat-
sink through the gap between the fan grilles and
allow the nozzle to move down. If necessary, please
press down the heat block with the hex wrench.
• Press the Next buon. The build plate is now
pressing up the loosened Extruder 2 to the proper
height.
• Tighten both screws and press Next to continue
calibration.
• Aer checking the two head levels, the X-Y
calibration is automatic and requires no intervention.
• If the process is not clear, please press the video help
buon on the right side and watch the video.
Please turn he build plate over with the Kapton foil side
facing UP.

IDEX USER MANUAL
11
Bed leveling
Adjusts the parallelity of the build plate and XY
mechanics, and the distance between the nozzle and the
build plate.
The assisted bed calibration requires you to manually
adjust the build plate. It will be adjusted using the 3 knob
screws at the boom of the build plate. There is one
knob at the front in the middle and two in the back le
and right corners of the build plate.
• At the beginning of the process the printer measures
the distance between the build plate and the nozzle
tip using the BL-Touch sensor. If the distance or
parallelity are not optimal, calibration will begin.
• The print head begins the measurement at the front
centre calibration point. At the boom of the screen,
you can see the scale of the deviation.
• If the deviation is large, the markings are dense. The
arrows below the markings indicate which direction
the knob should be twisted to achieve optimum
adjustment.
• To achieve optimum value, the meter should be
wrapped between two prominent lines.
• Aer 3 optimal measurements, the NEXT buon
appears. If one or more of the 3 measurements is out
of range, the calibration will not continue and will
need to be adjusted using the knob.
• Press the NEXT buon, the head is positioned above
the back right buon and then above the back le
buon screws.
• Repeat the procedure for theremaining two knobs.
If the measurement is correct, the Next buon appears.
If you press the buon the printer will proceed to the
next measuring point. Once all three measurement
points have been completed, the printer will re-check the
distances.
If all is well, the measurement process is complete.
Mesh bed leveling
Creates a map of the build plate and compensates for
any surface inequalities while printing the first few layers.
For this calibration, no user intervention is required.
During the process, the printer measures the build plate
at 3 different temperatures: 60°C, 80°C, 100°C
This process takes 15 minutes to complete.

IDEX USER MANUAL
12
FMS calibration
This calibration will measure the Filament Monitoring
System (FMS) sensor values and adjust if necessary.
Make sure you select the correct type of filament on the
screen. The head heats up to the correct temperature.
Aer it has heated, load the filament to the extruder.
To extrude filament from the print head, use the down
arrow on the touch screen.
• Press and hold the buon to keep extracting
filament through the head.
• Automatic filament feed can also be performed
by pressing the Load buon on the
boom bar.
• By pressing the buon once, the head automatically
extrudes some filament.
Filament loading is successful when the melted filament
flows out of nozzle evenly and vertically.
Caution! The freshly spilled melted filament is hot.
Avoid contact with spilled filaments or other flammable
materials in the nearby.
Press the Next buon.
Aer successful FMS calibration you can print some cool
things.

IDEX USER MANUAL
13
4.3. The first print job
Please print the CW_ToolDisk_dual.gcode or
CW_ToolDisk_single.gcode files from pendrive. If you
have not have this gcode please download it from this
link and copy it to the pendrive:
hps://support.crabot.com/hc/en-us/
articles/360012631777-Crabot-tooldisk-sample-test-
object
• Select the Print menu on the main screen.
• Locate the file you plan to print. The files on the flash
are found in the “pendrive” folder.
• Move the list up or down to locate the gcode of the
item you want to print and select it. You can only
select one gcode for printing, if multiple items are
selected, printing cannot be started.
• Press the Start buon in the boom right corner of
the screen.
• The machine warms up the print head and the build
plate to the values specified in the gcode.
• Printing starts when the machine reaches the
required operating temperature.
• Aer the object has been printed, remove the build
plate. Printed objects can be removed easily, just
bend the flexible build plate.
• Please note: if the object is still warm, it may bend
when removed. To avoid this, please let it cool for a
while.

IDEX USER MANUAL
14
5. THE GRAPHICAL USER INTERFACE
5.1. Home menu
Switch on the Crabot printer with the ON / OFF buon located at the back of the appliance.
The LCD panel on the front will light up.
You can navigate the touch screen by touching icons.
On the main screen, you can preheat the head to a preset temperature by pressing the print head or build-plate icon.
The display shows the following information:
1. HMI version number
2. The IP address (if the printer is connected
to a network)
3. The flash drive icon if there is a flash drive
plugged in
4. LAN icon (when the printer is connected)
5. The Wi-Fi icon when the printer is connected
to a Wi-Fi network
6. Door open icon
7. Head heating icon
8. Bed heating icon
The main menu items are on the le side:
• Print
• Heating
• Extrude
• Axes
• Info
• Seings
You can switch the head and the bed heating on and off.
1. 2. 3.
6.
4.
7.
5.
8.

IDEX USER MANUAL
15
5.2. Print menu
You can print the previously saved .gcode files in more ways: either form the printer’s 4GB internal storage or from a
USB flash drive. Save the gcode file created by the CraWare slicer program onto USB flash drive or directly to the
printer’s internal storage.
• Select the Print menu on the main screen.
• Locate the file you plan to print. The files on the flash
are found in the “pendrive” folder.
• Move the list up or down to locate the gcode of the
item you want to print and select it. You can only
select one gcode for printing, if multiple items are
selected, printing cannot be started.
• Press the Start buon in the boom right corner of
the screen.
• The printer warms the print head and the build plate
to the values specified in gcode.
• Printing starts when the unit reaches the required
operating temperature.
• Make sure that you have enough filament for the selected project. The quantity is pre-calculated by CraWare.
• Aer the object has been printed, remove the build plate. Printed objects can be removed easily, just bend the
flexible build plate. Please note: if the object is still warm, it may bend when removed. To avoid this, please let it
cool for a while.
5.3. File management
Flow generation machines have a 4GB internal storage
for printable items. In the Print menu, you can copy,
move or delete one or more items. Copy and move
operations are possible between the internal storage and
the flash drive, in both directions. You can create a new
directory if required.
To access the file actions, press the Action buon.
• To perform a file action, select the file / directory
you want to perform the operation on. To enter a
directory, short press it. You can select directories by
long press on them.
• Select the desired action from the Actions menu.
• Go to the destination directory for file transfer and
perform the paste operation. It will copy or move the
files / directories to the selected directory.
Please note: the deleted files are not stored in recycle bin
and cannot be restored.

IDEX USER MANUAL
16
5.4. The print menu
Printing starts when the machine has reached the
required operating temperature.
The following values are displayed during printing:
1. Name of the file/object to be printed
2. Percentage of total printing completed
3. Current z height/total z height
4. Remaining time (with heating time)
5. Head temperature
6. Filament remaining/ total
7. Bed temperature
8. The number of layers to be created/ total number of
layers
9. Print speed
Please make sure that you have enough filament for
the selected project. The quantity is precalculated by
CraWare.
Aer the object has been printed, remove the build plate.
Printed objects can be removed easily, just bend the flexi
kapton plate.
5.5. In-print adjustments / pause menu
During printing, sometimes it can be essential to modify the printing parameters on the fly.
This menu also pops up when the printer gets a pause command from the gcode or from the screen.
In the Pause menu users can change filament, continue printing or terminate the printing operation. Pressing the
resume buon will continue the print job. For filament change use the Extrude / Reverse functions or the prepro-
grammed Load / Unload options.
The in-print adjustments overrule the seing is the gcode.
You can change the print seings during printing by pressing the Seings buon on the right icon bar.
The following parameters can be changed:
• Print temperatures
• Extrude
• Fan speed
• Print speed
• Filament flow
• Light
• FMS
• Camera
3
4
1 2
6
8
7 95

IDEX USER MANUAL
17
Temperature
Head and build plate temperatures can be adjusted
separately.
Adjust the head and the build plate temperature by
touching the slider and the + and - buons.
You can lock the previously set values if needed.
Extrude
For filament change use the Extrude / Reverse functions
or the preprogrammed Load / Unload options.
Fan speed
Fan speed volume can be modified in percentage of the
original.
You can change the Object fans and the dome fan
speeds.
Print speed
Print speed and extrusion volume can be modified in
percentage of the original.
Use the reset buon to revert to the values specified in
the gcode.
Filament flow
Filament flow can be modified in percentage of the
original.
Use the reset buon to revert to the values of the gcode.
Light
Lights inside the printer and the display back-lighting
can be changed.
FMS
You can enable / disable the FMS functionality and
E-mail notifications here.
Camera
You can enable the time-lapse function if the printing has
already started. Here you can choose whether you want
to take a picture every 1, 5 or 10 seconds. This parameter
does not disable the remote camera access.

IDEX USER MANUAL
18
5.6. The heating menu
Warming up the head and loading or removing filaments
are essential for printing. From the main menu screen,
touch the element to be heated (head and build
plate icons), which will warm up to the predefined
temperature.
If you want to change the heating values, follow the
instructions below.
In the main menu, press the Heating icon.
In the upper part of the new window you can select the
desired material (ABS, PLA, PETG…) from the drop-down
list.
If you want to print a material with different temperature
values, you can change the values by selecting USER1 or
USER2. Adjust the sliders or the + and - marks to set the
desired values for the head or build plate.
In the Heating menu you can switch the heating on or off
by touching the element (head, build plate) icons.
Allowed temperatures:
• Head temperature: 40-300 °C
• Build plate temperature range: 40-110 °C

IDEX USER MANUAL
19
5.7. The extrude menu
Heat up the extruder where you want to insert the filament into.
• Take the end of the filament out of the securing hole on the Filament spool.
• Cut the end of the filament so the filament is straight and has no damage, bends kinks or melted parts.
• Remove the filament guide tube from the insert hole on the top of the extruder.
• Insert the end of the filament from the spool UP into the filament guide tube holder, then into the filament guide
tube. Pass the filament through the tube until it protrudes on the extruder side of the tube.
• Push the filament into the top of extruder hole.
Select the Extrude menu on the Home screen.
Before extruding, make sure the head is next to the build plate, not pressed into the plate or directly above it.
• To extrude filament from the print head, use the down arrow on the touch screen.
• Press and hold the buon to keep extruding filament from of the head.
• Automatic filament feed can also be performed by pressing the Load buon on the boom bar.
By pressing the buon once, the head automatically extrudes some filament.
• Filament loading is successful when the melted filament flows through the nozzle evenly and vertically.
Caution! The freshly spilled melted filament is hot. Avoid contact with spilled filaments or other flammable materials
in the nearby.
5.8. Unloading the filament
Never remove the filament from the extruder if the extruder is cold!
Always preheat the extruder before removing or changing filaments. Removing the filament from a cold extruder
might damage the extruder!
You don’t have to remove the filament between prints.
• Heat the extruder as described above.
• Make sure the head is next to the build plate, not pressed into the plate or directly above.
• When the extruder reaches the temperature required for the filament, press the down arrow,
then the up arrow.
• Automatic filament unloading can also be performed by pressing the Unload buon.
• When the gears start to retract the filament, you can safely pull out the rest of the filament from the guide tube
and connect the end of the filament to the spool for safekeeping. Now you are ready to load some new filament.

IDEX USER MANUAL
20
5.9. Changing filaments
• When changing filaments, note that different filaments, such as PLA, ABS, and PET, have different temperature
characteristics.
• If you want to replace a material with a higher temperature (eg. ABS, PETG) with a material with a lower
temperature (PLA), you will need to heat the head to a higher temperature so that the previous material can
leave the head completely before the other filament can its place.
• When changing colors, always push more material out of the head, ensuring that the replaced color is
completely removed from the head. During printing, it may be a nuisance to notice that the print color is still
blending with the previous color, for example, when changing from red filament to white.
5.10. The axes menu
The small house icon indicates the „home” position
of the extruder, which is the position in the front le
corner of the build plate. You can reset the extruder and
the build plate to the “home” or “zero” position.
You can either set each axis one at a time (X , Y
or Z ), or do all three of them at once by touching
the appropriate buon. If the individual house icons
are white, then this means that the motors of each
highlighted icon are engaged (working).
To disengage the motors, click on the icon in the boom
right corner , and you will see all of the house icons
turn grey. The motors have now been disengaged (not
working) and you can freely move the extruder by hand if
you wish to do so.
The le control panel controls the extruder along the
X and Y axes. You can move the motors that have the
house icon filled in. You can control the extruder by
dragging the center buon in one direction from the
center to the outside. The head will move in the same
direction.
You can use the up and down arrows to move
the build plate when the Z house icon is full.
Table of contents
Other CraftBot 3D Printer manuals

CraftBot
CraftBot Plus User manual

CraftBot
CraftBot FLOW IDEX XL User manual

CraftBot
CraftBot Flow User manual

CraftBot
CraftBot FLOW WIDE XL User manual

CraftBot
CraftBot Flow User manual

CraftBot
CraftBot PLUS PRO User manual

CraftBot
CraftBot CB4 FLOW Series User manual

CraftBot
CraftBot PLUS PRO User manual

CraftBot
CraftBot FLOW IDEX DOME User manual

CraftBot
CraftBot FLOWGENERATION FLOW User manual