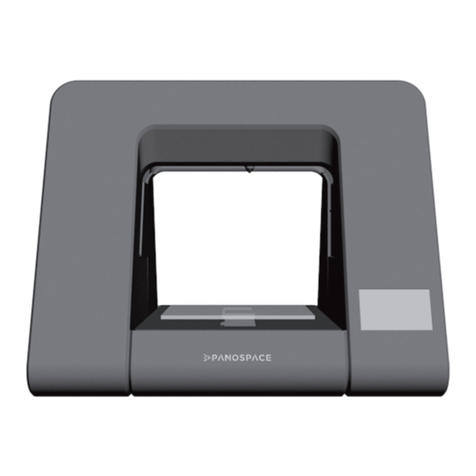
PanoSpace I User manual

USER MANUAL
FUN EASY 3D PRINTING
PanoSpace I


1
PANOSPACE
Thank you for purchasing our PanoSpace I 3D Printer. We pride ourselves in
having the most innovative products on the market with cutting edge technology
that is easy to use. We are dedicated to making the most enriching learning
experiences for you and hope you have as much fun using it as we did creating
it!
This user manual contains safety rules and instructions for printing, adjustments
and maintenance. It shows you how to use the 3D printer properly to extend its
lifetime. Please read this manual thoroughly and make sure you follow all the
instructions.
Declaration
■PanoSpace USA has thoroughly proofread the content of this user manual.
■PanoSpace USA will not be liable for typos and missing contents.
■This user manual is subject to change without notice due to improvements
of our product and manual.
■This user manual is used for helping the user operate the 3D printer correctly.
It doesn’t illustrate hardware and software congurations.
■If there is inconsistency between the illustration in this user manual and
the actual product, the actual product shall govern.
Copyright
© 2015-2017 by PanoSpace USA. All rights reserved.

2
Table of content
PANOSPACE ...........................................................................................1
Declaration ...............................................................................................1
Copyright ..................................................................................................1
I. First use................................................................................................5
1.1 Note....................................................................................................5
1.2 Safety .................................................................................................5
1.3 Product Appearance...........................................................................6
1.4 Accessories ........................................................................................6
1.5 Technical Specications.....................................................................7
1.6 Use .....................................................................................................9
1.7 Load Filament.....................................................................................10
1.8 Print 3D Models..................................................................................11
1.9 Post-Process for Printed Objects .......................................................12
II. Learning To Use The Touch Screen .................................................13
2.1 Preheat...............................................................................................13
2.2 Print 3D Models..................................................................................13
2.3 Load Filament.....................................................................................13
2.4 Unload Filament .................................................................................13
2.5 Adjust Level of Print Bed ....................................................................14
2.6 Adjust Gap..........................................................................................16

3
2.7 Settings...............................................................................................16
III. PanoBuilder .......................................................................................18
3.1 Download and Install PanoBuilder......................................................18
3.2 Connecting Printer to PanoBuilder .....................................................18
3.3 Load Digital 3D Model Files into PanoBuilder ....................................19
3.4 Print 3D Models..................................................................................20
3.5 Edit Digital 3D Models ........................................................................24
3.6 Load Filament.....................................................................................26
3.7 Unload Filament .................................................................................26
3.8 Adjust Level of Print Bed ....................................................................26
3.9 Adjust Gap..........................................................................................27
3.10 Adjust Printer....................................................................................27
3.11 Print 3D Models on SD Card ............................................................28
3.12 Calibrate Printer................................................................................28
3.13 Stop Printer.......................................................................................28
3.14 Settings.............................................................................................29
3.15 Update PanoBuilder and Upgrade Firmware....................................29
IV. Maintenance ......................................................................................30
4.1 Regular Cleaning................................................................................30
4.2 Troubleshooting..................................................................................31
V. Support and Services ........................................................................32


5
I. First use
1.1 Note
■ Please read this chapter carefully before rst use.
■Please follow all the safety rules in this manual.
■Do not repair or modify PanoSpace I 3D Printer, doing so will void the warranty.
■ Use of lament and / or components produced by other companies may void
the warranty.
1.2 Safety
■Use the printer in a well ventilated place.
■Do NOT use or store the printer under moist conditions.
■Use the power adaptor supplied by PanoSpace. Power adaptors from other
manufacturers might damage the printer or cause a re.
■Children under 12 using this product should be supervised by a responsible
adult. Printed objects or small parts may present a choking hazard and
should be kept away from young children.
■Do NOT touch the extruder, print bed and all other moving parts while heating or
printing.
■Do NOT use the printer for a long period of time when not present.
■Do NOT cleanup or move the printer when power is on.
■Do NOT use cleaning solvents or solutions to clean the printer. To clean the
printer, use a clean, slightly damp cloth.
■ When removing excess lament, wearing gloves and goggles is suggested.

6
1.3 Product Appearance
Front Back Side
1.4 Accessories
Power Adaptor USB Cable Filament Roll
Teflon Tube Glue Stick Scraper Adjustment Tool
Note: The appearance of some components might be different from the pictures above.
FILAMENT HOLDER COVER
TOP LID
EXTRUDER
PRINT BED
TOUCH SCREEN
POWER SWITCH
POWER SOCKET
USB SOCKET
SD CARD SLOT

7
1.5 Technical Specifications
Printing
Printing Technology: PJP (Plastic Jet Printing)
Max Build Dimensions: 150 mm x 150 mm x 150 mm
(about 6 inch x 6 inch x 6 inch)
Layer Resolution: 0.1 - 0.4 mm
Printing Filament: PLA
Filament Diameter: 1.75 mm
Extruder Quantity: 1
Nozzle Diameter: 0.4 mm
Max Moving Speed: X and Y axis 150 mm/s
Software
Application: PanoBuilder
Operating System: Windows 7+; Mac OS X 10+
File Format: 3MF, STL, PLY
Connection: USB cable, microSD card
Mechanics
Chassis: Steel
Body: ABS
Print bed: Glass
Motor: Stepping motor

8
Electronics
Screen: 3.2 inch resistor touch screen
Input: AC 100 - 240 V, 2 A, 50 / 60 Hz
Output: DC 24 V, 5 A
Operation and Storage Requirement
Printer: 15 - 26 °C (59 - 79 °F), < 70% RH (relative humidity)
Filament: 15 - 26 °C (59 - 79 °F), 25% - 45% RH (relative humidity)
Note: Keep filament away from moist conditions. PLA absorbs water in the air. It might affect print quality. Once
the filament package is opened, it must be used within a reasonable time.
Dimensions and Weight
Dimensions: 407 mm x 288 mm x 333 mm
(16 inch x 11.3 inch x 13.1 inch)
Net Weight: 8.4 kg (18.5 lb)

9
1.6 Use
By now the initialization should be ready.
Note: Please make sure all wires are connected tightly before use.
Tips: Please keep the package materials for later use.
1. Take printer out of the box
and place it on the table.
3. Connect power adaptor.
2. Remove fastening tapes.
4. Turn on power switch. The printer
should start the initialization
process at this point.

10
1.7 Load Filament
1. Open left lament holder cover
and top lid, insert lament
through the right hole on top
of the lament holder.
3. Insert lament through Tef lon
tube.
2. Place lament roll into
the holder and close the
lament holder cover.
4. Insert lament into the hole
on top of the extruder, and
close top lid.

11
5. Click the “Adjust” button on the main menu on the touch screen, then click
“Load lament” button.
6. The extruder heats up the lament and extrudes the lament out of the print head.
7. If the lament doesn’t come out, click the “Extrude” button.
8. Click the “Finish” button after lament is extruded from the print head.
1.8 Print 3D Models
1. Click the “Print” button on the main menu on the touch screen. You should
see a list of pre-installed les.

12
2. Choose any le you want to print.
3. Conrm the information on the screen, check the lament roll to make sure
you have enough for the print.
4. Apply two thin layers of glue to the print bed with the supplied glue stick
before continuing. Then, click the “Continue” button.
5. Your model will start to print at this stage.
1.9 Post-Process for Printed Objects
After printing has nished, use the supplied scraper to remove the printed object
from the print bed.
Remove excess lament and 3D model support carefully.
Tips: Use small tweezers or pliers (not included) and wear gloves and eye protection (not included) to remove
excess filament.

13
II. Learning To Use The Touch Screen
On the touch screen, you can install / uninstall lament, and print a few pre-
installed models.
2.1 Preheat
This is useful for preparation for demonstration or cleaning the print head.
Click the “Preheat” button on the main menu on the touch screen. Toggle the
button to heat up / cool down the print head. The goal temperature can be set
up on the settings page.
2.2 Print 3D Models
See section 1.8
2.3 Load Filament
See section 1.7
2.4 Unload Filament
1. Click the “Adjust” button on the main menu on the touch screen, then click

14
the “Unload lament” button.
2. The extruder heats up the lament and soon pulls the lament out of the print
head.
3. If the lament doesn’t come back from the top of the extruder, click the
“Retract” button.
4. Take out the lament and click the “Finish” button.
Note: When not in use, please insert the filament end into the hole on the edge of the filament roll, to prevent
tangling.
2.5 Adjust Level of Print Bed
Note: With our special printing algorithm, this operation is not necessary for most cases, unless the print bed or
the extruder has changed.
1. Click the “Adjust” button on the main menu on the touch screen, then click
the “Adjust level” button.
2. The print bed will move up and position itself to point A.
3. Click arrow buttons to adjust the gap between the print bed and the print
head. Fold a piece of print paper twice (about 0.4 mm thick), and insert into the
gap. Find out a proper gap that the paper right not able to move any longer.

15
4. From the slot on the back of the print bed, loosen the fastening screw under
point C with a M2.5 Allen wrench.
5. Click the “Go to C” button to point C.
6. Use the supplied adjustment tool to rotate the gear under the point C until
the gap is 0.4 mm. Then go back to the point A and fasten the fastening
screw.
7. Test the gap at the point A. If the gap changed, re-adjust step 3 to step 6.
8. Click the “Go to B” button and adjust the gap of point B, which is similar to the
steps of adjusting the point C.
9. Check the gaps under all three points. If gaps differ too much, redo above steps.

16
10. Now you need to adjust the gap for the rst layer. Click the “Back” button
to continue. Please see details in the next section.
2.6 Adjust Gap
1. Click the “Adjust” button on the main menu on the touch screen, then click
the “Adjust gap” button.
2. The print bed will move up and the extruder moves to the center.
3. Click arrow buttons to adjust the gap between the print bed and the print
head. Fold a piece of print paper twice (about 0.4 mm thick), and insert it into the
gap. Find the proper gap where the paper will not be able to move any longer.
4. Click the “Save” button to nish.
2.7 Settings
Preheat TMP: Setting up the preheat goal temperature. When you load

17
or unload the lament on the touch screen, the print head heats up to this
temperature as well.
Sleep after: Within this amount of time, if there is no operations on the touch
screen, it goes to power save mode. Touch anywhere on the screen can wake it
up.
Language: Setting up display language.

18
III. PanoBuilder
In addition to the pre-installed 3D models, you may print others using the
PanoBuilder application.
3.1 Download and Install PanoBuilder
1. Go to the http://www.3dpanospace.com page, download PanoBuilder installer
for Windows or Mac OS X.
2. Run PanoBuilder installer, follow the setup wizard to nish installation.
Notice: If following window pops up, please click the “Install this driver software anyway” button to continue.
3. Click the icon on the desktop to start PanoBuilder application.
3.2 Connecting Printer to PanoBuilder
Plug the printer cable from your printer to your computer, make sure the printer
is on, and run the PanoBuilder application. The application will search for your
printer automatically and connect to it. Once connected, the icon shows up
in the bottom right corner.
Table of contents
Other PanoSpace 3D Printer manuals