manuals.online logo
Brands
  1. Home
  2. •
  3. Brands
  4. •
  5. Crane
  6. •
  7. Heater
  8. •
  9. Crane EE-8069 User manual

Crane EE-8069 User manual

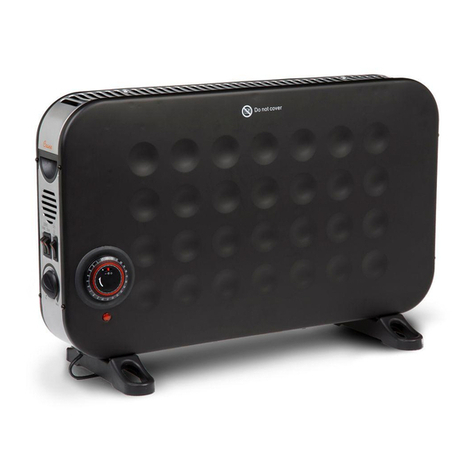
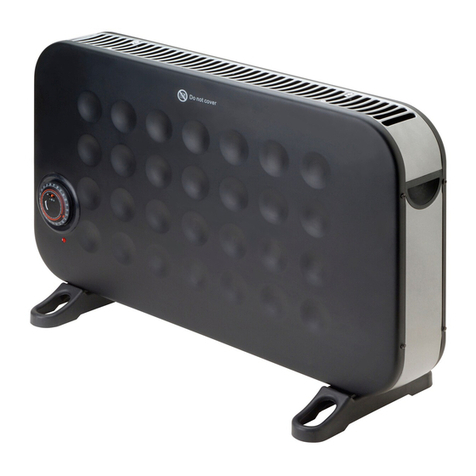
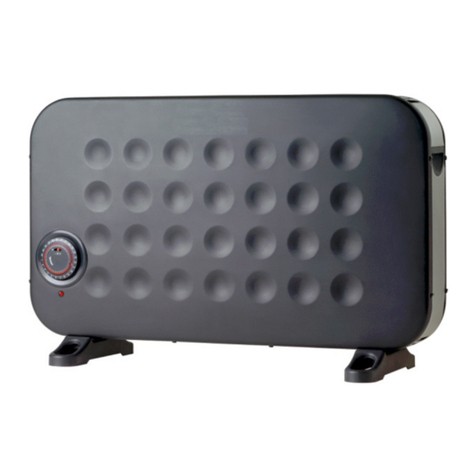
MINI ELECTRIC
CONVECTION HEATER
FOR THE FOLLOWING MODELS:
EE-8069
EE-8069R
EE-8069W
PLEASE READ AND SAVE ALL INSTRUCTIONS TO ENSURE
THE SAFE AND EFFCTIVE USE OF THIS APPLIANCE.
If you ave any questions
about t e operation of
your convection eater, please contact Crane
Customer Care.
Toll Free: 888-599-0992
Email: [email protected]
1
TABLE OF CONTENTS
Table of Contents, Heater Models
P.
Safety Instructions
P. 2-3
List of Main Parts, Technical Specifications
P. 4
Assembly, Operation and Use
P. 5-6
Maintenance
P. 6
Customer Care
P. 7
Warranty
P. 8
H
EATER
MODELS
This instruction manual applies to the following models of the Mini Electric Convection
Heaters product line:
Color Model #
Black EE-8069
Red EE-8069R
White EE-8069W
For information about all CRANE products,
please visit ttp://www.crane-usa.com.
2
IMPORTANT SAFETY INSTRUCTIONS
Always follow basic safety precautions when using electrical products, especially when
children are present.
WARNING: TO AVOID THE RISK OF ELECTRICAL SHOCK, ALWAYS MAKE SURE THE
PRODUCT IS UNPLUGGED FROM THE ELECTRICAL OUTLET BEFORE RELOCATING,
SERVICING, OR CLEANING IT.
WARNING!
READ AND SAVE THESE INSTRUCTIONS. Failure to follow all of
the instructions listed below may result in electric shock, fire and/or serious personal
injury.
. This product is intended for indoor, non-commercial, household use for temporarily
heating residential rooms. Do not use the product for any other purpose.
2. Do not leave the product unattended while it is in use. Always unplug the product
from the electrical outlet when it is not in use.
3. Keep the product out of the reach of children and pets. This product is not intended
for use by children.
4. Place the product on a flat, steady, stable, heat-resistant surface.
5. This product has hot parts inside. Do not use it in areas where gasoline, paint, or
flammable liquids are used or stored, as there may be a risk of fire or explosion.
6. Use the product in a well-ventilated area. This heater is hot when in use. To avoid
burns, do not let bare skin touch a hot surface. Keep combustible materials, such as
furniture, pillows, bedding, paper, clothes, and curtains at least 3 feet (0.9 meters)
from all sides of the heater.
7. Use this heater only as described in this manual. Any other use not recommended
by the manufacturer may cause fire, electric shock, or personal injury.
8. Do not insert or allow foreign objects to enter any opening on the heater as this may
cause an electric shock, fire, or product damage.
9. Do not use this product to dry or heat clothing, shoes, pipes, or any other item.
0. This heater is not intended for use in damp/wet locations. Do not use in the
immediate vicinity of the bathtub or shower. The heater should be out of reach of
persons who are using the bath or shower.
. Do not move the product when it is heated. Allow the product to thoroughly cool
before handling it.
2. Plug the product into a standard 20V AC electrical outlet.
3. Do not allow the Power Cord to hang (e.g., over the edge of a table or counter) or
place/run the Power Cord under rugs, carpeting, or in high-traffic areas where it may
be tripped over or pulled. The appliance must not be located immediately below a
socket-outlet or in front of a wall socket.
4. The appliance must not be covered by towels, curtains, etc. as there is a danger of
overheating when it is covered.
5. To disconnect the product, turn the controls to the off position, then remove the plug
from the electrical outlet. Never pull on the Power Cord when disconnecting from
power outlet.
6. Do not put any stress on the Power Cord where it connects to the product, as the
Power Cord could fray and break.
7. Do not plug or unplug the product from the electrical outlet with wet hands.
8. Keep the Power Cord and product away from heated surfaces.
9. Do not operate any heater with a damaged cord or plug, after the heater
malfunctions, or has been dropped or damaged in any manner. Return the product
to a service facility for examination, electrical or mechanical adjustment, or repair.
20. To prevent a possible fire, do not block heat in any manner. In order to avoid
overheating, do not cover the heater. Never cover the top or bottom heat vents.
SAVE ALL INSTRUCTIONS!
3
GENERAL SAFETY INSTRUCTIONS
WARNING!
Read and understand all instructions. Failure to follow all instructions
listed below may result in electric shock, fire or serious personal injury. The warnings,
cautions, and instructions discussed in this instruction manual cannot cover all possible
conditions and situations that may occur. It must be understood by the user that
common sense and caution are a factor which cannot be built into this product, but must
be supplied by the user.
SPECIAL INSTRUCTIONS
•To avoid a circuit overload when using this product, do not operate another high-
wattage product on the same electrical circuit.
•Avoid the use of an extension cord because the extension cord may overheat and
cause a risk of fire.
SAVE ALL INSTRUCTIONS!
CAUTION:
A short Power Supply Cord is provided to reduce the risk of personal
injury resulting from becoming entangled in or tripping over a longer cord. Extension
cords are available from local hardware stores and may be used if care is exercised in
their use. If an extension cord is required, special care and caution is necessary. Also
the extension cord must be ( ) marked with an electrical rating of 25 V and at least 3
A., 625 W., and (2) the cord must be arranged so that it will not drape over the
countertop or tabletop where it can be pulled on by children or accidently tripped over.
ELECTRIC POWER
If the electric circuit is overloaded by other appliances, your humidifier and/or
appliances may not operate properly. The humidifier should be operated on a separate
electrical circuit from other operating appliances.
POLARIZED GROUND FAULT CIRCUIT INTERRUPTER PLUG
This Mini Electric Convection Heater is provided with a ground fault circuit interrupter
(GFCI) built into the plug of the power supply cord. This device provides additional
protection from the risk of electrical shock. The ground fault circuit interrupter (GFCI)
must be tested before each use.
. Plug ground fault interrupter into a powered outlet.
2. Press the test button
3. Reset button will pop up. If not. Do not use appliance.
4. Press the rest button to restore power.
SAFETY WARNING
Although this appliance is easy to operate, for your safety, the below warnings must be
followed:
. Do not place the appliance near a heat source.
2. Never leave the appliance unattended while connected to the electrical outlet.
3. To avoid any accidental burns, never place hand on top vent or side when the
appliance is in operation.
4. Use the appliance on a stable surface away from water.
5. Do not unplug from the socket by pulling on the supply cord.
6. The appliance must be unplugged:
A. Before any cleaning
B. After use
C. If it appears to be faulty
THIS PRODUCT IS INTENDED FOR HOUSEHOLD USE ONLY.
4
LIST OF MAIN PARTS
Parts Description:
. Thermostat Controlled Knob
2. On / Off Switch
3. Indicator Light
4. Feet
5. Wall Mounting Brackets
6. Power Cord
TECHNICAL SP
ECIFICATIONS
Voltage 20 VAC / 60Hz
Maximum Power 400 W
Recommended Room Size Up to 250 ft / 23 M²
5
2
3
4
6
(back of unit)
5
ASSEMBLY
WARNING:
Risk of Fire – Do not operate wit out legs attac ed to eater, or
eater mounted to wall.
Assembly for Floor Operation
Attac ing Feet
. Before using the heater, attach the feet
(included separately) to the unit.
2. Attach to the base of the heater using the 4
tapping screws provided, taking care to ensure
that they are located correctly in the bottom
ends of the heater.
Assembly for Wall Mount Operation
Wall Mounting Instructions
Note: Wall anchor and mounting screws are not provided. You will need 6 anchors and
6 mounting screws before beginning mounting.
. Using the mounting brackets as a guide, mark
the holes for the brackets on the right side.
2. Move the wall mounting brackets, and drill the
first set of screw holes.
3. Insert mounting anchors into the drilled holes.
4. Insert a mounting screw into each of the top
2 anchors.
5. Slide the mounting brackets onto the screws
through the mount support and anchor.
Tighten the screw lightly.
6. Hold the heater level and use the other side of
the wall mounting brackets to mark the
second group of screw holes on the wall.
7. Remove the mounting brackets from the wall and drill the second set of holes.
8. Insert mounting anchors into the second set of drilled holes.
9. Insert a mounting screw into each of the top 2 anchors.
0. Slide the mounting brackets onto both sets of screws.
. Insert a mounting screw into each of the bottom brackets
2. Firmly tighten all 6 screws to secure heater to the wall.
OPERATION
AND USE
NOTE: It is normal for the heater to emit some odor when it is turned on for the first
time or after having not been used for a long period of time. This will disappear when
the heater has been on a short while.
. Ensure that the power cord is rolled out.
2. Choose a suitable location for the heater, taking into account the previously
stated safety instructions.
3. Insert the plug of the heater into a suitable outlet.
tapping screws
6
4. Press reset button on GFI plug.
5. Turn the thermostat knob fully in a clockwise direction to the maximum setting.
6. Turn on the Heater.
7. When the desired room
temperature has been
reached, turn the
thermostat knob counter
clockwise until you hear a
click. The heater will keep
the air temperature in the
room at the set temperature
by switching on and off automatically.
8. When set at minimum (fully counter-clockwise) position (depending on the size of
the room) the heater will maintain the temperature above freezing.
9. The indicator light will stay on to let the user know that the heater is connected
to an electrical power source.
OVERHEAT PROTECTION
The heater has an internal, over-heating safety device which automatically switches the
heater off if an over-heat situation is detected. If this should occur, unplug the
appliance and wait until the unit cools off. Once the unit has fully cooled, you can switch
it on again.
ANTI-FREEZING SAFETY LEVEL
In order to avoid the temperature dropping under approximately 32 degrees Fahrenheit
(for instance, when you are absent for a long time), you can turn the thermostat knob to
the anti-freezing safety level at the “Minimum” position.
MAINTENANCE
CAUTION:
Always be sure t at t e eater is switc ed OFF, unplugged and completely
cooled before cleaning or attempting to store t e item. Do not immerse eater
in water or allow water to drip into t e interior of t e eater, as t is could
create an electric s ock azard.
CARE AND CLEANING
. Clean the outside of the heater by wiping with a damp cloth and buff with a dry
cloth.
2. DO NOT use any detergents or abrasives and do not allow any water to enter the
heater.
Please Note: Regardless of the type of heating system setup, always install and
maintain at least one smoke detector in good working condition on each floor of your
home. Periodically check and/or replace the battery in your smoke detector with a fresh
battery.
STORING
Allow the appliance to cool completely before storing. Store the appliance in a dry
location. Do not place any heavy items on top of appliance during storage as this may
result in possible damage of appliance. Store the cord in a clean, dry location away
7
from metal objects. Always check the plug before use to assure metal items have not
become attached
.
CUSTOMER CARE
If you have any questions with regard to the operation of this convection
heater or are in need of a spare part, please contact Crane Customer
Care.
Crane USA, Inc.
62 IL Route 83, Suite 202
Bensenville, Illinois 60 06
Toll Free: -888-599-0992 (Monday - Friday 9:00am - 4:00pm CST)
Email: customer-ser[email protected]
Website: http://www.crane-usa.com
NOTE: Spare Parts can also be purchased online at http://www.crane-
usa.com.
ENVIRONMENTAL PROTECTION
If the heater should no longer operate, please be sure to dispose of the unit in an
environmentally friendly way by taking it into a public collection point. Please do not
place broken heaters with your regular household waste.
8
LIMITED WARRANTY
Thank you for purchasing a Crane product. This Convection Heater was tested
and meets our stringent quality standards. This product is warrantied to be free
from manufacturing defects under normal use and conditions for year.
PLEASE DO NOT RETURN THIS PRODUCT TO THE STORE. CALL US FOR
PROBLEMS AND QUESTIONS. WE CAN HELP.
If you experience unsatisfactory operation, first refer to the troubleshooting
section in the manual to ensure that it is not due to care or cleaning. Follow Care
and Cleaning Instructions from manual. You can also visit www.crane-usa.com
Customer Care for information.
If you have any questions or comments, please call Crane Customer Care, Toll
Free: 888-599-0992 or Email customer-service@crane-usa.com. Please specify
the style and model number so our Customer Care Department can assist you.
WARRANTY REQUIRES A DATED PROOF OF PURCHASE.
This warranty is void if the defect is due to accidental damage, misuse, abuse,
neglect, improper repair or alteration by unauthorized persons, or a failure to
follow operating instructions provided with the product. This warranty does not
apply to normal wear and tear or commercial use.
The warranty is non-transferable and applies only to the original purchaser and
does not extend to subsequent owners of the product. Liability under this
warranty is limited to repair or replacement. In no event shall liability exceed the
purchase price paid by the purchaser of the product. Under no circumstances
shall there be liability for any loss - direct, indirect or incidental – or consequential
damage arising out of, or in connection with the use of this product.
T is warranty is valid only in t e 48 contiguous states plus t e District of
Columbia and excludes Puerto Rico and the Virgin Islands. This warranty is
effective only if the product is purchased and operated in the United States of
America.
This warranty gives you specific legal rights; however you may have other rights
that vary from state to state. Some states do not allow limitation on implied
warranties or exclusion of consequential damages; therefore these restrictions
may not apply to you.
Any instructions or warranty included in this manual may be subject to change
without notice. For the most up-to-date instructions and warranty information,
please contact us or visit our website.
To receive warranty instructions and return authorization, please call or email
Crane Customer Care.
Crane USA, Inc.
62 Route 83, Ste 202, Bensenville, Illinois 60 06
Toll Free: -888-599-0992 (Monday - Friday 9:00am - 4:00pm CST)
Email: customer-service@crane-usa.com
Website: http://www.crane-usa.com
CRANE WARRANTY

Other manuals for EE-8069

1

This manual suits for next models

2

Other Crane Heater manuals

Crane EE-6490 User manual

Crane

Crane EE-6490 User manual

Crane EE-8083 User manual

Crane

Crane EE-8083 User manual

Crane EE-8084 User manual

Crane

Crane EE-8084 User manual

Crane EE-8079 User manual

Crane

Crane EE-8079 User manual

Crane Infrared smartHEATER EE-8077W User manual
Crane

Crane Infrared smartHEATER EE-8077W User manual

Crane EE-6353 User manual

Crane

Crane EE-6353 User manual

Crane EE-6490W User manual

Crane

Crane EE-6490W User manual

Crane EE-8079GR User manual

Crane

Crane EE-8079GR User manual

Crane HMC-1500T-TIM User manual

Crane

Crane HMC-1500T-TIM User manual

Crane EE-7589 User manual

Crane

Crane EE-7589 User manual

Crane EE-8069 User manual

Crane

Crane EE-8069 User manual

Crane Infrared smartHEATER EE-8077W User manual

Crane

Crane Infrared smartHEATER EE-8077W User manual

Crane HMC-1500T-TIM User manual

Crane

Crane HMC-1500T-TIM User manual

Crane EE-6492 User manual

Crane

Crane EE-6492 User manual

Crane EE-7588R User manual

Crane

Crane EE-7588R User manual

Crane EE-6490 User manual

Crane

Crane EE-6490 User manual

Crane Infrared smartHEATER EE-8077W User manual

Crane

Crane Infrared smartHEATER EE-8077W User manual

Crane EE-6491 User manual

Crane

Crane EE-6491 User manual

Crane EE-8080 User manual

Crane

Crane EE-8080 User manual

Crane EE-6353 User manual

Crane

Crane EE-6353 User manual

Crane EE-8083 User manual

Crane

Crane EE-8083 User manual
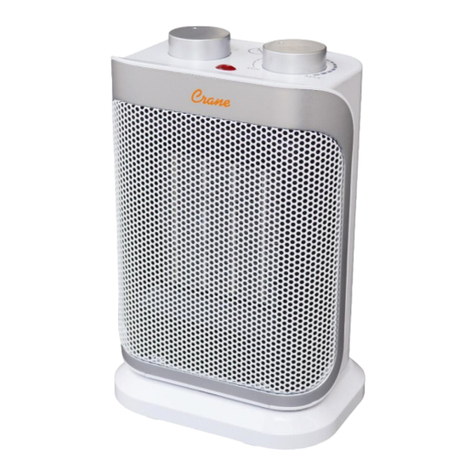
Crane EE-8068 User manual

Crane

Crane EE-8068 User manual

Crane EE-7588BK User manual

Crane

Crane EE-7588BK User manual

Crane EE-8068 User manual

Crane

Crane EE-8068 User manual

Popular Heater manuals by other brands

Olimpia splendid CALDOSTILE D Instructions for installation, use and maintenance

Olimpia splendid

Olimpia splendid CALDOSTILE D Instructions for installation, use and maintenance

Zibro Laser FF 55 operating instructions

Zibro

Zibro Laser FF 55 operating instructions

Ridea ROUND-AL BATH INSTALLATION AND INSTRUCTION

Ridea

Ridea ROUND-AL BATH INSTALLATION AND INSTRUCTION

Tylo Sense Combi-U7 manual

Tylo

Tylo Sense Combi-U7 manual

Futura ECO FAH600 Original operating instructions

Futura

Futura ECO FAH600 Original operating instructions

Narita NH-1500B instruction manual

Narita

Narita NH-1500B instruction manual

Reznor VPS Installation & operation manual

Reznor

Reznor VPS Installation & operation manual

Dimplex DHCB20 instruction manual

Dimplex

Dimplex DHCB20 instruction manual

BELLAGIO H1C009WSNB owner's manual

BELLAGIO

BELLAGIO H1C009WSNB owner's manual

Taurus Cairo 600 manual

Taurus

Taurus Cairo 600 manual

Arlec MTH8 user manual

Arlec

Arlec MTH8 user manual

Rinnai RCE-460PTR Service manual

Rinnai

Rinnai RCE-460PTR Service manual

JML Handy Heater instruction manual

JML

JML Handy Heater instruction manual

Dimplex BY 802 S Installation and operating instructions

Dimplex

Dimplex BY 802 S Installation and operating instructions

Skope 988E operating instructions

Skope

Skope 988E operating instructions

AREBOS AR-HE-THS2000/B user manual

AREBOS

AREBOS AR-HE-THS2000/B user manual

Midea NY2513-13A1L owner's manual

Midea

Midea NY2513-13A1L owner's manual

Zibro R 421 E operating manual

Zibro

Zibro R 421 E operating manual

manuals.online logo
manuals.online logoBrands
  • About & Mission
  • Contact us
  • Privacy Policy
  • Terms and Conditions

Copyright 2025 Manuals.Online. All Rights Reserved.