Crane AU4-PF-7GA User manual

Page 1
Fitness watch with speed and distance
tracking
Pulse measuring without chest strap
Operating instructions
Item No.: AU4-PF-7GA/7GB/7GC
Issue: January 2014
TABLE OF CONTENTS
1Area of Application 1
2Safety and Servicing 1
2.1 Safety Instructions .................................................. 1
2.2 Batteries..................................................................1
2.3 Operational Environment Conditions .....................1
2.4 Water Resistance ....................................................1
2.5 Disposal .................................................................. 1
2.6 Cleaning and Care................................................... 1
2.7 Storage.................................................................... 1
2.8 Notes on operating instructions .............................. 1
2.9 Scope of Supply...................................................... 2
3Getting Started 2
4Function Keys/Modes/Settings 2
4.1 Function Keys of the Fitness Watch....................... 2
4.2 Main Function Modes.............................................2
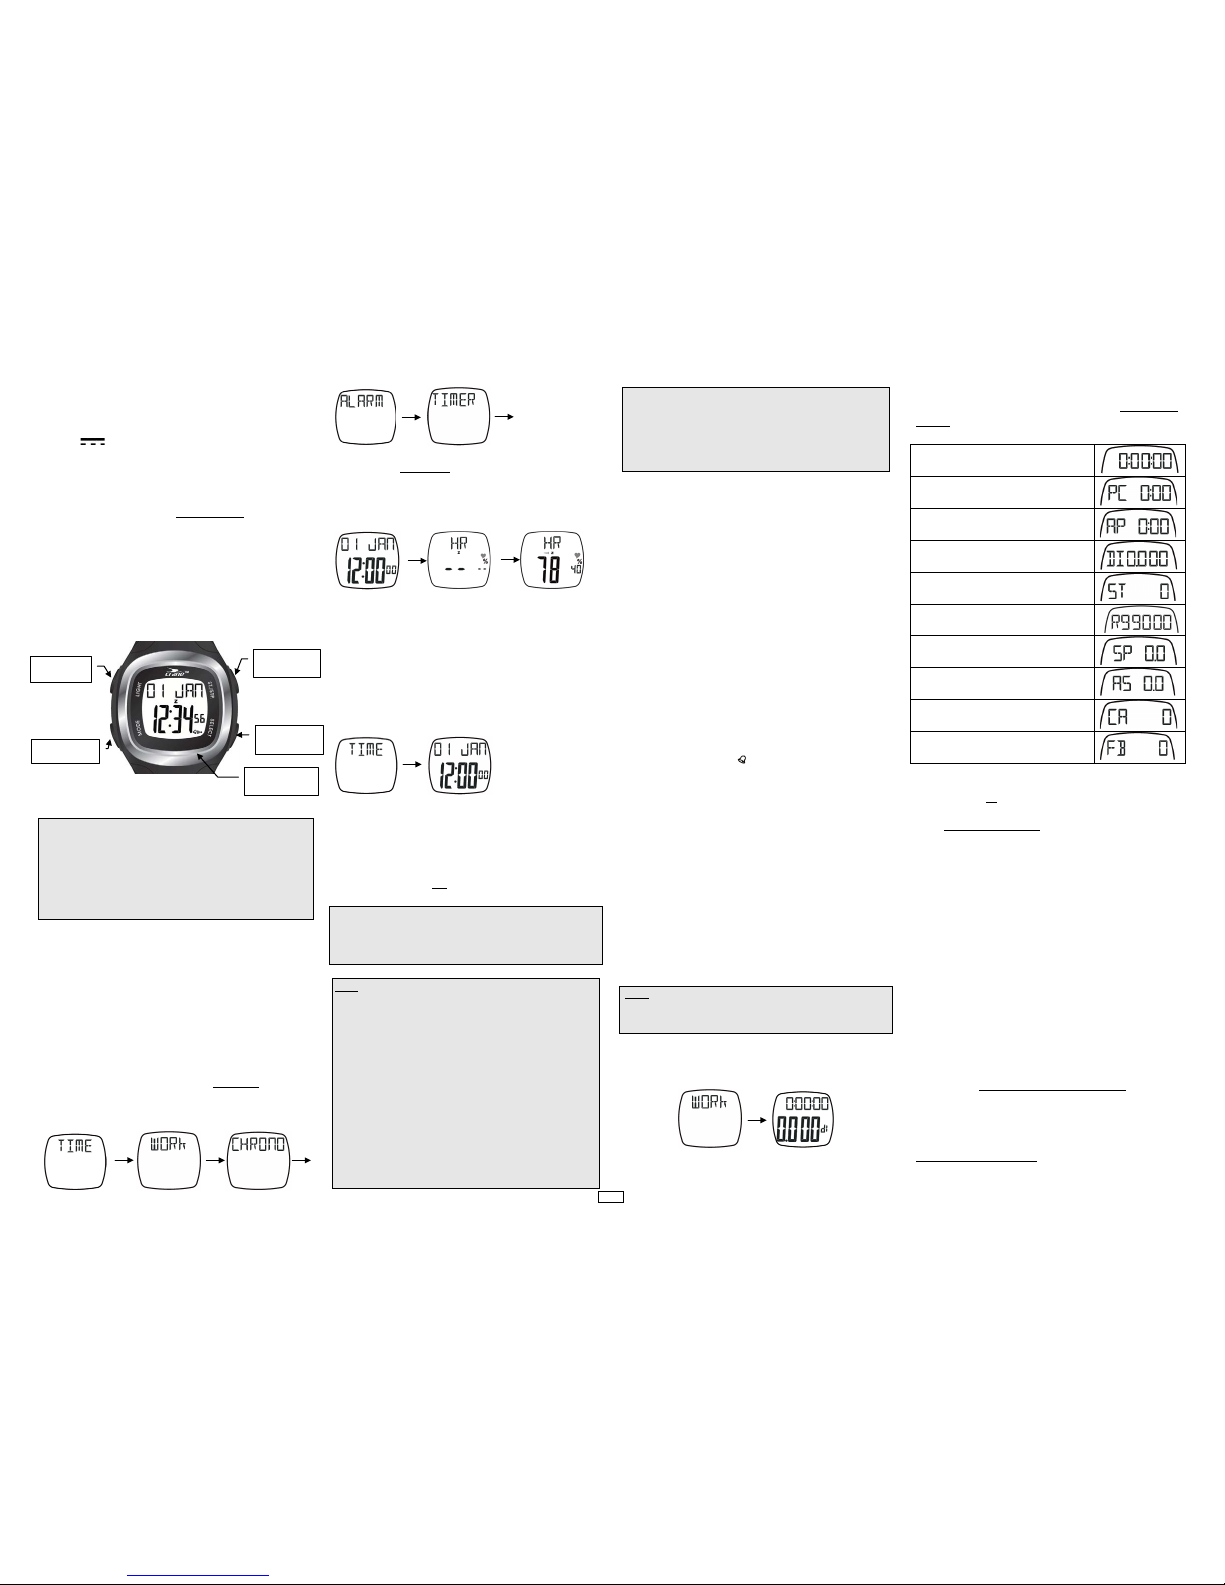
4.3 Time Mode..............................................................2
4.3.1 Basic Setting ..................................................2
4.4 Training Mode ........................................................ 2
4.4.1 Setting of Training Zones and Target Steps...2
4.4.2 Target Steps with Progress Bar......................3
4.4.3 Training.......................................................... 3
4.5 Stopwatch Mode.....................................................3
4.5.1 Addition Stopping..........................................3
4.5.2 Split Times Stopping...................................... 3
4.6 Alarm Mode............................................................ 3
4.6.1 Hourly Alarm ................................................. 3
4.6.2 Daily Alarm ................................................... 3
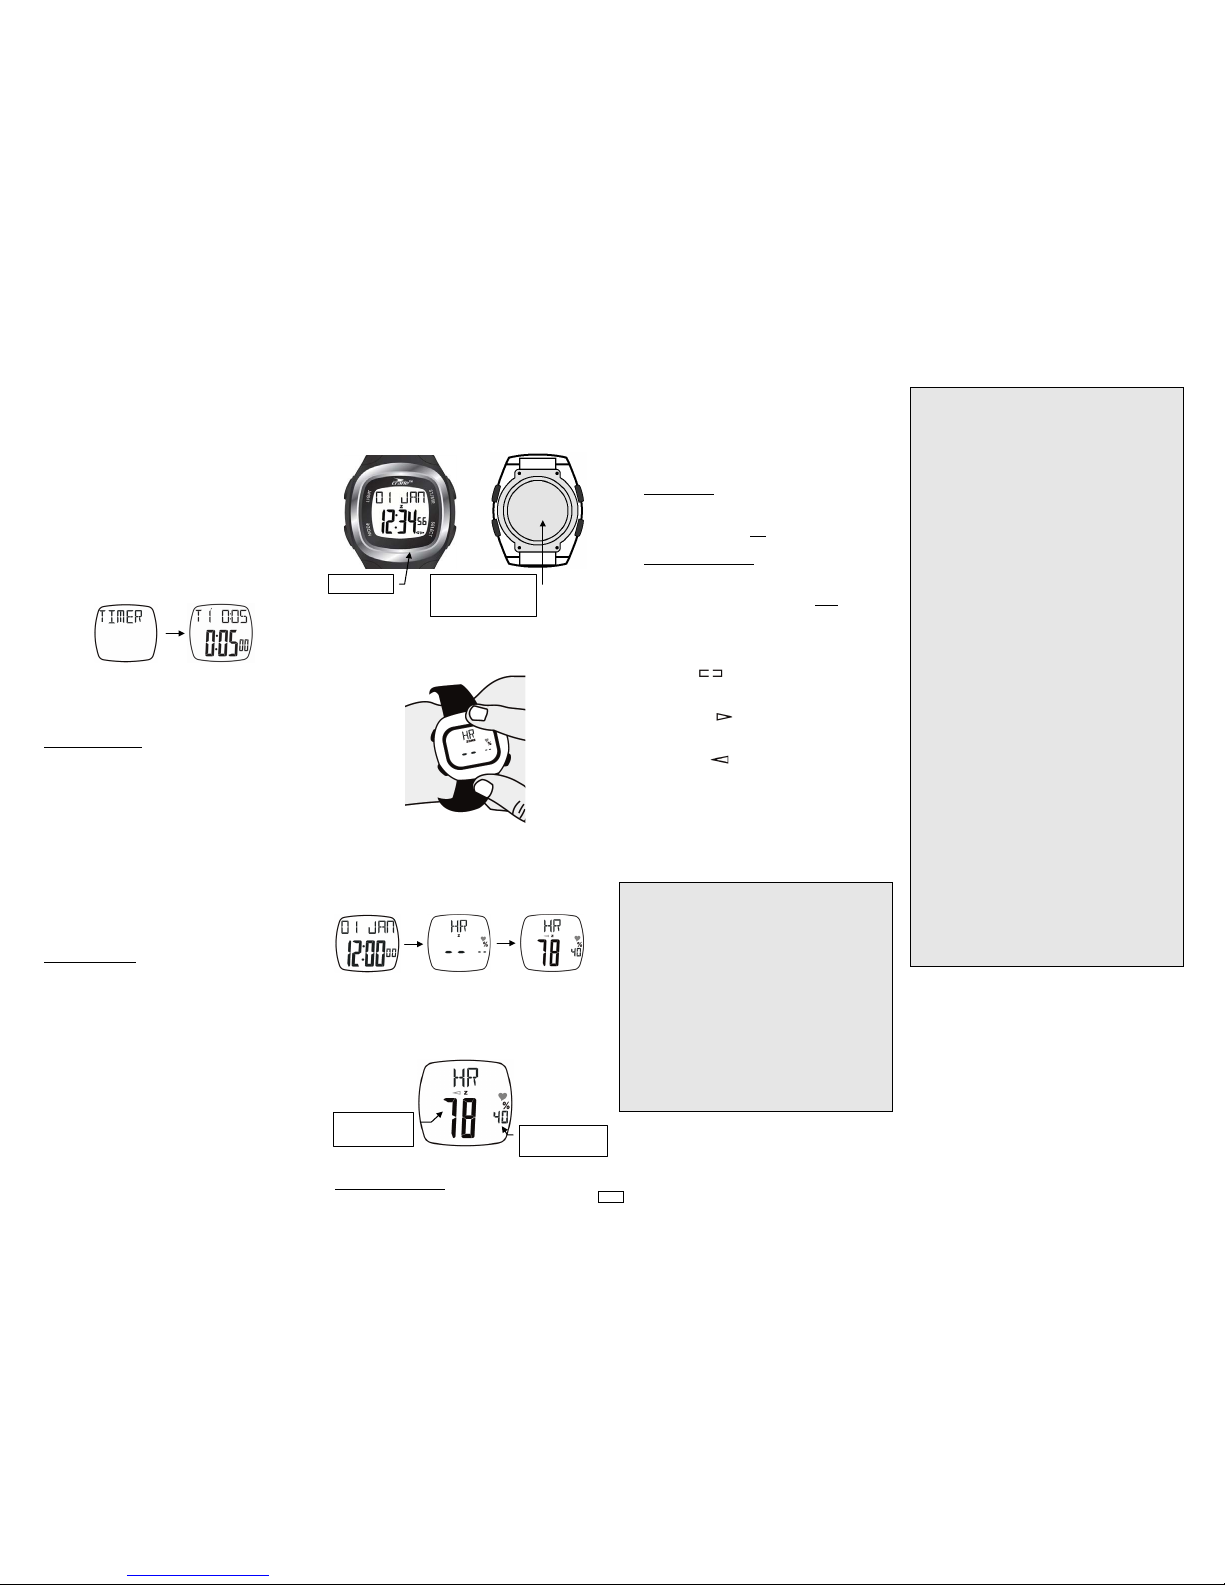
4.7 Countdown-Mode with Interval Timer................... 4
4.8 Pulse Mode ............................................................. 4
4.8.1 Pulse Measurement ........................................4
4.8.2 Pulse Alarm....................................................4
4.9 Power Saving.......................................................... 5
4.10 Display Light...................................................... 5
4.11 Specifications ..................................................... 5
4.12 Battery Change...................................................5
5Conformity 5
6Troubleshooting/FAQs 5
1Area of Application
The fitness watch is intended for use as a wrist watch.
Additionally it can also be used as a training tool for
measurement and display of your pulse. It has been designed
for personal use and is not suitable for any commercial
purpose. The fitness watch is not a medical device. Please read
the operating instructions to learn about all functions of your
fitness watch and ensure flawless operation. All specified data
are merely for guidance. Subject to technical modifications.
2Safety and Servicing
Please read the safety instructions carefully and only use the
fitness watch as described in these instructions to avoid
accidental injuries or damage. Retain these instructions for
future reference. These instructions should be handed over
when passed on to a new owner.
2.1 Safety Instructions
Important: Always consult a physician before starting a
regular training program. The fitness watch is not a medical
device, it is a training tool to measure and display your pulse.
Pacemaker users should only use pulse measuring devices after
consulting a physician.
Risks for children and individuals requiring
assistance:
This device is not intended for use by children aged
eight (8) upwards and individuals with limited
physical, sensorial or emotional capacities or limited
experience and / or knowledge unless they are
supervised by an individual responsible for their
safety or receive instructions from the latter as to
how the device should be used and have understood
the dangers arising from it. Children should be
supervised in order to ensure that they do not play
with the device. Cleaning and user maintenance may
not be performed by children without supervision.
For more information, please visit
www.produktservice.info
2.2 Batteries
Your fitness watch runs on a 3 V CR2032 battery.
Below are some directions on the use of batteries:
•Never expose the battery to excessive heat such as
sunlight, fire or the like - increased danger of leakage!
•Never recharge the battery.
•Do not short-circuit the battery and do not take it apart –
explosion hazard!
•If necessary clean the battery and unit contacts before
inserting the battery.
•Flat batteries should be immediately removed from the
device. There is increased danger of leakage.
•Remove the battery when the device is not in use for a
longer period of time.
•Caution! There is a risk of explosion if the battery is not
changed correctly. Only replace the battery with one of the
same or similar type.
•Keep the batteries and fitness watch out of reach of
children. Batteries can be swallowed by children. Seek
immediate medical attention if this happens.
•Avoid contact with skin, eyes and mucous membrane if
leakage occurs. Upon contact with battery acid rinse the
affected area with plenty of water and seek medical help
immediately.
Non-compliance with these instructions can lead to damage
and under certain circumstances to explosion of the batteries.
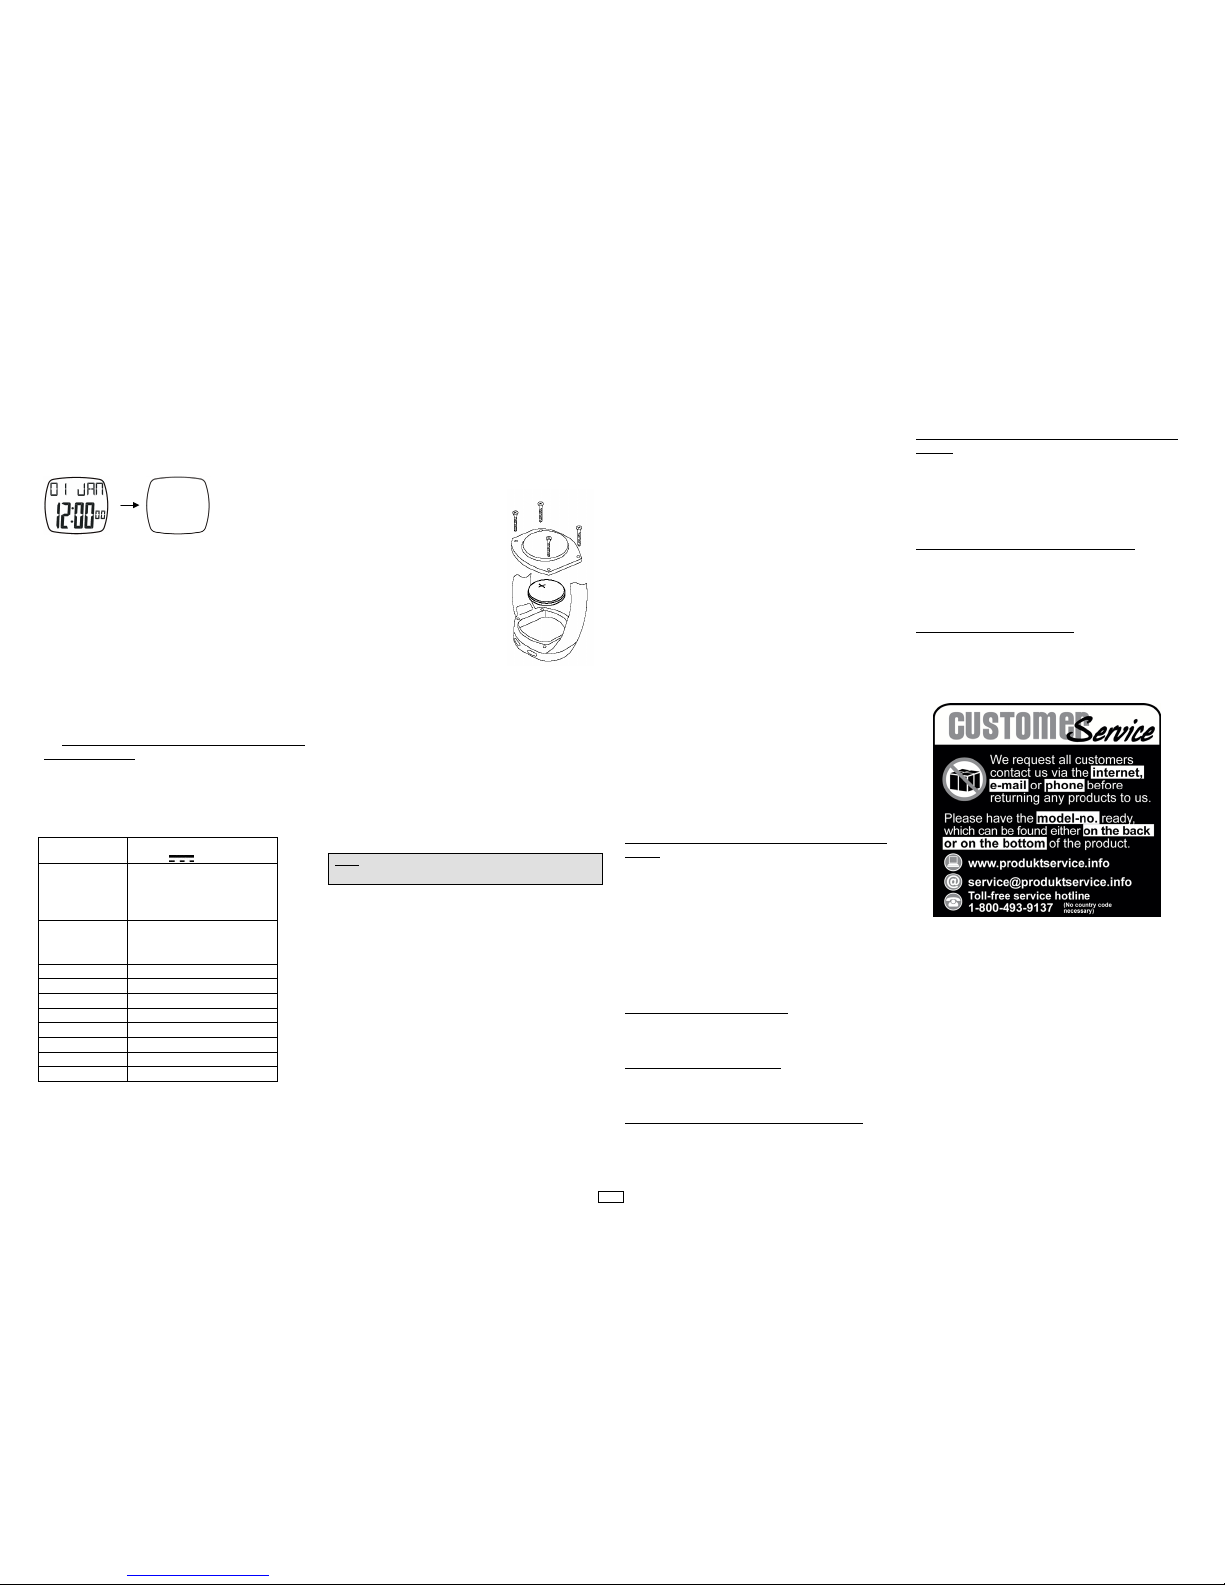
Details on how to change the batteries can be found under
Section 4.12 „Battery change“.
2.3 Operational Environment Conditions
The fitness watch can be operated continuously at an ambient
temperature of 32 °F to 122 °F. The fitness watch is protected
against shocks which may occur during normal wear on the
wrist. No evidence of condensation is allowed in a quartz
watch as this might trigger a short circuit. The fitness watch
should therefore never be exposed to extreme changes in
temperature. The unit should never be placed near very strong
magnet fields (e.g. electrical welding equipment, current
transformers) as this could cause variations in the time
measurement. Non-compliance with these directions can result
in malfunction or damage of the fitness watch.
2.4 Water Resistance
The fitness watch is water resistant up to 50 m. The following
table displays the activities and conditions suited for the
fitness watch. This information is based on a water resistance
test in compliance with DIN 8310.
Be careful not to press the keys when the watch is wet.
Water can only enter the casing through the keys and damage
the movement. Please bear in mind that salt water and thermal
water can cause corrosion of metal parts.
Please be aware that water resistance cannot be guaranteed
under extreme temperature changes (e.g. from the sauna to the
diving pool, from sun bathing into the cold sea). Changes in
temperature can cause condensation, thus damaging the
movement.
To guarantee the water resistance of your fitness watch the
battery exchange should be carried out by a watch
professional or a service centre to avoid damage to the sealing
ring and case.
2.5 Disposal
Batteries
Do not put in trash. Recycle or manage as hazardous waste.
Product
If you wish to dispose of your watch, follow the provisions
current at the time. Information may be obtained from the local
council waste disposal facility.
KRIPPL-WATCHES
Warenhandels GmbH
Maria-Theresia-Strasse 41, 4600 Wels, AUSTRIA
Packaging
Dispose of the watch packaging in accordance with the current
provisions. Information may be obtained from the local council
waste disposal facility.
2.6 Cleaning and Care
Use only a soft, damp, lint-free cloth to clean the fitness watch.
Do not use solvents, abrasive or gaseous cleaning materials.
Ensure that all water droplets are removed from the display.
Water can cause permanent discolouration. Ensure that the
fitness watch display is not exposed to glaring sunlight or
ultraviolet rays.
2.7 Storage
Store the fitness watch in a cool and dry place. Once the
battery has been removed, the fitness watch can be stored at
14 °F to 140 °F.
2.8 Notes on operating instructions
We have structured the operating instructions for this fitness
watch in such a way that you can always find the information
you require using the themed topics in the table of contents.
Additionally, you can refer to the FAQ section on our online
product service page for further help with your fitness watch.
http://www.produktservice.info EAN Code: 20009212

Page 2
2.9 Scope of Supply
1 fitness watch AU4-PF-7GA/7GB/7GC
1 x 3 V battery type CR2032 (preinstalled)
(1 x 3 V 0.5 mA CR2032)
Instruction manual, warranty card
3Getting Started
When starting the fitness watch for the first time please remove
the protective film and press any key. You will now
automatically access the time mode (see section 4.3 “Time
Mode“).
4Function Keys/Modes/Settings
4.1 Function Keys of the Fitness Watch
For all setting steps described in the following chapters please
be aware that:
•If you do not press a key for longer than 90 seconds during
the setting, the fitness watch will abandon the setting
mode.
•By holding the “ST./STP.“ or the „SELECT“ key you can
fast-forward.
4.2 Main Function Modes
The fitness watch offers five main function modes which are
described in detail in the following chapters:
- Time mode
- Training mode
- Stopwatch mode
- Alarm mode
- Countdown mode
- Pulse mode
The first mode to be displayed is the time mode. Press the
„MODE“ key to switch between the time, training, stopwatch,
alarm and countdown modes.
To access the pulse mode from any mode press with your
index finger on the sensor surface for approx. 5-8 seconds. The
back of the fitness watch housing must be in contact with your
wrist.
Any mode Pulse measurement Pulse indication
The individual modes are explained in detail from section 4.3
to section 4.8.
4.3 Time Mode
Keep pressing the „MODE“ key down until accessing the time
mode, displayed as „TIME“:
The time mode shows the time in the bottom segment of the
display. Press the “SELECT” key between the display “Day
and Month” to change between “Week day and Day”.
Before adjusting the basic settings, you need to calculate your
step length for walking and running.
Walk or run a pre-determined distance (e.g. 100 metres).
Calculate your step length by dividing the distance by the
number of steps. This will give you a good average value of
your step length.
Note:
Whether you only want to either walk or to run, the step
length for both WALKING and RUNNING should always
be set to obtain relevant results.
If you do not calculate your personal step length for walking
and running and save these settings in the fitness watch, the
displayed values will not be as accurate. The watch will
instead rely on standard values which do not fit your personal
step profile.
To obtain reliable results, please keep your pace and
rhythm as adopted when calculating the step length for
both walking and running.
The longer the distance you chose for the calculation of the
step length the more accurate the results will be.
The fitness watch automatically recognises whether you are
walking or running during your training and will display the
distance, speed, steps, etc. accordingly.
4.3.1 Basic Setting
•Press the „MODE“ key for approx. 3 seconds. Use the
„ST./STP.“ or the „SELECT“ key to choose either
German (DEU) or English (ENG). Confirm your selection
by pressing the „MODE“ key.
•The seconds flash. Use the „ST./STP.“ or the „SELECT“
key to reset the seconds to zero. Confirm your selection
by pressing the „MODE“ key.
•The minutes flash. Increase the minutes with the
„ST./STP.“ key or reduce it with the „SELECT“ key.
Confirm your selection by pressing the „MODE“ key.
•Set the other settings as described above.
Hours
Year
Month
Day
Day format (day-month or month-day)
Time format (12-h or 24-h display)
Hourly alarm (on or off)
Key tones (on or off)
Gender
Year of birth
Unit (metric = kg and cm or British = lbs and inch)
Size
Weight
Step length - Walking
Step length – Running
Daily reset (on or off)
•Press the „MODE“ key for approx. 3 seconds. All settings
have now been saved.
4.4 Training Mode
Note:To ensure correct measurements in the training mode,
the fitness watch needs to be attached either to the right or the
left wrist.
Keep pressing the „MODE“ key down until the training mode
„WORK“ is displayed:
Press the „SELECT“ key to select the following displays
(training data). They will be displayed in the upper display
segment.
Training time
Current pace (PC)
= Minutes per kilometre/mile
Average pace (AP)
Distance (DI)
Steps (ST)
Remaining steps (R)
Current speed (SP)
Average speed (AS)
Calorie consumption (CA)
Fatburning (FB)
By pressing the „SELECT“ key for approx. 3 seconds in one of
these 9 displays, all values will be set to zero.
In the lower display segment, speed, pace and distance can be
selected.
•Keep the „MODE“ key pressed for approx. 3 seconds.
Using the „ST./STP.“ or the „SELECT“ key to select the
current speed (SPD), the current pace (PACE) or the
distance (DIST)
•Note: The display selected in the lower display segment
(speed - SPD, current pace - PACE or distance - DIST)
will NOT be displayed again in the upper display segment
by pressing the „SELECT“ key.
Press the „MODE“ key for approx. 3 seconds. All settings have
now been saved.
4.4.1 Setting of Training Zones and Target Steps
Before performing a pulse measurement, we recommend
adjusting the lower and the upper pulse limit. Adjust the
limits according to the goal of your training. The fitness watch
has three preset training zones and 1 training zone that can be
freely adjusted.
Health training (HEALTH)
Pulse lower limit 50% (of the maximum pulse)
Pulse upper limit 65%
„LIGHT“-
key
„SELECT“-
key
„ST./STP.“-
key
„MODE“-
key
Sensor
surface

Page 3
This training is suitable for long training sessions with reduced
effort. Exercises in this range improve both your mental as
well as physical well-being.
Fatburning training (FAT-B)
Pulse lower limit 55%
Pulse upper limit 75%
This training is suitable for athletes who want to burn fat.
Aerobic training (AROBIC)
Pulse lower limit 65 %
Pulse upper limit 80%
This training is suitable for athletes who want to improve their
performance and stamina combined with a high consumption
of calories.
•Press the „MODE“ key for approx. 3 seconds. Press the
„MODE“ key once again to confirm the previously
selected mode (display for the lower display segment).
•Press the „ST./STP.“ or „SELECT“ key to select the
predefined training zones health (HEALTH), fatburning
(FAT-B) and aerobic (AROBIC) or the freely adjustable
training zone (MY). Confirm the selection by pressing the
„MODE“ key.
•The pulse value for the lower pulse limit flashes and the
percentage of the max. pulse is displayed on the right. Set
the pulse value using the „ST./STP.“ or the „SELECT“
key. Confirm the selection by pressing the „MODE“ key.
•The pulse value for the upper pulse limit flashes and the
percentage of the max. pulse is displayed on the right. Set
the pulse value using the „ST./STP.“ or the „SELECT“
key. Confirm the selection by pressing the „MODE“ key.
•„BELOW ALERT“ is displayed. Press the „ST./STP.“ or
the „SELECT“ key to select „ON“ to activate the alarm
and „OFF“ to deactivate the alarm. Confirm the selection
by pressing the „MODE“ key.
•„ABOVE ALERT“ is displayed. . Press the „ST./STP.“ or
the „SELECT“ key to select „ON“ to activate the alarm
and „OFF“ to deactivate the alarm. Confirm the selection
by pressing the „MODE“ key. As soon as one of the
alarms is activated, „Z“ is displayed.
•"TARGET STEP" is displayed. The number of steps is
flashing. You can now set your target number of steps
with the "ST./STP." button or the "SELECT" button.
•Press the „MODE“ key for approx. 3 seconds. All settings
have now been saved.
4.4.2 Target Steps with Progress Bar
On the left side of the display, a progress bar displays the steps
you have taken in relation to the set target in four sections.
This progress bar is displayed in all modes. If the set amount of
steps is reached, all four segments are displayed. Additionally,
an alert sounds for 10 seconds.The alert can be turned off early
by pressing any button. If the target steps are set to „0“, the
alert function is deactivated.
The target step is set to 10,000 steps by default. If the number
of target steps is greater than 1,000, it will be adjusted at a
multiple of 1,000. If the number of target steps is less than
1,000, it will be adjusted at a multiple of 100.
4.4.3 Training
Press the „ST./STP.“ key in training mode to start the training.
Depending on which display was selected for the lower display
segment, „DI” (distance), „PC” (pace) or „SP” (speed) starts
flashing. The training time starts to run and training data such
as distance, steps, calorie consumption and so on are recorded,
as soon as the fitness watch detects more than 10 steps.
If the training is stopped for a short while, the training time
stops. As soon as the fitness watch detects again more than 10
steps, the training time continues running and the training data
is recorded again.
To stop the training, press the „ST./STP.“ key. „DI” (distance),
„PC” (pace) or „SP” (speed) stops flashing.
When setting the daily reset to „on“ (see 4.3.1 „Basis Setting“)
the fitness watch resets the recorded training data to zero at 3
o'clock a.m.
By pressing the „SELECT“ key while in the training mode you
can manually reset the data.
Note:
•Calorie consumption and fatburning: For a reliable display
of the consumed calories and burned fat, the weight has to
be inserted correctly (see section 4.3.1 „Basic Setting”).
•Distance: The fitness watch calculates the distance by
multiplying the set step length with the number of steps
taken.
For precise calculation, the number of steps must be
accurate (see first point above) and the actual step length
has to match the set step length.
•Speed: The current speed is displayed correctly provided
that the number of steps is calculated correctly and the set
step length is strictly adhered to.
The length of time of the individual steps should also be
the same. This means that the pace and rhythm when
running and walking should be the same as during the
calculation of the step length.
4.5 Stopwatch Mode
Keep pressing the „MODE“ key down until accessing the
stopwatch mode, displayed as „CHRONO”:
4.5.1 Addition Stopping
•Press the „ ST./STP.“ keyStart timekeeper
•Press the „ ST./STP.“ keyStop timekeeper
•Press the „ ST./STP.“ keyTimekeeping is continued
•Press the „ ST./STP.“ keyStop timekeeper
•Press the „SELECT“ key for approx. 3 seconds Time is
set to zero.
4.5.2 Split Times Stopping
•Press the „ST./STP “ key Start timekeeper
•Press the „SELECT“ key whilst the stopwatch is running
The split time is shown on the display whilst the
stopwatch keeps running in the background.
•Press the „SELECT“ keyThe running timekeeping
appears on the display. This procedure can be repeated as
many times as required.
•Press the „ST./STP“ key Stop timekeeper
•Press the „SELECT“ key for approx. 3 seconds Time is
set to zero.
4.6 Alarm Mode
Keep pressing the „MODE“ key down until accessing the
alarm mode, displayed as „ALARM”.
The alarm mode shows the alarm time in the lower part of the
display segment (see image above).
The fitness watch offers an hourly alarm and a daily alarm (the
alarm time can be set as required).
4.6.1 Hourly Alarm
A short signal tone sounds every full hour.
To activate/deactivate the hourly alarm, proceed as described
under 4.3.1 „Basic Setting“.
4.6.2 Daily Alarm
You can set any alarm time for the daily alarm.
Setting the daily alarm
•Press the „MODE“ key for approx. 3 seconds and the
hours flash. Use the „ST./STP.” or the „SELECT“ key to
set the hour. Confirm your selection by pressing the
„MODE“ key.
•The minutes flash. Use the „ST./STP.“ or the „SELECT“
key to set the minutes. Confirm your selection by pressing
the „MODE“ key.
Press the „MODE“ key for approx. 3 seconds. All settings have
now been saved. When setting the daily alarm it is
automatically activated.
Activate/deactivate daily alarm
Press the „ST./STP.“ or the „SELECT“ key in the alarm time
display:
Alarm symbol displayed = Daily alarm is on
Alarm symbol not displayed = Daily alarm is off
Turn off daily alarm
The daily alarm sounds for approx. 30 seconds at the set time.
When the alarm goes on you can turn it off earlier by pressing
any key.

Page 4
4.7 Countdown-Mode with Interval Timer
This fitness watch has an interval timer, i.e. it consists of four
timers (1, 2, 3, and 4). You can use one or several timers. If
you use more than one timer, they are combined.
If you use only one timer, all the other timers have to be set to
"0:00".
If you use more than one timer, the countdown starts with
timer #1 and is continued by timers #2, #3, and #4 in sequence.
If the timers are stopped, they can be displayed by pushing the
"SELECT" button at the display.
Keep pressing the „MODE“ key down until accessing the
Countdown Mode, displayed as „TIMER“:
In the countdown mode, the current countdown time is
displayed in the lower display segment. In the upper display
segment, the set countdown time is displayed.
Setting the countdown
•Press the „MODE“ key for approx. 3 seconds. The hours
flash. Use the „ST./STP” or the „SELECT“ key to set the
hour. Confirm your selection by pressing the „MODE“
key.
•The minutes flash. Use the „ST./STP.“ or the „SELECT“
key to set the minutes. Confirm your selection by pressing
the „MODE“ key.
Press the „MODE“ key for approx. 3 seconds. All settings have
now been saved.
•By pushing the select button, you switch to the next timer.
Timers #2 – #4 are set in the same manner.
Using the countdown
•Press the „ST./STP.“ key to start the countdown.
•Press the „ST./STP.“ key to stop the countdown. The
countdown may be continued by pressing the „ST./STP.“
key or reset to the previously set time by pressing the
„SELECT“ key for 3 seconds.
•If you hold the "SELECT" button for a further 5 seconds,
the timer will be set to "0:00".
•If a timer reaches zero, a short alert is sounded.
•If you have selected several timers, after the countdown of
timer #1, timer #2 will start etc.
•When all timers have reached zero, they will start to count
down from the set time repeatedly until one timer is
stopped by pushing the button "ST./STP."
4.8 Pulse Mode
4.8.1 Pulse Measurement
The back cover of the fitness watch case also acts as a contact
area for the pulse measurement
•Wear the fitness watch on the wrist. The back cover of the
fitness watch must be in contact with the wrist.
•Press the sensor surface for approx. 5-8 seconds,
whichever mode you are in.
Any mode Pulse measurement Pulse display
The pulse display is shown on the display for approx. 5
seconds before the fitness watch returns to the display shown
before the pulse measurement.
% of the maximum pulse
To use the function of the % of the maximum pulse, the birth
year needs to be set (see section 4.3 „Time Mode“).
If the birth year is not set, the fitness watch cannot perform a
user-defined calculation of the maximum pulse. The fitness
watch will otherwise base its calculations on the standard
settings.
The maximum pulse is calculated as below:
Example: Age = 50
Maximum pulse = 220 – age
Maximum pulse = 220 – 50 = 170
The % of the maximum pulse is calculated as below:
Example: Pulse = 102
% of the maximum pulse = pulse x 100 / maximum pulse
% of the maximum pulse = 102 x 100 / 170 = 60 %
4.8.2 Pulse Alarm
•If the pulse is within the training area, a short beep
sounds, and is displayed in the centre around the
„Z“.
•If the pulse is above the set pulse limit, a warning triple
beep sounds and is displayed in the centre to the right
of „Z“.
•If the pulse is below the set pulse limit, a warning double
beep sound and is displayed in the centre to the left of
„Z“.
To take advantage of the pulse alarm function, the pulse alarm
must be activated (see section 4.4.1 „Setting of Training
Zones“).
NOTE!
If the pulse measurement does not display a value or if the
fitness watch starts measuring the pulse on its own, although
you have not touched the sensor surface with your fingers,
clean the front and the back of the fitness watch with a damp,
lint-free cloth.
If the word „CLEAN“ is indicated in the upper display
line, the fitness watch has recognized on its own that the
contact surface is contaminated. This information is
indicated alternately with the display in the upper display
line.
Clean the front and the back of the fitness watch with a damp,
lint-free cloth. Thereupon, the pulse measurement should be
working perfectly.
Follow these precautions for the pulse measurement:
•Do not measure the pulse under water.
•Always press the sensor surface directly with the index
finger. The finger (not the fingertip) should press flat and
stable and the fitness watch should be tight around the
wrist.
•If no pulse is displayed, please do not press the sensor
surface tighter but instead start a new pulse measurement
after a short while.
•Do not use the fingertip when measuring the pulse as the
skin might be dry and thick on this part (horny skin). The
fingertip may also not establish enough contact on the
sensor surface. Make sure that you do not touch the sensor
surface with the fingertip but with the central part of the
distal phalanx of the finger.
•If your fingers are very cold or poorly supplied with blood
this might also affect the pulse measurement.
•If you have very dry skin, moist the finger and the skin on
the wrist with some water. The same applies if the
forearms are very hairy.
•For an improved pulse measurement, clean the fingers and
the wrist with soap and water.
•Use of hand creams can affect the pulse measurement.
•Clean the back of the fitness watch from time to time with
a few drops of water and wipe it dry with a cloth to
remove any grease
•Stand still for a moment whilst you are walking or running
to measure the pulse. For safety reasons, please also stop
for a moment to measure the pulse when you are cycling.
•If you measure the pulse whilst moving, hold the fitness
watch very tight. We recommend placing the index finger
on the sensor surface whilst holding the watch strap of the
fitness watch with the thumb. This enables taking
measurements whilst running or walking.
•The pulse measurement may not work or not work
correctly if the heart beats are irregular.
Failure to follow these guidelines may hinder pulse
measurement or delay display of a pulse value.
Sensor surface
Back cover of the case
= Contact surface for
the pulse measurement
Pulse (Pulse beats
per minute)
% of the maximum
pulse
Symbol images
Symbol image

Page 5
4.9 Power Saving
The fitness watch offers a power saving function. The display
is turned off to prolong the life span of the battery.
To activate the power saving function, press the „SELECT“
key in the time mode for approx. 5 seconds. The display is
turned off. In doing so, the individual mode settings are NOT
deleted.
Press any key to stop the power saving and switch the display
back on.
4.10 Display Light
By pressing the LIGHT key the display is lit for approx. 4
seconds to allow you to read the display of the fitness watch in
the darkness. It is not possible to keep the display light turned
on. Please be aware that the use of the display lightening
requires more energy, resulting in a shorter life span of the
battery.
4.11 Specifications
Battery
1 x 3 V Battery type CR2032
(1 x 3 V 0.5 mA CR2032)
Stopwatch
* Meas. range:
* Accuracy:
99 hrs 59 min. 59 sec.
1/100 second
(up to 59 min. 59.99 sec.)
Pulse
* Meas. range:
* Accuracy:
40 to 240 bpm (beats/minute)
1 bpm
Steps
0 – 99,999 steps
Calories
0 – 9999 kcal
Fatburning
0 – 1298 g
Distance
0 – 93.17 miles
Speed
max. 40.7 miles per hour
Pace
max. 39 min. 59 sec.
Training time
max. 9 hrs. 59 min. 59 sec.
Countdown
max. 9 hrs. 59 min. 59 sec.
4.12 Battery Change
To guarantee the water resistance of your fitness watch the
battery change should be carried out by a watch professional
or a service centre to avoid damage to the sealing ring and
case. Symbol image
If you still want to change the battery
yourself please follow the instructions
below:
Unscrew the four screws on the back
cover on the fitness watch with a
screwdriver. Open the battery
compartment by carefully lifting the
locking clip with the screwdriver over
the locking hook.
Insert a new battery CR2032 (3 V)
with the plus polarity (+) facing
upwards. Then hook the battery fastener back into place and
screw the cover back on.
Caution: There is a plastic insert between the electronics and
the cover, displaying the required battery type for the fitness
watch. Be aware not to lose this plastic insert when changing
the battery.
If the display shows irregular symbols please take the battery
out and reinsert it. This will reset the microprocessor. After
the reset the fitness watch should be back to functioning as
usual.
Note: Please be aware that all personal data will need to be
reset after changing the battery.
5Conformity
This device complies with Part 15 of the FCC Rules.
Operation is subject to the following two conditions: (1) this
device may not cause harmful interference, and (2) this device
must accept any interference received, including interference
that may cause undesired operation.
NOTE: This equipment has been tested and found to comply
with the limits of a Class B digital device, pursuant to Part 15
of the FCC Rules. These limits are designed to provide
reasonable protection against harmful interference in a
residential installation. This equipment generates, uses and
can radiate radio frequency energy and, if not installed and
used in accordance with the instructions, may cause harmful
interference to radio communications. However, there is no
guarantee that interference will not occur in a particular
installation. If this equipment does cause harmful interference
to radio or television reception, which can be determined by
turning the equipment off and on, the user is encouraged to try
to correct the interference by one or more of the following
measures:
•Reorient or relocate the receiving antenna.
•Increase the separation between the equipment and
receiver.
•Connect the equipment into an outlet on a circuit different
from that to which the receiver is connected.
•Consult the dealer or an experienced radio/TV technician
for help.
WARNING: changes or modifications to this unit not
expressly approved by the party responsible for compliance
could void user's authority to operate the equipment.
Company Krippl-Watches
Telephone number: please refer to the information given in
the warranty card
6Troubleshooting/FAQs
Before submitting a claim about the fitness watch, please
check the battery and change it if required.
How to make a claim: Please inform us about the article
number of the product and the reason of the claim (email).
Additionally, you can refer to the FAQ section on our online
product service page for further help with your fitness watch.
http://www.produktservice.info EAN: 20009212
Why is the distance display of my distance covered not
correct?
Have you set the step lengths for walking and running? For
optimal results, the step length for both „walking“ and also
„running“ must be set. Shuffling gait, poor footwear and
uneven surfaces may result in incorrect measurements. When
climbing stairs or hills the distance measurement is reduced as
the watch has only been designed for activities on even
surfaces. Apply the same pace when walking or running as
when calculating the step length. Please be aware that the
measurements can be imprecise/irregular for less active people
What shall I do if my weightchanges?
Insert the new weight as the once set weight will be saved until
it is changed.
How is the calorie output measured?
The calorie output mainly depends on the number of steps and
the body weight (insert correct body weight!).
The pulse display is not working or is not correct - why?
Under certain circumstances it may happen that the pulse
cannot be measured on some people or it may be very difficult:
•Your pulse is below 40 beats per minute.
•Your heart only emits very weak signals
Please also refer to the grey information box in point 4.8.1
„Pulse Measurement”.
What can cause the display of my fitness watch to stop
reacting.
If the display is “frozen“ or it shows irregular symbols:
Take the battery out and reinsert it. This will reset the
microprocessor.
After the reset, the fitness watch should be back to functioning
as usual.
The display is weak, hardly legible – what can I do?
Replace the battery as soon as the display starts to diminish or
when it is fully faded. Always ensure the battery polarities are
aligned correctly. When the battery is removed and reinserted
the personal data must be reset.
Why is the display light not working?
The battery might be flat? Please check the battery and replace
with a new one (3 V/CR2032) if it is flat. Check the +/-
polarity.
This manual suits for next models
2
Table of contents
Other Crane Watch manuals