manuals.online logo
Brands
  1. Home
  2. •
  3. Brands
  4. •
  5. Creda
  6. •
  7. Heater
  8. •
  9. Creda NP Series User manual

Creda NP Series User manual

Dimensions
(millimetres)
Installation and Operating Instructions
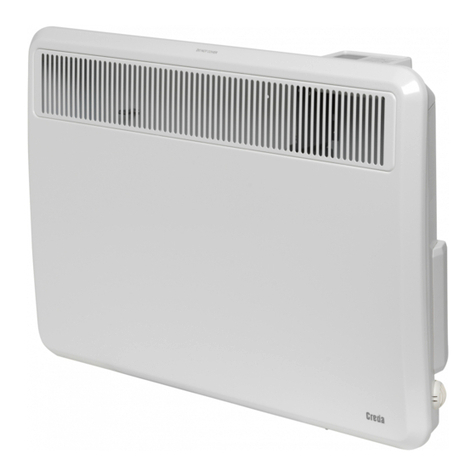
Panel Heater
Model : NP Range INCCUK35RG Issue 1
Model Specication
NP 150 1.5 kW Mains Neon Indicator
NP 200 2.0 kW Mains Neon Indicator
IMPORTANT : THESE INSTRUCTIONS SHOULD BE READ CAREFULLY AND RETAINED FOR FUTURE REFERENCE
Important Safety Advice
WARNING – THIS APPLIANCE MUST NOT BE USED IN A
BATHROOM.
WARNING - DO NOT USE THIS HEATER IN THE IMMEDIATE
SURROUNDINGS OF A BATH, A SHOWER OR A SWIMMING
POOL.
WARNING – THIS HEATER MUST NOT BE LOCATED IMMEDIATELY
BELOW A FIXED SOCKET OUTLET.
DO NOT USE THE HEATER UNTIL THE WALL BRACKET IS FITTED
CORRECTLY.
WARNING: This heater is not equipped with a device to control the
room temperature. Do not use this heater in small rooms when
they are occupied by persons not capable of leaving the room on
their own, unless constant supervision is provided.
FOLLOW these instructions carefully.
NEVER cover or obstruct in any way the heat outlet slots at the top
of the heater or the air inlet slots in the base of the heater.
The heater carries a warning ‘DO NOT COVER’ to alert the user to
theriskofrethatexistsiftheheaterisaccidentallycovered.
Warning: Due care and consideration must be taken when using
this heater in series with a thermal control, a program controller, a
timer or any other device that switches on the heater automatically,
sinceareriskexistswhentheheaterisaccidenticallycovered
or displaced.
This appliance is not intended for use by persons (including
children) with reduced physical, sensory or mental capabilities, or
lackofexperienceandknowledge,unlesstheyhavebeengiven
supervision or instruction concerning use of the appliance by a
person responsible for their safety. Children should be supervised
to ensure that they do not play with the appliance.
If young children, the aged or inrm are likely to be left in the
vicinity of the heater, we advise that adequate precautions should
betaken.Werecommendthataguardbettedtoensurecontact
with the heater is avoided and objects cannot be inserted into the
product.
If the supply cord is damaged, it must be replaced by the
manufacturer,itsserviceagentorasimilarlyqualiedpersonin
order to avoid a hazard.
Electrical
WARNING – THIS APPLIANCE MUST BE EARTHED
The electrical installation must be carried out by a competent electrician,
and be in strict accordance with the current I.E.E. regulations for
Electrical Equipment in Buildings.
The heater is tted with a length of exible cable type H05VV-F size 3
x 1.0mm2 for connection to the xed wiring of the premises through a
suitable connection box positioned adjacent to the heater.
The supply circuit to the heater must incorporate a double pole isolating
switch having a contact separation of at least 3mm.
Supplementary Earth Bonding
Should Equipotential Earth Bonding be required the earthing conductor
in the supply cord is deemed to provide the supplementary bonding
connection (See Regulation 544.2.5, latest edition I.E.E. Wiring
Regulations).
General
The NP panel heater is designed for wall mounting on the bracket
supplied and it should only be operated when in the installed position
as shown in Fig. 1above. Before connecting the heater check that
the supply voltage is the same as that stated on the heater. The mains
neon indicator will glow to show when the heater is connected to the
mains supply. The NP panel heater has no controls and is operated
with an external thermostatic or programming controller.
Wall Mounting
IMPORTANT – The wall bracket supplied with the appliance must
be used. The heater should be positioned observing the minimum
clearances stated around the heater - see Fig. 1.
Select a suitable position on a wall, near to a mains power socket,
making sure that there is at least 230 mm below the heater and at
least 450 mm above the heater of unobstructed space. Ensure that
curtains and furniture are not positioned close to the chosen position,
as this would create a potential re hazard.
DO NOT locate the heater immediately below a xed socket outlet or
connection box.
1. Remove wall mounting bracket from the back of the heater by
depressing the spring latch at the top of each bracket - see
Fig. 2.
2. Fix the wall bracket securely to the wall through the four screw
holes provided.
3. Present the heater to the wall bracket, and engage lower slots
inthe back with bracket.
4. Raise the heater to upright position and push the heater onto
brackets to engage top latch.
Fig. 2
Fig. 1
312
MIN
184
580
230 575
MIN
230
450
350
MIN
MIN
Safety – overheat protection
For your safety, this appliance is tted with a thermal cut-out. In the
event that the product overheats, the cut-out switches the heater off
automatically.
To bring the heater back into operation, remove the cause of the
overheating, then turn off the electrical supply to the heater for a
few minutes. When the heater has cooled sufciently, re-connect the
electrical supply to turn on the heater.
Important Notes
Although this heater is manufactured to comply with the relevant safety
standards, certain types of carpets could become discoloured by the
temperatures under the heater. If you are concerned about this, we
recommend that you contact the carpet manufacturer for guidance.
You may notice some parts of the element appearing to be hotter from
time to time because of the variable airow through the heater. This
does not cause a safety hazard.
The heat outlet grille may become discoloured with use – this is caused
by airborne pollution and is not a fault.
Cleaning and User Maintenance
WARNING – ALWAYS DISCONNECT FROM THE POWER SUPPLY
BEFORE CLEANING THE HEATER.
Do not use detergents, abrasive cleaning powder or polish of any kind
on the body of the heater.
Allow the heater to cool, then wipe with a dry cloth to remove dust
and a damp cloth (not wet) to clean off stains. Be careful not to allow
moisture into the heater.
Recycling
For electrical products sold within the European Community.
At the end of the electrical products useful life it should
not be disposed of with household waste.
Please recycle where facilities exist.
Check with your Local Authority or retailer for recycling
advice in your country.
After Sales Service
Your product is guaranteed for one year from the date of purchase.
Within this period, we undertake to repair or exchange this product free
of charge provided it has been installed and operated in accordance
with these instructions.
Your rights under this guarantee are additional to your statutory rights,
which in turn are not affected by this guarantee.
Should you require after sales information or assistance with this prod-
uct please go to www.credaheating.co.uk where you will nd our self
help guide by clicking on “Help Centre” or ring our helpdesk on 0844
879 3588 (UK) or 01 842 4833 (R.O.I.).
Spare parts are also available on the website
www.credaheating.co.uk
Please retain your receipt as proof of purchase.
The product complies with the European Safety Standards EN60335-2-30 and the European Standard Electromagnetic Compatibility (EMC)
EN55014, EN60555-2 and EN60555-3. These cover the essential requirements of EEC Directives 2006/95/EC and 2004/108/EC
CREDA HEATING
MILLBROOK HOUSE
GRANGE DRIVE
HEDGE END
SOUTHAMPTON
SO30 2DF
[c] GDC Group Ltd
All rights reserved. Material contained in this publication may not be reproduced in whole or in part, without prior permission in writing of Creda.
A division of GDC Group Ltd
United Kingdom:
Tel: 0844 879 3588
Fax: 0844 879 3583
Website: www.credaheating.co.uk
Republic of Ireland:
Tel: 01 8424833
INCCUK35RG Issue 1

This manual suits for next models

2

Other Creda Heater manuals

Creda 75773301 User manual

Creda

Creda 75773301 User manual

Creda Arezzo ARE050 Instruction Manual

Creda

Creda Arezzo ARE050 Instruction Manual

Creda CDF2N User manual

Creda

Creda CDF2N User manual

Creda PH2TR Manual

Creda

Creda PH2TR Manual

Creda CQH070 User manual

Creda

Creda CQH070 User manual

Creda CSS3 User manual

Creda

Creda CSS3 User manual

Creda NewEra 70305S User manual

Creda

Creda NewEra 70305S User manual

Creda COR15TS User manual

Creda

Creda COR15TS User manual

Creda CEP 500E User manual

Creda

Creda CEP 500E User manual

Creda Duo300i User manual

Creda

Creda Duo300i User manual

Creda CAR 033 Instruction Manual

Creda

Creda CAR 033 Instruction Manual

Creda CQH100 User manual

Creda

Creda CQH100 User manual

Creda CPH05T User manual

Creda

Creda CPH05T User manual

Creda Newera TSR18CW User manual

Creda

Creda Newera TSR18CW User manual

Creda TPRIII050E User manual

Creda

Creda TPRIII050E User manual

Creda Newera TSR12AW User manual

Creda

Creda Newera TSR12AW User manual

Creda CSQ15 User manual

Creda

Creda CSQ15 User manual

Creda NEWERA 85301 User manual

Creda

Creda NEWERA 85301 User manual

Creda Newera 75772001S User manual

Creda

Creda Newera 75772001S User manual

Creda TSF24K User manual

Creda

Creda TSF24K User manual

Creda TSF24K User manual

Creda

Creda TSF24K User manual

Creda TSF24K User manual

Creda

Creda TSF24K User manual

Creda Sunplus CSP2 Installer manual

Creda

Creda Sunplus CSP2 Installer manual

Creda CLSTH050 Instruction Manual

Creda

Creda CLSTH050 Instruction Manual

Popular Heater manuals by other brands

Rowenta SUNRAY IR3020 Instructions for use

Rowenta

Rowenta SUNRAY IR3020 Instructions for use

Schwank UHE Installation & owner's manual

Schwank

Schwank UHE Installation & owner's manual

Vent-Axia Warmair 6 Installation/Wiring Instructions

Vent-Axia

Vent-Axia Warmair 6 Installation/Wiring Instructions

Vivax PH-1500 user manual

Vivax

Vivax PH-1500 user manual

Webasto Air Top Evo 3900 Series Workshop manual

Webasto

Webasto Air Top Evo 3900 Series Workshop manual

DeLonghi HFX30 Series Instructions for use

DeLonghi

DeLonghi HFX30 Series Instructions for use

Infrared Dynamics Sunpak S25 Installation, operation and maintenance instructions

Infrared Dynamics

Infrared Dynamics Sunpak S25 Installation, operation and maintenance instructions

Caloritech EXC Installation, operation and maintenance instructions

Caloritech

Caloritech EXC Installation, operation and maintenance instructions

BRUGMAN FEK Series installation instructions

BRUGMAN

BRUGMAN FEK Series installation instructions

Smith’s Environmental Products STERLING E 2kW Installation & user guide

Smith’s Environmental Products

Smith’s Environmental Products STERLING E 2kW Installation & user guide

Frico Panther SE 06 manual

Frico

Frico Panther SE 06 manual

Sundirect Tower1000-Pro Installation & operation instructions

Sundirect

Sundirect Tower1000-Pro Installation & operation instructions

Parkside PKH 3000 B1 Operation and safety notes

Parkside

Parkside PKH 3000 B1 Operation and safety notes

Dimplex 7150B11 installation instructions

Dimplex

Dimplex 7150B11 installation instructions

Victorian Plumbing Keswick Bench Fitting instructions

Victorian Plumbing

Victorian Plumbing Keswick Bench Fitting instructions

Trotec TRH 20 E operating manual

Trotec

Trotec TRH 20 E operating manual

THOMSON THSFC10VR instruction manual

THOMSON

THOMSON THSFC10VR instruction manual

TESY CN03 050 EIS Wi-Fi Instructions for use

TESY

TESY CN03 050 EIS Wi-Fi Instructions for use

manuals.online logo
manuals.online logoBrands
  • About & Mission
  • Contact us
  • Privacy Policy
  • Terms and Conditions

Copyright 2025 Manuals.Online. All Rights Reserved.