manuals.online logo
Brands
  1. Home
  2. •
  3. Brands
  4. •
  5. Crestron
  6. •
  7. Docking Station
  8. •
  9. Crestron iPanel IDOC-PAD-LCA-DSWC Dimensional drawing

Crestron iPanel IDOC-PAD-LCA-DSWC Dimensional drawing

DO GUIDE
DO Check the Box
QUANTITY PRODUCT COLOR PART NUMBER
1 Bit, Torx, T8 2025915
4 Screw, 6-32 x 3/4", Undercut Head, Phillips 2033247
4 Screw, M3 x 16 mm, Flat Head, Phillips 2013788
4 Screw, 4-40 x 3/4", Pan Head, Phillips 2007184
2 Screw, M3.5 x 25 mm, Flat Head, Phillips 2023756
Items for IDOC-PAD-LCA-DSWC-B-S and IDOC-PAD-LCA2-DSWC-B-S
1Cover, Front Black 4519812
1Plate, Mounting Black 2040499
2 Screw, 2-56 x 5/16", Pan Head, Torx Black 2040263
4 Screw, 6-32 x 1/4", Pan Head, Phillips Black 2007215
Items for IDOC-PAD-LCA-DSWC-W-S and IDOC-PAD-LCA2-DSWC-W-S
1Cover, Front White 4519811
1Plate, Mounting White 2039781
2 Screw, 2-56 x 5/16", Pan Head, Torx 2040264
4 Screw, 6-32 x 1/4", Pan Head, Phillips 2007213
2. Connect the 24 Vdc or PoE line and earth ground to the rear of the iPanel.
NOTE: Ensure the unit is properly grounded by connecting the chassis ground terminal to an earth ground (building steel). If PoE is used, an earth
ground connection must still be made to the terminal block connector.
NOTE: The iPanel can be connected to 24 Vdc and and PoE simultaneously.
3. Lift and remove the plastic cover from the iPanel.
4. Use the Phillips screwdriver to remove the screws and washers that hold the metal plate in place, and remove the metal plate.
NOTE: If necessary, remove the cable holder.
IDOC-PAD-LCA(2)-DSWC
iPanel®Wall Dock for iPad Air® Devices
DO Install the Device
The Crestron®IDOC-PAD-LCA-DSWC and IDOC-PAD-LCA2-DSWC iPanel®Wall Docks feature similar operation. For simplicity within this guide, the
term “iPanel” is used except where noted. Similarly, the word “iPad” is used to denote iPad Air and iPad Air 2. The iPad®is sold separately.
For the iPad Air, use the IDOC-PAD-LCA-DSWC. For the iPad Air 2, use the IDOC-PAD-LCA2-DSWC.
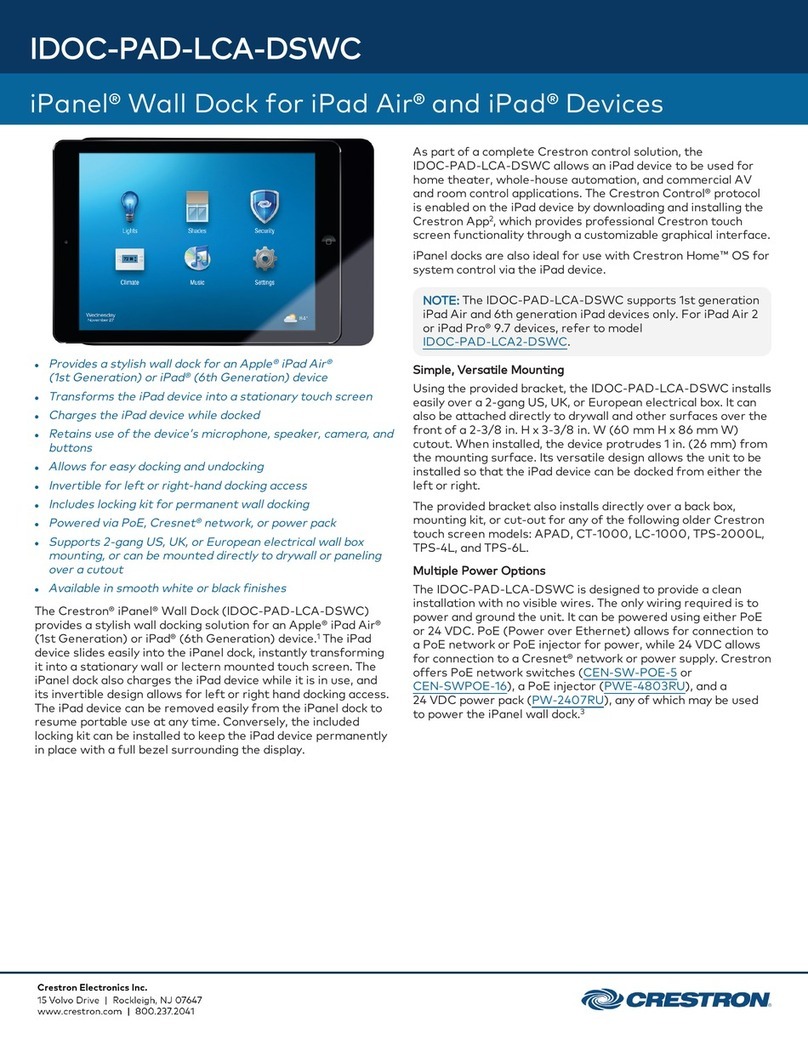
The Crestron iPanel installs into a standard 2-gang U.S., U.K., or European electrical box. It can also be attached directly to drywall and other surfaces
over the front of a 2-3/8" H x 3-3/8" W (60 mm H x 86 mm W) cutout. When installed, it protrudes just 1" (26 mm) from the mounting surface and secures
to its included mounting plate with included screws.
Choose a Location
To allow installation and removal of the iPad, the iPanel requires a minimum amount of clearance on both sides. When choosing an installation location,
make sure the center of the mounting location has a minimum of 7-7/16" (189 mm) clearance on the closed side of the iPanel and 15-1/2" (394 mm)
clearance on the open side of the iPanel, as shown below.
NOTE: Although the iPanel can be mounted with the opening oriented to the right, note that the iPad Air volume buttons face downward in this
conguration. This may not be optimal for the end user.
Required Tools
The following are required to install the iPanel.
• #2 Phillips screwdriver
• Torx bit (included) and driver (not included)
Install the Device into an Electrical Box
NOTE: A 24 Vdc or PoE cable should already be in the electrical box. The iPanel can use only one source for power.
1. Use the included screws to attach the mounting plate to the electrical box.
• For U.S.-style installations, use the included 06-32 x 3/4" screws.
• For U.K.-style installations, use the included 3.5 x 25 mm screws.
• For European-style installations, use the included 3 x 16 mm screws.
24 Vdc
PoE
24
G
Lift here.
Remove
screws and
washers.
Minimum Wall Distance Minimum Wall Distance
2 in
(51 mm)
2 in
(51 mm)
15-1/2 in
(394 mm)
7-7/16 in
(189 mm)
Center Box Cutout
U.S. Electrical Box
Mounting Plate
Screws (4) 6-32 X 3/4"
Screws (2) 3.5 X 25 mm
U.K. Electrical Box
Mounting Plate
European
Electrical Box
Mounting Plate
Screws (4) 3 X 16 mm

DO GUIDE DOC. 7766D (2043444) 05.16
Specications subject to change without notice.
5. Using the included 1/4" screws, attach the iPanel to the mounting plate.
6. Replace the metal plate and secure it to the iPanel using the screws and washers removed in
step 4.
NOTE: When replacing the metal plate, slide the metal plate between the cable holder’s top
prong and the bottom prongs, as shown in the following diagram.
7. Snap the plastic cover that was removed in step 3 into place.
8. (Optional) Install the antitheft lock.
a. Place the iPad in the iPanel as described in “Insert the iPad” below.
b. Slide the antitheft lock over the end of the iPad, and secure it to the iPanel using the
included Torx screws and bit, as shown in the following diagram. Do not overtighten the
Torx screws.
DO Use the Device
Insert the iPad
1. Hold the iPad horizontally (with the iPad dock connector facing into the dock), and position it so
that it rests behind the iPanel’s top and bottom retaining lips.
2. Slide the iPad into the iPanel until the cable holder pops out, as shown in the following diagram.
3. Hold the iPad in place and press the cable holder so that it is ush with the iPanel. The iPad is
now connected to the iPanel.
Remove the iPad
To remove the iPad, hold the left side of the iPad and slide it out of the iPanel.
As of the date of manufacture, the product has been tested and found to comply with specications for CE marking.
Federal Communications Commission (FCC) Compliance Statement
This device complies with part 15 of the FCC Rules. Operation is subject to the following conditions:
(1) This device may not cause harmful interference and (2) this device must accept any interference received, including interference that may cause undesired operation.
Caution: Changes or modications not expressly approved by the manufacturer responsible for compliance could void the user’s authority to operate the equipment.
Note: This equipment has been tested and found to comply with the limits for a Class B digital device, pursuant to part 15 of the FCC Rules. These limits are designed to provide reasonable protection
against harmful interference in a residential installation. This equipment generates, uses and can radiate radio frequency energy and, if not installed and used in accordance with the instructions, may
cause harmful interference to radio communications. However, there is no guarantee that interference will not occur in a particular installation.
If this equipment does cause harmful interference to radio or television reception, which can be determined by turning the equipment off and on, the user is encouraged to try to correct the interference
by one or more of the following measures:
• Reorient or relocate the receiving antenna.
• Increase the separation between the equipment and receiver.
• Connect the equipment into an outlet on a circuit different from that to which the receiver is connected.
• Consult the dealer or an experienced radio/TV technician for help.
Industry Canada (IC) Compliance Statement
CAN ICES-3(B)/NMB-3(B)
The specic patents that cover Crestron products are listed ahttp://www.crestron.com/legal/patents. The product warranty can be found at www.crestron.com/warranty.
Certain Crestron products contain open source software. For specic information, please visit www.crestron.com/opensource.
Crestron, the Crestron logo, and iPanel are either trademarks or registered trademarks of Crestron Electronics, Inc., in the United States and/or other countries. iPad, iPad Air, and Lightning are either trademarks or registered trademarks of Apple, Inc. in the United States and/or other countries.
Other trademarks, registered trademarks, and trade names may be used in this document to refer to either the entities claiming the marks and names or their products. Crestron disclaims any proprietary interest in the marks and names of others. Crestron is not responsible for errors in typography
or photography.
This document was written by the Technical Publications department at Crestron.
©2016 Crestron Electronics, Inc.
DO Learn More
Visit the website for additional information and the latest rmware updates. To learn
more about this product, use a QR reader application on your mobile device to scan
the QR images.
Crestron Electronics
15 Volvo Drive, Rockleigh, NJ 07647
888.CRESTRON | www.crestron.com
Cable Holder
IDOC-PAD-LCA-DSWC
IDOC-PAD-LCA2-DSWC
Bottom
Prong
Metal
Plate
Bottom
Prong
Top
Prong
Lightning®
Connector
Screws (4) 6-32 x 1/4"
iPanel Mounting Plate

This manual suits for next models

1

Other Crestron Docking Station manuals

Crestron IDOC-PAD-DSWC Dimensional drawing

Crestron

Crestron IDOC-PAD-DSWC Dimensional drawing

Crestron ST-DS User manual

Crestron

Crestron ST-DS User manual

Crestron UFO-WPR-3ER-DSCE How to use

Crestron

Crestron UFO-WPR-3ER-DSCE How to use

Crestron iPanel IDOC-PAD-LCA-DSWC Series User manual

Crestron

Crestron iPanel IDOC-PAD-LCA-DSWC Series User manual

Crestron TPMC-3X-DSW How to use

Crestron

Crestron TPMC-3X-DSW How to use

Crestron iPanel IDOC-PAD2-DSWC How to use

Crestron

Crestron iPanel IDOC-PAD2-DSWC How to use

Crestron FreeSpeech MP-FSDS2 How to use

Crestron

Crestron FreeSpeech MP-FSDS2 How to use

Crestron Docking Station TPS-6X-DS User manual

Crestron

Crestron Docking Station TPS-6X-DS User manual

Crestron TPS-XDS User manual

Crestron

Crestron TPS-XDS User manual

Crestron TST-600-DS User manual

Crestron

Crestron TST-600-DS User manual

Crestron ST-DSN User manual

Crestron

Crestron ST-DSN User manual

Crestron TSR-310-DS User manual

Crestron

Crestron TSR-310-DS User manual

Crestron UFO-WPR-3ER-DS User manual

Crestron

Crestron UFO-WPR-3ER-DS User manual

Crestron CEN-IDOC-DS User manual

Crestron

Crestron CEN-IDOC-DS User manual

Crestron TPS-6X-DS-C User manual

Crestron

Crestron TPS-6X-DS-C User manual

Crestron DA-1700CW Quick start guide

Crestron

Crestron DA-1700CW Quick start guide

Crestron TPS-6X-DSC-LP User manual

Crestron

Crestron TPS-6X-DSC-LP User manual

Crestron IDOC-PAD-DSWC How to use

Crestron

Crestron IDOC-PAD-DSWC How to use

Crestron CSP-RS232I How to use

Crestron

Crestron CSP-RS232I How to use

Crestron TPMC-8X-DS User manual

Crestron

Crestron TPMC-8X-DS User manual

Crestron Docking Station TPS-6X-DS User manual

Crestron

Crestron Docking Station TPS-6X-DS User manual

Crestron WPR-DS User manual

Crestron

Crestron WPR-DS User manual

Crestron IDOC-PAD-DSWC How to use

Crestron

Crestron IDOC-PAD-DSWC How to use

Crestron TPMC-4XG-DS User manual

Crestron

Crestron TPMC-4XG-DS User manual

Popular Docking Station manuals by other brands

Dell D5000 user manual

Dell

Dell D5000 user manual

Origin OSDOCK-MMUSBCA user manual

Origin

Origin OSDOCK-MMUSBCA user manual

RCA RC170i user manual

RCA

RCA RC170i user manual

ACT AC7048 quick start guide

ACT

ACT AC7048 quick start guide

iHome iH52 Specification sheet

iHome

iHome iH52 Specification sheet

PEEKTON Peekball user guide

PEEKTON

PEEKTON Peekball user guide

Jensen JiSS-585 user manual

Jensen

Jensen JiSS-585 user manual

Intermec AD21 instructions

Intermec

Intermec AD21 instructions

Pokini Tab K10 quick start guide

Pokini

Pokini Tab K10 quick start guide

iLive IS108B Specifications

iLive

iLive IS108B Specifications

Havis DS-PAN-1500 Series owner's manual

Havis

Havis DS-PAN-1500 Series owner's manual

SIIG JU-DK0E11-S1 quick start guide

SIIG

SIIG JU-DK0E11-S1 quick start guide

iHome iP user guide

iHome

iHome iP user guide

Logic3 Valve80 instruction manual

Logic3

Logic3 Valve80 instruction manual

HP THUNDERBOLT DOCK G4 Features and troubleshooting

HP

HP THUNDERBOLT DOCK G4 Features and troubleshooting

Philips AJ7030D user manual

Philips

Philips AJ7030D user manual

Gembird HD32-U3S-2 user manual

Gembird

Gembird HD32-U3S-2 user manual

EiRA ER1218DS user manual

EiRA

EiRA ER1218DS user manual

manuals.online logo
manuals.online logoBrands
  • About & Mission
  • Contact us
  • Privacy Policy
  • Terms and Conditions

Copyright 2025 Manuals.Online. All Rights Reserved.