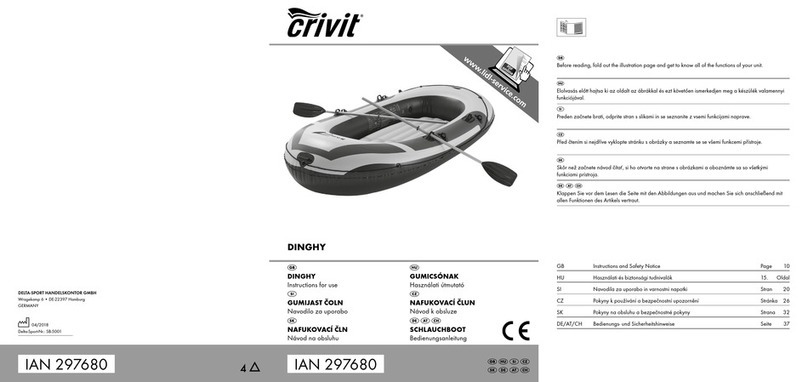
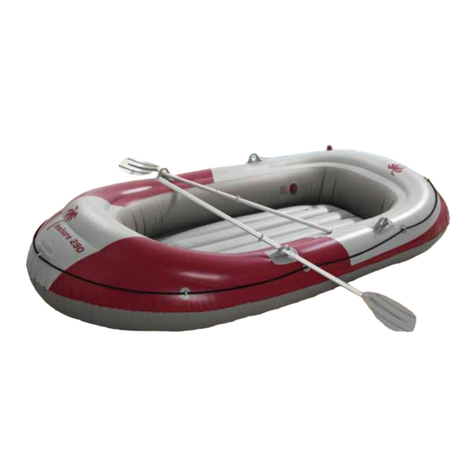
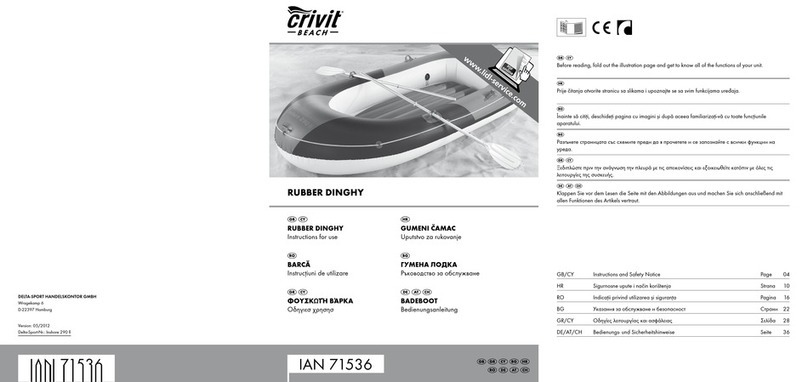
Crivit 297670 User manual

IAN 297670IAN 297670
GB/IE/NI Instructions and Safety Notice Page 09
DK Betjenings- og sikkerhedshenvisninger Side 15
FR/BE Instructions d‘utilisation et de sécurité Page 21
NL/BE Gebruiksaanwijzingen en veiligheidsinstructies Pagina 29
DE/AT/CH Gebrauchs- und Sicherheitshinweise Seite 36
Before reading, fold out the illustration page and get to know all of the functions of your unit.
Klap siden med illustrationerne op inden du læser dem og gør dig efterfølgende fortrolig med alle
apparatets funktioner.
Dépliez la page avec les illustrations avant la lecture et informez-vous ensuite au sujet des fonctions de
l‘appareil.
Klap voor het lezen de pagina met de afbeeldingen open en maak u vervolgens vertrouwd met alle
functies van het apparaat.
Klappen Sie vor dem Lesen die Seite mit den Abbildungen aus und machen Sie sich anschließend mit
allen Funktionen des Artikels vertraut.
2-PERSON KAYAK
2-PERSON KAYAK
Instructions for use
2-PERSONEN-KAJAK
Bedienungsanleitung
KAJAK TIL 2 PERSONER
Brugervejledning
KAYAK 2 PLACES
Notice d’utilisation
2-PERSOONS KAJAK
Gebruiksaanwijzing
DELTA-SPORT HANDELSKONTOR GMBH
Wragekamp 6 • DE-22397 Hamburg
GERMANY
03/2018
Delta-Sport-Nr.: Inshore 335 VI

A
B
D
C
E F
HG
I J
1x 1
1x 2
1x 93x 10 1x 11 2x 12 1x 14
1x 15
1x 31x 41x 52x 61x 72x 8
1g 1f
1x 13
788 6
8
6a7a
6
3
1a
9d
3
1b
9c
4
9a
1b
2
9a
1b
1c 10b
10c
10a
10b
~17,5cm
10c
10b
1c

5
K L
1d
1e
1d
M
~8,5cm
1d
O
1h
11
10
N
1e
1d
12

6
Complies with ISO 6185-1, Category III, Type B
I overensstemmelse med ISO 6185-1, kategori III, type B
Contents/Indholdsfortegnelse
Package contents .............................................. 9
Technical data ................................................... 9
Symbols used .................................................... 9
Intended use ...................................................... 9
Safety information .................................... 9 - 10
Life-threatening hazard ............................... 9
Risk of injury ........................................ 9 - 10
Avoiding damage to the item .................. 10
Setting up ................................................. 11 - 12
Assembling the 2-way screw-on valve .... 11
Inflating ...................................................... 11
Inflating the air chambers .................. 11 - 12
Regulating the operating pressure ........... 12
Attaching accessories ............................. 12 - 13
Securing the front seat .............................. 12
Securing the bow splash guard ....... 12 - 13
Securing the stern splash guard and
seat ............................................................. 13
Triangular cushion ..................................... 13
Assembling the double-bladed paddle ... 13
Kit bag ........................................................ 13
Storage pouch ........................................... 13
Dismantling the kayak .................................... 13
Deflating .................................................... 13
Disassembling the double-bladed
paddle ........................................................ 13
Carrying the kayak ......................................... 13
Storage, cleaning ........................................... 14
Repairs ............................................................. 13
Disposal ........................................................... 14
Notes on the guarantee and
service handling ............................................. 14
Leveringsomfang ............................................... 15
Tekniske data ................................................... 1 5
Anvendte symboler ........................................... 15
Bestemmelsesmæssig brug .............................. 15
Sikkerhedsanvisninger .............................. 15 - 16
Livsfare ......................................................... 15
Fare for kvæstelser .............................. 15 - 16
Undgå tingsskader ...................................... 16
Opstilling ................................................... 16 - 18
Montering af 2-vejs-skrueventilen .............. 17
Oppumpning ............................................... 17
Fyldning af luftkamrene ...................... 17 - 18
Kontrol af driftstrykket ................................. 18
Anbringelse af tilbehør ............................. 18 - 19
Fastgøring af forreste sæde ....................... 18
Fastgøring af forreste stænkbeskyttelse .... 18
Fastgøring af bagerste stænkbeskyttelse
med sæde .................................................... 18
Trekantpude ................................................. 18
Montering af dobbeltpagajen ................... 19
Pakpose ........................................................ 19
Opbevaringstaske ....................................... 19
Sammenpakning af kajakken .......................... 19
Tømning for luft ............................................ 19
Afmontering af dobbeltpagaj .................... 19
Transport ............................................................ 19
Opbevaring, rengøring .................................... 19
Reparationer ............................................. 19 - 20
Henvisninger vedr. bortskaffelse .................... 20
Oplysninger om garanti og
servicehåndtering ............................................ 20

7
Conforme à ISO 6185-1, catégorie III, type B
Voldoet aan ISO 6185-1, categorie III, Typ B
Table des matieres/Inhoudsopgave
Étendue de la livraison .................................... 21
Caractéristiques techniques ............................ 21
Pictogrammes utilisés ....................................... 21
Utilisation conforme à sa destination ............. 21
Consignes de sécurité ............................. 21 - 22
Danger du mort .......................................... 21
Risque de blessure ............................. 21 - 22
Éviter les dommages matériels ......... 22 - 23
Montage .................................................. 23 - 24
Montaggio della valvola a vita
a 2 vie ........................................................ 23
Gonflage ................................................... 23
Remplissage des chambres d’air ..... 23 - 24
Contrôle de la pression de service .......... 24
Montage des accessoires ...................... 24 - 25
Fixation du siège avant ..................... 24 - 25
Fixation de la protection avant contre les
projections ................................................. 25
Fixation de la protection arrière contre les
projections ................................................. 25
Coussin triangulaire .................................. 25
Montage de la pagaie double ................ 25
Sac de marin ............................................. 25
Sac de rangement ..................................... 25
Démontage du kajak ...................................... 26
Dégonflage ................................................ 26
Démontage de la pagaie double ............ 26
Transport .......................................................... 26
Stockage, nettoyage ...................................... 26
Réparations ..................................................... 26
Mise au rebut .................................................. 26
Indications concernant la garantie et
le service après-vente ............................. 27 - 28
Leveringsomvang ............................................. 29
Technische gegevens ....................................... 29
Gebruikte symbolen ........................................ 29
Beoogd gebruik ............................................... 29
Veiligheidstips .......................................... 29 - 30
Levensgevaar .............................................. 29
Kans op lichamelijk letsel .................. 29 - 30
Voorkomen van materiële schade ............ 30
Montage ................................................... 31 - 32
Montage van het 2-weg schroefventiel .... 31
Oppompen ................................................. 31
Vullen van de luchtkamers ................. 31 - 32
Controle van de bedrijfsdruk .................... 32
Toebehoren monteren ............................. 32 - 33
Zitting voorzijde bevestigen .............. 32 - 33
Boegsproeibescherming bevestigen ........ 33
Sproeibescherming achtersteven
met zit bevestigen ....................................... 33
Driehoekig kussen ...................................... 33
Montage van de dubbele peddel ............ 33
Zeetas ......................................................... 33
Opbergtas .................................................. 33
Demontage van de kajak ....................... 33 - 34
Lucht aflaten ................................................ 34
Dubbele peddel demonteren .................... 34
Vervoer ............................................................. 34
Opslag, reiniging ............................................. 34
Reparaties ........................................................ 34
Afvalverwerking .............................................. 34
Opmerkingen over garantie en
serviceafhandeling .................................. 34 - 35

8
Entspricht der ISO 6185-1, Kategorie III, Typ B
Inhaltsverzeichnis
Lieferumfang .................................................... 36
Technische Daten ............................................ 36
Verwendete Symbole ..................................... 36
Bestimmungsgemäße Verwendung ............... 36
Sicherheitshinweise ................................. 36 - 38
Lebensgefahr ............................................. 36
Verletzungsgefahr ............................. 36 - 37
Vermeidung von Sachschäden ..........37 - 38
Aufbau ..................................................... 38 - 39
Montage des 2-Wege-Schraubventils ..... 38
Aufpumpen ................................................ 38
Befüllen der Luftkammern ................. 38 - 39
Kontrolle des Betriebsdrucks .................... 39
Zubehör anbringen ................................ 39 - 40
Vorderen Sitz befestigen .................. 39 - 40
Bugspritzschutz befestigen ...................... 40
Heckspritzschutz mit Sitz befestigen ........ 40
Dreieckskissen ........................................... 40
Montage des Doppelpaddels ................. 40
Seesack .................................................... 40
Aufbewahrungstasche .............................. 40
Abbau des Kajaks ................................... 40 - 41
Entlüften ...................................................... 41
Doppelpaddel demontieren ...................... 41
Transport ........................................................... 41
Lagerung, Reinigung ....................................... 41
Reparaturen ...................................................... 41
Hinweise zur Entsorgung ................................ 41
Hinweise zur Garantie und
Serviceabwicklung .................................. 41 - 42

9
Congratulations!
With this purchase you have opted for a
high-quality item. Familiarise yourself with the item
before using it for the fist time.
Please read and obey the following
instructions carefully.
Only use this item in the manner described and
for the purpose for which it is intended.
Store these instructions carefully.
When passing the item on to third parties, hand
over all accompanying documents as well.
They contain important details about the product,
including instructions for assembly, use and main-
tenance, as well as safety regulations. There is al-
ways a risk associated with watersports; to avoid
injury, or even death, it is therefore important that
you have detailed knowledge about this product.
Package contents (Fig. A)
1 x kayak (1)
1 x bow splash guard (2)
1 x front seat (3)
1 x stern splash guard with seat (4)
1 x triangular cushion/foot rest (5)
2 x double-bladed paddles (6)
1 x mid-section (7)
2 x drip rings (8)
1 x set of cord lengths (9)
2 x 285cm (9a)
1 x 200cm (9b)
2 x 150cm (9c)
1 x 80cm (9d)
3 x 2-way screw-on valves (10)
1 x straightedge (11)
2 x deflation tubes (12)
1 x repair kit (13)
1 x storage pouch (14)
1 x kit bag (15)
1 x instruction manual
Technical data
Dimensions (inflated):
kayak: approx. 325 x 91 x 46cm (L x W x H)
dual paddle: length: approx. 220cm
Weight not including accessories: approx. 7kg
Permissible operating pressure: approx. 0.05bar
(0.73psi)
Date of manufacture (month/year):
03/2018
160
Maximum load
Symbols used
WARNING!
Take note of the symbols displayed on the kayak
before using it.
= label on the kayak
permissible number of per-
sons: 2 adults/
0 children
permissible carrying capacity:
160kg (352.73lbs)
0.05bar
Permissible operating pressure
Intended use
This product has been designed for private use.
Areas for use: Within 300m of protected shore-
lines – for use on protected waters close to the
shoreline; small bays; small lakes; narrow rivers
and canals. Do not use in winds stronger than
force 4 and/or in waves higher than 0.5m.
Safety information
Life-threatening hazard!
• Never leave children unattended with packing
materials. There is a risk of suffocation.
• Never allow children to play with the item
unsupervised.
Risk of injury!
Beware of offshore winds!
Beware of offshore currents!
• Ensure that the weight (people and
load) is always evenly distributed in
the kayak to avoid the risk of capsiz-
ing.
• Pay attention to the maximum permissible carry-
ing capacity, and number of persons as well as
the safety warning detailed on the rating plate.
GB/IE/NI

10
• Always comply with the local navigation rules.
• Do not take any sharp or pointed objects with
you in the kayak.
• The kayak should be protected from contact
with potentially unsafe liquids or acids, as these
can cause irreparable damage.
• Protect the kayak from heat and fire! Be careful
with lit cigarettes!
• To avoid damage to the hull, take care to en-
sure that the kayak does not get onto on stony
ground.
• Do not leave the kayak, under any circumstanc-
es, if damage should occur to one of the five
internal chambers during use on the water. The
buoyancy of the remaining four chambers will
be sufficient to keep the kayak afloat.
• Do not, under any circumstances, transport the
kayak on a vehicle while it is still inflated.
• Never leave your kayak unoccupied on the
water. It will be carried away too fast for a
swimmer to be able to reach it.
• Before using the kayak, always make sure that
you have the paddles with you, otherwise you
will not have sufficient control over the kayak.
• Do not make any technical alterations to your
kayak. Modifications of any kind will impair the
operability of the sports equipment.
• Never use your kayak under the influence of
alcohol, drugs or medication.
• Never overestimate your strength; always
pace yourself when paddling so that you can
easily retrace the distance you have covered.
Stay within 300m of protected shorelines and
pay attention to changing winds and currents
that can severely hamper your ability to keep
moving.
CAUTION!
It is extremely important that you
exercise caution and self-awareness
when on the water. Never overestimate
your strength and boat-handling skills!
Always stay close to the shore! Pay at-
tention to the weather conditions, storm
warnings and any light signals or flares!
CAUTION!
Please observe the safety rules and ap-
plicable statutory regulations for lakes
and open waters, and for your own safe-
ty always wear an approved life jacket.
CAUTION!
Avoid using sunscreen and skincare
products which contain alcohol. Sun-
screens and skincare products which
contain alcohol can strip off the coloured
layer of this inflatable PVC product.
This can result in staining on your body,
clothing or other articles which come into
contact with the product.
WARNING!
In the event of a person’s falling over-
board, he or she must always climb back
in over the bow or stern, as there is a
high risk of capsizing when climbing in
over the sides.
Avoiding damage to the item!
• All inflatable items are sensitive to cold. Never
unfold and inflate the product at temperatures
below 15°C!
• If the air pressure in the inflatable increases in
direct sun, this must be rectified by releasing the
corresponding amount of air.
• Ensure that the product does not come into
contact with stones, gravel or sharp objects,
particularly when inflated, and do not allow it
to rub or scrape against rough surfaces as this
can cause damage to the PVC.
• Only insert suitable pump adapters into the
safety valves. Use of other adapters could
result in damage to the valves.
• Do not over-inflate – this can result in the seams
splitting open. Ensure the valves are firmly
closed after inflating.
• Avoid contact with sharp, hot, pointy or haz-
ardous items.
GB/IE/NI
11GB/IE/NI
Setting up
Follow the step-by-step instructions in
the order given. If the five air chambers
are not inflated in the correct order, it
can result in unequal pressure distribu-
tion. This can lead to the kayak’s being
unstable, thus compromising its handling
characteristics.
Note: The side of the kayak with the 3 screw-on
valves is the stern side (1f). The opposite side
(without screw-on valves) is the bow side (1g).
• Due to its size, the product should always be
assembled by two adults.
• Find a clean, level surface with sufficient room
to accommodate the fully unfolded kayak.
Check to make sure that all the parts are there
and in perfect condition.
• When assembling the kayak for the second
and subsequent times, check for any damage,
holes or tears and seal them as described in the
section entitled “Repairs”. Once you are on the
water, it is too late to repair any damage.
• Do not over-inflate the air chambers as this will
overstretch the PVC.
• Make sure that the inflated kayak does not
come into contact with stones or other sharp
objects that can damage it.
Assembling the 2-way screw-on
valve (Fig. I)
The floor chamber and the top side chambers
, of the kayak each have a threaded hole
for the supplied screw-on valves (10).
1. Pull the ring of the valve (10a) over the thread-
ed hole (1c) so that it sits neatly in the groove.
2. Screw the base (10b) clockwise into the thread-
ed hole.
Inflating
CAUTION!
• Follow the correct order when inflating the air
chambers. The correct order is indicated on the
kayak itself as well as in the instructions for use
(no. – ).
• The recommended operating pressure is
0.05bar (= 50mbar = 0.73psi).
• Avoid over-inflating the air chambers – other-
wise you risk overstretching the PVC or even
splitting the seams.
• Use a commercially available foot pump or
double action hand pump with the appropriate
attachments (and pressure gauge if available)
to inflate the product.
• Do not use a compressor or compressed air
canister to inflate the product. This can damage
the product.
• Always inflate each chamber fully.
Order of inflation
Inflate the chambers in the following order:
1. – floor chamber with screw-on valve
2. – lower side chamber with stopper valve
3. – upper side chamber with screw-on valve
4. – lower side chamber with stopper valve
5. – upper side chamber with screw-on valve
Note: The air chambers on the boat are marked
with their respective numbers ( – ).
Inflating the air chambers
Note: For the screw-on valves you will need a
pump that has a conical adapter with a diameter
of 17.5mm (Fig. J).
For the stopper valves you will need a pump that
has a conical adapter with a diameter of 8.5mm
(Fig. M).
1. Floor chamber with screw-on valve
1. Screw the cap (10c) on the screw-on valve (10)
anticlockwise to open it.
2. Inflate the floor chamber with the appropri-
ate pump.
3. Check the operating pressure as described in
the section “Regulating the operating pressure”.
4. Screw the cap (10c) on the screw-on valve (10)
clockwise to close it.
2. Lower side chamber with stopper
valve
1. Remove the stopper.
2. Inflate the lower side chamber with the
appropriate pump.
3. Check the operating pressure as described in
the section “Regulating the operating pressure”.
4. Replace the stopper in the valve and depress
the valve using light pressure (Fig. K/L).

12
3. Upper side chamber with screw-on
valve
1. Screw the cap (10c) on the screw-on valve (10)
anticlockwise to open it.
2. Inflate the upper side chamber with the
appropriate pump.
3. Check the operating pressure as described in
the section “Regulating the operating pressure”.
4. Screw the cap (10c) on the screw-on valve (10)
clockwise to close it.
4. Lower side chamber with stopper
valve
1. Remove the stopper.
2. Inflate the lower side chamber with the
appropriate pump.
3. Check the operating pressure as described in
the section “Regulating the operating pressure”.
4. Replace the stopper in the valve and depress
the valve using light pressure (Fig. K/L).
5. Upper side chamber with screw-on
valve
1. Screw the cap (10c) on the screw-on valve (10)
anticlockwise to open it.
2. Inflate the upper side chamber with the
appropriate pump.
3. Check the operating pressure as described in
the section “Regulating the operating pressure”.
4. Screw the cap (10c) on the screw-on valve (10)
clockwise to close it.
Regulating the operating pressure
IMPORTANT!
The PVC material will stretch slightly
after initial inflation of the item, and will
not revert to its original state.
Please be aware that the required pres-
sures may vary slightly depending on
the load and outdoor temperature.
1. Inflate the floor chamber and the two lower
side chambers , until they feel firm and
there are no more creases visible in the materi-
al.
Note: There should be a small amount of give in
the air chambers when pressed with the thumb.
2. To regulate the operating pressure of the two
upper side chambers, place the straightedge (11)
along the measuring strip (1h) on the inside of
each of the two upper chambers (Fig. O).
The bottom arrow and the 0 on the straight-
edge (11) must overlap with the bottom arrow
and the 0 on the measuring strip (1h).
3. The first time the kayak is inflated, the number
10 on the measuring strip (1h) must NOT go
beyond position A on the straightedge (11).
Note: The number 10 on the measuring strip
(1h) indicates the maximum expansion of the air
chambers.
4. When inflating for the second or subsequent
times, the number 10 on the measuring strip
(1h) must be between position A and position
10 on the straightedge (11).
Attaching accessories
Note: Tie the cords using figure-of-eight knots
(Fig. C) and square knots (Fig. D).
Securing the front seat (Fig. E)
1. Inflate all the air chambers in the front seat (3).
2. Position the seat base between the two upper
side chambers , to ensure that the seat
will stay firmly in place.
Note: The Velcro strips on the backrest of the
front seat (3) must point towards the stern (1b).
3. Tie the seat to the eyelets (1a) on the floor
chamber (Fig. E) using the 80cm cord (9d)
and secure with a square knot (Fig. D).
4. Tie the seat backrest (3) to the eyelets (1b)
on the two lower side chambers , using
the 150cm cords (9c), one on each side in a
zigzag shape (Fig. F).
Make a figure-of-eight knot at one end of the
cord (Fig. C). Feed the cord through the eyelets
on the side chamber, finishing off with a figure-
of-eight knot (Fig. C) at the other end of the
cord.
Securing the bow splash guard
(Fig. G)
1. Inflate all the air chambers on the bow splash
guard (2).
2. Tie the bow splash guard (2) to the eyelets (1b)
on the two upper side chambers , using a
285cm cord (9a) in a zigzag shape (Fig. G).
GB/IE/NI

13
Make a figure-of-eight knot at one end of the
cord (Fig. C). Feed the cord through the eyelets
on the side chamber, finishing off with a figure-
of-eight knot (Fig. C) at the other end of the
cord.
Securing the stern splash guard and
seat (Fig. H)
1. Inflate all air chambers on the stern splash
guard (4).
2. Push the seat base down underneath the two
upper side chambers , to ensure that the
seat will stay firmly in place.
3. Tie the stern splash guard (4) to the eyelets
(1b) on the two upper side chambers ,
using a 285cm cord (9a) in a zigzag shape
(Fig. H).
Make a figure-of-eight knot at one end of the
cord (Fig. C). Feed the cord through the eyelets
on the side chamber, finishing off with a figure-
of-eight knot (Fig. C) at the other end of the
cord.
Triangular cushion
1. Inflate the triangular cushion (5).
2. Position the inflated triangular cushion (5) firmly
in the bow of the kayak.
Note: The triangular cushion (5) serves as a foot
rest for the person sitting at the front of the kayak.
Assembling the double-bladed pad-
dle (Fig. B)
1. Push a drip ring (8) over each end of the
paddle shaft until the rings are sitting below the
locking button (6a) on the tapered part of the
shaft.
2. Push the two paddle shafts (6) into the mid-sec-
tion (7). Both locking buttons (6a) must click
audibly and visibly into place into the holes
(7a) in the mid-section (7).
Note: The paddles can also be used individually
without the mid-section as single-bladed paddles
for 2-person canoeing.
Kit bag
A kit bag (15) is included with the product, which
can be used to carry and store the kayak.
Use the 200cm cord (9b) to tie up the bag.
The kit bag can also be used to protect provisions,
clothing etc. from spray on board the kayak.
Note: Please note that the kit bag is not water-
proof. Do not store any sensitive objects such as
cameras in the kit bag.
When using it on board, remove the cord and
roll up the top end evenly. Then close the kit bag
using the Velcro fastenings.
Storage pouch
A spray-proof storage pouch (14) is also included
with the product, which can be fastened to the
rear of the front seat (3) using the Velcro fasten-
ings. Smaller objects can be kept in this storage
pouch.
Note: Please note that the pouch is not water-
proof. Do not keep sensitive objects in this pouch.
Dismantling the kayak
Remove the front seat, stern splash guard and
seat, bow splash guard and triangular cushion.
Deflating
Deflate the kayak as follows:
1. To deflate the air chambers with stopper valves,
pull out the stopper valves (1d) so that they are
no longer flush with the chamber
(Fig. K) and squeeze the sides of the valve
gently together or use the deflation tube (12)
(Fig. N).
2. To deflate the chambers with screw-on valves,
unscrew the valves (10b) fully out of their bases
(1c) and let the air out completely
(Fig. J).
Disassembling the double-bladed
paddle
1. Press the respective locking button.
2. Pull the mid-section out of the paddle shaft.
Note: The drip rings should be left on the paddle
shafts.
Carrying the kayak
The kayak should always be carried by two peo-
ple. Use the carrying loops on the bow and stern.
GB/IE/NI

14
Storage, cleaning
CAUTION!
Only use cleaning agents that do not
contain acids or petrol, and never use
silicon-based products.
The product must always be kept dry, clean and
deflated in a temperature-controlled room, and
out of the reach of rodents. Valves should always
be kept closed when the kayak is being stored.
Ensure that the product is stored flat and not in a
distorted position.
1. Clean your kayak thoroughly after each use by
rinsing with fresh water and mild soap in order
to remove any salt crystals, grains of sand and
any other minor soiling. After cleaning, allow
the item to dry completely before storing.
2. Let the air out of all the air chambers complete-
ly.
3. Place the two upper side chambers inside the
kayak and then fold the kayak together careful-
ly.
Repairs
CAUTION!
You should never attempt to repair larg-
er damaged areas yourself.
Smaller punctures etc. can be repaired using the
repair kit (13) supplied.
1. Let the air out of the kayak completely and
clean the damaged area with an alcohol-based
solution. Roughen the area surrounding the tear
or hole slightly using fine sandpaper.
2. Cut a patch that is large enough to cover the
damaged area plus 1.25cm around it on all
sides.
3. Apply the glue to the appropriate spot on the
kayak as well as on the patch itself. Leave the
glue dry for about three minutes.
4. Press the patch down with a soft object.
Note: Make sure to work on an even surface
without any creases or folds. Using a rounded ob-
ject, gently remove any bubbles, moving outwards
from the centre.
5. Wait for at least 12 hours after the repair
before re-inflating the kayak.
Disposal
Dispose of the article and the packaging materi-
als in accordance with current local regulations.
Packaging materials such as foil bags are not sui-
table to be given to children. Keep the packaging
materials out of the reach of children.
Notes on the guarantee and
service handling
The product was produced with great care and
under constant supervision. You receive a three-
year warranty for this product from the date of
purchase. Please retain your receipt. The warranty
applies only to material and workmanship and
does not apply to misuse or improper handling.
Your statutory rights, especially the warranty
rights, are not affected by this warranty. With
regard to complaints, please contact the following
service hotline or contact us by e-mail. Our ser-
vice employees will advise as to the subsequent
procedure as quickly as possible. We will be per-
sonally available to discuss the situation with you.
Any repairs under the warranty, statutory gua-
rantees or through goodwill do not extend the
warranty period. This also applies to replaced
and repaired parts. Repairs after the warranty are
subject to a charge.
IAN: 297670
Service Great Britain
Tel.: 0871 5000 720 (£ 0.10/Min.)
Service Ireland
Tel.: 1890 930 034
(0,08 EUR/Min., (peak))
(0,06 EUR/Min., (off peak))
GB/IE/NI

15
Hjertelig tillykke!
Du har valgt at købe et kvalitetsprodukt. Lær
produktet at kende, inden du tager det i brug
første gang.
Læs og overhold nøje den medfølgende
betjeningsvejledning.
Brug kun produktet som beskrevet og til de
angivne anvendelsesområder. Opbevar denne
vejledning et sikkert sted. Udlever også alle
dokumenter, hvis produktet videregives til en
tredjepart. De indeholder vigtige oplysninger om
produktet, dets opbygning, drift og pleje samt
sikkerhedsregler. Vandsport medfører altid risici,
så godt kendskab til produktet kan forhindre
eventuelle personskader eller endda dødsfald.
Leveringsomfang (fig. A)
1 x kajak (1)
1 x forreste stænkbeskyttelse (2)
1 x forreste sæde (3)
1 x bagerste stænkbeskyttelse med sæde (4)
1 x trekantpude/fodstøtte (5)
2 x dobbeltpagaj (6)
1 x midterstykke (7)
2 x drypring (8)
1 x snoresæt (9)
2 x 285 cm (9a)
1 x 200 cm (9b)
2 x 150 cm (9c)
1 x 80 cm (9d)
3 x 2-vejs-skrueventil (10)
1 x kontrollineal (11)
2 x lufttømningsrør (12)
1 x reparationssæt (13)
1 x opbevaringstaske (14)
1 x pakpose (15)
1 x betjeningsvejledning
Tekniske data
Mål (oppustet): kajak:
ca. 325 x 91 x 46 cm (L x B x H);
pagaj: længde: ca. 220 cm)
Vægt uden tilbehør: ca. 7 kg
Tilladt driftstryk: ca. 0,05 bar (0,73 psi)
Fremstillingsdato (måned/år):
03/2018
160
Maksimal belastning
Anvendte symboler
ADVARSEL!
Bemærk symbolerne anbragt på produktet,
inden du tager det i brug.
= mærkning på kajakken
Tilladt antal personer:
2 voksne/0 børn
Tilladt nyttelast: 160 kg
(352,73 lbs.)
0,05 bar Tilladt driftstryk
Bestemmelsesmæssig brug
Dette produkt er udviklet til privat brug. Anven-
delsesområde: Beskyttede kystzoner op til 300
m – til færdsel i beskyttede, kystnære farvande,
små bugter, små søer, smalle åer og kanaler. Må
ikke benyttes ved en vindstyrke over 4 og/eller
ved en bølgehøjde over 0,5 m.
Sikkerhedsanvisninger
Livsfare!
• Lad aldrig børn være alene med emballage-
materialet. Der er fare for kvælning.
• Lad aldrig børn lege med produktet uden
opsyn.
Fare for kvæstelser!
Forsigtig ved fralandsvind!
Forsigtig ved udgående strøm!
• Sørg for, at personer og last altid er
fordelt jævnt i kajakken, da der ellers
er fare for at kæntre.
• Overhold angivelserne på typeskiltet, den
tilladte nyttelast og antal personer samt ad-
varslerne.
• Overhold altid de lokale søfartsregler.
• Medbring ingen skarpe eller spidse genstan-
de.
• Kajakken skal beskyttes mod kontakt med
tvivlsomme væsker eller syrer. De kan medføre
skader, der ikke kan repareres.
DK

16
• Beskyt kajakken mod varme og åben ild! Vær
forsigtig med tændte cigaretter!
• Sørg for, at du ikke ender på stenet under-
grund for at undgå skader på bådens skrog.
• Hvis der under sejladsen opstår skader på et
af de fem kamre, må du under ingen omstæn-
digheder forlade kajakken. Opdriften fra de
fire intakte kamre er tilstrækkelig til at holde
kajakken sikkert oven vande.
• Kajakken må under ingen omstændigheder
transporteres på køretøjer i oppustet stand.
• Lad ikke kajakken ligge i vandet ubemandet.
Den driver væk, hurtigere end du kan svømme
efter den.
• Sørg altid for at medbringe pagajen ved brug,
da du ellers ikke er i stand til at manøvrere
kajakken tilstrækkeligt.
• Foretag ingen tekniske ændringer på kajak-
ken. Ændringer af enhver art udgør fare i
forbindelse med sejlads med sportsudstyret.
• Benyt aldrig kajakken, hvis du er påvirket af
alkohol, narkotika eller medicin.
• Overvurder ikke dine kræfter, og spar på
kræfterne, når du padler, så du uden proble-
mer kan padle tilbage ad den tilbagelagte
strækning. Ophold dig i beskyttede kystzoner
op til 300 m, og vær opmærksom på skiften-
de vind- og strømforhold, der kan vanskeliggø-
re sejladsen betydeligt.
FORSIGTIG!
Forsigtighed og selvkritik på vandet er
enormt vigtigt! Overvurder aldrig dine
kræfter og dine manøvreringsevner!
Ophold dig altid i nærheden af kysten!
Hold øje med vejret, varsler om uvejr
og eventuelle lyssignaler!
FORSIGTIG!
Overhold altid sikkerhedsreglerne og
de gældende lovbestemmelser for søer
og åbent vand, og bær for din egen
sikkerheds skyld altid en godkendt
redningsvest.
FORSIGTIG!
Undgå brug af alkoholholdige solbe-
skyttelses- og hudplejemidler. Alkohol-
holdige solbeskyttelses- og hudpleje-
midler kan opløse farvebelægningen
på det oppustelige PVC-produkt. Dette
kan medføre, at det smitter af på din
krop, dit tøj eller andre genstande, der
kommer i kontakt med produktet.
ADVARSEL!
Hvis en person er faldet overbord, skal
denne altid kravle op i kajakken igen
over stævnen eller agterenden, da der
er stor fare for at kæntre, hvis man gør
det over siderne.
Undgå tingsskader!
• Alle oppustede produkter er følsomme over
for kulde. Produktet må derfor aldrig foldes ud
og pumpes op ved en temperatur under
15 °C!
• Hvis lufttrykket stiger i direkte sollys, skal det
udlignes ved at lukke en passende mængde
luft ud.
• Sørg for, at produktet – især i oppumpet stand
– ikke kommer i kontakt med eller gnider mod
sten, grus eller spidse genstande, da der ellers
kan opstå skader på materialet.
• Sæt kun egnede pumpeadaptere i sikkerheds-
ventilerne. Ellers kan ventilerne blive beskadi-
gede.
• Pump ikke for hårdt op, da der ellers erfare
for, at svejsesømmene revner. Luk ventilerne
godt efter oppumpning.
• Undgå kontakt med skarpe, varme, spidse
eller farlige genstande.
Opstilling
Følg de enkelte klargøringstrin i den
angivne rækkefølge. Hvis de fem
luftkamre ikke pumpes op i den rigtige
rækkefølge, kan der opstå en ujævn
trykfordeling. Dette kan gøre kajakken
ustabil og forringe dens sejlegenskaber.
Bemærk: Siden af kajakken med de 3 skrue-
ventiler er agterenden (1f). Den modsatte side
(uden skrueventiler) er stævnen (1g).
DK

17
DK
• Klargøringen af produktet skal på grund af
produktets størrelse altid udføres af to voksne.
• Vælg et glat og rent underlag med tilstrækkelig
plads til at folde kajakken ud. Kontroller, om
alle enkeltdele forefindes og er i fejlfri stand.
• Fra den anden klargøring skal kajakken under-
søges for eventuelle skader, huller og revner,
og disse skal tætnes som beskrevet i afsnittet
”Reparationer”. Når du først er på vandet, kan
eventuelle skader ikke længere afhjælpes.
• Pump ikke luftkamrene for hårdt op, så materia-
let ikke bliver overstrakt.
• Sørg for, at kajakken i oppumpet stand ikke
kommer i kontakt med sten eller andre spidse
genstande og bliver beskadiget.
Montering af 2-vejs-skrueventilen
(fig. I)
Bundkammeret og de øverste sidekamre
, på kajakken er hver udstyret med en gevind-
åbning til de medfølgende skrueventiler (10).
1. Træk ventilens strop (10a) over gevindåbnin-
gen (1c), så den sidder fast i den dertil bereg-
nede rille.
2. Drej basen (10b) ind i gevindåbningen i urets
retning.
Oppumpning
FORSIGTIG!
• Overhold den rigtige rækkefølge, når du puster
luftkamrene op. Den rigtige rækkefølge er an-
givet på kajakken og i betjeningsvejledningen
(nr. – ).
• Det anbefalede driftstryk er 0,05 bar (= 50
mbar = 0,73 psi).
• Undgå at blæse luftkamrene for hårdt op, da
der ellers er fare for overstrækning af materia-
let, eller at svejsesømmene bliver revet op.
• Anvend en almindelig fodpumpe eller dob-
beltvirkende stempelpumpe med passende
tilslutningsmulighed og evt. manometer.
• Anvend ikke kompressor eller trykluftflaske til at
pumpe produktet op. Dette kan medføre skader
på produktet.
• Pump altid alle luftkamre helt op.
Rækkefølge af oppumpningen
Pump luftkamrene op i følgende rækkefølge:
1. – Bundkammer med skrueventil
2. – Nederste sidekammer med propventil
3. – Øverste sidekammer med skrueventil
4. – Nederste sidekammer med propventil
5. – Øverste sidekammer med skrueventil
Bemærk: Luftkamrene er afmærket med tilhøren-
de numre ( – ) på båden.
Fyldning af luftkamrene
Bemærk: Til skrueventilen skal du bruge en
pumpe med konisk tilslutning og en diameter på
ca. 17,5 mm (fig. J).
Til propventilen skal du bruge en pumpe med
konisk tilslutning og en diameter på ca. 8,5 mm
(fig. M).
1. Bundkammer med skrueventil
1. Skru låget (10c) af skrueventilen (10) mod urets
retning.
2. Pump bundkammeret op med den passende
pumpe.
3. Kontroller driftstrykket, som beskrevet i afsnittet
”Kontrol af driftstrykket”.
4. Skru låget (10c) på skrueventilen (10) igen i
urets retning.
2. Nederste sidekammer med propventil
1. Åbn ventillukningen.
2. Pump det nederste sidekammer op med den
passende pumpe.
3. Kontroller driftstrykket, som beskrevet i afsnittet
”Kontrol af driftstrykket”.
4. Luk ventillukningen igen, og forsænk ventilen
med et let tryk (fig. K/L).
3. Øverste sidekammer med skrueventil
1. Skru låget (10c) af skrueventilen (10) mod urets
retning.
2. Pump det øverste sidekammer op med den
passende pumpe.
3. Kontroller driftstrykket, som beskrevet i afsnittet
”Kontrol af driftstrykket”.
4. Skru låget (10c) på skrueventilen (10) igen i
urets retning.
4. Nederste sidekammer med propventil
1. Åbn ventillukningen.
2. Pump det nederste sidekammer op med den
passende pumpe.
3. Kontroller driftstrykket, som beskrevet i afsnittet
”Kontrol af driftstrykket”.

18
4. Luk ventillukningen igen, og forsænk ventilen
med et let tryk (fig. K/L).
5. Øverste sidekammer med skrueventil
1. Skru låget (10c) af skrueventilen (10) mod urets
retning.
2. Pump det øverste sidekammer op med den
passende pumpe.
3. Kontroller driftstrykket, som beskrevet i afsnittet
”Kontrol af driftstrykket”.
4. Skru låget (10c) på skrueventilen (10) igen i
urets retning.
Kontrol af driftstrykket
VIGTIGT!
PVC-materialet strækkes ved første op-
pumpning af produktet og vender ikke
tilbage til sin oprindelige tilstand.
Husk, at angivelserne let kan variere
afhængigt af belastning og udendør-
stemperatur.
1. Pumpe bundkammeret og de to nederste
sidekamre , op, til de føles faste og der
ikke længere er synlige folder i materialet.
Bemærk: Hvis du trykker på det pågældende
luftkammer med tommelfingeren, skal det stadig
let kunne trykkes ind.
2. Kontroller driftstrykket i de to øverste sidekamre
ved at lægge kontrollinealen (11) over målestri-
berne (1h) på indersiden af det pågældende
øverste luftkammer (fig. O).
Den nederste pil og 0 på kontrollinealen (11)
skal overlappe den nederste pil og 0 på må-
lestriben (1h).
3. Ved første oppumpning må 10 på målestriben
(1hb) IKKE overskride position A på kontrolline-
alen (11).
Bemærk: 10 på målestriben (1h) viser den
maksimale strækning af luftkamrene.
4. Ved gentagen oppumpning skal 10 på målestri-
ben (1h) ligge mellem position A og position
10 på kontrollinealen (11).
Anbringelse af tilbehør
Bemærk: Bind snorene med et ottetalsknob (fig.
C) og et råbåndsknob (fig. D).
Fastgøring af forreste sæde (fig. E)
1. Pump alle luftkamrene i forsædet (3) op.
2. Placer sædet mellem de to øverste sidekamre
, , så sædet sidder godt fast.
Bemærk: Burrebåndene på ryglænet af forsæ-
det (3) skal vende mod agterenden (1b).
3. Fastgør sædet til øsknerne (1a) i bundkammeret
med snoren på 80 cm (9d) (fig. E) med et
råbåndsknob (fig. D).
4. Fastgør sædets (3) ryglæn til øsknerne (1b) på
de to nederste sidekamre , med de to
snore på 150 cm (9c) i zigzagform (fig. F).
Lav et ottetalsknob i den ene ende af snoren
(fig. C). Før den pågældende snor igennem
øsknerne i sidekammeret, og lav derefter et ot-
tetalsknob (fig. C) i den anden ende af snoren.
Fastgøring af forreste stænkbeskyt-
telse (fig. G)
1. Pump alle luftkamrene i forreste stænkbeskyttel-
se (2) op.
2. Fastgør forreste stænkbeskyttelse (2) til øsk-
nerne (1b) på de to øverste sidekamre ,
med en snor på 285 cm (9a) i zigzagform
(fig. G).
Lav et ottetalsknob i den ene ende af snoren
(fig. C). Før den pågældende snor igennem
øsknerne i sidekammeret, og lav derefter et ot-
tetalsknob (fig. C) i den anden ende af snoren.
Fastgøring af bagerste stænkbeskyt-
telse med sæde (fig. H)
1. Pump alle luftkamrene i bagerste stænkbeskyt-
telse (4) op.
2. Tryk sædet ind under de to øverste sidekamre
, , så sædet sidder godt fast.
3. Fastgør bagerste stænkbeskyttelse (4) til øsk-
nerne (1b) på de to øverste sidekamre ,
med en snor på 285 cm (9a) i zigzagform
(fig. H).
Lav et ottetalsknob i den ene ende af snoren
(fig. C). Før den pågældende snor igennem
øsknerne i sidekammeret, og lav derefter et ot-
tetalsknob (fig. C) i den anden ende af snoren.
Trekantpude
1. Pump trekantpuden (5) op.
2. Placer den oppumpede trekantpude (5) fast i
bunden af kajakken.
Bemærk: Trekantpuden (5) fungerer som fod-
støtte for den, der sidder forrest.
DK

19
DK
Montering af dobbeltpagajen (fig. B)
1. Skub en drypring (8) på begge neder af
pagajrøret, så ringene sidder under låsepalen
(6a) på forsnævringen af røret.
2. Stik de to pagajrør (6) ind i midterstykket (7).
Begge låsepaler (6a) skal tydeligt gå i hak
i åbningerne (7a) i midterstykket (7) med et
klik.
Bemærk: Pagajen kan med 2 personer i kajak-
ken også anvendes enkeltvis uden midterstykket.
Pakpose
Produktet er vedlagt en pakpose (15), som kan
bruges til opbevaring af kajakken ved transport
og opbevaring.
Posen lukkes med snoren på 200 cm (9b). Der-
udover kan pakposen anvendes til opbevaring
af proviant, tøj osv. beskyttet mod vandsprøjt.
Bemærk: Bemærk, at pakposen ikke er vand-
tæt. Opbevar ikke følsomme genstande som
f.eks. kameraer i pakposen.
Tag snoren ud og rul den øverste ende fladt
sammen ved anvendelse om bord. Luk derefter
pakposen med burrebåndene.
Opbevaringstaske
Produktet er også vedlagt en dryptæt opbeva-
ringstaske (14), der anbringes bag på forsædet
(3) med burrebåndene. Opbevaringstasken kan
bruges til opbevaring af mindre genstande.
Bemærk: Bemærk, at tasken ikke er vandtæt.
Opbevar ikke følsomme genstande i tasken.
Sammenpakning af kajakken
Fjern forsædet, bagerste stænkbeskyttelse med
sæde, forreste stænkbeskyttelse og trekantpu-
den.
Tømning for luft
Tøm kajakken for luft som følger:
1. Tøm luftkamrene med propventiler for luft ved
at trække propventilen (1d) ud af forsænk-
ningerne (fig. K) og trykke ventilskaftet let
sammen, eller brug lufttømningsrøret (12)
(fig. N).
2. Tøm luftkamrene med skrueventiler for luft ved
at skrue skrueventilen (10b) helt ud af soklen
(1c), og lad al luften slippe ud (fig. J).
Afmontering af dobbeltpagaj
1. Tryk på en af låsepalerne.
2. Træk midterstykket af det pågældende pagaj-
rør.
Bemærk: Drypringene skal blive siddende på
pagajrørene.
Transport
Transporter altid kajakken to personer sam-
men, og anvend bærestropperne på stævn og
agterende.
Opbevaring, rengøring
FORSIGTIG!
Benyt kun rengøringsmidler, der ikke
indeholder syre eller benzin, og aldrig
silikonebaserede produkter.
Opbevar altid produktet tørt, rent og tømt for
luft i et tempereret lokale og utilgængeligt for
skadedyr. Ventilerne skal altid være lukkede ved
opbevaring. Sørg for, at produktet ikke bliver
deformeret, men opbevares jævnt.
1. Rengør kajakken grundigt efter hver brug
ved at skylle den med rent vand og sæbe
for at fjerne saltkrystaller, sandkorn og andet
småsnavs. Lad den derefter tørre helt.
2. Luk al luften ud af alle luftkamrene.
3. Læg de to øverste sidekamre ind i kajakken,
og fold den derefter omhyggeligt sammen.
Reparationer
FORSIGTIG!
Ved større skader bør du under ingen
omstændigheder selv foretage repara-
tioner.
Mindre skader kan du reparere med det medføl-
gende reparationssæt (13).
1. Luk al luften ud af kajakken, og rengør det
beskadigede sted med en alkoholbaseret op-
løsning. Riv let op i materialet omkring revnen
eller hullet med fint smergellærred.
2. Skær en lap til, der dækker det beskadigede
område plus yderligere 1,25 cm til alle sider.
3. Smør lim på stedet på kajakken og på lappen.
Lad limen tørre i ca. 3 minutter.

20
4. Tryk lappen fast med en blød genstand.
Bemærk: Sørg for at arbejde på et jævnt
underlag uden rynker eller folder. Fjern forsigtigt
eventuelle luftbobler med en afrundet genstand
indefra og ud.
5. Vent mindst 12 timer efter reparationen, inden
du pumper kajakken op igen.
Henvisninger vedr. bortskaf-
felse
Bortskaf artikel og emballage i overensstem-
melse med lokalt gældende forskrifter. Embal-
lagematerialer som f.eks. plastposer hører ikke
hjemme i børnehænder. Opbevar emballagen
utilgængeligt for børn.
Oplysninger om garanti og
servicehåndtering
Produktet er fremstillet med største omhu og un-
der vedvarende kontrol. Der ydes en garanti på
tre år fra købsdatoen på dette produkt. Opbevar
venligst kvitteringen fra købet.
Garantien gælder kun for materiale- og
fabrikationsfejl og bortfalder ved misbrug eller
uhensigtsmæssig anvendelse. Deres lovpligtige
rettigheder, særligt garantikrav, begrænses ikke
af denne garanti.
Ved eventuelle klager bedes du henvende
dig til nedenstående service-hotline eller tage
kontakt til os via e-mail. Medarbejderne i vores
kundetjeneste vil så aftale den videre fremgangs-
måde med dig. Vi vil under alle omstændigheder
rådgive dig personlig.
Garantiperioden forlænges ikke ved eventuel-
le reparationer inden for garantien eller ved
kulance. Dette gælder også for udskiftede
og reparerede dele. Efter udløb af garantien
er forefaldende reparationer forbundet med
omkostninger.
IAN: 297670
Service Danmark
Tel.: 32 710005
E-Mail: [email protected]
DK

21
Félicitations !
Vous venez d’acquérir un article de qualité. Avant
la première utilisation, familiarisez-vous avec
l’article.
Pour cela, lisez attentivement le mode
d’emploi suivant et observez-le.
Utilisez l’article uniquement comme indiqué et pour
les secteurs d’utilisation mentionnés.
Conservez bien ce mode d’emploi.
Si vous cédez l’article à un tiers, veillez à lui
remettre l’ensemble de la documentation.
Elle renferme des informations importantes sur le
produit, le montage, l’utilisation, l’entretien ainsi que
des conseils de sécurité. Comme le sport aquatique
présente toujours des risques, les connaissances
précises du produit peuvent éviter des dommages
corporels, voir même des décès.
Étendue de la livraison (fig. A)
1 kajak (1)
1 protection avant contre les projections (2)
1 siège avant (3)
1 protection arrière contre les projections (4)
1 coussin triangulaire/repose-pieds (5)
2 pagaies double (6)
1 élément central (7)
2 anneaux pare-gouttes (8)
1 kit de cordes (9)
2 cordes de 285 cm (9a)
1 corde de 200 cm (9b)
2 cordes de 150 cm (9c)
1 corde de 80 cm (9d)
3 valves à visser à 2 voies (10)
1 règle de contrôle (11)
2 tubes de dégonflage (12)
1 kit de réparation (13)
1 sac de rangement (14)
1 sac de marin (15)
1 Notice d’utilisation
Caractéristiques techniques
Dimensions (gonflé) : kayak :
env. 325 x 91 x 46 cm (L x l x h)
rame double : longueur : env. 220 cm
Poids sans accessoires : env. 7 kg
Pression de service autorisée : 0,05 bar (0,73 psi)
Date de fabrication (mois/année) :
03/2018
160
Charge maximale
Pictogrammes utilisés
AVERTISSEMENT !
Observez les pictogrammes apposés sur le produit
avant de l’utiliser.
= marquage sur le kajak
nombre de personnes autori-
sé : 2 adultes/0 enfant
charge utile autorisée :
160 kg (352,73 lbs.)
0,05 bar
Pression de service autorisée
Utilisation conforme à sa desti-
nation
Cet article a été conçu pour une utilisation privée.
Domaine d’utilisation : zones côtières protégées,
jusqu’à 300 m – pour des sorties dans des eaux
protégées, situées à proximité des côtes, dans de
petites baies, sur de petits lacs, rivières et canaux
étroits. Ne pas utiliser lorsque la force du vent est
supérieure à 4 et/ou lorsque les vagues dépassent
0,5 m.
Consignes de sécurité
Danger de mort !
• Ne laissez jamais les enfants sans surveillance
avec le matériel d’emballage. Il y a risque
d’étouffement.
• Ne laissez jamais les enfants sans surveillance
avec l’article.
Risque de blessure !
Attention en cas de vent de terre !
Attention en cas de courants venant de
terre !
FR/BE

22
• Veillez toujours à répartir régulière-
ment les charges et les personnes dans
le kayak, pour éviter que le kayak ne
chavire.
• Respectez les indications de la plaque signalé-
tique, la charge maximale autorisée, le nombre
maximal de personnes autorisées et l’avertisse-
ment.
• Respectez toujours les lois locales sur la naviga-
tion.
• N’emmenez pas d’objets tranchants ou pointus.
• Protégez le kayak contre tout contact avec des
liquides ou des acides à risques. Un tel contact
pourrait engendrer des dégâts irréparables.
• Protégez le kayak contre la chaleur et le feu !
Attention aux cigarettes incandescentes !
• Évitez les fonds pierreux, afin d’éviter des endom-
magements sur l’embarcation.
• Si l’une des cinq chambres à air venait à être
endommagée durant l’utilisation du kayak sur
l’eau, ne quittez en aucun cas le kayak. La force
portante des quatre autres chambres à air est suf-
fisante pour maintenir en toute sécurité le kayak
à la surface de l’eau.
• Ne transportez en aucun cas le kayak sur des
véhicules à l’état gonflé.
• Ne laissez jamais votre kayak sans personne sur
l’eau. Il sera plus très rapidement déporté et vous
ne pourrez plus le rejoindre à la nage.
• Veillez toujours à la présence des pagaies, car le
kayak ne pourrait autrement pas être correcte-
ment manœuvré.
• N’effectuez pas de modifications techniques
sur votre kayak. Des modifications en tout genre
mettent en danger l’utilisation correcte de l’appa-
reil sportif.
• N’utilisez jamais votre kayak sous l’emprise de
l’alcool, de drogues ou de médicaments.
• Ne surestimez jamais vos forces et employez la
force de vos muscles en pagayant de manière
à pouvoir revenir sans problème à votre point
de départ. Restez dans les zones de rivage
protégées à moins de 300 m et veillez aux
changements de conditions météorologiques/
de courants, qui pourraient considérablement
entraver votre avancée.
ATTENTION !
Votre circonspection et votre évaluation
des risques sur l’eau sont essentielles. Ne
surévaluez jamais vos forces et vos talents
de navigation ! Restez toujours à proximi-
té des côtes et rivages ! Prenez en consi-
dération les conditions météorologiques
et les alertes météo, ainsi que d’éventuels
signaux lumineux !
ATTENTION !
Veuillez toujours respecter les règles de
sécurité et les lois en vigueur sur les lacs/
mers et portez toujours un gilet de sauve-
tage certifié et contrôlé pour assurer votre
propre sécurité.
ATTENTION !
Évitez d’utiliser des produits de protection
solaire ou de soins pour la peau contenant
de l’alcool. Les produits de protection
solaire ou de soins pour la peau contenant
de l’alcool risquent de détacher le revête-
ment couleur de l’article à gonfler en PVC.
Ceci peut entraîner des décolorations sur
votre corps, vos vêtements ou d’autres
objets en contact avec le revêtement.
AVERTISSEMENT !
Si une personne est passée par dessus
bord, elle devra alors toujours remonter
par l’avant ou par l’arrière. Une montée
sur les côtés risque de faire chavirer le
kayak.
Éviter les dommages matériels !
• Tous les articles gonflables sont sensibles au
froid. Ne dépliez et ne gonflez pas l’article à une
température inférieure à 15 °C !
• Si la pression de l’air venait à augmenter sous
l’influence du soleil, elle doit alors être compen-
sée par un dégonflage approprié.
• Tout spécialement lorsque l’article est gonflé,
veillez à éviter tout contact du kayak avec des
pierres pointues, des graviers ou d’autres objets
tranchants, et à l’absence de tout frottement. De
tels contacts pourraient endommager le revête-
ment du kayak.
FR/BE
Table of contents
Languages:
Other Crivit Boat manuals

Crivit
Crivit M7-990053 User manual

Crivit
Crivit Rubber Dinghy User manual

Crivit
Crivit DINGHY User manual

Crivit
Crivit Beach Inshore 290 II User manual

Crivit
Crivit Beach INSHORE 290 User manual

Crivit
Crivit IAN 71536 User manual

Crivit
Crivit IAN 71536 User manual

Crivit
Crivit 282714 User manual

Crivit
Crivit IAN 71536 User manual