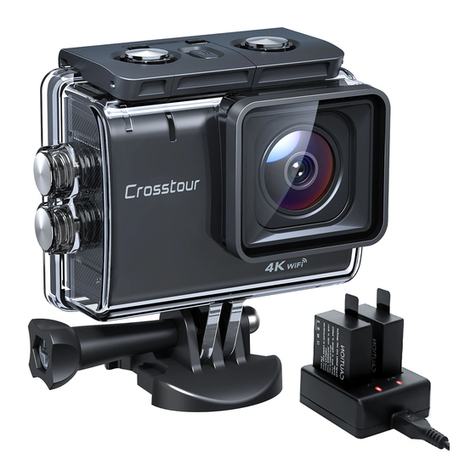
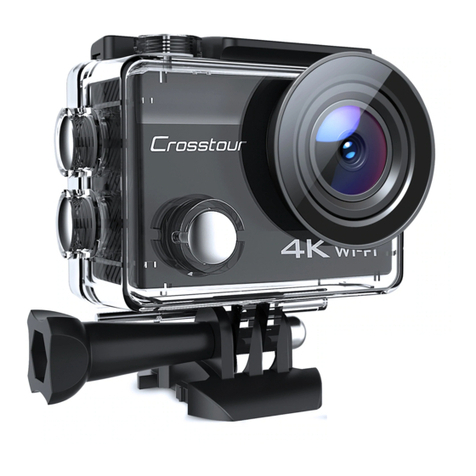
Crosstour CT9000 User manual

,Crassur
Action Camera
CT9000
User Manual


Contents
16
17
;,
1
42

Thank
you
for
purchasing
proriuct
from
Crosstour.
Please
mad
anrl
follow
this
user
manuRI
carefully
and keep it in a snfe place
for
future
n:iference.
Crosstour
consistently
attaches
great
importance
to
product
quality
and
high
customflr
satisfaction.
We
s!ncflrAly
hope
you
urn
make
n
few
suggestions
during
your
use
to hAlp
us
mprove
our
products.
Your
precious
suggestions
will
hAlp us shape
our
husinAss to perfActly
fit
your
standards.
We'tl
soon
introduce
sAr!es of
new
products
for
our
valuAd
customers,
please
share
this
with
your
frienrls
.
.Just !et us
know
if you
encounter
any
problem
during
your
use.
Our
support
team
wit[
providfl
you
our
best
solution
without
any delay. Anri
all
terns
purchRsed
from
Crosstour
are covered hy
! yf!ar
warrnnty.
You
can find
our
contnct
inform;:;tion below:
supportlacrosstou
r.co
I ook forvvard to
bringing
you
more
great
products
in
the
future.
K
nrl
cega"ds,
Crosstour
Support
Team

-Product
Diagram
OK
Bu,10° /
Vioeo
/
Dhoto
Power/
Mode
Bullon
Back
LED
Status
Indicator-
L::J C--arg·ng
lnd,cato-
Bat:ery
Compartment
Door
Top
LED
Slalus Indicator
Microphone
Micro SD
Card
Slot
Micro-USB Port
M
cro-HDMI
Wort
~----
Cc:irnerci
Lens
Up
Button/
PlayoacK
Mode
Speaker
Dow' Gutton /
Wi-Fi
Battery Co~par:ment
Door Catch

-Specifications
Model
CT9000
4K (?5fps].
7.
7K (30fps]
Video Resolution 1080p (60,ps]. 1080p [30fps]
720p [120fps]. 720p (60fps]
Image Resolution 16MP,12MP, SMP, 5MP, 4MP
lens
170'
HD
wide-angle fishcyo lone
Video Compression
Format
H.26"
Video/
Image
Format
MDV
/IPG
Wi-Fi
Connection
Android/
iOS
supported
Storage 32GB micro
SD
card support [Maxi.
Class 1
O+
recommended [not ncludedl
USB Interface USB 2.0
Charging Time 2 hours
Continuous Recording Time
Up
to
90
minutes (or continuously if powered
through the cable!
Battery
Removable 3.'/V 10b0mAh
U-ion
battery
Waterproof Case Depth Rating 30m ! 98.4ft
Fnglish
/German/
trench/
Spanish/
Italian/
Language Options
Portuguese/
Chinese
Traditional/
Chinese
Simplified/
.JApanesfl
/Russian/
Korean
Weight
64g
/ 2.24oz [with battery]
Dimensions
59
x
41
x 25mm / 2.33" x
1.61
X 0.97"

-Getting Started
Charging
To
chc1rye,
connect
one
end
of
lhe
included
rnicro-USB
c;:1ble
to
a
power
1:1dcipler·
or
c1
USB
charging
por·l ,rnd
the
other
end
to
lhe
rnicrn-USB
µorl
on
lhe
c1:1rnerc1.
When
you
connecl
the
carnerc1 to
the
power, the
c,:1rner·a
will c1ulornalically
turn
O".
To
:::ore eFfectively
chi:lr\:]e
the
cc1rner1:1,
lurn
it
off.
The
red chc1rging indiC!:llor
will
st!::1y
on
when
lhe
cc1rnen,1
is
charging
and
turn
off
when
the
camera
is fully
char·ged
Charging with the power·
adapler·
tc1kes
arnund
2
nours
Turning the Camera
On/Off
Press and hold the power
bullon
for"
2 seconds lo turn the camera on/off. When the carnera is
turned
on,
the two
LED
status indicc1lors
will
Lght
up
and the display
will
turn
on
Using a
Micro
SD
Card
The
camera does not include internal storage and requires a micro
SD
card [Class10 + recom-
mended and
32GB
Max
s,.pportedl
to
function.
Use
a h'gh-qual·ty, oranoeo card
'or
maximum
reliability_
insert a micro
SD
card
into
the micro
SD
card slot and format
it
[ 'Format'
in
camera
settings]
to
prepare the card for use, Formatting
will
permanently erase
any
data
on
the
SD
ca-d.
Camera
Modes
Press the mode button
to
cycle through video, photo, burst photo, time lapse photo, and settings
modes Press
up
to
go
to
playback mode
0
Video
Mode:
Press the
OK
button
to
start or end recording.
When
the camera ·s recora-
the
LED
status indicators flash once every 2seconds, When
it
stops recording, the
status indicators stay
on,
Photo
Mode,
P--ess
OK
button
o--ce
to
,ake photos.
Burst Photo Mode: Press
OK
button once
to
take 3 photos
in
1.5
sAconds
Tlme
Lapse
Photo
Mode:
Press
OK
button
to
lake
c1
photo
ofter
a
sel
lime
[you
can
set
2,
3, 5, 10, 20, 30,
or
60-second
lirnings
in
settings).
fake
i:l
ser·ies
oi
photos
automatically
al
the
set
inlerV1:1l
by
on
the
'continuous
lapse'
selling
,md
pressing
OK
butto"
once
(c1,ir1cel
by
pressing

~
Press mode
bulton
unlil
the
spanner
symbol
is shown and press
OK
button
to
enter
sellings mode
~
Use up/down lo highlight individual selling
and
press
OK
button
to
enter those sellings
~
Use up/down lo choose
an
op
lion
la
white area
on
the
scroll
bar means there are more
pages). Press
OK
button again
to
confirm
or
press mode button
to
relurn
lo
sellings menu
without changing.
~
To
exit settings, move up/down
to
highlight the cross symbol at the top
o'
lhe page and
pr-ess
OK
button
to
exit
g Playback Mode:
~
Press
up
button to enter pli:lyb.Jck menu.
~
Press down
or
mode button
to
switch between video
or
picture files
i:lnd
then press
OK
button to confirm
• Press up/down button to choose desired picture
or
video. For videos, press
OK
button to
pli:ly/pouse, mode button to stop,
i:lnd
up/down to rewind/fost-forword.
•Togo
biJck
to video/picture menu, mode button
If
you
WJnt to delete J file,
go
to
video
or
photo, then press
i:lnd
hold
OK
button for
sever.Jl seconds
until
iJ
delete confirmJtion Jppe.Jrs. Press
up
to choose
'Yes·
;::ind
OK
button to confirm. It
will
then move to the next video
or
photo. Press
OK
to
select 'No' to stop deleting files
or
press
up
Jnd then
OK
button
to
delete the next
~
Press mode button to return to plJybock menu. Press
up
button to exit plJybock mode
Connecting to a Computer
here are two options when you use the included micro-USU cable to connect to a
computer:
USU
and
PC
Camera. Press
OK
button to switch between the two modes. Charging
works
in
either
mode but is
more
etfective
it
you
turn
ott the camera [press and hold camera
power
button). Charging may
be
slower
than when using a power adapter due to
lower
power output
of
compute" USll ports.
USB
Mode: Access files
on
the camera's
r-r~icro
SD
card lo copy them
or
view them
on
a computer.
Allernatively, lake the micro
SD
car·d
oul
of
lhe camer·a and insert it nto a micro
SD
card slot
or
reader.
4

PC
Camera: Use
as
a web cam for video chats and video recording
on
your computer.
You
may
need
to
allow Adobe Flash Player
to
run
in
your video chat software before video
will
display.
Connecting
to
a TV or Monitor
If
your
TV
or monitor has a
USB
port or
SD
card slot [requires a micro-SD card adapter],
you
can
access
and view files
in
a similar way
as
·connecting
to
a Computer· [see above].
You
can
also use a
micro-HDMI
cable [not included]
to
connect and
view
directly.
Operating
Camera
via
Mobile
Phone
Download the app
to
view
and control the camera
on
your mobile device.
Download
the
App
Option
1,
Download the ·;smart
DV
app from the
App
Store
[iOS
7.1
or later] or
Google
Play
[Android
4.3
or later
I.
Option 2: Scan
the
QR
code below
that
corresponds
with your device
05
to
download and install the 'iSmart
DV
app.
Wi-Fi Connection
Connect your phone
to
the camera wirelessly.
You
can
see
the camera picture, control the
camera, and download recordings from the camera
to
your phone.
• Turn
on
the camera; then press
down
button.
• Switch
on
Wi-Fi
on
your phone and scan
for
Wi-Fi
connections.
•
Find
and connect with 'ActionCam'
Wi-Fi
using the password, 1234567890
•
Open
the 'iSmart
DV'
app
on
your phone.
•
To
turn
off
Wi-Fi
[and disconnect), press
down
again.
Note,
• When
you
use your mobile phone
to
operate the camera, the camera screen will stay
off.
• The camera can
only
connect
to
one device at a time.
Using the
Wi-Fi
connection
is
more energy-intensive;
avoid
using
it
when the camera
is
low
on
battery.

Operating
Camera
via
the
2.4GHz
Remote
Control
Use
the remote control
to
take photos or record videos
with
the touch
of
the photo button
[red)
or
video
button
[gray].
It
operates
in
the current photo or
video
mode, or switches
to
standard photo
or
video
mode
to
capture. After
long
use, the battery
will
eventually need
to
be
replaced. Unscrew
the four small screws
on
the back
of
the case and replace
with
a
new
CR2025
cell battery.
Camera Mount Assembly and Application
This Action
Camera
comes
with a
large
selection
of
mount
parts
and
other
practical
accesso-
ries
for a wide variety of
configuration
options
and
applications.
The
camera
can
be
mounted
on
bicycles
and
other
vehicles,
helmets,
clothing,
and
much
more.
Below
are
a
few
common
configuration
and
application
options
but
you
can
arrange
and
use
the
parts
according
to
your
situation
and desired use.
+
[CJ
~

::
+
~j
+
~J
+ M=
D~1
fl9
+
~~
=
~~
D-+~+D~=~

-Product Care &
Use
~
Keep away from liquids (unless using the \"Jaterproof easel. extreme heat,
and
strong magnetic
felds.
~
[nsure
the camera
is
mounted safely and
fixed
securely
to
avoid
causing an accident or damage
to
the camera.
~
/\lways
pay
attention to your surroundings and safety when using the camera.
•
Wipe
any dust and water
off
the camera after each use.
~
Gently
clean the camera lens
with
the included lens-cleaning doth when necessary.
•
Keep
the camera out
of
the waterproof case when storing.
~
Keep your videos and photos backed
up
elsewhere to protect against
file
corruption or loss
caused
by
extreme conditions or
SD
card issues.
~
If
the camera
crashes
or becomes unresponsive,
you
can reset it
by
disconnecting and recon-
necting the battery.
You
can also leave
it
turned
off
for a short time
to
cool
down.
-
Warranty
& Customer Support
AU
Crosstour
products
come
with
a
limited
wn!TAnty of
1?
months
from
the
date
of purr.hAse
Also profAssionnl
customer
service
team
for
your
support
without
nny
delay.
If you hAve
nny
question
Ahout
our
proriuct
or
the
warranty,
please feel frefl to
contact
us
At
the
;:;rlriress below
with
your
Ama10n
order
number.
supportfacrosstou
r.c:o

-
Diagramm
des Produkts
OK-Taste/Video/ 10!0
Power-/
Modus-Toste
t
Fn
Statusan1eige
[h,nten)
Ti.ir des
Ratteriefachs
LED-StaLsanze ge :obenl
Mikrofon
MicroSD-Kcirte-Slot
M cro-USB-A--schluss
M cro-HlJMI-A0schluss
Ki:lmerJobjcktiv
Up-Taste I
Wiede
0gaoe-Mod"s
Lautsprecher
Dow
0-
Taste/
W1-F1
TUrvcrschlus
des Bottencfochs

-Spezifikationen
Modell
CI 9000
4K [25fpsl, 2.7K [3Dfps]
Auflosung
des Videos 1080p [60tpsl. 1080p l30tpsl
·12op
I
1201
psi. 120p
(6Cf
psi
Aulliisung
des
Bilds
16MP,12MP, 8MP, 5MP,
/4MP
Objekliv
170°
HD
Weilwinkel-~isheye-Objektiv
Kompressionsformat
des Videos H.264
Formal
des
Videos/
Bilds
MOV
I
JPG
Wi-Fi-Verbindung Android I
iOS
untorstutzt
Speicher
37GB
microSD-Kartc untcrshH1t [mflx.l.
Clus.s 1
O+
wird
cmpfohlcn
[nicht
cnthJltcn]
USB-Anschluss
USG
2.0
Ladedauer 2 Stunden
Konlinuierliche Aulnahmezeil Bis
1u
90
Minutcn [oder kontinuicrlich, wcnn
cs durch
d;:is
K;:ibd £Jngctrichcn wird]
Akku
Fntfernbarer
3,7V 1050mAh I i Akku
Tiele-Schulzklasse
von 30m / 98,4ft
Lnglisch / Ueutsch / f-ranzosisch / Spanisch / ltalienisch I
Sprachoptionen Portugiesisch / lraditionelles Chinesisch I Vereintachtes
Chinesisch / Japanisch / Hussisch / Koreanisch
Gewicht
64g
I 2,24oz [rn,t Akku]
Abmessungen
b9
x
41
x 2bmm / 2.33" x
1.61
'X
0.9'/"

-Starten
Aufladen
Zurn
;\ufladen
schlie11en
Sie
ein
[nde
von
dem mitgelieferten Micro-USG-Kabel an
ein
Netzteil
oder
einen
USG-Ladeanschluss
und das andere
[nde
an den
Micro-USG-J\nschluss
auf
der
Kamera an. Wenn Sie die Kamera an eine Stromquelle anschUellen, wird die Kamera siCh
automatisch
einschalten. Um die Kamera effektiver aufzuladen, schalten Sie bitte sie aus. Die
Ladeanzeige leuchtet beim Aufladen dauernd rot, und
schaltet
sich aus, wenn vollstandig
aufge.aden
ist.
Die
Ladu"g
mil
Netzteil dauert etwa 2 Stu 0den.
Ein/Ausschalten
der
Kamen':!
Hallen
Sie 2 Sekunden
Lang
die Power-Taste gedrUckt,
um
die Kamer-a ein / ausLus-
challen
Wenn die Kar-nera
eingeschallel
isl,
leuchten
die ,:wei
StalusanLeigen
au! und
schaltel
das
□
,splay
e,n
Verwendung
der
microSD-Karte
Uie Kamera enthi:llt keinen intern
en
Speicher und ertordert eine microSLJ-Karte [Class
10-+-wird
empfohlen
und unterstUtzt max. 32Gl3) zum f-unktionieren, Verwenden Sie eine
hochwertige,
gebrandmarkte
Karte
tur
maximale
Luverlassigkeit.
Setzen Sie eine
microSU-Karte
in den
microSLJ-Karte-Slot ein und tormatieren Sie sie
U-ormat
"in
Kamerasystemeinstellungenl. um
die
Karte
zur
Verwendung
vorzubereiten
l3eim
f-ormatieren
werden
alle
Uaten
auf
der
microSLJ-Karte dauerhatt gelOscht
Kameramodus
DrUcken Sie die
Modus-fasle,
durch Video,
Fol
□,
Ser·ienfoto, Zeilrafferfolo und Einslellungs-
rnodus durch,:ulaufe::. DrUcken Sie Up-Tasle, urn
in
den
Wieder·g1:1bernodus
Lu
gelangen
0
l.l
Videomodus: DrUcken Sie die Tasle
OK,
urn die Aufnahrne
LU
starle:: oder· LU beenden
Wenn die Karner·a aufgenornrnen wird,
blinken
die LED-Slalus1:1nLeigen
einrnal
alle
2
Sekunden.
Werm
es die Aufnahrne slop
pt,
bleiben die LED-Slatusarueigen eingesdrnltel
Fotomodus:
DrUcke'
Se
d·e
OK-Taste,
_m
Fotos aufzunehmen.
Serienfotomode:
DrUcken Sie die OK-Taste einrnal, um 3 Folos
in
1,5
Sekunden
aufzunehrnen
Po
Time
Lapse
Photo
Mode:
Press
OK
button
to
take a photo
a'ter
a set time
:you
Ca'
set
2,
3,
5,
10,
20,
30,
er
60-second timings
in
settings).
Take
a series of photos automatically at
11

the set interval
by
turning
on
the 'continuous lapse' setting and r:ressing
OK
button once
[rnncAI
by
prAssing again)
~
EinsteUungsmodus:
~
Dh.kken Sie die Modus-Taste, bis das
Syr-nbol
,.SchraubenschlUssel" erscheinl und
drUcken
Sie
die OK-Taste, um
in
den Einstellungsmodus
LU
gelangen
~
Heben
Sie
lndividuelle Einstellung
mit
Up/
Down hervor und
Jr"Ucken
Sie die OK-Tasle,
in
die entsµr·echenden Einstellungen
LU
yelangen
~
Wahlen Sie eine
Op
lion
mil
Up/
Down [Ein weifler Bereich auf Jer· Bildlaufleisle becieulet,
dass
es
noch
mehr
Seiten ~jibl).
Dr·Ucken
Sie
die OK-Taste wieder·, um
LU
Uesli:iligen oder
dri..icken
Sie
die Modus-Taste, um Lum EinslellunysmenU ohne Anderung LurUckLukehr·en
• Um Jen Einstellunysrnodus
LU
verfassen, drUcken
Sie
Up
/ Down, urn das Symbol
..
Kreul"
hervorLuheben, das sich oben auf
der·
Seile befindet und
ciri..icken
Sie OK-Taste
LU
verl!::lssen
i
IJ]
Wiedergabemodus:
~
Drljckcn Sic die
Up-fastc,
um
in
dus Wicderg<lbcmcnU
1u
gclungen.
~
Drlickcn Sic Down- oder Modus-fostc, um 1wischcn Video- oder Bild-Dntcicn
um?Uschr:iltcn und dunn drlJCkcn Sic die OK-Tflstc 1ur Bcsh:itigung.
•
DrUckcn
Sic
Up-/
Down-Toste,
um cin gewljnschtcs Bild oder
Video
nus1uwiihtcn.
Flir
Videos,
drUckcn Sic die OK-fastc, um wicdcr?LJgcben oder
1u
pnusicrcn, Modus-Taste
1u
stoppen, und
Up-/
Down-faste
1urlick-
oder vo:1uspulcn.
~
Um
in
d<1s
Video
/ Bildmcnlj 1urlick1LJkchrcn, drlickcn
Sir:
die Modus fastc.
~
Wcnn
Sir:
cine Dntci lbschcn wotlcn, wtihlcn Sic
d£Js
Vdco
oder Foto aus, dunn hattcn Sic
die
OK
fastc
hir
Sckundcn
l.:rng
gedrlickt, bis die BcsU:itigung des LOschens
crschcint. Drlickcn
Up
fastc, um
..
Yes··
1u
wtihlcn und drijckcn Sic die
OK
faste
7lJr
Bcstntigung.
Dns
Displ.:Jy
wirri dnnn das ni"ichstc Video oder Foto
nwcigen.
Driickcn Sic
die
OK
Toste, um
..
No··
1u
w;ihlen, und
d£Js
Lbschcn
von
Dutcicn
1«
stoppcn oder drlicken
Sic die
Up
Toste, dann
OK
fastc,
um die ntichstc
7«
IOschcn.
~
DrUcken Sic die Modus fastc, um 1um Wiedcrgflhcmend 1urUck?LJkchren DrlJCkcn Sic
die
Up
TEJstc,
um den Wiedcrg<1hcmodus
1u
verlasscn.
Verbindung
mit
dem
Computer
Fs
gibt 1wei Optionen, wenn Sie das mitgelieferte Micro
USR
Kahel
7lJr
Verhindung
mit
dem
ComputAr verwendfln:
USR
und
PC
Kamera. Drlicken
Sie
die
OK
Taste, um 1wischAn 1wei Modi
um?Uschalten.
Die
arlung funktioniArt in beiden Modi, Rher
es
ist Affekt!ver, wenn
Sie
die
Kamera nusschalten (halten Sifl Power
TastA
gedrUckt].
Die
t adung kann langsamAr
Rls
mit
einem Net1tAil se!n, Rufgrund der gAringeren eistung der Computflr
USR
Anschlljsse

USB-Modus:
Sie
k □
nnen
die Dateien auf
der
microSD-Karte der Kamera zugreifen, und die auf
einen Computer kopieren oder anschauen. Alternativ, nehmen Sie die microSD-Karte aus und
stecken Sie sie
in
einen microSD-Karte-Slot oder Kartenleser ein.
PC-Kamera:
Die
Kamera kann als eine Web-Cam
!Ur
Video-Chats
und
Videoaufnahme
mit
lhrem
Computerverbinden. Miiglicherweise mUssen
Sie
Adobe
Flash Player
in
lhrem Video-Chat-Soft-
ware laufen
Lassen,
bevor das
Video
angezeigt wird.
Verbindung mit dem TV oder Monitor
Wenn
1hr
Fernsehgerat oder
1hr
Monitor Uber einen USB-Anschluss oder einen SD-Karte-Slot
verfUgt (benOtigt einen Micro-SD-Kartenadapterl,
kOnnen
Sie
Dateien auf ahnliche Weise
zugreifen und anschauen, wie
..
Verbindung mit dem Computer" [siehen obenl. Sie
k □
nnen
auch
ein Micro-HDMI-Kabel (nicht im Lieferumfang enthalten] verwenden und direkt anzuschauen.
Herunterladen der
App
Laden Sie die
App
herunter, um die Kamera auf lhrem Mobilgerat anzuschauen und
zu
steuern.
Herunterladen der
App
Option
1:
Laden Sie die
App
..
iSmart
DV
..
von
App
Store
[iOS
7.1
oder hiiher]
oder
Google
Play
[Android
4.3
oder hiiher] herunter.
Option
2:
Scannen
Sie
den unteren OR-Code zum Herunterladen
und
Installa-
tion
der
App
..
iSmart
DV",
der lhrem
Ge
rat-OS entspricht.
Wi-Fi-Verbindung
Verbinden Sie
1hr
Handy drahtlos mit
der
Kamera. Sie
k □
nnen
das Kamerabild anschauen, die
Kam
era
steuern und Aufnahmen
van
der Kamera auf
1hr
Handy herunterladen.
Schalten
Sie
die Kamera ein; dann drUcken Sie die Down-Taste.
• Aktivieren Sie Wi-Fi
an
lhrem Handy und scannen
Sie
fUr Wi-Fi-Verbindung.
Fin
den
und verbinden
Sie
..
ActionCam··, geben
Sie
das Passwort: 1234567890 ein.
Offnen
Sie
die
App
..
iSmart DV' auf lhrem
Handy.
Schalten
Sie
das Wi-Fi [und trennen] aus, drUcken Sie die Down-Taste wieder.
Hinweis:
•
Wenn
Sie
1hr
Handy benutzen, um die Kamera
zu
steuern, bleibt der Kamera-Display aus.
•
Die
Kamera kann jeweils
nur
mit einem Gerat verbinden.
•
Die
Nutzung
der
Wi-Fi-Verbindung ist energieintensiver; vermeiden Sie
es,
wenn
der
Akkuzu-
stand niedrig ist.
13

Kamera Uber 2,4GHz Fernbedienung steuern
Verwenden
Sie
die Fernbedienung, um Fotos oder Videos aufzunehmen,
mit
dem Tippen der
Foto-Taste [rot) oder derVideo-Taste [grau].
Es
bedient im aktuellen Foto- oderVideomodus oder
wechselt zum Standardfoto- oder -videomodus zum Aufnehmen. Nach langem Gebrauch muss
die Batterie eventuell ersetztwerden. Schrauben
Sie
die vier kleinen Schrauben
an
der RUckseite
des Gehi:iuses
ab
und ersetzen
Sie
sie durch eine neue CR2025 Zellenbatterie.
Kamerahalterung und Anwendung
Diese
Action
Kamera
kommt
mit
einer
gror3en
Auswahl
an
Montageteilen
und
anderem
praktischem ZubehOr
fur
eine Vielzahl
von
KonfigurationsmOglichkeiten und Anwendungen. Die
Kamera kann auf Fahrri:idern und anderen Fahrzeugen, Helmen, Kleidung und vielen mehreren
montiert
werden. Im Folgenden finden Sie einige gi:ingige
Konfigurations-und
Anwendung-
smOglichkeiten, aber
Sie
kOnnen
die
Tei
le
entsprechend
lhrer
Situation und lhrem gewUnschten
Gebrauch einrichten und verwenden.
+
14

::
+
~j
+
~J
+ M=
D~1
fl9
+
~~
=
~~
D-+~+D~=~
15

-Produktspflege & Nutzung
~
Ilalten Sie die Kamera von FlUssigkeiten [drauf3en
mit
wasserdichtem
GehauseL
extremer
Ilitze
und
starken Magnetfeldern fern.
~
Vergewissern Sie sich, dass die Kamera
sicher
montiert
und befestigt ist,
um
einen
Unfall
oder
eine Geschadigung
der
Kamera
zu
vermeiden.
~
Achten Sie
immer
auf
!hre Umgebung und Sicherheit bei
der
Genutzung
der
Kamera.
Nach
jedem
Gebrauch
wischen
Sie Staub und Wasser
aut
der
Kamera ab.
Reinigen Sie bei Liedart
mit
dem mitgeLeferten Objektiv- Reinigungstuch das Kameraobjektiv.
I1alten Sie die Kamera bei
der
Lagerung aus dem wasserdichten Gehi::iuse.
I
lalten
Sie
ihre
Videos und f-otos an
anderer
Stelle
gesichert.
um
gegen
Uatei-Korruption
oder
-Verlust
durch extreme l3edingungen
oder
Probleme
der
SU-Karte
zu
schUtzen.
~
Wenn die
Kamera
absturzt
oder
nicht
mehr
reagiert,
k0nnen
Sie sie
zurUcksetzen,
indem
Sie
den
Akku
trennen
und
wieder
anschlief3en, Sie k0nnen sie auch kurzzeitig abkUhlen Lassen.
-Garantie & Kundenservice
Allc
rroduktc
van
Crosstour
kommcn
mit
cincr
bcgrcnztcn
12-moni:ltigcn GiJr<rntic
Jb
KJufdi:l-
tum.
Also gibt cs profcssioncllcs Kundcnscrvicc-Tci:lm
fur
ihrc UntcrstUtzung ohnc VcrzCgcrung
Wcnn Sic
irgcndwclchc
FriJgcn Uber
unscr
Produkt
oder
GiJri:lntic hiJbcn, fUhlcn Sic
bittc
sich
frci,
mit
uns
i:ln
dcr
Adrcssc
untcn
mit
lhrcr
Ami:lzon-Bcstcllnummcr
in Vcrbindung
zu
trctcn
su
pport~crosstou
r.co
16
Table of contents
Languages:
Other Crosstour Action Camera manuals

