Akaso Brave 7 User manual

BRAVE 7
anba
ACTION CAMERA

01
EN
Important Messages --------------------------------------------------------------------------06
Micro SD Card Use -----------------------------------------------------------------------------07
IPX8 Waterproof Rating ----------------------------------------------------------------------08
Overheating Detection -----------------------------------------------------------------------10
1. Specications---------------------------------------------------------------------------------11
2. What’s in the Box----------------------------------------------------------------------------12
3. Your Brave 7 Action Camera------------------------------------------------------------13
4. Getting Started-------------------------------------------------------------------------------15
4.1 Unboxing ------------------------------------------------------------------------------------15
4.2 Take the Camera Out of the Camera Frame------------------------------------15
4.3 Detach the Camera Frame from the Packing Box ----------------------------16
4.4 Charge the Battery Separately-------------------------------------------------------16
4.5 Install the Battery ------------------------------------------------------------------------17
4.6 Install the Micro SD Card --------------------------------------------------------------17
4.7 Charge the Battery in the Camera--------------------------------------------------18
4.8 Power on the Camera ------------------------------------------------------------------18
5. Getting Started-------------------------------------------------------------------------------19
5.1 Operation Instructions -----------------------------------------------------------------19
(1) Powering On and Off ----------------------------------------------------------------19
(2) Preview Screen -------------------------------------------------------------------------19
(3) Using the Shutter Button------------------------------------------------------------20
(4) Quickly Switching Modes ------------------------------------------------------------20
(5) Zooming in or out ---------------------------------------------------------------------21
(6) Video Sound ----------------------------------------------------------------------------22
(7) Album Access ---------------------------------------------------------------------------23
(8) Setting Resolution ---------------------------------------------------------------------23
(10) Switching Screens-------------------------------------------------------------------24
5.2 Quick Operation Guide-----------------------------------------------------------------25
Content

02
EN EN
5.3 Quick Menu---------------------------------------------------------------------------------26
(1) Voice Control----------------------------------------------------------------------------27
(2) Wi -----------------------------------------------------------------------------------------27
(3) Screen Brightness --------------------------------------------------------------------28
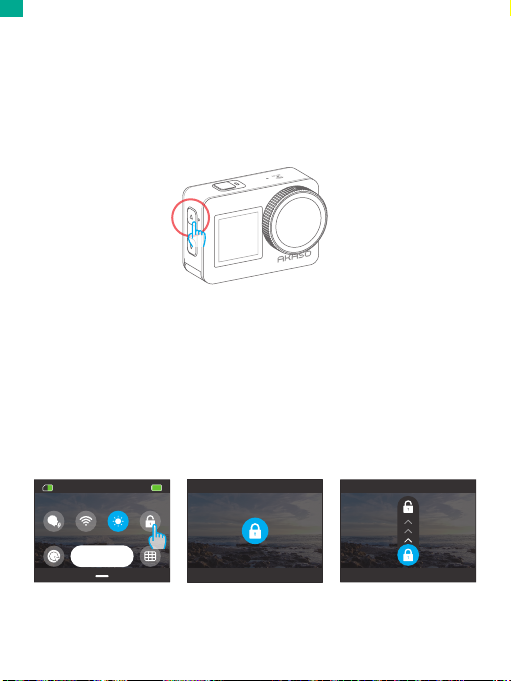
(4) Screen Lock------------------------------------------------------------------------------28
(5) One Key Fast Shooting ---------------------------------------------------------------28
(6) Grid ----------------------------------------------------------------------------------------29
(7) Preferences------------------------------------------------------------------------------29
(8) Exiting the Quick Menu --------------------------------------------------------------29
6. Video --------------------------------------------------------------------------------------------30
6.1 Video Modes -------------------------------------------------------------------------------30
(1) (1) Video (default) ----------------------------------------------------------------------32
(2) Timelapse Video -----------------------------------------------------------------------33
(3) HyperLapse Video ---------------------------------------------------------------------34
(4) Slow Motion Video---------------------------------------------------------------------35
6.2 Video Settings -----------------------------------------------------------------------------36
(1) Resolution--------------------------------------------------------------------------------38
(2) Timelapse Interval --------------------------------------------------------------------39
(3) HyperLapse Speed -------------------------------------------------------------------40
(4) Slow Motion Speed -------------------------------------------------------------------41
(5) Image Stabilization --------------------------------------------------------------------42
(6) Metering----------------------------------------------------------------------------------42
(7) EV-------------------------------------------------------------------------------------------43
(8) ISO -----------------------------------------------------------------------------------------44
(9) White Balance---------------------------------------------------------------------------44
(10) Sharpness ------------------------------------------------------------------------------45
(11) Bit Rate----------------------------------------------------------------------------------45
(12) Filter--------------------------------------------------------------------------------------46
(13) Fragment -------------------------------------------------------------------------------46
(14) Driving Mode --------------------------------------------------------------------------47
(15) Wind Noise Reduction--------------------------------------------------------------47
(16) Dark Light Mode----------------------------------------------------------------------48
(17) Distortion Calibration -------------------------------------------------------------48

03
EN
(18) Capture Duration --------------------------------------------------------------------48
(19) WDR--------------------------------------------------------------------------------------49
(20) HindSight -------------------------------------------------------------------------------49
6.3 Video Settings Menu --------------------------------------------------------------------51
7. Photo --------------------------------------------------------------------------------------------53
7.1 Photo Modes-------------------------------------------------------------------------------53
(1) Photo (default) -------------------------------------------------------------------------55
(2) Timelapse Photo -----------------------------------------------------------------------56
7.2 Photo Settings -----------------------------------------------------------------------------57
(1) Resolution--------------------------------------------------------------------------------58
(2) Metering----------------------------------------------------------------------------------58
(3) EV-------------------------------------------------------------------------------------------59
(4) ISO------------------------------------------------------------------------------------------60
(5) Shutter ------------------------------------------------------------------------------------60
(6) White Balance---------------------------------------------------------------------------61
(7) Sharpness--------------------------------------------------------------------------------61
(8) Filter ---------------------------------------------------------------------------------------62
(9) Self-Timer --------------------------------------------------------------------------------62
(10) Image Format -------------------------------------------------------------------------63
(11) Capture Duration --------------------------------------------------------------------63
(12) Burst Photo ----------------------------------------------------------------------------64
(13) Photo Quality--------------------------------------------------------------------------64
(14) WDR--------------------------------------------------------------------------------------65
(15) Distortion Calibration---------------------------------------------------------------65
7.3. Photo Settings Menu -------------------------------------------------------------------66
8. System Settings------------------------------------------------------------------------------67
8.1 Preferences --------------------------------------------------------------------------------67
(1) Voice Control ---------------------------------------------------------------------------68
(2) Language---------------------------------------------------------------------------------68
(3) Video Format----------------------------------------------------------------------------69
(4) Code ---------------------------------------------------------------------------------------69
(5) Power Frequency ----------------------------------------------------------------------70

04
EN EN
(6) Wireless Connection------------------------------------------------------------------70
(7) Remote ----------------------------------------------------------------------------------72
(8) One Key Fast Shooting --------------------------------------------------------------72
(9) Gyroscope -------------------------------------------------------------------------------73
8.2 General Settings --------------------------------------------------------------------------73
(1) Screen Brightness --------------------------------------------------------------------73
(2) Sound -------------------------------------------------------------------------------------74
(4) Video Sound-----------------------------------------------------------------------------77
(5) Auto Power Off -------------------------------------------------------------------------78
(6) Screen Saver ----------------------------------------------------------------------------78
(7) Date & Time -----------------------------------------------------------------------------79
(8) Date Stamp ------------------------------------------------------------------------------80
(9) Format ------------------------------------------------------------------------------------81
(10) Factory Reset--------------------------------------------------------------------------82
(11) Voice Command ---------------------------------------------------------------------82
(12) About ------------------------------------------------------------------------------------82
9. Album--------------------------------------------------------------------------------------------83
9.1 Album Access ------------------------------------------------------------------------------83
9.2 Album Interface---------------------------------------------------------------------------84
9.3 Video Playback ---------------------------------------------------------------------------84
(1) Playback Videos ------------------------------------------------------------------------84
(2) Video Screen ----------------------------------------------------------------------------85
9.4 Photo Playback ---------------------------------------------------------------------------85
(1) Playback Photos------------------------------------------------------------------------85
(2) Photo Screen ---------------------------------------------------------------------------86
9.5 File Deletion --------------------------------------------------------------------------------86
(1) Delete Files from the File List ------------------------------------------------------86
(2) Delete Files on the Video Screen -------------------------------------------------87
(3) Delete Files on the Photo Screen -------------------------------------------------87
10. Data Transmission------------------------------------------------------------------------88
10.1 Transferring Files to a Computer -------------------------------------------------88
10.2 Webcam Mode --------------------------------------------------------------------------88

05
EN
11. App Download & Wi Connection --------------------------------------------------89
11.1 Camera Wi ------------------------------------------------------------------------------89
11.2 Features of the AKASO GO App ---------------------------------------------------89
11.3 Download the AKASO GO App ----------------------------------------------------89
11.4 Create An Account for the AKASO GO App ------------------------------------90
11.5 Connect to the AKASO GO App via Wi-----------------------------------------91
11.6 AKASO GO App Menu -----------------------------------------------------------------94
(1) User Interface --------------------------------------------------------------------------94
(2) Video --------------------------------------------------------------------------------------94
(3) Photo -------------------------------------------------------------------------------------97
(4) Album -------------------------------------------------------------------------------------99
(5) System Settings ----------------------------------------------------------------------102
12. Remote -------------------------------------------------------------------------------------107
12.1 Connect to the Remote-------------------------------------------------------------107
12.2 Button Operation Instructions---------------------------------------------------108
12.3 Indicators--------------------------------------------------------------------------------108
13. Mount Your Brave 7 -------------------------------------------------------------------109
14. Troubleshooting -------------------------------------------------------------------------110
15. Battery Maintenance-------------------------------------------------------------------110
15.1 Maximizing Battery Life ------------------------------------------------------------110
15.2 Battery Handling and Storage----------------------------------------------------111
16. Precautions--------------------------------------------------------------------------------112
17. Contact Us ---------------------------------------------------------------------------------112

06
EN
Important Messages
Congratulations on your new AKASO Brave 7 Action Camera! You must be excited
to use your new camera, but please spend some time familiarizing yourself with
this manual rst so that you get the most out of your camera’s features and use
it safely.
It’s of great importance to regularly update the camera’s rmware. To do this, you
can connect your camera to the AKASO GO app via the camera’s Wi, and then
download and install the newest rmware.
1. This camera is a precision instrument. Safeguard it from drops or impacts to
prevent damage.
2. Store the camera away from devices or objects with strong magnetic elds or
power, like motors and magnets.
3. Ensure the camera operates within its recommended temperature range. Avoid
leaving it at high or low temperatures for extended periods, as this can reduce
its lifespan.
4. This camera body is waterproof, but make sure all covers are tightly closed and
the lens area is free from debris before immersing it underwater.
5. After using the camera in saltwater, rinse it with fresh water and gently dry it
with a soft cloth.
6.Don’t charge the battery for long periods of time.
7. Keep the battery away from kids and pets to prevent accidents.
8. Remove the battery from the camera if you don’t plan to use it for an extended
period.
9.Store the camera away from sharp objects and moisture-prone areas.

07
EN
To capture photos and videos, you’ll need a separate memory card. We recommend
branded memory cards that meet the following criteria:
1. U3
2. Capacity up to 512GB (FAT32)
Warm Tip:
1. Format the memory card in the camera before using it to ensure compatibility.
2. Memory cards larger than the specied maximum capacity can cause issues
like non-recognition or even camera malfunctions like unresponsiveness or
rmware failure.
3. Regularly reformat your memory card for optimal performance. Remember,
reformatting erases all data, so transfer your photos and videos before reformatting.
With FAT32, the card will stop recording and create a new le if the le size of a
recording reaches 4GB.
Notes
1. Don’t use the card near strong currents or magnetic elds.
2. Don’t let the card touch metal objects, or use any metal tools on it case it’s
squeezed, bent, or falls.
3. Store the card in dry places away from corrosive substances.
4. Insert the card into the card slot in the right orientation.
5. Ensure that no foreign items are inserted into the card slot.
6. Turn off the camera before inserting or removing the card.
Micro SD Card Use

08
EN
The Brave 7 action camera boasts an IPX8 waterproof rating, allowing submersion
up to 8 meters (26 feet) deep without an external case. However, always ensure
the protective covers are tightly sealed to prevent any leakage. Listen for a click - this
means the covers are securely fastened and you can begin your underwater
adventure with peace of mind.
IPX8 Waterproof Rating
USB port cover not closed securely
Battery cover not closed securely
USB port cover closed securely
Battery cover closed securely
Lens cover not closed securely Lens cover closed securely

09
EN
Notes:
1. While the Brave 7 action camera is waterproof, moisture can interfere with the
touchscreen, resulting in screen drift or multiple screen jumps. Therefore, it’s
best to use the physical buttons for underwater operations.
2. For instance, to switch shooting modes underwater, ensure the camera displays
the preview screen and then press and hold the Up button for 3 seconds.
3. To prevent touchscreen issues underwater, lock the screen by tapping the Lock
icon on the quick menu. Unlocking is just as simple: tap the Lock icon and
swipe up.
Reminder: The camera cannot be operated through the touchscreen underwater;
please use the buttons instead.
4. If you plan a deep dive, equip your Brave 7 with the waterproof case (sold
separately) to prevent it from getting soaked.
Note: The camera won’t record sound when it’s in the waterproof case.
05:05
Preferences

10
EN EN
The Brave 7 action camera is designed to detect overheating conditions. Should
the camera get too hot, a red warning stating “Temperature too high! The camera
will automatically shut down” will display on the touchscreen, followed by an
automatic shutdown. When this happens, allow the camera to cool down before
using it again. This helps bump up performance by protecting the the camera's
hardware from damage.
Heads up:
1. The Brave 8 Lite action camera’s optimal operating temperature range is between
-5℃and 45℃(23℉and 113℉). Using the camera in excessively highor low
temperatures may impact its performance.
2. Capturing at a high resolution and frame rate can cause the camera to consume
more power and heat up more quickly, especially in warmer environments.
Consider using lower settings in such conditions to lower the risk of overheating
your Brave 7.
Overheating Dectection

11
EN
1. Specications
Brand AKASO
Name 4K Versatile Brave 7 Action Camera
Model Brave 7
Size 66×44×34mm
Net weight 112g
Material Plastic, silicone, glass
Battery capacity 1350mAh
Battery life
90mins of recording time in 4K, and 140mins in 1080P.
Note: This may vary based on the environment and
usage.
Wireless network RF 2.4G+Wi 2.4GHz
Camera Waterproof
Rating IPX8
Remote Waterproof
Rating IPX4
Working Temperature -5℃~45℃(23℉~113℉)
External Microphone
Supported but sold separately.
Note: Be sure to purchase external microphones
compatible with this camera.

12
EN EN
2. What’s in the Box
Brave 7
×1 Camera Frame
×1
Battery Charger
×1
Battery
×2
USB Cable
×1
Remote Control
×1
Remote Control
Strap ×1
Spanner
×1
Helmet Mount 1
×1
Helmet Mount 2
×1
Buckle Mount
×1
J-Hook Mount
×1
A Mount
×1
C Mount
×1
D Mount
×1
F Mount
×1
E Mount
×1
H Mount
×1
Bandage
×4
Tether
×5
Lens Cloth
×1
Double-Sided
Adhesive Tape ×2
Quick Start Guide
×1

14
EN EN
10
11
12
13
14
15
16
Touchscreen
Battery Cover
Up Button
Voice Control Microphone
Down Button
Charging Indicator
Working Indicator
10 14
12 16
13
11 15

15
EN
4. Getting Started
4.1 Unboxing
Open the packing box along the dotted line, then take the Brave 7 action camera
together with its accessories out of the packing box.
Open the packing box along
the dotted line
1
Take out the Brave 7 action
camera and its accessories
2
4.2 Take the Camera out of the Camera Frame
First, pull up the camera frame’s buckle as indicated by the arrow to release the
latch and open the door. Then, take the camera out of the camera frame.
Pull up the camera
frame's buckle
1Open the camera
frame’s door
2Take the camera out
of the camera frame
3

16
EN EN
4.3 Detach the Camera Frame from the Packing Box
First, turn the screw rod counterclockwise, using your hand or the included spanner.
After removing the rod, take the camera frame out of the box. Then, remove the silicon
gel from the camera frame. Finally, lift the mount buckle and slide it back to release it
from its position.
① Loosen the rod by rotating
it clockwise
② Tighten by rotating it
counterclockwise
Peel o the silicon gel
Unscrew the screw rod
Remove the screw rod from its position
and take out the camera frame
3
1
2
Lift the mount buckle upwards
4Push it backwards
5
Orient the spanner with
the pattern facing outward
4.4 Charge the Battery Separately
Connect the battery charger to a USB outlet, then insert the battery.
The battery charger indicator will appear red while charging and blue when
fully charged.

17
EN
4.5 Install the Micro SD card
Press the buckle of the battery cover to open it, then place the battery into its slot
and close the battery cover. To remove the battery, pull the battery strip.
4.6 Install the Micro SD Card
First press the battery cover to reveal the memory card slot, then insert the mem-
ory card in the orientation shown and close the cover.
Be sure to turn off the camera before installation.

18
EN EN
4.7 Charge the Battery in the Camera
Connect the camera to a USB adapter or computer using the USB cable. Once
fully charged, disconnect the cable and ensure the battery cover is securely
fastened.
4.8 Power on the Camera
Press and hold the Power button for 3 seconds to turn on the Brave 7 action
camera.
Ensure all the camera covers are securely closed before powering it on.

19
EN
5. Getting Started
5.1 Operation Instructions
(1) Powering On and Off
Powering On: While the camera is off, press and hold the Power button to turn
it on.
Powering O: While the camera is on, press and hold the Power button to turn
it off.
(2) Preview Screen
4K30
SD Card Capacity
Remaining Card Capacity
Preview Screen
Audio Recording Status
Current Shooting Mode
Battery Level
Zoom
Resolution
1
2
4 7
5 8
6
3
1
2 6
57
8
4
3
Other manuals for Brave 7
5
Table of contents
Other Akaso Action Camera manuals

Akaso
Akaso BRAVE 4 PRO User manual

Akaso
Akaso BRAVE 4 PRO User manual

Akaso
Akaso Brave 4 User manual

Akaso
Akaso Brave 6 User manual

Akaso
Akaso V50 Elite User manual

Akaso
Akaso Brave 4 User manual

Akaso
Akaso V50X User manual

Akaso
Akaso Brave 4 User manual

Akaso
Akaso Brave 8 User manual

Akaso
Akaso V50 Elite User manual

Akaso
Akaso Brave 7 LE User manual

Akaso
Akaso EK7000 User manual

Akaso
Akaso EK7000 User manual

Akaso
Akaso Brave 4 User manual

Akaso
Akaso Brave 5 User manual

Akaso
Akaso Brave 8 User manual

Akaso
Akaso EK7000 Pro User manual

Akaso
Akaso Brave 6 Plus User manual

Akaso
Akaso Brave 7 User manual

Akaso
Akaso Brave 4 User manual