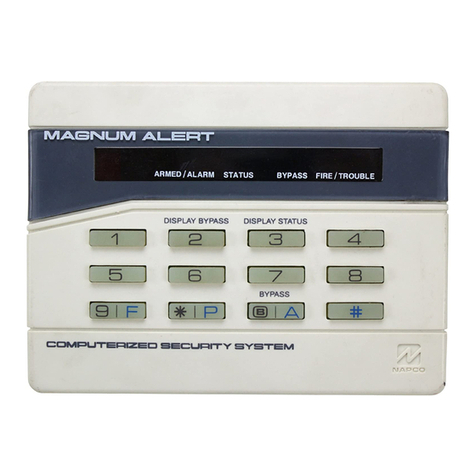
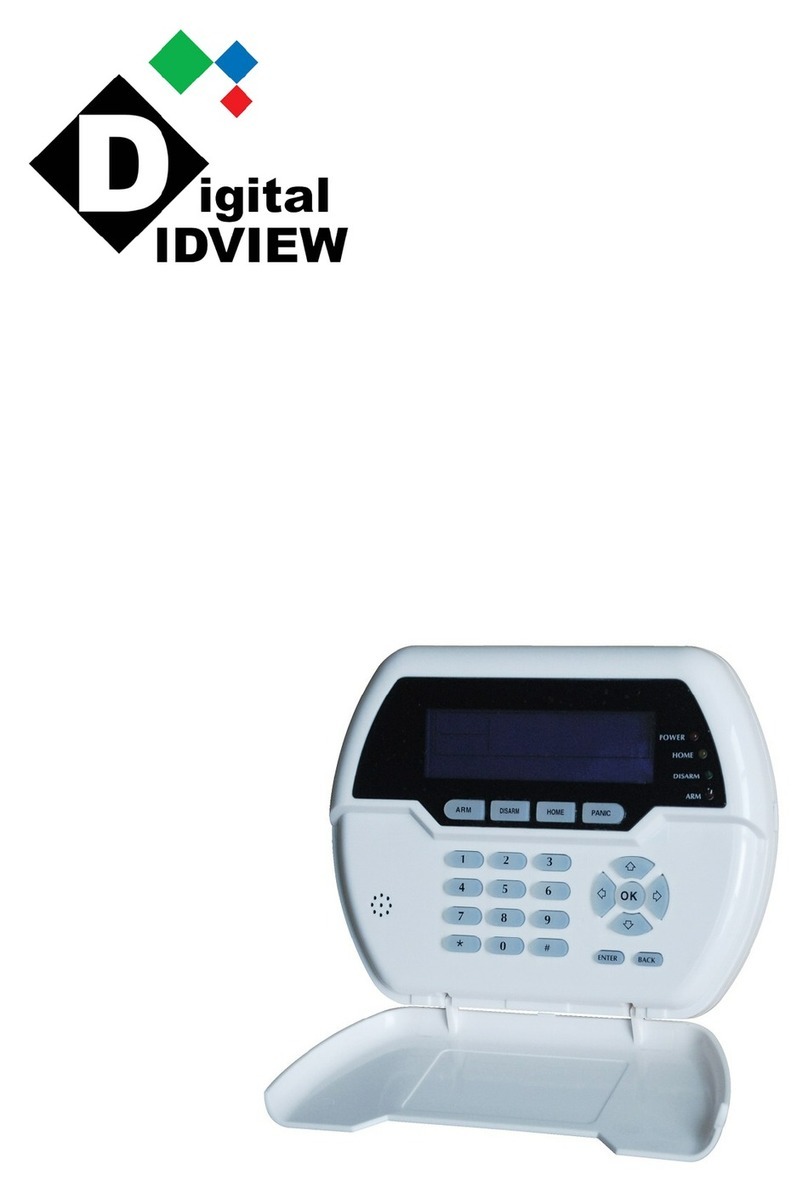
Crow OLED Keypad User manual

ELECTRONICENGINEERING LTD.
OLEDKeypad
User’sGuide
P/N: RUNOLEDWG20-July-2010

Crow LimitedWarranty
Crow warrants thisproduct to be free fromdefects in materials andworkmanshipunder normal use andservice for
aperiodof one year from the last dayof the weekandyear whose numbers are printedon the printedcircuit
boardinside his product.
Crow’s obligation is limitedto repairingor replacingthis product, at itsoption, free of charge for materials or labor,
if it is provedtobedefectivein materialsorworkmanshipunder normal use andservice. Crow shall haveno
obligation under this LimitedWarrantyor otherwise if the product is alteredor improperlyrepairedor servicedby
anyone other then Crow.
There are no warranties, expressedor implied,of merchantabilityor fitnessfor aparticular purpose or otherwise,
which extendbeyondthe description on the face hereof.Inno case shall Crow beliable to anyone for any
consequential orincidental damages for breach of thisor anyother warranty,expressedor implied,or upon any
other basis of liabilitywhatsoever, even if the loss or damage is causedby Crow’s own negligence or fault.
Crow does notrepresent that this productcan notbecompromisedor circumvented;that this product will prevent
anyperson injuryor propertyloss or damageby burglary,robbery,fire or otherwise; or that this product will in all
cases provideadequate warningor protection.Purchaserunderstandsthataproperlyinstalledandmaintained
product can onlyreduce the riskof burglary, robberyor other events occurringwithout providingan alarm, but it is
not insurance or aguarantee that suchwillnot occurorthat there willbenopersonal injuryor propertylossor
damageas aresult. Consequently,Crowshallhaveno liabilityfor anypersonalinjury,propertydamageor any
other lossbasedonclaimthatthisproduct failedtogiveanywarning.However, ifCrowisheldliable, whether
directlyor indirectly,foranylossordamagearisingunder this limitedwarrantyor otherwise, regardlessof cause
or origin, Crow’s maximum liabilityshallnot in anycase exceedthe purchase price of this product, whichshall be
the complete andexclusive remedy against Crow.
© 2010. Allrights reserved.
Information in this document is subject to change without notice. No part of this document maybe reproducedor
transmittedin anyform or by anymeans, electronic or mechanical, without express written permission of
Printversion 001

i
Contents
KEYPAD DESCRIPTION........................................................................................................................3
FUNCTION KEYS ................................................................................................................................ 3
ALPHANUMERIC KEYS .......................................................................................................................... 4
AUDIBLE SIGNALS .............................................................................................................................. 4
INDICATORS ..................................................................................................................................... 4
SUMMARYOF FUNCTIONS ..................................................................................................................... 4
OPERATING THE KEYPAD....................................................................................................................7
H OW TO ARMTHE SYSTEM BEFORE EXIT ................................................................................................... 7
Preparing the System forArming...................................................................................................... 7
Arming the System........................................................................................................................... 7
Quick Arm (When enabled atinstallation).......................................................................................... 8
Disarming the System....................................................................................................................... 8
Stopping and Resetting Alarms......................................................................................................... 8
ARMINGTHE SYSTEM WHILE STAYING HOME ............................................................................................. 9
Arming the System inStayMode ...................................................................................................... 9
Disarming the System....................................................................................................................... 9
HOW TO BYPASS ZONES..................................................................................................................... 10
USING CHIME (IF ENABLED AT INSTALLATION).......................................................................................... 11
EMERGENCY ALERTS ......................................................................................................................... 12
Howto initiate Panic....................................................................................................................... 12
Howto initiate Medical Alarm.......................................................................................................... 12
Howto initiate Fire Alarm................................................................................................................ 12
GENERATE THREATOR DURESS ............................................................................................................ 12
SYSTEM MESSAGES........................................................................................................................... 12
HOW TO READ TROUBLE MESSAGES AND EVENTSFROM MEMORY ................................................................... 13
SPECIALINDICATIONS ....................................................................................................................... 13
HOW TO CONTROL OUTPUTSAND DEVICES.............................................................................................. 14
ENTERINGTHE USER PROGRAM/CLIENT MODE.......................................................................................... 15
HOW TO CHANGEOR ADD CODES ......................................................................................................... 15
About Master Code and the User Code........................................................................................... 15
Howto Change the Master Code.................................................................................................... 15
Howto Add or Change the User Code............................................................................................ 15
Howto Delete the User Code ......................................................................................................... 16
ADDING/CHANGING TELEPHONE NUMBERS .............................................................................................. 16
HOW TOSET TIMEAND DATE .............................................................................................................. 16
HOW TOSTART WALK TEST MODE ........................................................................................................ 16
HOW TO ANSWERAN IN-COMING CALL .................................................................................................. 17
USING THE REMOTE COMMAND CONTROL................................................................................................ 17
USING LOCAL COMMAND CONTROL........................................................................................................ 18
LCD KEYPAD IN LOCAL EDIT MODE ....................................................................................................... 19
Accessing LocalEdit Mode............................................................................................................. 19
EditNamesat Local Edit Mode ....................................................................................................... 20
Button Assignment ......................................................................................................................... 21
Changing Language....................................................................................................................... 22
Adjusting Backlighting..................................................................................................................... 22
Resetting All Text toDefault............................................................................................................ 23

Contents
ii
Copying Text toanother LCD or OLED Keypad.............................................................................. 24
Exiting LocalEditProgram Mode .................................................................................................... 24

3
Keypad Description
The OLED Keypad shows alltheinformation required to operate the system.The User
communicates withthe alarm system viathe keypad.The Keypad displayscontinuous
information aboutthe status of the alarm system and enables the User to operate the system in
different modes,change settings and programUsers access codes.
The keypad also collects and records events to bedisplayed afterward on request,to overview
system activities and to analyze system performance for diagnostics.
Function Keys
These keys are used to arm the system,enter commands to alter system settings,or scroll
through the history events.
ARM,STAY, BYPASS,PROGRAM, CONTROL, MEMORY, PANIC,ENTER, MENU,
, , , - these buttons are pre-programmed:
- Arm Area A
- Arm Area B
- Chime
- Bypass
These buttons can be reprogrammed inLocalEditmode (seeP20 "buttonassignment )"
ARM
STAY
ARM/READY LED
TROUBLELED
MENU
OPEN
ZONES
STATUS
HELP

Keypad Description
4
Alphanumeric Keys
These keys are used to enter codes,Initiate Emergency activations orused for programming.
AudibleSignals
When the keypadis usedto activate or deactivatethe different functions,itemits different
audible beeps.The meaning of these beepsisdescribed in the table below.
Table 1 Listof Audible Signals
SoundSequenceDescription
ShortbeepOnce onlyA key inthekeypad has been pressed.
3 shortbeepsOnce onlyOperation carriedout successfully.
Long beepOnce onlyIllegal operation or wrongkey pressed.
SlowbeepingWhile the Exitor
Entry delaytimers
are running.
Exitorentry delay warning. WhenArming the system,this
indicatesthatyoumustexittheprotected area. Whendisarming
the system,itindicates youhaveentered theprotectedentry
zone.
Indicators
qARM/READY -RED/GREEN
qTROUBLE-RED
Summary of Functions
The main functions of the system arelistedin table below.
FunctionKeysDescriptionNotes
Full orPartition
Arm CC OD E C
Initiatesfull Arm
InitiatesPartial Arm [Only
If enabled by installer]
Exitdelay (slow) beeps will
be heard.
Full Arm C
Initiatesfull Arm Exitdelay (slow) beeps will
be heard.
Another wayto Arm the
system is [If enabled by
installer] toenter the
MENU functionand
scrolldownthelist until
you see the Arm option
and select it.
Disarmduring
exit C
Disarms the system
during exit delay
Only whentheslowexit
delaybeepsareheard.
Disarm
CC OD E C
Disarms the systemStopping Alarms.
FunctionKeysDescriptionNotes
Arm Stay
CC OD E C
InitiatesPartial Arm when
the user is home
Onlyif enabled byinstaller.
Arm Stay CInitiatesPartial (Stay)
Arm whenthe useris
staying home.
Exitdelay (slow) beeps will
be heard.
Another waytoPartial
(Stay) Arm the system is
[If enabled byinstaller] to

Keypad Description
5
FunctionKeysDescriptionNotes
enter the MENU
functionandscrolldown
the list until yousee the
Arm Stay
option and select
it.
DisarmStay
CC OD E C
Disarms the system
DisarmStay CDisarms the system[If enabled byinstaller]
Bypass
C
BYPASS
C
Zone#
C
Bypasses azone.
After the Bypass button
ispressed (orthe Bypass
functionis selected),the
keypad digitscanbe used
to enter the2digitzone
number of the zone(s)
that you wouldlike to
Bypass.
Multiple zones can be
bypassedwhilein
‘Bypass’ mode.
Repeatthe same (Bypass)
procedure toun-bypass
zones.
The Bypassfunction can
also be assigned[by the
installer] toone ofthe
following buttons(usually
the button) asa
shortcut:
, , ,
Another waytobypassa
zone isby entering the
MENU functionand
scrolldownthelist until
you see the Bypass option
and select it.
Option 1:
The Buttonisassigned
to operate the bypass
function.(default)
Option 2:
MENU:
Initiate Panic C+
Activates emergencyalert
Initiate Medical
C+
Activates emergencyalert

Keypad Description
6
FunctionKeysDescriptionNotes
Initiate Fire
Alarm C+
Activates emergencyalert
Memory CMEMORY Initiatesdisplayof events
frommemory.
or cancels
memory readout
Displays eventsand
current faultsof the
system.
The Memory function can
also be assigned[by the
installer] toone ofthe
following buttonsasa
shortcut:
, , ,
Another waytoenterthe
Memory functionis by
entering the
MENU functionand
scrolldownthelist until
you see the Memory View
optionandselect it.
Chime
Enable/disable C
Enableor disablechime
function
The Chime functioncan
also be assigned[by the
installer] toone ofthe
following buttonsasa
shortcut:
, , ,
The Buttonisassigned
to operate the Chime
function.(default)
Another waytoenterthe
Chime functionisby
entering the
MENU functionand
scrolldownthelist until
you see the Chime option
and select it.
Control
C
CONTROL
CDevice# C
Activates ordeactivates
outputs and devices
Controlbuttoncanbe one
of the followingbuttons
(Must besetup manually
through the ‘Local Edit
Mode’): , , , .
Note:Ifyoustarted an operation incorrectly, press toexitand returnto the previous mode.

7
Operating theKeypad
How to Arm theSystem beforeExit
Preparing the SystemforArming
Verify that allzoneindicators are off,when allzones are closed (allexit doors and windows are
closed and motion inthe protected area is restricted or zones are bypassed),the systemisready
to be armed.If one or more zone indicators are illuminated,thekeypad willshow any open zones.
When the systemisready,you will see the Green Readyindication indicator on the left side
of the screen.
To arm the system, Closeall openzones,orbypass them.Bypassany zone you cannot
close.
To seewhich zones areinbypassmode,press or
Note: Bypassed zones are not protected.
Arming the System
Before leaving the premises,you must arm the system.
Arming the alarm system turns on all detectors in the partition/s being armed.
1. Enter your PIN Code.
2.Press to Arm the system.
Thereis an exit delay prior to the system being armed.During this delay time,a slow
beeping is heard fromthe keypad to indicate that the system is not armed yet and reminds
you to vacate the protected area.
The followingtext will showon the screen to indicate that the systemis armed:
ArmedA –for AreaA,and Armed B –for Area B.
The indicators may go out few seconds after exitdelay times out,depending on theinstallation
setting.
qTo disarm the system during the exitdelay,press .

Operating theKeypad
8
QuickArm(Whenenabled atinstallation)
qPress to arm the system.
During exit delaytime,a slow beeping is heard reminding you tovacate the protected area.
Disarming the System
1.Enter your PINCode.
2.Press .
The Aor Bindicator goesoff,the systemis now disarmed.
Stopping and Resetting Alarms
1.Enter your PINCode.
2.Press .
Thiswillreset the alarm at any time,and also turns off anyaudiblesirens.

Operating theKeypad
9
ArmingtheSystem WhileStayingHome
Arming the SysteminStay Mode
Thistype of arming is used when people are present within the protectedarea.At nighttime,
when the family isabout to retire,perimeter zonesare protected,but not the interior zones.
Consequently,movement within theinterior zones are ignored by the system.
1.Enter your PIN Code.
2. Press .
(Shouldbe configured byinstaller)
The followingtext will showon the keypad screen to indicate the systemisarmed instay mode:
Stay ArmedA –for Area A,and Stay ArmedB –for Area B.
Quick Stay
qPress to Stay Arm the system.
During exit delayyou can leave thepremises.If you wish to stay,or you don’t want anybody
to enter the protected premises,you can cancelthe Entry/Exit delay by pressing the
key.
When the slow (Exit) beeping stops,the system then becomes immediately armed.
The followingtext will showon the keypad screen to indicate that the systemisarmed in
Stay Mode:
Stay ArmedA –for Area A,and Stay ArmedB –for Area B.
Disarming the System
Enter user’s PINCode and press ,or press ifenabledby installer.

Operating theKeypad
10
How to ArmPartitions
The protected area can begrouped into 2separatepartitions (Aor B).The system can be
groupedfor User‘s convenience to separate,in abusiness environment,the offices from the
warehouse area,or in aprivate residence,the house from thegarage or workshop,etc.
ToArmpartition A enter, user PINCodefor partition A
ToArmpartition B enter, userPINCode for partition B
Note:to Arm apartition with a PINCode, seepage 7“Howto arm the systembefore exit”.
During exit delayyou can leave premises.Atthe end of the procedure,the following writing
lights up atthe screen to indicate that the system is armed:
ArmedA –for AreaA,and Armed B –for Area B.
To disarm partition,see "Disarming the System" on page-8.
How to Bypass Zones
Bypass any zone that cannot be closed.You can bypass selected zones prior to arming.Itis
also used to temporarilyexclude a faulty zone from service which requires repair.
To bypass a selected zone,press the button,which is assigned by default to perform the
<BYPASS> function,enter the Zone Number you want to Bypass then press . To Exit the
Bypass mode,press .
The <BYPASS> function can beassigned to any of the following buttons , , , .
Another methodto bypass is by entering MENU screen and scroll down untilthe bypass
option.
Option1:
At thiscase the (default)
Button assigned to operate bypass.

Operating theKeypad
11
Option2:
MENU:
Enter the zonenumber(e.g.01, 05, 12) one or more zones.
To seewhich zones areinbypassmode,press or
To resetbypassed zones,press <BYPASS>,enter zonenumber (example,07,13)
To see that the zones removed from bypassmode,press or
NOTE:
Disarmingthe Runneralarmsystem will automatically un-bypassmostzone (24Hrzones
Must beManually un-bypassed–See ‘To reset bypassedzones’ above).
UsingChime(If enabledat timeof Installation)
A Chime(Day) zoneis adetector that announces a Chime(Keypad Beeps) during theDisarmed
state of the Runner system and can a fully Armed(Alarming)zone when the Runner systemis
armed.Itcan be programmed to operate a buzzeror light to let you know you havea visitor.
To disable the Day (chime)zone,press .The Keypad screen will Indication thatChime is
Disabled:

Operating theKeypad
12
To enableChime mode,press .The Keypad screen willIndication that Chimeis Enabled:
Emergency Alerts
These three specialkey functions are best programmed by your installer tosuityour individual
needs.They are used most commonlyduring Emergency situation.
These are “PANIC”,“FIRE”,and “MEDICAL” alarms.
How to initiate Panic
qPresssimultaneously keys and .
How to initiate Medical Alarm
qPresssimultaneously keys and .
How to initiate Fire Alarm
qPresssimultaneously keys and .
GenerateThreat or Duress
If you are compelled to disarm the system under threat,you must enter the duress digit before
the user’scode to activate the automaticdialer.The duress digit shifts up your usualcode by
one digit.If your code is 345 and 8isyour duress digit,than entering 8345 modifies your code.
The modified duress code disarms the systemin a normalway,but at the same time activates
the dialer silently to reporta “duress event” without arousing suspicion.(For detailsask the
installer).
System Messages
When viewingthe memory events at the keypad by the MEMORY function availableby pressing
the Options button and scrolling the Options Menu by using the .Thefirst thing
that is always displayed isthe system messages.The first ‘Memory’ screenwill display any
current ‘System Faults’.If thereare no system faults,the screen willsay ‘No Current Faults’.
Otherwise,the screen will display any current faults thatmay be active at that time.Pressing the

Operating theKeypad
13
buttons will move the memory displayup or downthe list (pressing the down arrow
willdisplay the memory events from the most recent (thatoccurred last) to theleast recent
(that occurred some time ago).
Following the display of current system alarms,thepanelscrolls down thelist through the255
historicalmemoryevents.
How to ReadTroubleMessages and Events from Memory
Any failure or abnormalevents that may occur areindicated by trouble messages,and the
Trouble indicator is lit.To view Events History,go to the Events Memory screen (See System
Messages page-12 above).One of the , , , function buttonscan be assigned to
indicate the Memory Events History.Another method to enter the Memory Function is by
pressing the Options button and scrollingthe Options Menu by using the ,then
selecting the‘Memory View’ option:
Press to enter the memory event.
or cancelsmemory readout.
Specialindications
OLED Keypad has specialindications,to indicate current troubles,or current status of the system.
If on the mainscreen of the keypad,thereisa following icon then,by pressing on the button
below,willshow the current status of the control panel,it willshow open zones,bypassed zones,and
any informative data of the controlpanel.If on the mainscreen of the keypad,thereisthe following

Operating theKeypad
14
icon ,it meansthat there are some Current System Faults at the control panel,such asMains fail,
Phone Line fail,Low Batteryetc… by pressing the Down Arrow,the keypad willdisplay current faults
and other(possible) ‘trouble’ type events.
Another icon button appears constantly on the main screen - .This isthe ‘Help’ button.
Presson thisbutton ifyou want a quick reminder about the assignment of the Function buttons:
A secondpress on this‘Help’ button will exitto Help screen.
How to ControlOutputs andDevices
The keypad enables you to controlexternaldevices,such asan air-conditioner or heater.To
turn-on or turn-off a device:
1.Press <CONTROL>.
The Controlfunction must firstbe assigned to oneof the following buttons (See ‘Button
Assignment’ page-21): , , , .
2.Pressthe numberof the device.
This activates or deactivates theselecteddevice.
The display willchange to indicate the Outputs Status.Thescreen Digits 1to 8will turn on
to indicatewhich Outputisinthe Onstate.or willturn-on for each of the devices that are
ON.
3. Pressthe device(Output) number(using thekeypadbuttons) to turn the device off.
4. To Exit the Controlmode,press or let the screen Time-Out after 1minute.

Operating theKeypad
15
EnteringtheUserProgram/ClientMode
There are 2levelsof program mode, CLIENT mode and INSTALLER mode.Normally the
installer givesyou access to the CLIENT mode so that you can add,delete,or change the user
codes.If you request it,your installer can provide you with access tothe INSTALLER mode as
well.To getintoCLIENT modeprovided the systemisNOT armed,Press enter Master
code and .
If you get a singlelong beep at this point,it means your code cannot access Program mode.
Howto Exit Program Mode
To exit out of program mode press and .
How to Changeor Add Codes
AboutMasterCode and the UserCode
The factory default master code (123)isintended as a preliminary controlof the alarm system.
After Runner panelis installed and put into service,thecode can be changed to any codeknown
to the Master user.The Masteruser can define up to 100 user codes.To limitaccessrights,the
holder of the Master codecan ask the installer to define severalUserprofiles.
Access rights are listed below:
qUser code has Area A and/or Bpermission
qUser code can arm and/ordisarm an area
qUser code can arm and/ordisarm an areain Staymode
qUser code can change its code
qUser code can change other user’s code
qUser code can Operate controlFunctions
qUser code can change dialer telephone numbers
qUser code can alter the realtime clock
qUser can answer an incoming calland start up/down load sessions
qUser can allow access to installer program mode from client mode.
qInitiate Walk-test mode.
How to Change the MasterCode
While in CLIENT mode (seepage-14),Press 11,then use the numeric keys to
enter your newMaster code followed by to save your new code.The code can be any
combination of 1to6 digits. Ensurethatyourememberyournewcode. Ifyouforgetyour
newcode,youwill needtoarrangefor an installer to comeandreset thecodefor you
which willincuraservicecallcharge. Thenew codeisdisplayedon the screen.Press
and to exit Client programming mode.
How to Add orChange the UserCode
While in CLIENT mode (seepage-14),press 1then the Usernumber(i.e.:user 2
throughto100 of thesystem) .Usingthe numerickeys,Addor Change the PIN Code for

Operating theKeypad
16
that use,then press to save yournew code.The PIN Code can be anycombination of 1to6
digits.
Note that entering anew PIN Code will delete the oldcode.
Repeat the procedure for allusers.
Press and to exitClient Programming mode.
How to Delete the UserCode
While in CLIENT mode (seepage-14),press 1then the Usernumber(i.e.:user 2
throughto100 of thesystem) .The codewillbe displayed on the screen.Press to
delete the existingUser PIN Code.
Press to save the change.Press and to exitClient Programming mode.
Adding/ChangingTelephoneNumbers
Your panelaccepts up to eight (8) phonenumbers, each can be up to16 digits.Yourpanel can
be programmed to dialall or any of these numbersdepending on the event which have occurred.
(The eight(8) phone numbers are atprogram address P181E 1-8E).
While in CLIENT mode (seepage-14),keyinthe following sequence P181E 1E
(The address for telephone number 1),the existing number isdisplayed on the screen of the
keypad.Using the numerickeys,enter the <NEW TELEPHONE#> thenpress .
At any time you can enter in theaddress for the telephone number just to viewthe currently
programmed value.Press and to exitClient Programming mode.
Forexample,P181E 1E=PH # 1, P181E 2E=PH# 2, P181E 8E= PH# 8, etc.
How to set TimeandDate
The alarm system has an internal clock that maybe used to automaticallyArm or Disarm the
alarm or turn Outputs On or off.Itis alsoused to identifywhen events occurred inmemory via
the keypad display.If you need to change the Time & Date,it must be done from the CLIENT
mode (see page-14).To change the Time & Date;
Press <26> <1> <HHMM>
Where HH = Hour in 24 Hour Format and MM =Minutes
Press <26> <2> <1-7>
Where 1-7= the current day of theweek (where 1=Sun,2= Mon 3=Tuesday,7= Sat,etc.)
Press <26> <3> <DDMMYY>
Where DD=1-31 current date,MM= months 1-12, YY =year 00-99
How to start Walk Test Mode
While in CLIENT mode (seepage-14),a User withthe proper authority can start the walk-test
mode.This specialmode is used to checkif the detection devices connected to the systemare
functioning when you walk in front of them.In Walk TestMode,thekeypad willcontinually beep
and ifyou activate a detection device,the keypaddisplay willcontinue to showthe zone number
of that device.Thistest function willallow one person to trigger every detectorconnected to the

Operating theKeypad
17
alarm then return to thekeypad toverifythe operation.Onterminating Walk-testmode,the test
results are put into the memory buffer so theycanbe viewedat a later time.
You can startWalk-test mode while in CLIENT mode (see page-14),press <200>
<6> and the keypad buzzer beeps at 1-second intervals.
Next,trigger every detector connectedto the panelthen return to the keypad and allof the
zones that were triggered will be displayed on the keypad.
To terminate Walk-test mode press ,thekeypad stops beeping.To exits CLIENT mode,
press 4times untilthe screen says‘Exit ProgramMode’,then press .
How to Answer an In-ComingCall
From time to timeyour installer may need to access the alarm from a remote PC to make
changes to the programming of your system and for security reasons they may have configured
the alarm so that an authorized person on-site is required to make the alarm system answer the
in-comingcall.This option is onlyavailable inCLIENT mode (see page-14).
If the panelis not configured to answerin-coming calls,the user can force itto answer the call
by pressingandholding down the ‘Control’ function button (that has been manually assigned
to the ‘CONTROL’function), followedveryquickly by holdingdownthedigit <9>.This
forces the panelto answer the call immediately.For this function to work,the phone line must
be ringing at thetime and there must have been atleast two rings before pressing the buttons.
Provided the line connected tothe alarm was ringing at the time,the panelnow answers the call
and allows a remote PC connection.
Controlbutton can be one of the followingbuttons: , , , (See Button
Assignments on page-21).
UsingtheRemoteCommandControl
Another powerful feature available from your alarmisCommand Control.This featureisa
remote controlfacilitywhich allows valid users to access the panelvia a standardtouch tone
telephone and checkor changes the Arm/Disarm status of each of the areas,operate each of the
eight outputs or turn on an optionalMicrophone.
The Command Controlfeatureis only available on panelsfitted with a Voice board.The Voice
board provides voice prompts to guideyou through Command controloperations.
Please talk to your installer to findout if all or anyof these options are available onyour alarm.
To perform any of the Command Controlfeatures you must first ring the phone number which
the panelis connected to.The panelmay be set up to answer after a specific number of rings or
it can be set-up to use a fax defeat option.Either way,when you ring the phone number and
the panelanswers the call,thefirst thing you hearover the phoneisa two seconds burst of
modem tone.After thistone stops,you must enter the access code assigned by your installer
which is associated with the Command menu option you wish to access.Remember thatthe
code you enter determines which menu option youaccess.If you miss thepause,the panel
repeats the modem tone andthen pauses again for 5seconds looking foryour access code.This
process is repeated four times before hanging up,if no valid codeisreceived.When entering
codes or other information inCommand Controlthe "#" keyacts as a "Clear" button.
When you have entered the required 4-digitaccess code the panelreplies with the status
message associated with the Command Controlfunction you have accessed.For example,let's
say we have a code of “2045” to allow Arming &Disarming of Area A.Once the code “2045” has
been received,the panelchecks the current statusof Area A and replies with the pre-
programmed voicemessage relating to that status.For example,if AreaA is armed,then the
Armed message is sent,if Disarmed thenthe Disarmed message is sent.

Operating theKeypad
18
Once thestatus message hasinformed you of the actualstate ofthe system,you can use the
"*" key to togglethe option on &off or Arm and Disarm,e.g.in our example above,code “2045”
accesses Area "A" arming or disarming.
Assuming thestatus message we received was"Area A alarm is Armed" If we press the "*" key,
Area "A" isDisarmed and wewould receive astatus message "Area A alarm isDisarmed" (or
whatever message is programmed in the Voice Board by the installer).
While you are on-line with the panel,you can move between menu options by entering the code
of the option youwant to control.Assuming therewas a code of “4321” programmed tocontrol
outputs.After having used code “2045” to controlthe Arm/Disarm status of Area A,wefirst
press the “#” button toreset allprevious entries.Then we can enter the digits “43215” (that is
“4321” as the code to controloutputs and“5” to select output #5).The current status of output
#5is given either by the voice message or the appropriate tone and then the status can be
changed with the “*” buttonon the remote telephone.
NOTE:
For output control,you must enterthe 4 digit code,for example,4321 followedby the
output numberyou wish to control, in thiscase5.
At any stage,ifyou enter in an incorrect code you can press the “#” button on the remote
telephone to clear all code entries and then start again.
To turn on the optionalMicrophone (only available ifthe Voice Boardis fitted) you must enterin
the appropriate code for Microphone Controlfollowed by the “*” button.To turn the Microphone
off,you simply press the “*” button again.
To end a Command Controlsession,simply hangs up the phone.The panelismonitoring the
phone line at all times and 15 seconds after your last key press,it automatically hangs up the
line.This 15-second timer is active during the whole command control process,so a periodof
15 seconds without akey press causes the panelto hang-up.
UsingLocalCommandControl
If a command controlcode for outputsisprogrammed and the output/s are allowed to be locally
controlled from thekeypad,then entering the 4digit code at a keypad followed by ,willtake
the keypad screen back to normalmode but you will be ableto press keypad digits that
correspond tothe Output number you want to control.When you press the digit for the Output
Number,the Output willoperate and the screen willchange and show a ‘*’ for each digit (Output
Number) you press.To Exit the LocalCommand Controlmode,you can either press the
button or you can let the keypad ControlModeto Time-Out (1minute) and returnto normal
mode.
This featureworks thesame way as “Directly Controlling an Output”,with the difference being
that you require a code to accessthisfunction.
Table of contents
Other Crow Keypad manuals
Popular Keypad manuals by other brands

Elk Products
Elk Products Keypad Arming Station ELK-M1KPAS Operation guide

Fortrek
Fortrek SPIDER VENOM 2 GK705BK Configuration guide
Crestron
Crestron GLPPA-KP installation guide

CDVI
CDVI GALEOR installation manual
Linear
Linear AM-KPI installation instructions
Digital ID View
Digital ID View IV-IA502R user manual
