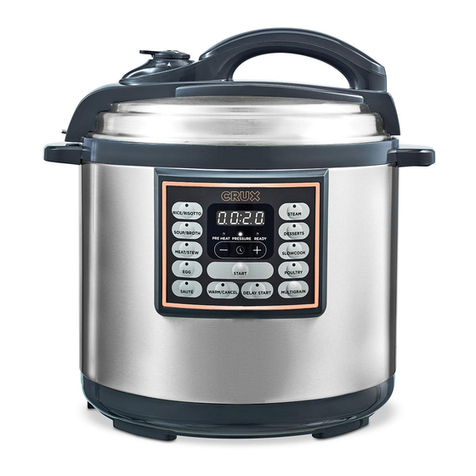
Crux 17538 User manual

S’MORES MAKER
17538_CruxMello_Smores_IM_V3.indd 117538_CruxMello_Smores_IM_V3.indd 1 7/15/2022 12:23:27 AM7/15/2022 12:23:27 AM

THANK YOU CARD - inside Front Cover
17538_CruxMello_Smores_IM_V3.indd 217538_CruxMello_Smores_IM_V3.indd 2 7/15/2022 12:23:28 AM7/15/2022 12:23:28 AM

Important safeguards ................................................................................................................. 2-3
Additional important safeguards............................................................................................... 4
Notes on the plug ............................................................................................................................. 4
Notes on the cord..............................................................................................................................5
Plasticizer warning ............................................................................................................................5
Electric power .....................................................................................................................................5
Introduction......................................................................................................................................... 6
Getting to know your S’mores Maker .......................................................................................7
Parts & assembly............................................................................................................................... 8
How to operate ..............................................................................................................................8-9
Helpful tips........................................................................................................................................... 9
Cleaning & Maintenance .......................................................................................................... 9-10
Warranty......................................................................................................................................... 11-12
TABLE OF CONTENTS
THANK YOU CARD - inside Front Cover
17538_CruxMello_Smores_IM_V3.indd 117538_CruxMello_Smores_IM_V3.indd 1 7/15/2022 12:23:28 AM7/15/2022 12:23:28 AM

2
IMPORTANT SAFEGUARDS
WHEN USING ELECTRICAL APPLIANCES, BASIC SAFETY
PRECAUTIONS SHOULD ALWAYS BE FOLLOWED, INCLUDING THE
FOLLOWING:
1. READ ALL INSTRUCTIONS.
2. Do not touch hot surfaces. Use handles or knobs. Use oven mitts or
potholders.
3. To protect against electric shock do not immerse cord, plugs, or appliance in
water or other liquid.
4. This appliance is not intended for use by persons (including children) with
reduced physical, sensory or mental capabilities, or lack of experience
and knowledge, unless they have been given supervision or instruction
concerning use of the appliance by a person responsible for their safety.
5. Close supervision is necessary when any appliance is used by or near
children.
6. Unplug from outlet when not in use and before cleaning. Allow to cool
before putting on or taking o parts, and before cleaning the appliance.
7. Do not operate any appliance with a damaged cord or plug or after the
appliance malfunctions, or has been damaged in any manner. Bring it to
a qualified technician for examination, repair or electrical or mechanical
adjustment.
8. The use of accessory attachments not recommended by the appliance
manufacturer may cause injuries.
9. Do not use outdoors.
10. Do not let cord hang over edge of table or counter, or touch hot surfaces.
17538_CruxMello_Smores_IM_V3.indd 217538_CruxMello_Smores_IM_V3.indd 2 7/15/2022 12:23:28 AM7/15/2022 12:23:28 AM

3
11. Do not place on or near a hot gas or electric burner, or in a heated oven.
12. Extreme caution must be used when moving an appliance containing hot oil
or other hot liquids.
13. Always attach plug to appliance first, then plug cord into the wall outlet. To
disconnect, turn any control to “o”, then remove plug from wall outlet.
14. Do not use appliance for other than intended use.
FOR HOUSEHOLD USE ONLY
SAVE THESE INSTRUCTIONS
17538_CruxMello_Smores_IM_V3.indd 317538_CruxMello_Smores_IM_V3.indd 3 7/15/2022 12:23:28 AM7/15/2022 12:23:28 AM

4
ADDITIONAL IMPORTANT
SAFEGUARDS
CAUTION HOT SURFACES: THIS APPLIANCE GENERATES HEAT AND
ESCAPING STEAM DURING USE. PROPER PRECAUTIONS MUST BE TAKEN TO
PREVENT THE RISK OF BURNS, FIRES, OR OTHER INJURY TO PERSONS OR
DAMAGE TO PROPERTY.
CAUTION: THIS APPLIANCE IS HOT DURING OPERATION AND RETAINS HEAT
FOR SOME TIME AFTER TURNING OFF. ALWAYS USE OVEN MITTS WHEN
HANDLING HOT MATERIALS AND ALLOW METAL PARTS TO COOL BEFORE
CLEANING. DO NOT PLACE ANYTHING ON TOP OF THE APPLIANCE WHILE IT
IS OPERATING OR WHILE IT IS HOT.
1. All users of this appliance must read and understand this instruction manual
before operating or cleaning this appliance.
2. The cord to this appliance should be plugged into a 120V AC electrical outlet
only.
3. If this appliance begins to malfunction during use. Turn it o and remove
plug from wall outlet. Do not use or attempt to repair the malfunctioning
appliance.
4. Do not leave this appliance unattended during use.
NOTES ON THE PLUG
This appliance has a polarized plug (one blade is wider than the other).
To reduce the risk of electric shock, this plug will fit in a polarized outlet
only one way. If the plug does not fit fully into the outlet, reverse the plug. If it
still does not fit, contact a qualified electrician. Do not modify the plug in any
way.
17538_CruxMello_Smores_IM_V3.indd 417538_CruxMello_Smores_IM_V3.indd 4 7/15/2022 12:23:28 AM7/15/2022 12:23:28 AM

5
NOTES ON THE CORD
A. A short power-supply cord (or detachable power-supply cord) is to be
provided to reduce the risk resulting from becoming entangled in or tripping
over a longer cord.
B. Longer detachable power-supply cords or extension cords are available
and may be used if care is exercised in their use.
C. If a long detachable power-supply cord or extension cord is used:
1. The marked electrical rating of the cord or extension cord should be
at least as great as the electrical rating of the appliance;
2. If the appliance is of the grounded type, the extension cord should be
a grounding-type3-wire cord.
3. The longer cord should be arranged so that it does not drape over the
countertop or table top where it can be pulled on by children or
tripped over unintentionally.
PLASTICIZER WARNING
CAUTION: To prevent Plasticizers from migrating from the finish of the counter
top or table top or other furniture, place NON-PLASTIC coasters or place mats
between the appliance and the finish of the counter top or table top. Failure to
do so may cause the finish to darken; permanent blemishes may occur or stains
can appear.
ELECTRIC POWER
If the electrical circuit is overloaded with other appliances, your appliance may
not operate properly. It should be operated on a separate electrical circuit from
other appliances.
17538_CruxMello_Smores_IM_V3.indd 517538_CruxMello_Smores_IM_V3.indd 5 7/15/2022 12:23:28 AM7/15/2022 12:23:28 AM

6
INTRODUCTION
Thank you for purchasing the S’MORES MAKER. Now
you can bring a taste of the outdoors inside and enjoy
homemade s’mores all year ’round!
Simply, turn on and roast your marshmallow to perfection.
Best of all, this unit has a built-in serving tray, making it
easy to grab any of the s’mores fixings. Perfect for guests
of all ages, your family will love making s’mores anytime!
FEATURES INCLUDE
• Flameless electric heater
• Serving tray with4 compartment tray to hold
marshmallows, chocolate, and graham crackers
• 3 roasting forks
• Durable stainless steel housing and top cover
• Easy to use, easy to clean
17538_CruxMello_Smores_IM_V3.indd 617538_CruxMello_Smores_IM_V3.indd 6 7/15/2022 12:23:28 AM7/15/2022 12:23:28 AM

7
GETTING TO KNOW YOUR CRUX MARSHMELLO S’MORES MAKER
Product may vary slightly from illustration
1. Durable stainless steel housing and
top cover
2. Flameless electric heater
3. Serving tray
4. Roasting Forks
1
2
3
4
17538_CruxMello_Smores_IM_V3.indd 717538_CruxMello_Smores_IM_V3.indd 7 7/15/2022 12:23:29 AM7/15/2022 12:23:29 AM

8
PARTS & ASSEMBLY
• Thread the plug of the ELECTRIC STAINLESS STEEL S’MORES
MAKER through the middle of the center of the serving tray. Place
the base of the unit in the center.
• The Power Cord fits beneath the serving tray center.
• Link together the Food Trays and place the Food Tray over the
HOW TO OPERATE
1. Place the S’MORES MAKER on a flat, stable surface near an electrical
outlet before starting. Keep about a foot of space around the unit to
make sure that there is proper ventilation.
2. Always make sure that the cord is away from any water source.
3. Plug the appliance into an electrical socket.
4. Fill the Food Tray with marshmallows, graham crackers, chocolate, or
other desired food items.
5. Press the Power Button of the S’MORES MAKER to the “ON”
position.
NOTE:After a period of time, the Heater and Top Cover may glow red hot.
6. Push marshmallow into the tines (prongs) of the Roasting Fork
provided.
7. Hold the handle of the Roasting Fork and hold above the Heater;
rotate frequently to ensure even heating.
8. When the marshmallow has been roasted to the desired color and
doneness, it is ready to serve.
9. Once finished with the S’MORES MAKER, Press Power Button to the
“OFF” position and unplug from electrical socket.
17538_CruxMello_Smores_IM_V3.indd 817538_CruxMello_Smores_IM_V3.indd 8 7/15/2022 12:23:29 AM7/15/2022 12:23:29 AM

9
By following these simple instructions, your S’MORES MAKER will be
fun for friends, family and kids of all ages!
HELPFUL TIPS
MARSHMALLOWS
Packaged marshmallows tend to become misshapen. For even
heating, it is best to mold marshmallows back into cylindrical shape
before sliding onto Roasting Fork for cooking.
BURNING/ SMOKING
DO NOT overcook the marshmallow, as it may melt and fall on the
Top Cover, causing smoke, fire, and a stain mark. In the event any
object or food item falls onto the Top Cover, press Power Button to
“OFF” position and unplug the unit. Wait until unit has cooled before
cleaning.
CLEANING & MAINTENANCE
• Press Power Button to “OFF” position, unplug unit from the electrical
socket before cleaning.
• Allow unit to cool for at least 20 minutes before cleaning. Top Cover
will be hot to the touch.
• Once appliance has cooled, remove the Top Cover from the S’MORES
MAKER. Clean with a soft, damp cloth, or wash in warm, soapy water
and rinse.
• Dry S’MORES MAKER and Top Cover and Roasting Forks thoroughly
before storage. Make sure the appliance has completely cooled and
is dry before storing.
17538_CruxMello_Smores_IM_V3.indd 917538_CruxMello_Smores_IM_V3.indd 9 7/15/2022 12:23:29 AM7/15/2022 12:23:29 AM

10
• Never use abrasive cleaners on the unit.
• Never place the appliance in a dishwasher.
NOTE:Do not submerge the unit in water, as it is an electrical unit.
• Any other servicing shall be performed by an authorized service
representative.
17538_CruxMello_Smores_IM_V3.indd 1017538_CruxMello_Smores_IM_V3.indd 10 7/15/2022 12:23:29 AM7/15/2022 12:23:29 AM

11
LIMITED TWO-YEAR WARRANTY
SENSIO Inc. hereby warrants that for a period of TWOYEARS from the date of purchase,
this product will be free from mechanical defects in material and workmanship, and
for 90 days inrespect to non-mechanical parts. At its sole discretion, SENSIO Inc.
will either repair orreplace the product found to be defective, or issue a refund on
the product during thewarranty period.
The warranty is only valid for the original retail purchaser from the date of initial
retail purchase and is not transferable. Keep the original sales receipt, as proof
of purchase isrequired to obtain warranty validation. Retail stores selling this
product do not have theright to alter, modify, or in any way revise the terms
and conditions of the warranty.
EXCLUSIONS:
The warranty does not cover normal wear of parts or damage resulting from
any ofthefollowing: negligent use of the product, use of improper voltage
or current, improper routine maintenance, use contrary to the operating
instructions, disassembly, repair, oralteration by anyone other than qualified
SENSIO Inc. personnel. Also, the warranty doesnot cover Acts of God such as
fire, floods, hurricanes, or tornadoes.
SENSIO Inc. shall not be liable for any incidental or consequential damages
caused by thebreach of any express or implied warranty. Apart from the extent
prohibited byapplicable law, any implied warranty of merchantability or fitness
for a particular purpose is limited in time to the duration of the warranty. Some
states, provinces or jurisdictions do not allow the exclusion or limitation of
incidental or consequential damages, or limitations on how long an implied
warranty lasts, and therefore, the above exclusions or limitations may not apply
to you. The warranty covers specific legal rights which may vary by state,
province and/or jurisdiction.
17538_CruxMello_Smores_IM_V3.indd 1117538_CruxMello_Smores_IM_V3.indd 11 7/15/2022 12:23:30 AM7/15/2022 12:23:30 AM

12
HOW TO OBTAIN WARRANTY SERVICE:
You must contact Customer Service at our toll-free number: 1-866-832-4843.
A Customer Service Representative will attempt to resolve warranty issues
over thephone. If the Customer Service Representative is unable to resolve the
problem, you will be provided withacase number and asked to return the product
to SENSIOInc. Attach a tag to theproduct that includes: your name, address,
daytime contact telephone number, case number, anddescription of the problem.
Also, include a copy of the original sales receipt. Carefully package the tagged
product with the sales receipt, and send it (with shipping and insurance
prepaid) to SENSIO Inc.’s address. SENSIO Inc. shall bear no responsibility or
liability for the returned product while in transit to SENSIO Inc.’s Customer
Service Center.
17538_CruxMello_Smores_IM_V3.indd 1217538_CruxMello_Smores_IM_V3.indd 12 7/15/2022 12:23:30 AM7/15/2022 12:23:30 AM

13
For customer service, call 1-866-832-4843
or email help@cruxkitchen.com
For recipes, visit www.cruxkitchen.com
SENSIO Inc.
New York, NY 10016/USA
17538 V1
17538_CruxMello_Smores_IM_V3.indd 1317538_CruxMello_Smores_IM_V3.indd 13 7/15/2022 12:23:30 AM7/15/2022 12:23:30 AM

14
NO
CAMPFIRE
NEEDED
17538_CruxMello_Smores_IM_V3.indd 1417538_CruxMello_Smores_IM_V3.indd 14 7/15/2022 12:23:30 AM7/15/2022 12:23:30 AM
Table of contents
Other Crux Kitchen Appliance manuals
Popular Kitchen Appliance manuals by other brands

BOSKA
BOSKA Cheese Curler Marble quick start guide

Moulinex
Moulinex Juice Express JU550D10 user manual

Danby
Danby Designer DWC114BLSDD user manual

inventum
inventum MK650 instruction manual

Nostalgia Electrics
Nostalgia Electrics NBM400 Instructions and recipes

Zojirushi
Zojirushi SW-EXE35 instruction manual