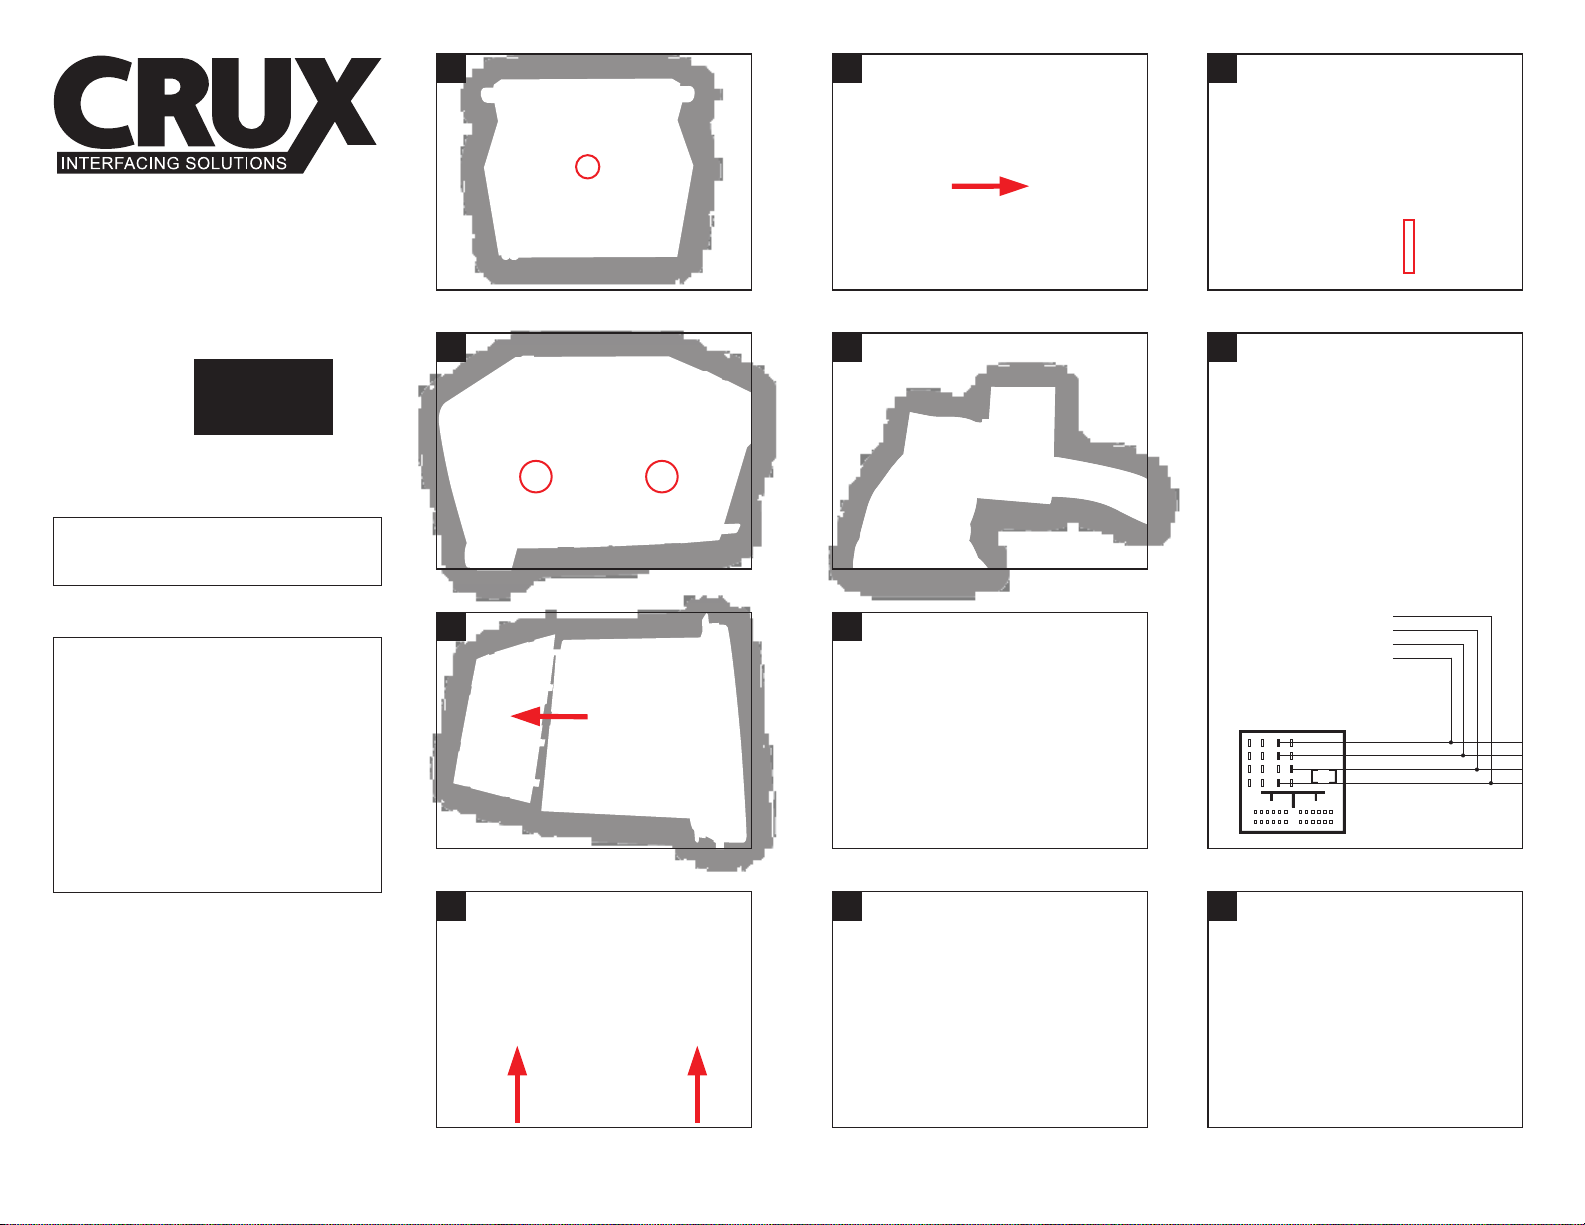
VOLKSWAGEN
2011 - UP Vehicles equiped with this
premium 8 radio
CAMERAS
DIRECT FIT
Bettle LED, License Plate Style Light
Bettle Light Bulb, License Plate Style Light
CC
Golf Light Bulb, License Plate Style Light
Jetta, Early 2012
Jetta, Later 2012
Passat 2011 - 2012
Tiguan
Direct Fit Camera Housings may differ on vehicles
within the same model year.
UNIVERSAL
Golden base universal camera w/ 45˚Screw Type
APPLICATIONS
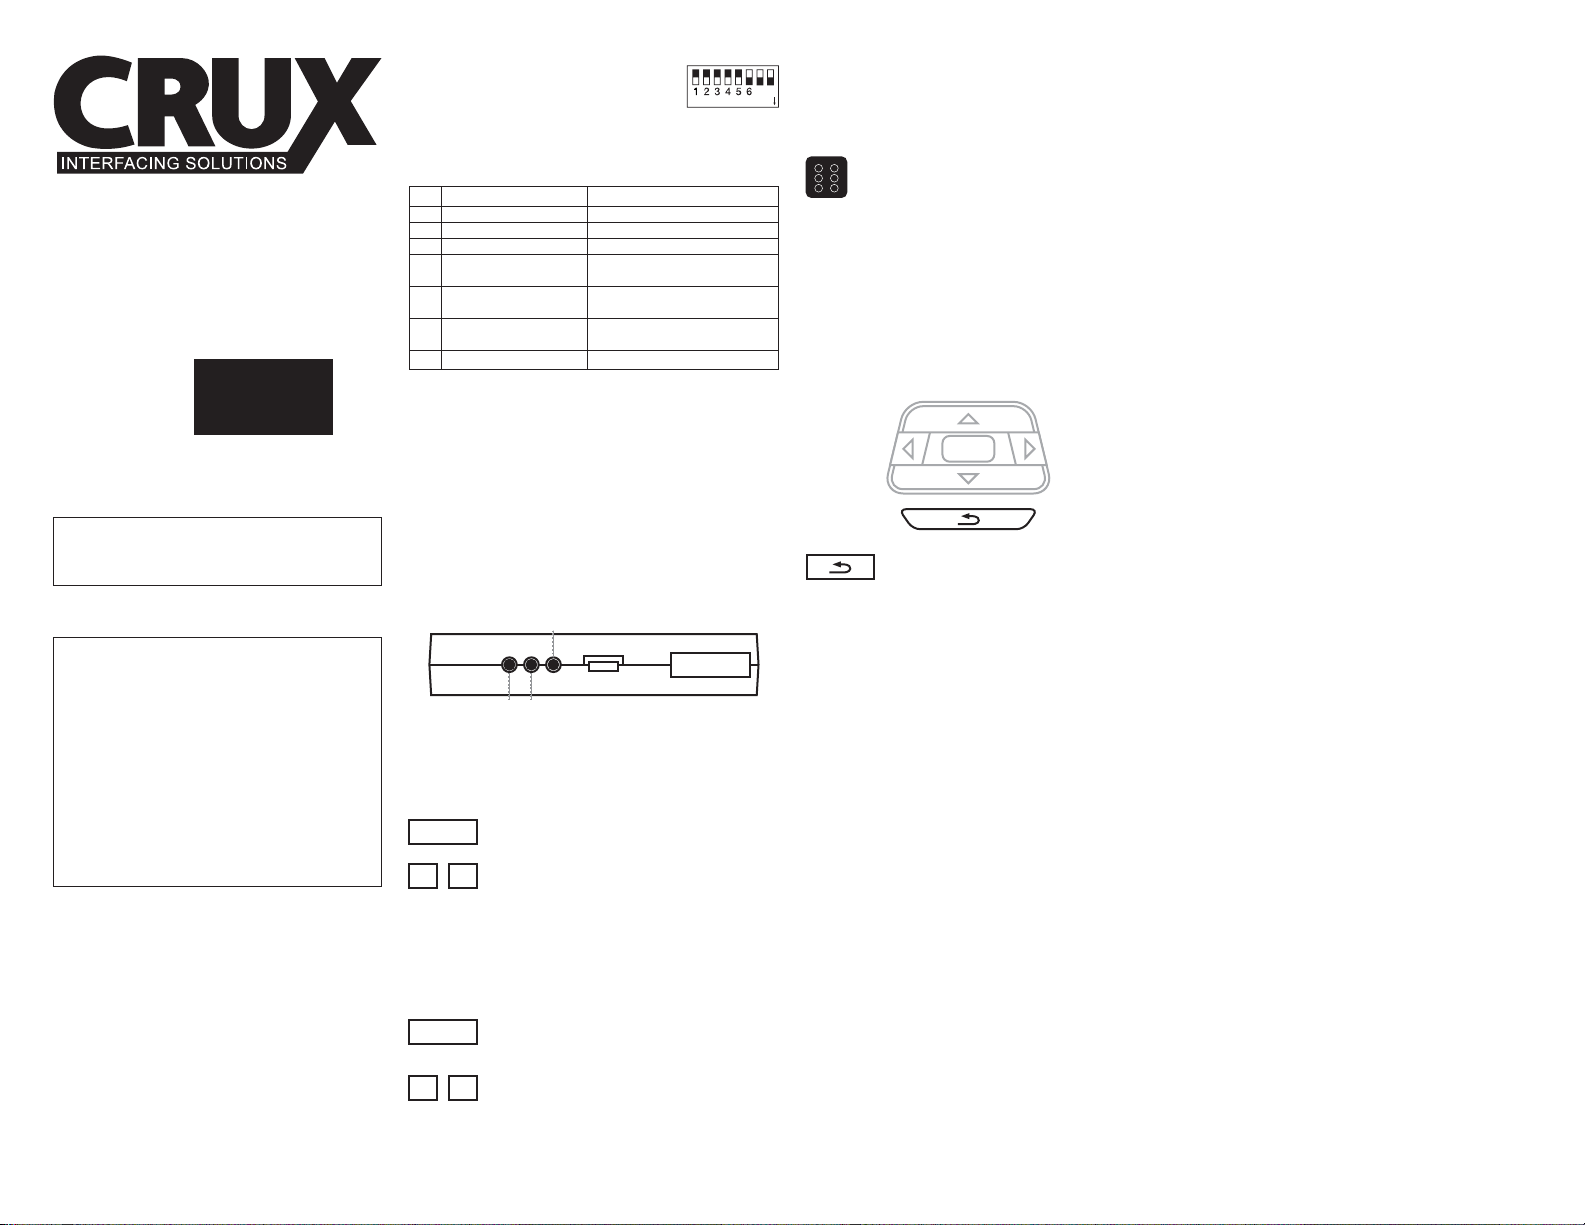
7 8
DIP ON
Factory Screen > RGB > AV1 > AV2
Setthe dip switches on theinterface according to the
functions the interface need to perform.
Prior tomounting the radio back in its place, turn the system
on and make display adjustmentas needed.
TheOn Screen Display (OSD) menuis accessed and
controlled by the three buttons on the interface.
OSD Menu 1
Access to the adjustment controls for better video quality.
(Contrast/ Brightness / Saturation / Sharpness)
To exit, let the menu time out.
To exit, let the menu time out.
OSD Menu 2
Access to the adjustment controls to center the image within
thescreen.
•Lens angle
-170 degrees
•Resolution
- 420 TV lines
• Minimum illumination
- 0.2 Lux
• Voltage
- 12v
•Operation temp.
- (-22ºF to 176ºF)
• NTSC
• Reference lines
• Shutter speed
- 1/60s - 20us
• Waterproof
•Pixels
- 656x492
CAMERA SPECIFICATIONS
•RGB video amplitude
- 0.7Vpp with 75 ohm impedance
-NTSC resolution (400x240, 480x240)
of navigation is allowed
• Sync amplitudein RGB - navi port
- 3˜5Vppwith 5kK ohm impedance
-Sync shouldbeNTSC compositewith
negative polarity
• AV1,AV2,Cam video amplitude
-0.7Vpp with 75 ohmimpedance
• AV1,AV2,Cam standar
- NTSC / PAL / SECAM automatic switch
• Normal work power consumption
- 2.4W (0.2A @12V)
• Standby current
- <5mA
• Standby start
- 10 seconds after theuser switch off the
CD unit
•Reverse trigger threshold
- >5V trigger
INTERFACE PARAMETERS
Step 4
SETTINGS
ADJUSTING THE INTERFACE DISPLAY SETTINGS
Step 5
Press and release to switch to the next input.
If Right handed steering wheel controls are present,
the return button can also be used to switchbetween
interface inputs.
• This is the sequence of operation for toggling through the
Input sources.
• The interface begins the sequence over after toggling
past AV2.
IMPORTANT
• Camera source will always take priority when the vehicle is
put into reverse.
• When the vehicle is turned off and allowed to power down,
the display will always revert back to “factory screen.”
SELECTING INPUT SOURCE
THROUGH STEERING WHEEL CONTROLS
SELECTING INPUT SOURCE
SEQUENCE
OK
SETTINGS
SETTING THE DIP SWITCHES
DIP
1
2
3
4
5
6
7,8
ON (Down)
RGB input enabled
AVI input enabled
AV2 input enabled
RGB resolution = HD
When using aftermarket
back-up camera
ON for IR programming
/ Display calibration
OFF (UP)
RGB input disabled
AVI input disabled
AV2 input disabled
RGB resolution = normal NTSC
Vehicle LCD accepts (480x240)
When Vehicle has OEM camera
OFF for Normal operation
No Function, OFF position
REAR-VIEW INTEGRATION
SYSTEM FOR VOLKSWAGEN
VEHICLES WITH PREMIUM 8
RADIOS
RVCVW-73P
FUNCTIONALITYSPECS
Press and release to switch to the next input.
Press and release to access OSD Menu 1.
Press and release either button forthe
desired adjustment.
There is asequence to selecting the desired source.
Reference the “SEQUENCE” portion of this section.
SELECTING INPUT SOURCE
USING THE SOURCE SELECTBUTTON
50 PIN
Menu
Menu
+
-
+
-
Press and release 2 times to access
OSD Menu 2.
Press and release either button for the
desired adjustment.
Menu
+
-
Product Liability
This unit is installed withintheFactory Radio which
requires it tobe opened by the Installer.
CRUX Interfacing Solutionsshall not be held liable for a
vehicle's electronic components insuch case, thereby
it is the responsibility of the installer to verify and confirm
vehicle configuration as to product compatibility prior to
installation. Installer shall be responsible as to all liability
insurance to cover any damagethatmay arise through
installation. Likewise, CRUX's recommendation of an
installation facility shall not constitute any grounds for
responsibility orliability. Notwithstanding any other
provisions ofthis disclaimer, CRUX's maximum
combined liability shall be limited to theprice paid for
the specific product that caused the alleged damages.