manuals.online logo
Brands
  1. Home
  2. •
  3. Brands
  4. •
  5. Cuckooland
  6. •
  7. Indoor Furnishing
  8. •
  9. Cuckooland MG 7769 User manual

Cuckooland MG 7769 User manual

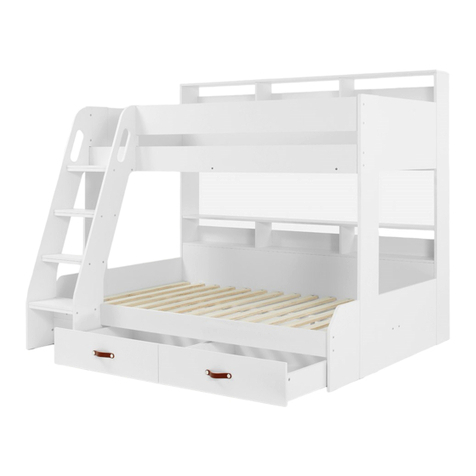
Harper High Sleeper
Assembly Instructions
Page : 1 of 32
Model : MG 7769
Product Size : 920mm x 1930mm (Base Int Size)
Thank you for purchasing this product. Before starting assembly we suggest you spend a short time reading
through this leaftlet, then follow the simple step by step guide.Two people are needed to assemble this product.
1966.28
[77.41"]
964mm
[37.95"]
1780mm
[70.08"]
www.cuckooland.com | +44 (0)1305 231231
Model : MG 7769
Product Size : 920mm x 1930mm (Base Int Size)
Page : 2 of 32
TOP TIPS BEFORE YOU START !
1. Please check that all parts & hardware are present before you start the assembly of your furniture.
2. For ease and speed of assembly, we recommend that before you commence each step of the assembly,
3. We recommend that where possible, all items are assembled near to the area in which they will be placed in use,
4. For the protection of your furniture, particularly items of high gloss finish, we recommend that the product is placed on a
5. During assembly please take care not to over-tighten any fittings, as this may damage the product.
CARE AND MAINTENANCE OF YOUR FURNITURE
Please periodically check all fittings and re-tighten as necessary.
To clean your item, please use a damp cloth and wipe clean.
Never allow any kind of liquid to remain on your furniture. Absorption can cause wood to warp or finishes to de-laminate.
Please do not place hot items (e.g hot drinks) directly on the wood surface.
Please do not drag or pull your furniture.
IMPORTANT INFORMATION
1. Thickness of mattress should not exceed 184mm.
2. Children should be discouraged from playing on top of this bunk bed.
3. The bunk bed should be checked periodically by the owner to ensure that the guardrail, ladder, and other components
4. A bunk bed is not to be placed near a ceiling fan unless the distance between the closest points on the ceiling fan bunk
5. Use guardrails on both sides of upper bunk.
6. Prohibit horseplay on or under bed(s).
7. Prohibit more than one person on upper bunk.
8. Use Ladder for entering and leaving upper bunk.
9. If the bunk bed will be placed next to the wall, the guardrail that runs the full length of the bed should be placed against
STRANGULATION HAZARD:
19. Never attach or hang items to any part of the bunk bed that are not designed for use with the bed for example, but not
Bed is at lest 2 metres.
are maintained in the correct position and state of repair and that all connectors are tight.
The wall to prevent entrapment between the bed and the wall.
Please identify all the parts required for that step.
to avoid moving the product unnecessarily once assembled.
Protected surface during assembly to prevent any damage.
limited to hook, belt and jump ropes.
IMPORTANT - READ CAREFULLY - RETAIN FOR FUTURE REFERENCE
10. WARNING Do not use the bunk bed/high bed if any struclural part is broken or missing.
11. Ventilation of the room is necessary in order to keep the humidity low and to prevent mould in and around the bed.
12. WARNING "high beds & the upper bed of bunk beds are not suitable for children under six years due to risk of injury from falls";
13. WARNING "children can become trapped between the bed & the wall, a roof pitch, the ceiling, adjoining pieces of furniture (e.g.cupboard)
and the like. To avoid risk of serious injury the distance between the top safety barrier and the adjoining structure shall not exceed 75mm
nor shall be more than 230mm"
14. always follow the manufacturer's instruction;
15. Recommended Mattress Size : 90cm x 190cm (UK Single) with Maximum Depth of 18.4cm
16. This item conforms to European Safety Standards - BS EN 747-1 : 2012 + A1 : 2015 & BS EN 747-2 : 2012 + A1 : 2015
17. WARNING "Bunk beds and high beds can present a serious risk of injury from strangulation if not used correctly. Never attach or hang
items to any part of the bunk bed that are not designed to be used with the bed, for example, but not limited to ropes, strings, cords,
hooks, belts and bags"
18. High beds and the upper bed of bunk beds is suitable for a maximum mattress thickness of 184mm. The top of mattress must not come
above the line marked on the bed.

www.cuckooland.com | +44 (0)1305 231231
Guide To Assembly
Model : MG 7769
Tools Required For Assembly
Rubber Hammer
DO NOT USE POWER TOOLS TO
ASSEMBLE THIS PRODUCT. USE
OF POWER TOOLS WILL INVALIDATE
ANY CLAIM AND MAY DAMAGE THIS
PRODUCT MAKING IT UNSAFE.
Phillips Screw Driver
Tape Measure

€2 People Required
Approximately 3 hour
Page : 3 of 32
€
www.cuckooland.com | +44 (0)1305 231231
Part List
Model : MG 7769
Page : 4 of 32
No. Pcs No. Part Name
Carton 2 of 4
Pcs
Part Name
Carton 1 of 4
1
02
04
1Right Panel (Upper Desk)
14
15
13
12
11
01
1
1
1
1
1
1
Top Panel (Desk)
Plinth Panel (Cabinet)
Right Panel (Cabinet)
1
07
08
1
Top Panel (Upper Desk)
1
09
10
1
2
Bottom Support Panel (Cabinet)
Bottom Panel (Front Cabinet)
Back Panel (Drawer)
Back Panel (Cabinet)
Top Panel (Upper Desk)
Support Panel (Desk)
Left Panel (Cabinet)
1
05
Shelf Panel (Upper Desk)
03
06
2
LVL Slats 15
Back Panel (Front Cabinet)
Plinth Panel (Cabinet)
18
19
20
Bottom Panel (Drawer)
Front Panel (Drawer)
Back Panel (Drawer)
3
1
2
26
25
23
22
1
1
2
2
Right Panel (Drawer)
Front Panel (Drawer)
Left End Panel (Back)
Center Upper Panel (Left)
30
27 Center Lower Panel (Left)
4
1
28 1
29
31 1
1
Right Panel (Cabinet)
Back Panel (Shelf)
Bottom Panel (Cabinet)
Shelf Panel (Cabinet)
Assembly Instructions + Fitting List
16 1
33 1
Shelf Panel (Cabinet)
Left Panel (Drawer)
17
21
1
Right Panel (Drawer)
2Left Panel (Drawer)
34 1
Back Panel (Cabinet)
32 1
Front Panel (Cabinet)
Metal Side Rail
Ladder Support Rail
35 Side Panel (Cabinet)
36 Support Panel
40
39
38
37 Right End Panel (Front)
Right End Panel (Back)
Center Panel (Right)
Side Panel (Back)
45
46
43
41
42
24
44
51
48
47
50
Hanging Rail (592mm)
8
2
1
Side Panel Front (Lower)
Side Panel Front (Upper)
Left Panel (Ladder)
Right Panel (Ladder)
1st Step Ladder
2nd Step Ladder
3rd Step Ladder
4th Step Ladder
1
1
1
1
1
1
1
1
1
1
1
1
1
1
Carton 3 of 4
Carton 4 of 4
www.cuckooland.com | +44 (0)1305 231231
Part List
Model : MG 7769
Page : 5 of 32
LVL Slats x15
08
09 x2
25
26
07
27
39
40
42
41
38
37
34
35
06
05
01
36
03
04
28
30
30
30
30
32
29
33
31
14
10
10
11
13
12
48
51 x2
50 x8
47
46
45
44
24
43
22 x2
23 x2
21 x2
20 x2
18 x2
19
17
18
16
15
02
www.cuckooland.com | +44 (0)1305 231231
Carton 1 of 4
Fitting List
No. Part Name Pcs
ACam Stud (small)71
Cam 85
M8 x 25mm Wood Dowel
B
D
F
C
H
J
K
L
M
P
Q
R
140
S
E
Page : 6 of 32
T
G
U
M6 Allen Wrench
20
26
4
10
Felt Pads (45 x 14mm)
2
28
M6 x 13mm Baller 24
16
30+2
Fitting List
M6 x 25mm Allen Bolt
14" Drawer Slide (SJ)
M6 Round Nut
M6 x 35mm Allen Bolt
M6 x 50mm Allen Bolt
Sticker 25mm
M6 JCN NUT
Model : MG 7769
38mm Chipboard Screw
14mm Chipboard Screw
Contractfic Dowel 14
30
3 set
M6 x 30mm Allen Bolt 30
N
6
M5 x 40mm JCBCW Screw 4
PVC Hanging Hook 2
Caution
There are many small components
used in the construction of this
unit.These loose items should be
kept away from young children
whilst assembling your unit. As
an extra precaution, screw cover
caps should be permanently
fixed in position.(Where applicable)
USEFUL HINTS & TIPS
Two people will be required to
assemble this unit
Please keep this assembly
instruction for future reference
www.cuckooland.com | +44 (0)1305 231231
01
Guide To Assembly
Model : MG 7769
Page : 7 of 32
12
G x 9
G
H
To Assembly the Drawer Slide, Please Follow Step as Below
BACKFRONT
Last Hole
Second Hole H
GGG
H x 3
G
G
G
To Assembly the Drawer Slide, Please Follow Step as Below
BACK FRONT
Last Hole Second Hole
H
G G G
02 G x 9
H x 3
G
G
G
G
G
13
H
H
H
H
H
G
GG
G
G
G
G
GG
www.cuckooland.com | +44 (0)1305 231231
03
Guide To Assembly
Model : MG 7769
Page : 8 of 32
13

WHEN FITTING CAMS
ENSURE STARTING POSITION IS CORRECT
BEFORE YOU INSERT CONNECTING BOLT
TURN CLOCKWISE UNTIL SECURE
WRONG
CORRECT

B x 19
D x 45
A x 11
A
12
07
08
09 x2
10 x2
11
05
03 04
02
06
D
www.cuckooland.com | +44 (0)1305 231231
04
Guide To Assembly
Model : MG 7769
Page : 9 of 32
36

WHEN FITTING CAMS
ENSURE STARTING POSITION IS CORRECT
BEFORE YOU INSERT CONNECTING BOLT
TURN CLOCKWISE UNTIL SECURE
WRONG
CORRECT

B x 7
D x 9
A x 7
A
01
D
05 06
09
07 08
09
www.cuckooland.com | +44 (0)1305 231231
07
Guide To Assembly
Model : MG 7769
Page : 10 of 32
09 P x 6
11
x 4
10
10
07
08
13
08
x 4
10
12
14
12
13
09
09
P
P
P
P
P
P
www.cuckooland.com | +44 (0)1305 231231
11
Guide To Assembly
Model : MG 7769
Page : 11 of 32
03
04
02
x 2
12
02
06
A x 1
A
13
06
05
x 1
14
x 1
x 3
36 01
www.cuckooland.com | +44 (0)1305 231231
15
Guide To Assembly
Model : MG 7769
Page : 12 of 32
F x 4
16
05
02
F
F
F
F
01
28
www.cuckooland.com | +44 (0)1305 231231
17
Guide To Assembly
Model : MG 7769
Page : 13 of 32
26

WHEN FITTING CAMS
ENSURE STARTING POSITION IS CORRECT
BEFORE YOU INSERT CONNECTING BOLT
TURN CLOCKWISE UNTIL SECURE
WRONG
CORRECT

A
D
27
B x 16
D x 26
A x 11
C x 8
R x 10
C
C
C
25
43
24
44
45
46
47
C
C
C
C
C
R
R
R
R
R
R
R
R
R
R
www.cuckooland.com | +44 (0)1305 231231
18
Guide To Assembly
Model : MG 7769
Page : 14 of 32
19
27
x 8
26
24
25
44
45
46
47
x 4
24
www.cuckooland.com | +44 (0)1305 231231
20
Guide To Assembly
Model : MG 7769
Page : 15 of 32
21 P x 8
x 4
43
27
24
43
25
P
P
P
P
P
P
P
P
www.cuckooland.com | +44 (0)1305 231231
22
Guide To Assembly
Model : MG 7769
Page : 16 of 32
U x 12
23
L
U
L x 16
50 x8
L
L
L
L
L
LL
L
L
L
L
L
L
L
L
U
U
U
U
U
U
U
U
U
U
U
www.cuckooland.com | +44 (0)1305 231231
24
Guide To Assembly
Model : MG 7769
Page : 17 of 32

WHEN FITTING CAMS
ENSURE STARTING POSITION IS CORRECT
BEFORE YOU INSERT CONNECTING BOLT
TURN CLOCKWISE UNTIL SECURE
WRONG
CORRECT

B x 37
A x 27
A
C
D x 50
C x 6
R x 6
29
32
31
30 x4 33
35
39
34
C
C
C
R
R
Q x 2
Q
R
C
C
QD
RR
R
37
38
www.cuckooland.com | +44 (0)1305 231231
25
Guide To Assembly
Model : MG 7769
Page : 18 of 32
39
U
x 6
26
P
38
37
P x 6
U x 8
39
38
37
U
UU
UU
UU
PP
PP
P
www.cuckooland.com | +44 (0)1305 231231
27
Guide To Assembly
Model : MG 7769
Page : 19 of 32
29
29
E x 2
E
x 4
30
31
29
30
30
30
30
32
x 6
x 9
E
28
32
32
31
37
39
38
31
www.cuckooland.com | +44 (0)1305 231231

Other Cuckooland Indoor Furnishing manuals

Cuckooland Harry MG 7733 User manual

Cuckooland

Cuckooland Harry MG 7733 User manual

Cuckooland Bailey Cabin Bed User manual

Cuckooland

Cuckooland Bailey Cabin Bed User manual

Cuckooland MG 7775 User manual

Cuckooland

Cuckooland MG 7775 User manual

Cuckooland AVIARY User manual

Cuckooland

Cuckooland AVIARY User manual

Cuckooland Lars MG 7777 User manual

Cuckooland

Cuckooland Lars MG 7777 User manual

Cuckooland HARBOUR HOUSE BED User manual

Cuckooland

Cuckooland HARBOUR HOUSE BED User manual

Cuckooland ADVENTURE TREEHOUSE BED VARIATIONS User manual

Cuckooland

Cuckooland ADVENTURE TREEHOUSE BED VARIATIONS User manual

Cuckooland Hampstead CLHNRCSCT User manual

Cuckooland

Cuckooland Hampstead CLHNRCSCT User manual

Cuckooland Bailey User manual

Cuckooland

Cuckooland Bailey User manual

Cuckooland Ava MG 7827 User manual

Cuckooland

Cuckooland Ava MG 7827 User manual

Cuckooland Leo MG 7824 User manual

Cuckooland

Cuckooland Leo MG 7824 User manual

Popular Indoor Furnishing manuals by other brands

Regency LWMS3015 Assembly instructions

Regency

Regency LWMS3015 Assembly instructions

Furniture of America CM7751C Assembly instructions

Furniture of America

Furniture of America CM7751C Assembly instructions

Safavieh Furniture Estella CNS5731 manual

Safavieh Furniture

Safavieh Furniture Estella CNS5731 manual

PLACES OF STYLE Ovalfuss Assembly instruction

PLACES OF STYLE

PLACES OF STYLE Ovalfuss Assembly instruction

Trasman 1138 Bo1 Assembly manual

Trasman

Trasman 1138 Bo1 Assembly manual

Costway JV10856 manual

Costway

Costway JV10856 manual

moss DESIGN Caisson Credenza Assembly instructions

moss DESIGN

moss DESIGN Caisson Credenza Assembly instructions

Aquaglide FULL DECK 15.0 owner's manual

Aquaglide

Aquaglide FULL DECK 15.0 owner's manual

AREBOS AR-HE-SW30 user manual

AREBOS

AREBOS AR-HE-SW30 user manual

Till-Hilft Fulda 87005.330 Assembly instructions

Till-Hilft

Till-Hilft Fulda 87005.330 Assembly instructions

Twoey Outside 2010 quick start guide

Twoey Outside

Twoey Outside 2010 quick start guide

Hettich Easys 200 operating instructions

Hettich

Hettich Easys 200 operating instructions

The bedboss RELAX 404 Series owner's manual

The bedboss

The bedboss RELAX 404 Series owner's manual

Oeseder Möbelindustrie Bern 991 720 Assembly instructions

Oeseder Möbelindustrie

Oeseder Möbelindustrie Bern 991 720 Assembly instructions

Costway HW68469 user manual

Costway

Costway HW68469 user manual

Next ALIX A27743 Assembly instructions

Next

Next ALIX A27743 Assembly instructions

BROSA Hans Assembly guide

BROSA

BROSA Hans Assembly guide

Prodigg MINIKA PBA015T-FUR installation manual

Prodigg

Prodigg MINIKA PBA015T-FUR installation manual

manuals.online logo
manuals.online logoBrands
  • About & Mission
  • Contact us
  • Privacy Policy
  • Terms and Conditions

Copyright 2025 Manuals.Online. All Rights Reserved.