Curtis DVB350UK User manual

DVB-T Twin Tuner Receiver/HDD Recorder
DVB350UK
INSTRUCTION MANUAL
Please read thisUser Manual carefully to ensure proper useof this
product and keepthis manual forfuture reference.
ON OFF
DVB350UK

Tableof Contents
11
Tableof Contents ------------------------------------------------------------------------- 1
Introduction-------------------------------------------------------------------------------- 2
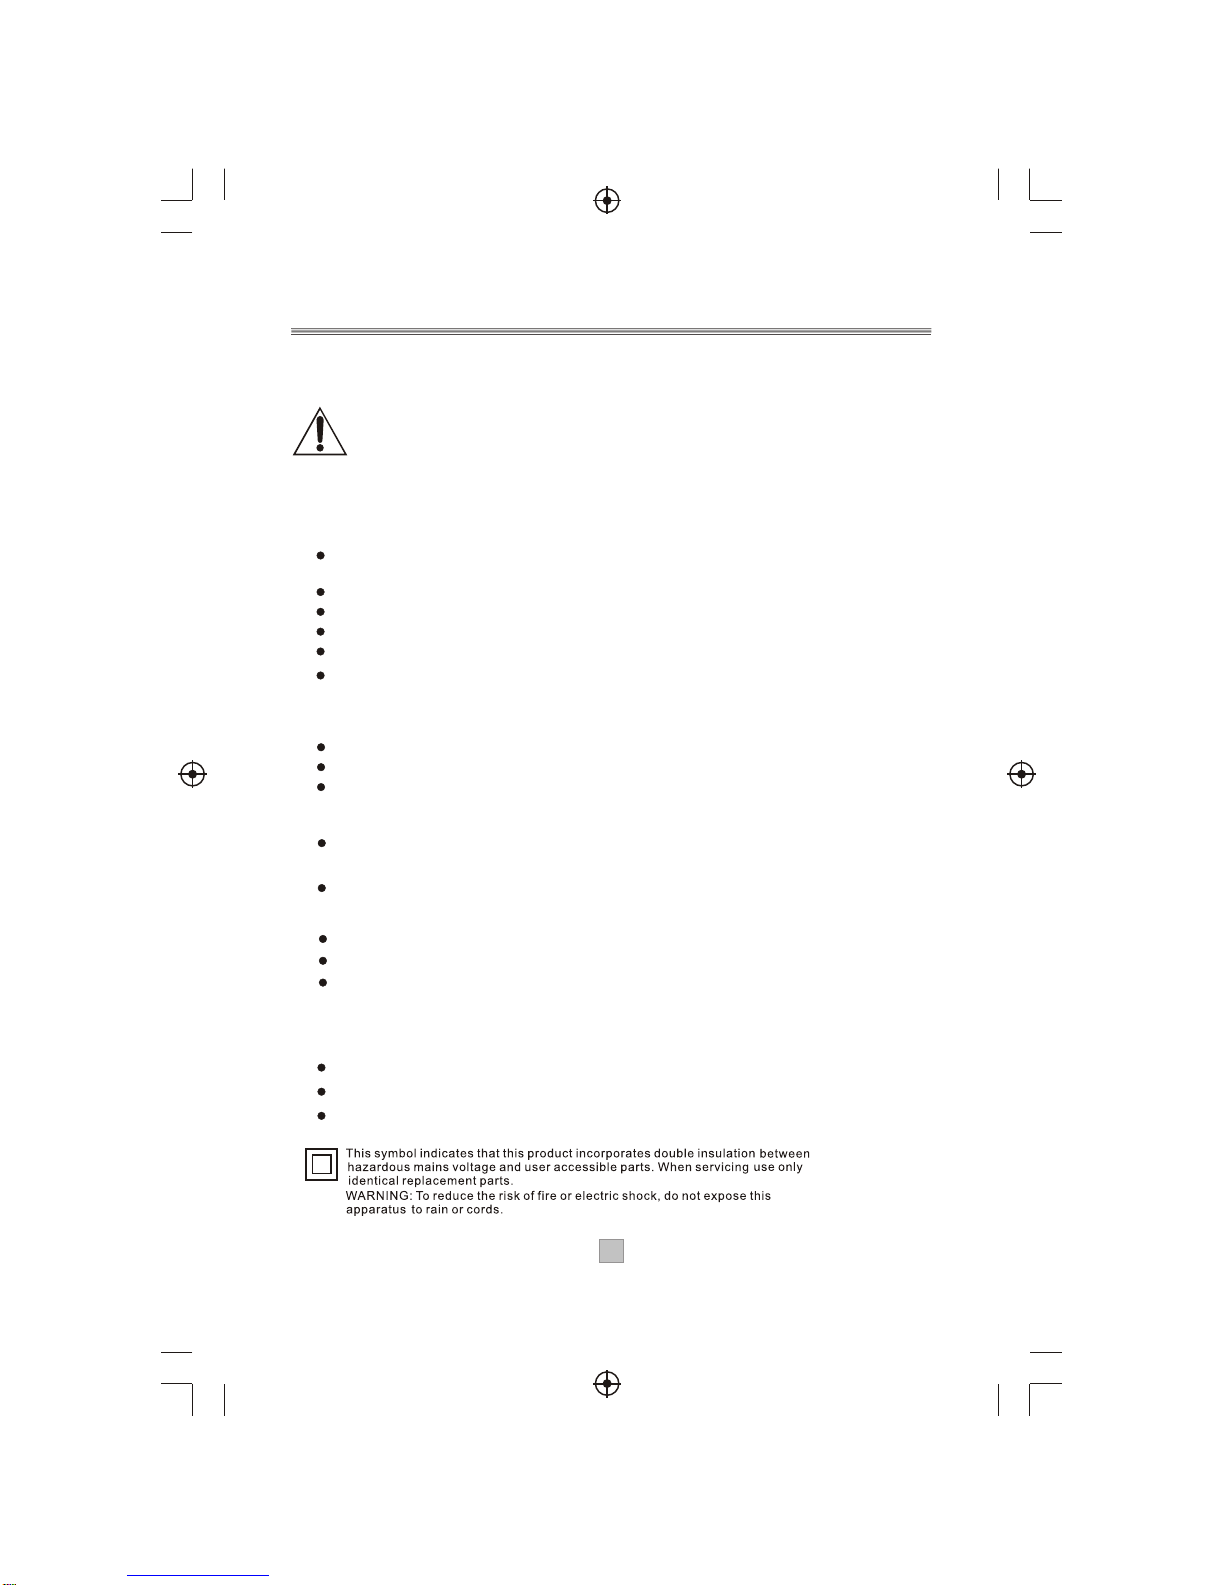
Safety Information------------------------------------------------------------------------ 3
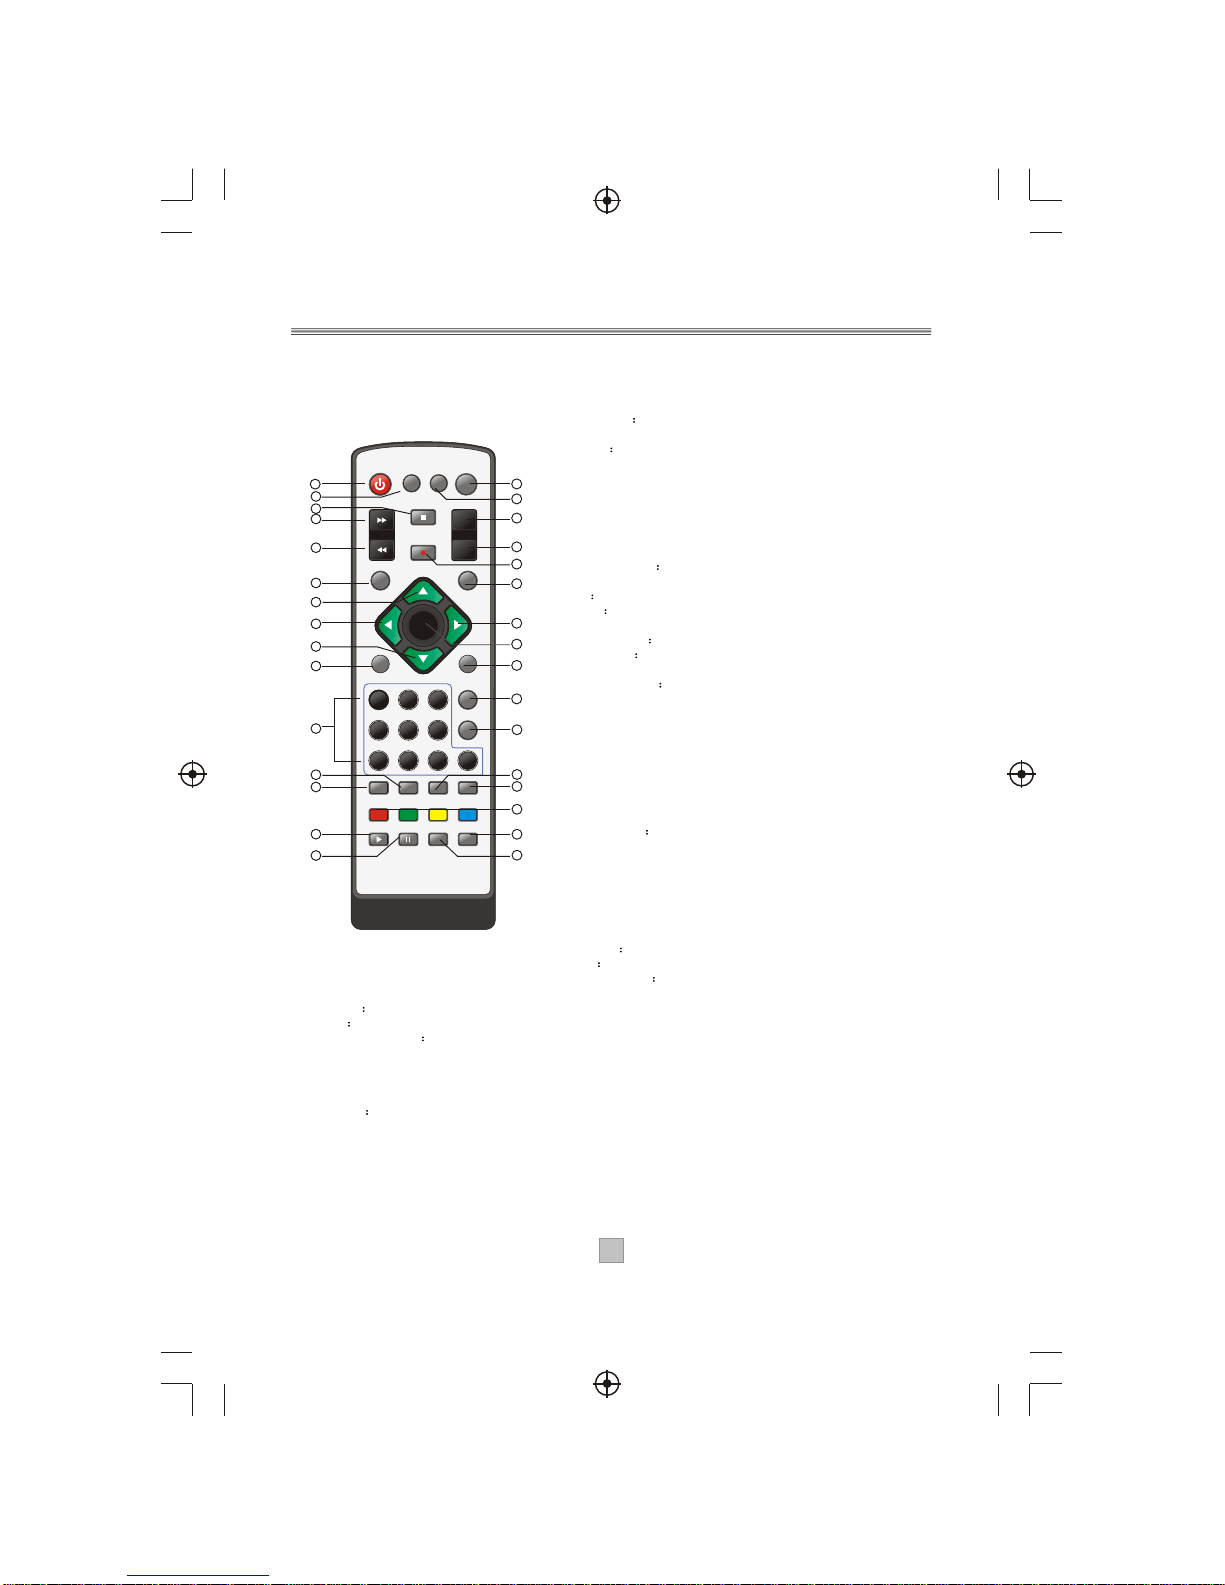
Remote Control--------------------------------------------------------------------------- 4
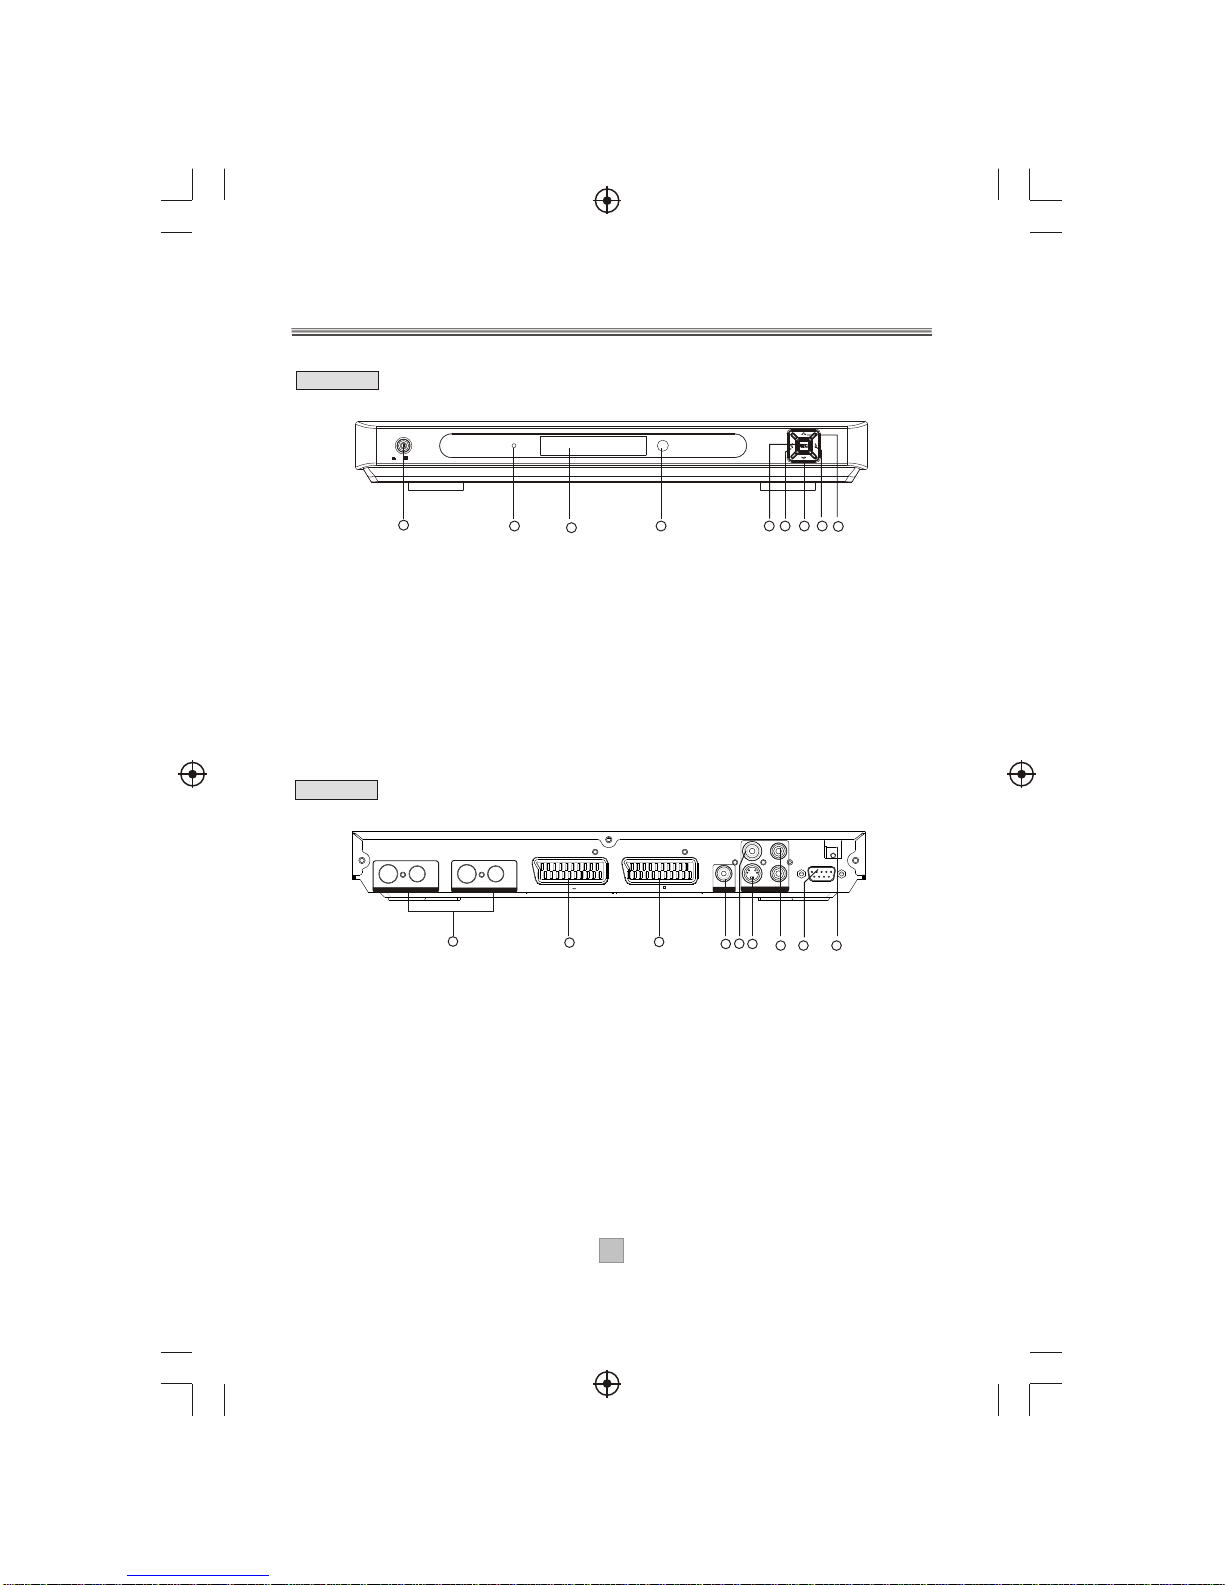
Front and Rearpanel illustration------------------------------------------------------- 6
Connecting to aTelevision and Video------------------------------------------------- 7
Connecting to aTelevision ----------- -------------------------------------------------- 8
Connecting to a Surround Sound System------------------------------------------- 9
Getting Started ---------------------------------------------------------------------------10
Switch on forthe first time------------------------------------------------------------10
Channel Search------------------------------------------------------------------------ 11
Automatic channel scan------------------------------------------------------------ 11
Manual channel scan----------------------------------------------------------------11
System Setting-------------------------------------------------------------------------12
A/V Setting----------------------------------------------------------------------------12
First TimeInstallation---------------------------------------------------------------13
System Info---------------------------------------------------------------------------13
Change Pin Code-------------------------------------------------------------------- 13
Software Update---------------------------------------------------------------------14
Auto Mode:-------------------------------------------------------------------------- 14
Manual Mode----------------------------------------------------------------------- 14
DTR Setting---------------------------------------------------------------------------15
Time ShiftDurationg--------------------------------------------------------------- 15
Format Hard Disk------------------------------------------------------------------ 15
HDD Information-------------------------------------------------------------------15
Auto discardSetting--------------------------------------------------------------15
OSD Setting------------------------------------------------------------------------ 15
Timers------------------------------------------------------------------------------------15
Channels List---------------------------------------------------------------------------16
Favourite List---------------------------------------------------------------------------17
Basic Operations---------------------------------------------------------------------- 18
Channel Schedule(EPG)-----------------------------------------------------------18
Changing Channels----------------------------------------------------------------- 19
Volume Control---------------------------------------------------------------------- 19
Digital Teletext----------------------------------------------------------------------- 20
Subtitle-------------------------------------------------------------------------------- 20
Displaying programme information---------------------------------------------- 20
TV Format-----------------------------------------------------------------------------20
Pausing the currentpicture-------------------------------------------------------- 21
Record Operations-------------------------------------------------------------------- 21
Hard Disc Installation----------------------------------------------------------------- 23
Help andAdvice-------------------------------------------------------------------------- 24
TechnicalSpecifications ---------------------------------------------------------------25

Introduction
Thank you for purchasing this product which has been designed and
manufactured to give you many years of trouble-free service.
About This User Guide
This user guide contains all the information you need to know about how to
setup and watch available free view Channels using your set top box.
What is DVB-T?
It works like traditional TV, but because the signals are Digital you need a
set top box to convert them. This means more channels can be transmitted with
extra features such as interactivity and wide screen pictures.
22
Look out for this symbol. It indicates useful and important tips.
Trade Mark of the DVB Digital Video Broadcasting
Project(1991 to 1996)
Digital Video
Broadcasting
Accessories In the Box
Remove your Digital set top box carefully from the box ,and remove the
packaging from each part.
You will find the following items:
Digital set top box with fitted mains plug
Remote Control with 2xAAAbatteries
Instruction Manual
AV cable
RF loop through cable
PVR (Personal Video Recording) Instruction:
It supports up-to-55-hoursrecording time with80G hard disk.
If more than55 hours recordingtime needed, youshould change thehard disk
with higher capacityone easily byyourself.
In the caseof that, itis necessary toformat new HDD.
Please refer tothe section ofPVR setting onpage 16 fordetail.

Safety Information
Please read allthe safety informationbefore using theproduct.
Safety Considerations
Position the cablesso that theycannot be walkedon or pinchedby items
placed on oragainst them.
Do not usethe set topbox in humidor damp conditions.
Do not allowthe set topbox to getwet.
Do not placewater filled objectssuch as vaseson top ofthe set topbox.
Do not exposethe set topbox to drippingor splashing.
Do not placenaked flame sources,such as candles,on the topof the
set top box.
Cleaning
ALWAYS unplug theset top boxbefore you cleanit.
Do not useliquid or aerosolcleaners.
Clean the settop box witha soft, damp(not wet) cloth.
Ventilation
The slots andopenings on theset top boxare for ventilation.Do not coveror
block them asit may causeoverheating.
NEVER let childrenpush anything intothe holes orslots on thecase.
Servicing
There are nouser serviceable partsin this settop box.
When servicing ,referto qualified servicepersonnel.
Consult your dealerif you areever in doubtabout the installation,operation
or safety ofthis unit.
33
Battery Disposal
Please ensure batteriesare disposed ofsafely.
Never dispose ofbatteries in thefire or withhousehold waste.
Check with yourlocal authority fordisposal regulations.
Safety is Important
Toensure your safetyand the safetyof others, pleaseensure you read
the Safety Instructionsbefore you operatethis product.
Keep this informationin a safeplace for futurereference.

OK
DTV/VCR
MUTE
RECORD
STANDBY
P+
P-
EXITMENU
INFOEPG
STOP
REC LIST
VOL+VOL-
123
456
7890
TEXT
FAVOURITE
LANGUAGESUBTITLE WIDE
RECALL
PAUSE SLOWPLAY GOTO
Remote Control
44
Remote Key Function:
1) DTV/VCR Used to switchbetween the VCRSCART
input and theDTV output mode.
2) MUTE Used to turnthe sound onor off.
3) P+:Used to changechannels.
4) P-:Used to changechannels.
5) RECORD:Used to recordthe program manually, and
select the recordduration if pressedit again. theuser
can change thewatching channel ifrecording the
specific program
6) EXIT: Used to returnto the previousscreen or menu.
7) VOL+/RIGHT Used to movearound the menuscreens
or changing thevolume in non-menustate.
8) OK Used to confirma selection withina menu.
9) INFO Used to displayinformation about thechannel
being viewed.
10) FAVORITE Used to accessyour favourite channels.
11) RECALL Used to switchbetween the lasttwo viewed
channels.
12) LANGUAGE Used to switchbetween different audio
languages that arebroadcasted.
13) WIDE:Used to changethe aspect ratios.
14) COLOR KEYS(RED/GREEN/YELLOW/BLUE):
Used to operatedifferent functions inTEXT screenor
other menus.
15) GOTO:
16) SLOW:Used to adjust the slow speedin HDD playback
mode.
17) STANDBY Used to switchthe set topbox to onand off.
18) RECORD LIST: Used to viewthe recorded program.
19) STOP:Used to stop the current recordingif exist orstop
the HDD playbackback to DTVmode.
20) FASTFORWARD:Used to adjust the forward speedif in
HDD time shiftingplayback mode.
21) FASTBACKWARD:Used to adjustthe backward speed
if in HDDtime shifting playbackmode.
22) MENU Used to openthe main menuwindow.
23) UP Used to movearound the menuscreens.
24) VOL-/LEFT Used to movearound the menuscreens or
changing the volumein non-menu state.
Used to selectthe playback starttime in HDD
playback mode.
25) DOWN Used to movearound the menuscreens.
26) EPG Used to displayinformation about theprogram being viewedand what's onnext.
27) NUMBER KEYS Used to selectchannel numbers orinput numbers inmenus.
28) TEXT: Used to openteletext OSD displayif digital teletextavailable in thebroadcasted
stream.
29) SUBTITLE:Used to switchbetween different subtitlesthat are broadcasted.
30) PLAY:Used to resumethe playback ifstopped or intime shifting mode(FF,FB,SLOW etc).
31) PAUSE Used to pauseor playback theprogram being viewed.
Note: SUBTITLE/TEXT/LANGUAGE maynot available forall channels
1
2
3
4
5
6
7
8
9
10
11
12
13
14
15
16
17
18
19
20
21
22
23
24
25
26
27
28
29
30
31

55
Installing the Batteries
Remove the batterycover from theremote control andput 2xAAAsize batteries
inside the compartment.
The diagram insidethe battery compartmentshows the correctway to installthe
batteries.
OPEN
OPEN
1.Open the cover 2.Install batteries 3.Close the cover
Using the RemoteControl
Touse the remotecontrol, point ittowards the frontof the digitalset top box
The remote controlhas a rangeof up to7 metres fromthe set topbox at anangle
of up to60 degrees.
The remote controlwill not operateif its pathis blocked.
Sunlight or very bright light will decrease the sensitivity of the remote
control.

LOOPRF
THROUGH
INRFLOOPRF
THROUGH
INRFPVR TUNERPVR TUNERTV TUNERTV TUNER
100-240V~
50/60Hz
SERVICE
S-VIDEOS-VIDEO RR
COAXIALCOAXIAL AUDIO/VIDEO OUTAUDIO/VIDEO OUT
DIGITALAUDIODIGITALAUDIO
VIDEOVIDEO LL
VCR O OVCR O O TVTV
13
25
46789
66
Front Paneland RearPanel Illustration
1. Front panel
2. Rear panel
1) RF IN/ RF LOOPTHROUGH (PVR andTV tuner)
PVR/TV RF INsocket connects toyour external aerial.PVR/TV RF LOOPTHROUGH socket will
bypass the inputRF signal toanother tuner oryour TV orother video system. See connection
pages for details
2) VCR SCART: This socket connectsto either aDVD or anothervideo system.
3) TV SCART: This socket connectsto your TV.
4) COAXIAL:This socket connectsto a coaxialsocket on yoursurround sound systemto output
digital audio.
5) CVBS video:This socket outputscomposite video signal.
6) S-Video output:This socket outputsseparate Y/C videosignal.
7) AUDIO L/R:This socket outputsanalog audio L/Rsignal.
8) RS-232 PORT: This socket isonly used forsoftware upgrade.
9) MAIN POWERCABLE:This is usedto connect toyour main powersupply.
1) POWER BUTTON: Used to switchthe main powerof the settop box toon and off.
2) STANDBYINDICATOR:Used to visuallyshow power stateof the settop box,
the red LEDwill be lightif the settop box enteredstandby mode.
3) LED DISPLAY: Used to displaythe channel numberand time informationand other playstates.
4) REMOTE CONTROLSENSOR: Used to receivethe signal fromthe remote control.
5) RECORD:Used to recordthe program manually, and selectthe record durationif pressed itagain.
6) VOLUME DOWN: Used to decreasethe volume withoutusing the remotecontrol.
7) CHANNEL DOWN: Used to changechannels without usingthe remote control.
the user canchange the watchingchannel if recordingthe specific program.
8) VOLUME UP: Used to increasethe volume withoutusing the remotecontrol.
9) CHANNEL UP:Used to changechannels without usingthe remote control.
ON OFF
123456789

77
TVAerial
SCART
SCART
DVD or VCR
LOOPLOOPRRFF
THROUGHTHROUGH
ININRRFFLOOPLOOPRRFF
THROUGHTHROUGH
ININRRFFPVR TUNERPVR TUNERTV TUNERTV TUNER
100-240V~
50/60Hz
SERVICE
S-VIDEOS-VIDEO RR
COAXIALCOAXIAL AUDIO/VIDEO OUTAUDIO/VIDEO OUT
DIGITALAUDIODIGITALAUDIO
VIDEOVIDEO LL
VCR O OVCR O O TVTV
(SCART cable not included)

Connecting to aTelevision
88
SERVICE
VIDEO
S-VIDEO
L
R
COAXIAL AUDIO/VIDEO OUT
DIGITAL AUDIO
100-240V~
50/60Hz

Connecting toa SurroundSound System
SERVICE
VIDEO
S-VIDEO
L
R
COAXIAL AUDIO/VIDEO OUT
DIGITALAUDIO
BASS
TREBLE
ECHO
DOWN UP
VOLUME
INPUT SELECTOR
MUTE
KARAOKE
CHANNEL
TEST
MODE
3STEREO
PROLOGIC
BYPASS
EXCITE
POWER
MIC
2
1
1
MICVOL
2
MIC
Digital Amplifier
Coaxial
Coaxial cableCoaxial cable
AUDIO IN
99
100-240V~
50/60Hz

Getting Started
Turn onyour TVset and selectthe correspondingAVinput (with theAV key orsimular,
on the televisionremote control).
Press the "LEFT"or "RIGHT" cursorbutton to chooseeither "16:9" or"4:3".
Press the "OK"button to continueinstallation , aconfirmation message window
displays as right.
Press the "LEFT"or "RIGHT" cursorbutton to highlight"confirm".
Press the "OK" button to continue. " Scan Progress" menu will appear and list the
channels as theyare found. A barappears below the listing panel thatindicates the
progress of thechannel search.
When all availableradio and televisionchannels have beenfound, the channelat the
top of thelist will beviewed.
Switching on forthe first time
Scan Progress:
Channels Found:
20. f tn
19. UKTV Br tldeas
21. TMF
18. The HITS
22/48
Channel No 42 (642 MHZ)
43%
Exit
EXIT
Do you want to startsearch?
Exit
Confirm
TV Setting
TV Shape
Continue installation:
4:3
OK
1010

Automatic channel scan
1) Press the"MENU" button toenter the mainmenu of theSTB.
2) Press the"UP" or "DOWN"cursor button toselect Channel Search
3) Press the"OK" button toenter the sub-menu.
4) Highlight the"Search Type" and pressthe "LEFT" or"RIGHT" cursor buttonto
select "Auto Scan".
5) Press the"OK" button tostart searching.
6) Press the"EXIT" button toquit.
Manual channel scan
1) Press the"MENU" button toenter the mainmenu of STB.
2) Press the"UP "or "DOWN" cursorto select "ChannelSearch"
3) Press the"OK" Button toenter the sub-menu.
4) Highlight the"Search Type" and pressthe "LEFT" or"RIGHT" cursor toselect
"Manual Scan".
5) Press the"DOWN" cursor toselect "Channel No"section, and enterdesired
Channel Number.
6) Press the"OK" button tostart searching.
7) Press the"EXIT"button to quit.
Note: When thesearch is finished,the first channelof the channellist is displayedyou
Channel Search
Search Type
Start Search Exit
OK EXIT
Auto Scan
Channel Search
Channel No
Start Search Exit
OK EXIT
22
Search Type Manual Scan
Strength: 55%
Quality: 100%
1111
Channel Search
Favourite List
Channel Search
System Setting
Channel List
Timer

Many aspects ofyour STB canbe set toreflect your circumstancesand preference.
The System Settingmenu is accessedfrom main menu.
A/V Setting
This menuallows the usersto setTV shape, Video Output andOSD Transparency.
1) Press the"MENU" button toenter the mainmenu of theSTB,
2) Press the"UP" or "DOWN"cursor to selectSystem Setting,
3) Press the"OK" button toenter the sub-menu,
4) Press the"UP" or "DOWN"button to select"A/V Setting" andPress the "OK"
button to enterits sub-menu.
TV Shapeoptions: 4:3 /16:9
Video Outputoptions: RGB /CVBS
OSD Transparencyrange: 0~100%
5) Press the"UP" or "DOWN"button to selectthe desired itemand press the "LEFT"
or " RIGHT"button to selectdesired setting,
6) Press the"MENU" button toreturn the uppermenu or "EXIT"button to quit.
System Setting
4:3
TV Shape
Video Output
OSD Transparency
RGB
00%
First Time Installation
System Info
Change Pin Code
Software Update
DTR Setting
OSD Setting
A/V Setting
1212

First TimeInstallation
This menuallows the userto delete allexisting channels inthe STB, andreset the
STB to factorydefault setting.
1) Enter theSystem Setting menu,press the "UP"or "DOWN" buttonto highlight the
"First TimeInstallation".
2) Press the"OK" button toconfirm, a confirmationwindow appears.
3) Press the"LEFT" or "RIGHT"cursor to highlight"Confirm" icon, pressthe "OK"
button to startfirst time installation.
4) Or Highlight"Exit" icon, pressthe "OK" buttonto cancel thefirst time installation.
System Info
This menuallows users toview the softwareversion and hardwareversion of theSTB.
1) Enter theSystem Setting menu,press the "UP"or "DOWN" cursorto highlight the
System Info menu.
2) Press the"OK" button toopen up theinformation box.Youcan view the software
version and hardwareversion of theSTB in thisbox
Change Pin Code
This menuallows users tochange pin code
1) Enter theSystem Setting menu,press the "UP"or "DOWN" cursorto highlight the
Change Pin Codemenu.
2) Press the"OK" button toenter the sub-menu.
Are you sure you wantto delete
all channels and setting forfirst
time installation?
Confirm Exit
Software Version
Hardware Version
20070703
39162000
Zoran 39163 Decoder Version 1.0
Change Pin Code
Old Pin Code
New Pin Code
Enter Again
Confirm Exit
OK EXIT
****
1313

3). Enter theold pin codeusing the numericbuttons(Default pin codeis 6666).
4). Press the "UP" or "DOWN"cursor to select"New Pin Code"and enter 4new
numbers with numericbuttons(0~9).
5). Press the"UP"or "DOWN" cursorto select "EnterAgain", andenter the newpin
code again withnumeric buttons(0~9).
6). Press the"OK" button toconfirm the changedpin code.
Software Update
This menuallows users toupdate the softwareversion.
1 Enter theSystem Setting menu,press the "UP"or "DOWN" cursorto highlight the
Software Update menu.
2 Press the"OK" button toenter the sub-menu,
Auto Mode:
1) Enter thesoftware update menu,press the "UP"or "DOWN" cursorto highlight
Auto Mode.
2) Press the"OK" button toenter AutoMode menu,
3) Press the "LEFT" or "RIGHT"cursor to setthe status to"ON",
4) Press the "UP" or "DOWN"cursor to selectStart Time.Use the numericbutton to
enter the timein HH:MM mode.
5) Press the"OK" button tosave the settingand quit, thenthe system willstart auto
update at theset time.
Manual Mode:
1) Enter theSoftware Update menu,press the "UP"or "DOWN" cursorto highlight
Manual Mode.
2) Press the"OK" button toenter Manual Modemenu.
Status
Start Time HH:MM
ON
Confirm Exit
OK EXIT
00: 00
Manual Mode
Auto Mode
Exit
EXIT
Searching...
Scan Progress:
Upgrade
Current Release:
537396505
Scan for Upgrade Now?
CancelScan
1414
12%

DTR Setting
Youcan modify thetime shift duration,format the harddisk, check thehard disk
information or setthe auto discardmode here.
Time ShiftDuration
Adjust the timeshift duration accordingto the options:30/60/90/120 minutes.
Format Hard Disk
After pressedthe OK button,you need inputthe right PINcode to proceedthe
format operation.
HDD Information
Display the harddisk information ofthis unit ifan available harddisk attached.
Auto Discard Setting
When the HDDis full erasethe exist recordingsas to theirtype, the choices are:
"Oldest,Shortest,Biggest", select "Excluded"to remove theunviewed recordings
otherwise choose "Included".
OSD Setting
Youcan modify thetimeout of theOSD banner here.The optionscan be:5 seconds,
10 seconds,15 seconds,20seconds, the OSDmenu will turnoff iftimeout.
Timers
Follow below stepsto activate theTimer window:
1) Enter themain menu, pressthe "UP" or"DOWN" button tohighlight the "Timer".
2) Press the"OK" button toconfirm, a popup window appears.
When a timerstart time isreached, the receiverstarts to recordor view thedesired
programme, then whenthe end timeis reached, therecord stops. Filterthe timers
with the REDbutton and Deletewith the OKbutton.
1515
Timer
Exit
EXIT
Delete
OK Filter
No SERVICE NAME Start Date Start End Mode
001 Classic Hits Wee 19.11.2004 13:00 15:59
002 Fashion on Frid 19.11.2004 16:0017:59
003 Matchmaker 19.11.2004 17:00 17:59
004 Then & Now 19.11.2004 18:0018:59
Auto Discard Setting
Deleting Setting:
Exclude unviewed recordings
Oldest
Format Hard Disk
HDD Information
Auto Discard Setting
TimeShift 30Min

The Channel Listpresents a listof all channelsfound during thechannel search. From
the Channel Listyou can watchand listen tothe selected channels,delete them from
the list orset a passwordto access thechannel.
1) Press the "MENU " buttonto enter themain menu ofthe STB.
2) Press the"UP" or "DOWN"cursor to highlightthe "Channel List"
3) Press the"OK" button toenter Channel Listmenu.
4) Press the"UP" or "DOWN"cursor to highlighta channel.
5) Press the"OK" button topreview the selectedchannel.
6) Press the"EXIT" button toquit the channellist menu andview the channelon full
screen.
Delete a channel:
1) Enter thechannel list menu,press the "UP"or "DOWN" cursorto select achannel.
2) Press the"Yellow"button to deletethe selected channel
Lock/Unlock a channel:
1), Enter thechannel list menu,press the "UP"or "DOWN" cursorto select yourdesired
channel.
2), Press the"Blue" button, youare asked toenter the pincode.
3) Enter thecorrect pin codeusing the numericbuttons, press the "OK" button to
confirm.(the default pincode is 6666)
4) Thena lock symboldisplays alongside theselected channel, itshows that the
channel has beenlocked.
5) Repeat step1)2)3) to removethe lock symbol.
6) Press the"EXIT" button toquit the channellist.
Channels List
Channel List
18 - The HITS
19 - UKTV Br tldeas
20 - f tn
21 - TMF
22 - Ideal World
53 - YooPlay Games
80 - BBC World Sv.
81 - The Hits Radio
82 - Smash Hits!
,
Exit
EXIT
Confirm
OK
Delete Lock
Quality:
Strength:
100%
56%
Channel List
18 - The HITS
19 - UKTV Br tldeas
20 - f tn
21 - TMF
22 - Ideal World
53 - YooPlay Games
80 - BBC World Sv.
81 - The Hits Radio
82 - Smash Hits!
,
Exit
EXIT
Confirm
OK
Delete Lock
Quality:
Strength:
100%
56%
Enter Pin Code
Pin Code
Exit
EXIT
Confirm
OK
1616

This menu allowsthe user tostore a listof your favouritechannels so thatyou can
access them moreeasily.In this STB,you have fivefavourite lists toset potentially,
each family membercan have hisown favourite list.
Adding channels tofavourite list:
1) Press the"MENU" button toenter the mainmenu of theSTB.
2) Press the"UP" or "DOWNcursor to select"Favourite List".
3) Press the"OK" button toenter the favouritelist menu.
4) Press the"Red" button toswitch to thedesired favourite list.
5) Press the"UP" or "DOWN"cursor to highlightthe desired channelin the selected
favourite list.
6) Press the"OK" button toadd the selectedchannel to thefavourite list.
7) Press the"EXIT" button toquit.
Remove favourite channelsfrom favourite list:
1) Press the"MENU" button toenter the mainmenu of theSTB.
2) Press the"UP" or "DOWNcursor to select"Favourite List".
3) Press the"OK" button toenter the FavouriteList menu.
4) Press the"Red" button toswitch the desiredfavourite list.
5) Press the"UP" or "DOWN"cursor to highlightthe favourite channelin the favourite
list.
6) Press the"OK" button toremove the channelfrom the favouritelist.
7) Press the"EXIT" button toquit.
Accessing the favouritechannels:
1) Press the"FAVOURITE" button toenter the favouritelist.
2) Press the"Red" button toswitch to thedesired favourite list.
3) Press the"UP" or "DOWN"cursor to selectthe favourite channelin the selected
favourite list.
Favourite List
Exit
EXIT
Add
OK
Favourite Switch
18 - TheHITS
19 - UKTV Br tldeas
20 - f tn
21 - TMF
22 - Ideal World
53 - YooPlay Games
80 - BBCWorld Sv.
81 - TheHits Radio
,
List 2
List 3
List 4
List 5
Favorites List
List 1
Fav List: 1
18 - The HITS
21 - TMF
22 - Ideal world
80 - BBC World Sv.
82 - Smash Hits!
85 - Magic
87 - oneword
88 - JAZZFM
Exit
EXIT
Confirm
OK
Favourite Switch
1717

Channel Schedule(EPG)
From the channelschedule(EPG,Electronic programme Guide),you can change
channels available, checkprogramme information, accessone-week programme
schedule which detailsthe times andprogrammes for thenext seven days.
1) Press EPG button to showthe Channel Schedule.
2) Press MENU button to exchangeto TimelineEPG mode.
3) Press GOTO button to viewor modify theoption ofAuto discard.
4) Press CH+ or CH- button to previewthe current programmeon the selected
channel and checkthe current programmeinformation.
5) Press the LEFT or RIGHT button for navigationof the previousor next seven
days.
6) Press the UP or DOWN to highlight thedesired programme.
7) Press OK button to bookthe focused eventfor play, if theevent is bookedfor play,
then OK buttonwill cancel thebooking for play;Press RECORD button to bookthe
focused event forrecord, if theevent is bookedfor record, thenRECORD button will
cancel the bookingfor record.
8) Press BLUE button to setthe content filter.
9) Press EXIT button to quitthe Channel Schedule.
Timeline(EPG)
Timeline EPGis another modethat convenient foruser to viewthe EPG.There is atime
line to markthe current time.User will beeasy to viewinformation in severalservices at
the same time.
1) Press MENU button to exchangeto Schedule EPGmode.
2) Press GOTO button to viewor modify theoption ofAuto discard.
3) Press UP or DOWN button for servicesnavigation.
4) Press LEFT or RIGHT button for eventsnavigation.
5) PressYELLOW button toview the eventsin the previousday; BLUE buttonto view the
events in thenext day.
6) Press OK button to bookthe focused eventfor play, if theevent is bookedfor play,
then OK buttonwill cancel thebooking for play;Press RECORD button to bookthe
focused event forrecord, if theevent is bookedfor record, thenRECORD button will
cancel the bookingfor record.
7) Press EXIT button to quitthe Timeline.
Basic Operations
1818
Channel Schedule 19/11/2004 16:11
18 - The HITS
19 - UKTV Br tldea
20 - f tn
21 - TMF
,
18:00 - 19:59 Classic Hits Weekend
20:00 - 20:59 Kiss Smooth Grooves Chart
21:00 - 21:29 Classic Hits Weekend
23:00 - 23:59 Kerrangl Superstars of Noise
Select Channel
Reminder
Record
P+ P-
19/11/2004 Friday
Content filter: All
HDD info: Used Reserved Free
Could you get lucky with your
favourite star? To find out your
compatibility just text STAR then
YOU NAME then a Celeb s NAME to
88686 e.g. Star james Britney
,
16:00 - 17:59 StarDate (NOW)
OK
MENU
GOTO Auto discard
Timeline EPG
Channel Schedule 19 Nov. 2004 116:11:59
,
To find out your compatibility justtext STAR
then YOUR NAME then a Celeb s NAMEto
88686 e.g. Star james Britney Spears(50p +
std rate)
16:00-17:59 StarDate
Channel
Reminder
Record
Prev day
HDD info: Used Reserved Free
OK
MENU
GOTO Auto discard
Schedule EPG
19 Nov. 2004 16:00 16:30 17:00 17:30
UK TV Br tldeas Good Food Gardens Un Water Gar Garden ER
f tn Ftn
TMF TMF Top 10 Matchmaker
Ideal world Fashion on Friday at 4 and 5
YooPlay Games Updating...
BBC Word Sv. W Worl Brit Foot Analy W Europe Today
The HITS StarDate
Next day
Program Event

Changing Channels
There are fourways of channelselection - steppingthrough the channellist, selection by
number, fromthe Channel Schedule,or using theon-screen channel list.
1. Stepping throughthe channel list:
Press the "P+"button to browseup and the"P-" button tobrowse down theavailable
channels.
2. Selection bynumber:
Enter the completechannel number directlyvia the remotecontrol to selectdesired
channel.
3. Selection byChannel Schedule:
Youcan also selectthe desired channeldirectly from ChannelSchedule. Thisis
displayed by pressingthe "EPG" buttonon the remotecontrol. TheChannel Schedule
provides the userswith a briefdescription of theprogramme on thecurrently selected
channel and liststhe current channels.
1) Press the"EPG" button toenter the ChannelSchedule .
2) Press the"P+" or "P-"cursor to selectthe desired channel,the screen switchesto the
programme on thecurrently selected channel.
3) Press the"EXIT "button to quitthe Channel Scheduleand view thechannel on full
screen.
4) Selection byon-screen Channel List:
Youcan also selectthe desired channeldirectly from on-screenchannel list.This is
displayed using theSTB's main menu.
a) Press the"UP" or "Down"cursor to select"Channel List".
c) Press the"OK" button toenter the channellist menu.
d) Press the"UP" or "DOWN"cursor to highlightthe desired channel.
e) Press the"OK" button topreview the selectedchannel.
f ) Pressthe "EXIT" buttonto quit thechannel list andview the channelon full screen.
Recall
Youcan switch tothe previously viewedchannel by pressingthe "RECALL" button.
VolumeControl
The volume levelof the STBcan be alteredwith the "VOL+" or "VOL-" button onthe
remote control.
Youcan silence thesound from thereceiver by pressingthe "MUTE" button.The sound
remains muted untilthe "MUTE" buttonis pressed againor until the"VOL+" or "VOL-"
button is pressed,or until thereceiver is turnedoff andon again.
1919
Channel List
Exit
EXIT
Confirm
OK
18 - The HITS
19 - UKTV Brtldea
20 - f tn
22 - Ideal World
53 - YooPlay Game
80 - BBC WorldSv
81 - The Hits Radio
82 - Smash Hits!
83 - Kiss
21 - TMF
,
Other manuals for DVB350UK
2
Table of contents
Popular Satellite TV System manuals by other brands

MotoSAT
MotoSAT Executive brochure

KVH Industries
KVH Industries TracVision C3 owner's manual

KVH Industries
KVH Industries TracVision R5SL Replacement instructions

Televes
Televes 563301 user manual

Teleco
Teleco Voyager Digimatic SM 65 Installation guide and user's manual

KVH Industries
KVH Industries TracVision M5 user guide