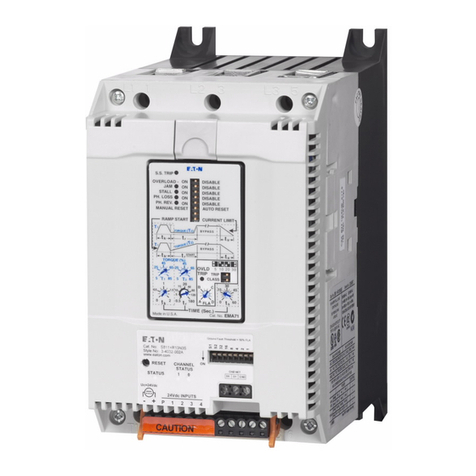
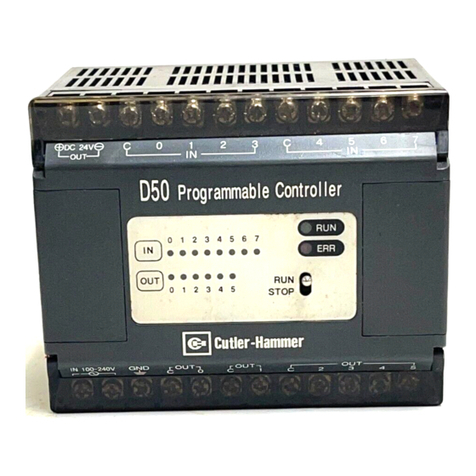
Cutler-Hammer AMPGARD Series User manual

Effective 11/97
I.B. 48004
Cutler-Hammer
Instructions for 26" Wide Vacuum-Break Starters
Rated 360 Amperes, 7200 Volts, Stab-Connected
Fig. 1 Ampgard® Motor Controller, 26" Wide
DANGER
HAZARDOUS VOLTAGE.
READ AND UNDERSTAND THIS MANUAL IN ITS
ENTIRETY BEFORE INSTALLING OR OPERATING
CONTROLLER. INSTALLATION, ADJUSTMENT, REPAIR
AND MAINTENANCE OF THESE CONTROLLERS MUST
BE PERFORMED BY QUALIFIED PERSONNEL. A
QUALIFIED PERSON IS ONE WHO IS FAMILIAR WITH
THE CONSTRUCTION AND OPERATION OF THIS
EQUIPMENT AND THE HAZARDS INVOLVED.
THE CONTROLLER
Each Ampgard®motor starter (controller) consists of one
nonload-break isolating switch, one Type SJD, NEMA
Size H3, vacuum-break contactor, current-limiting fuses,
a set of current transformers, and some form of overload
protection. The isolating switch has a limited make and
break rating, suitable only for closing and opening limited
magnetizing current loads. The controller is designed to
start, stop and protect a three-phase medium-voltage
motor within the ratings shown in Table I. The controller
may also be used to switch transformer windings or
capacitor banks. Each Ampgard®controller occupies all
of a steel structure that may also enclose a horizontal
bus system to distribute power to two or more sections
and a vertical bus system in each section connected to
the horizontal main bus system. They are configured for
full-voltage starting, nonreversing, single-speed applica-
tions.
TABLE I. AMPGARD®EQUIPMENT RATINGS
Continuous 50 or 60 Hertz Interrupting Capacity, 50-60 Hz Isolating
Range Of Normal Current Horsepower Rating (rms) Symmetrical At Switch
System Utilization Rating Synchronous Motor Induction Nominal Utilization Voltage
Make/Break
Voltage Voltage Enclosed 80% P.F. 100% P.F. Motor Fuses Controller Ratings
2200-2500 2300 360A 1500 1750 1500 50,000 Amp 200,000 kVA 750 VA
3800-5000 4000 360A 2500 3000 2500 50,000 Amp 350,000 kVA 600 VA
6200-7200 6600 360A 4000 5000 4000 50,000 Amp 570,000 kVA 600 VA
Nonmotor Applications at: >>>>>>>>> 2200 - 2500 Volts 3800 - 5000 Volts 6200 - 7200 Volts
Transformer Switching Rating = 1250 kVA 2250 kVA 3000 kVA
Capacitor Switching Rating = 1200 kVAR 2100 kVAR 2400 kVAR

I.B. 48004
Page 2
Effective 11/97
MEDIUM-VOLTAGE COMPONENTS
The flow of power through a vacuum-break controller
(starter) can be traced by referring to the lower portion of
Figure 5, where the controller is shown in the energized
position. The line stab assembly mounted at the back of
the enclosure also serves as the controller line terminals
(1). The stabs themselves are engaged by the fuse jaws
(2) of the isolating switch which is mounted on rails at the
top of the lower compartment. The line ferrules (3) of the
current-limiting motor-starting power circuit fuses (4) clip
into the fuse jaws, and the load ferrules (5) fit into the
fuse holders (6) which are part of the contactor line
terminals. Power flow through the contactor is from the
load ferrules of the power circuit fuses, through the
shunts (7), and the vacuum interrupters (bottles) of the
contactor (8), to the contactor load terminals. Spring-
loaded contact jaws (9) mounted on the contactor load
terminals plug onto the lower stab assembly (10), provid-
ing a convenient means to disconnect the contactor.
Cables (11) pass through current transformers and
connect the load stabs to the controller load (motor)
terminals mounted on a pan behind the low-voltage panel
which is behind the door above the isolating switch. See
Figures 2 and 4. Connect the conductors from the motor
to these latter terminals. Do not disassemble the factory
installed cables that run from the contactor load stabs,
through the current transformers to the controller load
(motor) terminals.
LOW-VOLTAGE CONTROL COMPONENTS
The low-voltage components consisting of an interposing
relay, protective relays, and optional equipment are
mounted on a hinged panel behind the upper door. The
Fig. 3 SJD Contactor & Isolating Switch
Fig. 4 Load Terminal Compartment
Fig. 2 Low-Voltage Compartment
single-phase control power transformer is bolted to the
contactor frame.The capacity of this transformer ranges
from 600VA to 2 kVA, depending upon voltage, frequency
and extra capacity requirements. The primary of the
control power transformer is connected to the line
through the power circuit fuse assembly, and is protected
by two additional low rating current-limiting fuses
mounted on the contactor. See Figure 5. The secondary
of the control power transformer supplies power to the
120 (or 240) volt grounded control circuit through second-
ary fuses mounted next to the test-run plug.

I.B. 48004 Page 3
Effective 11/97
Fig. 5 Ampgard
®
Components

I.B. 48004
Page 4
Effective 11/97
LOW-VOLTAGE CONTROL COMPONENTS (Cont.)
Pull-apart terminal blocks are mounted on the pan
directly in front of the low-voltage panel. These terminal
blocks permit mechanical and electrical separation of the
contactor from the structure for servicing or replacement.
Those Ampgard®motor controllers that include metering
have instrument-grade potential transformers bolted to
the contactor frame, opposite the control power trans-
former.
To energize the primary of the control power transformer,
the contactor must be inserted into the enclosure, the
power circuit fuses must be installed, and the isolating
switch must be closed.
For convenience during maintenance, when it may be
desirable to energize the contactor or the control circuit, a
test-run plug is provided. WITH THE ISOLATING
SWITCH OPEN, disconnect the plug from the socket and
plug it into a 120-volt single phase polarized extension
cord (or 240-volt when specified). See Figure 7.
Disconnect this temporary circuit and restore the plug to
its socket on the contactor before returning unit to service.
LOW-VOLTAGE CUTOFF SWITCH
Two auxiliary switches are installed behind the operating
handle housing of the isolating switch and used to
disconnect the load of a control power transformer, space
heaters, or other auxiliary circuits. Each of these auxil-
iary switches has an inductive load rating of 20 amperes
at not greater than 250 VAC. These auxiliary contacts
operate within the first five degrees of movement of the
isolating switch handle. At least one of the normally-open
contacts of these switches disconnects the control power
transformer from its load.
ISOLATING SWITCH
Each Ampgard®isolating switch is a medium-voltage,
three-pole, manually operated device. It consists of an
operating mechanism and a sliding tray mounted be-
tween two steel end plates. The sliding tray is molded
insulating material and carries three sets of fuse jaw
finger assemblies. One end of the fuse jaw finger assem-
bly grips the upper ferrule of the power fuse while the
other end engages the line stab. In the switch open
position, the three fuse jaw fingers are grounded.
Arc-resistant and flame-retarding insulating barriers are
mounted between phases and also between the two outside
poles and the isolating switch end plates. This isolating
switch is a nonload-break device. It must never close or
interrupt a power load. However, it does have a limited
capacity for interrupting the single-phase control power and
potential transformers exciting current. In terms of trans-
former ratings, the maximum load is the equivalent of an
unloaded (exciting current only) 6 kVAtransformer.
An Ampgard®starter is shipped with the isolating switch
in the ON position (Figure 6, ViewA). The isolating
switch handle is operated by moving it through a vertical
arc from the ON to the OFF position. From the OFF
position, it can be rotated 90ocounterclockwise to the
HORIZONTAL position, the door-open position (Figure 6,
View D).
In both the ON and OFF positions, a portion of the
handle housing extends over the door to the medium-
voltage compartment, preventing this door from being
opened. To open this door, the handle must be moved to
the HORIZONTAL position.
With the handle in the OFF position, up to three padlocks
can be used to lock out the switch, preventing the handle
from being moved to either the ON or the HORIZONTAL
position. This locked position prevents both unauthorized
entry into the medium-voltage compartment and acciden-
tal closing of the isolating switch while maintenance work
is being done. From the HORIZONTAL position, the
handle cannot be moved to the ON position without first
moving to the OFF position.
AB
CD
The operating handle has three distinct positions.
In the ON position (A), the isolating switch is closed, the door
is interlocked shut, and the starter may be energized.
In the OFF position (B), the isolating switch is open, the door
is interlocked shut, and the starter is de-energized and
grounded.
With the handle rotated 90° counterclockwise (C) to the
HORIZONTAL position (D), the isolating switch is open, the
starter is de-energized and grounded, and the door may be
opened.
Four Screws
▼
▼
▼
▼
Fig. 6 Isolating Switch Handle Positions

I.B. 48004 Page 5
Effective 11/97
SHORT-CIRCUIT AND OVERLOAD PROTECTION
Overcurrent protection is provided by the current-limiting
power circuit fuses and by the overload sensor supplied
from the current transformers. The power circuit fuses
have a special time/current characteristic for motor
service that is coordinated with the characteristic of the
overload protection. Currents greater than full-load motor
current, up through locked-rotor current, will operate the
overload protection and trip the contactor before the
fuses open. This coordination prevents unnecessary fuse
blowing. Since the interrupting capacity of the contactor
is limited, the power circuit fuses must operate faster
than the overload protector and contactor when the
overcurrent is greater than the current corresponding to
the contactor interrupting rating, in order to limit damage
to the starter or motor. In all faults above this interrupting
rating and within the rating of the equipment, the current-
limiting “R” rated fuses will operate first. The interrupting
rating of the vacuum bottles in this contactor is 7600
amperes, r.m.s. symetrical. The current transformers,
overload protector, and power circuit fuses are coordi-
nated with the motor characteristics, so that the controller
must be used with the motor for which it was designed.
Motors with special characteristics often require addi-
tional protective relays. Consult the instruction leaflet for
that particular protective relay before attempting any
adjustment or service. Protective relays are not set at
the factory.
ENCLOSURE
These Ampgard® motor controllers are supplied in cells
assembled into floor-mounted enclosures. These enclo-
sures are 26 inches wide x 30 inches deep x 90 inches
high (66 cm wide, 76 cm deep, and 229 cm high). Each
90-inch high enclosure accommodates one Ampgard®
starter. A 10-inch (25 cm) high horizontal bus enclosure
can be added at the top which increases the total enclo-
sure height to 100 inches (254 cm).
Fig. 7 Type SJD Contactor, Front View
POWER CIRCUIT
FUSE CLIP
(CPT) PRIMARY
FUSES
KICKOUT SPRING
CONTROLPOWER
TRANSFORMER
(CPT)
TEST-RUN PLUG
PULL-APART TERMINALBLOCKS TO
LOW-VOLTAGECOMPARTMENT
BARRIERS
PULL-APART TERMINAL
BLOCKS FROM ISOLATING
SWITCH
POTENTIAL
TRANSFORMER
POTENTIAL
TRANSFORMER
SECONDARY
FUSES
CPT
SECONDARY
FUSES

I.B. 48004
Page 6
Effective 11/97
MECHANICAL INTERLOCKS
Before putting an Ampgard®controller into service,
become familiar with the mechanical interlocks.
Door Interlock.
With the isolating switch handle in the HORIZONTAL
position, the door to the medium-voltage compartment can
be opened. As soon as the door opens, a mechanical
interlock becomes effective. It is designed to prevent the
user from accidentally operating the isolating switch handle
and closing the starter on to the line with the door open.
This interlock is a spring-loaded plunger located just
below the handle housing (Figure 6, View D). This
prevents the handle from being accidentally returned to
the OFF position. This interlock may be deliberately
bypassed by depressing the plunger with a screwdriver
so that the handle can be moved to the OFF position to
observe the operation of the isolating switch during
installation or maintenance. To do this, it is necessary to
deliberately bypass the interlock. The handle must be
returned to the HORIZONTAL position by again depress-
ing the interlock plunger before the door can be closed.
The operator must be aware of what he is doing and take
appropriate safety precautions.
Contactor-to-Isolating-Switch Interlock.
There is also a mechanical interlock that is designed to
prevent the isolating switch from closing with the
contactor already closed, and to prevent the contactor
from closing while the isolating switch is being opened.
This latter state (the transition phase) is shown in Figure
8. With the isolating switch fully open or fully closed the
contactor may be opened or closed. See Figure 9. If the
clevis is not connected to the interlock arm, the contactor
cannot be closed electrically. This is a positive interlock,
it cannot be bypassed without disassembly of the inter-
locking parts. DO NOT DISTURB THE FACTORY
ADJUSTMENTS OF THESE INTERLOCKS!
Line Stab Insulating Shutter.
When an Ampgard®isolating switch is installed, both a
shutter and a rear line stab barrier are in place in the
controller structure and are intended to prevent acciden-
tal access to the line bus. As the isolating switch is
opened, the sliding tray (Figure 10) mechanically drives
the insulating shutter closed across the three line stab
openings in the rear barrier. As the shutter closes the
openings, green and white striped labels are uncovered
to visually indicate that the shutter is closed. With the
isolating switch in the fully open position, the fuse jaw
finger assemblies and the line side of the main fuses are
connected to the ground bar.
Fig. 9 Contactor Open, Interlock Neutral
Fig. 8 Switch and Contactor Interlocked Closed

I.B. 48004 Page 7
Effective 11/97
As a final precaution before touching any of the electrical
parts of the starter, visually check to make certain that
the shutter is closed, the green and white striped labels
are visible, the grounding fingers are in contact with the
ground bar, and the tips of the fuse fingers are visible.
When the isolating switch is removed from the starter
structure, a latch lever (32, Figure 11) on the shutter
assembly is activated. It is designed to hold the insulating
shutter closed. This latch may be deliberately bypassed and
the shutter moved to the open position. BE CAREFUL!
Under these conditions the exposed line terminal stabs
of the starter may be energized at line potential.
When the isolating switch is replaced in the structure, the
latch member is automatically released to allow the
shutter to operate normally.
THE CONTACTOR
The Type SJD contactor has its main contacts sealed
inside ceramic tubes from which all air has been evacu-
ated, i.e., the contacts are in vacuum. No arc boxes are
required, because any arc formed between opening
contacts in a vacuum has no ionized air to sustain it. The
arc simply stops when the current goes through zero as it
alternates at line frequency. The arc usually does not
survive beyond the first half cycle after the contacts begin
to separate. The ceramic tube with the moving and
stationary contacts enclosed is called a vacuum inter-
rupter or a bottle, and there is one such bottle for each
pole of the contactor. A three-pole contactor has three
vacuum bottles. A metal bellows (like a small, circular
accordion) allows the moving contact to be closed and
pulled open from the outside without letting air into the
vacuum chamber of the bottle. Both the bellows and the
metal-to-ceramic seals of modern bottles have been
improved to the point that loss of vacuum is no longer
cause for undue concern. The moving contacts are
driven by a molded glass polyester crossbar (see Figure
12) rotating with a square steel shaft supported by two
shielded, pre-lubricated ball bearings that are clamped in
alignment for long life and free motion. Only the end
edges of the square shaft are rounded to fit the bearings,
so that portions of the four shaft flats provide positive
indexing of mechanical safety interlocks.
The contacts in an unmounted bottle (vacuum interrupter)
are normally-closed, because the outside air pressure
pushes against the flexible bellows. For contactor duty, the
contacts must be open when the operating magnet is not
energized. Therefore, the contacts of the vacuum bottles
must be held apart mechanically against the air pressure
when used in a contactor. In the Type SJD contactor, all of
the bottles are held open by a single kickout spring on the
front of the contactor. (See Figure 12.) The kickout spring
presses against the moving armature and crossbar and
thereby forces the bottles into the open contact position.
Note that in the open position, the crossbar is pulling the
moving contacts to hold them open.
Fig. 10 Sliding Tray Mechanism of 360Ampere Isolating
Switch Fig. 11 Shutter Operating Mechanism
AUXILIARY
CONTACTS

I.B. 48004
Page 8
Effective 11/97
THE CONTACTOR (Continued)
The kickout spring is adjustable and occupies the space
above the operating magnet. The kickout spring must be
removed before the magnet coil can be changed if that
becomes necessary. The normal position of the kickout
spring lever is vertical. The lever can be loosened to
unload the kickout spring (after loosening the set screw
that locks the adjusting screw). Unscrew the 0.313-inch
adjusting screw immediately below the kickout spring
itself. Although it can be loosened, the lever is captive.
As the screw is loosened, the kickout spring will reach its
relaxed, free length and can be removed easily. To re-
install it, reverse the procedure. Insert the
uncompressed, free spring into position; then apply load
by tightening the adjusting screw on the lever until the
lever is approximately vertical. See specific instructions
later. Because the spring forces exceed 100 pounds (45
kilograms), place a free hand over the kickout spring as a
precaution while turning the adjusting screw in either
direction. Tighten the set screw to lock the adjusting
screw.
The operating magnet (see Figure 12) is on the front of
the contactor. The coil has a “figure-eight” shape and is
really two coils in series, with a connection to their
common point. Both coils are encapsulated in one
environmentally-immune coil shell, which also contains a
full-wave silicon diode rectifier. An AC or DC source can
be connected to terminals A and B on the coil shell.
When an AC source is applied, the rectifier converts the
AC to unfiltered DC to excite the magnet. When a DC
source is applied, only two legs of the full-wave rectifier
are active and pass DC current for magnet excitation.
The magnet will not chatter as AC magnets sometimes
do but at less than rated voltage, it may hum slightly. A
normally-closed auxiliary contact, set to open slightly
before the armature fully closes, is connected to termi-
nals C and D on the coil shell. When adjusted correctly,
this auxiliary contact allows a relatively high current
through the pick-up winding, and as the contactor closes,
the auxiliary contact inserts the holding winding, which
reduces the coil current to a low value, sufficient to hold
the magnet closed without overheating.
In the description of the bottles, it was mentioned that no
arc boxes are required. However, because of electrical
clearance requirements, four phase barriers must be
installed before the contactor is energized.
CONTACTOR-MOUNTED COMPONENTS
To simplify installation and servicing, a number of related
components are mounted on the Type SJD contactor
chassis: a control power transformer with test plug and
fuses, instrument-quality potential transformers with
secondary fuses (when furnished), primary fuses for the
control power and potential transformers, and load side
fuse clips for the power circuit fuses. See Figures 7 and
13. The test-run plug is used to connect to an auxiliary
source of control voltage when it is not inserted into the
receptacle that is the output from the secondary of the
control power transformer. This male test plug can be
plugged into a standard polarized 120-volt (or 240-volt,
depending on coil voltage rating) extension cord socket
for testing the control circuit and any sequence without
energizing the medium-voltage controller at power circuit
voltage. When the male plug is transferred to the exten-
sion cord, it automatically disconnects from the control
power transformer to prevent feedback of high voltage
into the power circuits. Check to be sure no inadvertent
bypass of this arrangement has been made in the wiring
before relying on this safety feature.
CONTACTOR HANDLING
Each contactor weighs about 160 pounds (73 kilograms). An
oblong hole is provided in each sidesheet for lifting if desired.
A horizontal bar is provided at the front for pulling the
contactor out of its cell, or for pushing it back into place.
When a type SJD contactor is installed in a medium-
voltage controller it can be moved to a drawout position
or removed from the enclosure as follows:
DANGER
WARNING: ALL WORK ON THIS CONTACTOR SHOULD
BE DONE WITH THE MAIN DISCONNECT DEVICE
OPEN.AS WITHANY CONTACTOR OF THIS VOLTAGE,
THERE IS DANGER OF ELECTROCUTION AND/OR
SEVERE BURNS. MAKE CERTAIN THAT POWER IS
OFF. CHECK FOR THE PRESENCE OF DANGEROUS
VOLTAGE WITH AVOLTAGE SENSOROFTHE
APPROPRIATE RANGE.
1. If removal is planned, provide a lift truck or suitable
platform to receive the contactor as it comes out.
2. Make sure all circuits are deenergized.
3. Remove the three power circuit fuses using the fuse
puller supplied with the starter.
4. Disconnect the pull-apart terminal blocks connecting
the contactor to the low-voltage compartment and
stow them so that the cable will not be damaged.

I.B. 48004 Page 9
Effective 11/97
Fig. 12 Type SJD Contactor Positions
CONTACTOR
OPEN
CONTACTOR
CLOSED

I.B. 48004
Page 10
Effective 11/97
CONTACTOR HANDLING (Cont.)
5. Disconnect the isolating switch auxiliary contact pull-
apart terminal blocks located on the lower right-hand
side of the isolating switch.
6. Loosen the hex-head bolt attaching the clevis at the
end of the isolating switch interlock rod to the
contactor mechanical interlock sufficiently far to free
the clevis and rod. See Figures 8 and 9.
7. Use a 0.50-inch socket wrench to remove the horizon-
tally-mounted positioning bolt located at the bottom
front edge of the contactor right-hand sidesheet.
8. Carefully slide the contactor out to a balanced
drawout position or onto the fork truck or platform. All
routine inspection and maintenance can be done with
the contactor in the drawout position. Lift off the
phase barriers for easier access.
To reinstall, reverse the procedure.
INSTALLATION
This industrial type control is designed to be installed by
adequately trained and qualified personnel with appropri-
ate supervision. These instructions do not cover all
details, variations, or combinations of the equipment, its
storage, delivery, installation, check-out, safe operation,
or maintenance. Care must be exercised to comply with
local, state, and national regulations, as well as safety
practices, for this class of equipment. See START-UP
PRECAUTIONS.
For site preparation and general information regarding
receiving, storage, and installation see I.B. 48001.
CAUTION
The motor controller should be kept in an upright position
unless specific instructions to the contrary are provided
with the controller.
After a level installation site has been prepared, the
Ampgard®assemblies positioned and fastened in place,
and protective packaging removed, the individual control-
lers can be disassembled to permit access to conduit
and complete wiring. Step-by-step disassembly proce-
dures are shown on Pages 12, 13, and 14. Following the
recommended procedures will save time. All cable
connections can be made by access through the front of
the enclosure.
When there is access space behind the installation, the
rear panel of the enclosure can be removed to facilitate
wiring. Adequate space has been provided at the rear of
the enclosure for medium-voltage line and load cables,
while low-voltage cables may be conveniently arranged
near the right-hand enclosure wall. See Figure 15.
Fig. 13 Type SJD Contactor Rear View
TALL STRUCTURE — MAY TIP OVER IF MISHANDLED.
MAY CAUSE BODILY INJURY OR EQUIPMENT DAMAGE.
DO NOT REMOVE FROM SKID UNTIL READY TO SE-
CURE IN PLACE. READ THE HANDLING INSTRUC-
TIONS IN I.B. 48001 BEFORE MOVING.
Medium-voltage motor controllers are extremely heavy
and the moving equipment used in handling must be
capable of handling the weight of the motor controller.
Confirm this capability prior to starting any handling
operations with the controller.

I.B. 48004 Page 11
Effective 11/97
F. ISOLATING SWITCH MOUNTING SCREWS
G. ISOLATING SWITCH OPERATING HANDLE
H. ISOLATING SWITCHAUXILIARY CONTACT TERMINALBLOCKS
J. ISOLATING SWITCH MECHANICAL INTERLOCK
K. FUSE PULLER
A. POSITIONING BOLT
B. POWER CIRCUIT FUSES
C. CONTROL CONDUCTORS TO UPPER COMPARTMENT
D. DOOR INTERLOCK
E. VACUUM CONTACTOR
A
K
H
J
G
E
B
D
F
Fig. 14 Key Points In Disassembly (Shown with door removed.)
C

I.B. 48004
Page 12
Effective 11/97
1
Remove the single positioning bolt
(A). Free the clevis attached to the
mechanical interlock arm.
See Step 5. Save all hardware.
2
Remove three power circuit fuses
(B) using the fuse puller (K)
supplied. See operating
instructions inside medium-
voltage door.
3
Separate the contactor side of the
control wires from the terminal
block in the low-voltage
compartment.
4
Disconnect the auxiliary contact
terminal blocks (H) on the
isolating switch.
5
Loosen the hex-head bolt
attaching the clevis at the end of
the isolating switch interlock rod
to the contactor mechanical
interlock sufficiently far to free the
clevis and rod. Access to this
clevis bolt is from the right side of
the medium-voltage
compartment.
6
Remove contactor (E) with a sharp
pull forward. Part way out the
contactor will reach a balanced
position. Lower the contactor to
the floor and slide out of the way.
The contactor weighs
approximately 160 lbs. (73
kilograms).

I.B. 48004 Page 13
Effective 11/97
9
If no vertical bus bars are present
and cable is used to connect
power to the line stabs, connect
incoming power cables to the stab
extensions provided, extending up
for top entry and down for bottom
entry. These terminals are located
behind the hinged panel or the
insulated panel behind the
contactor, respectively.
7
Free the isolating switch by
removing two hex head bolts (F)
as shown.
10
Remove the two cover plates
located behind the terminal
blocks to gain access to the load
terminal compartment. Refer to
load cable instruction tag located
at motor terminals for load wiring
instructions.
11
Note the proper terminal holes to
use for lug mounting, depending
upon the direction in which the
cables are run. After wiring,
reverse the procedure to
reassemble. Slide the isolating
switch in place and secure with
two bolts. Refer to Steps 7 and 8.
12
Check to make sure each fuse
clamp is in correct position in fuse
locator. Refer to instructions on
the lower door.
8
Pull the isolating switch forward.
CAUTION: It has no latch and will
pull completely out. However, it
weighs only 75 lbs. (34 kgs.) and
can usually be handled without a
crane or lift.

I.B. 48004
Page 14
Effective 11/97
13
Return the contactor to its
compartment. Reattach the
positioning bolt and the
mechanical interlock clevis and
rod. See Step 5.
START-UPPRECAUTIONS
Before attempting to put a newly installed motor control-
ler into service, study the wiring diagram and instruction
literature.
General Precautions. Be sure that:
1. The corresponding controller and motor are con-
nected as shown on the Cutler-Hammer drawings.
This is particularly essential in this class of motor
controller as the fuse ratings, current transformers,
and overload protection are based on the character-
istics of the particular motor to be controlled.
2. The controller is connected to a suitable power
supply with characteristics agreeing with motor and
starter nameplate markings.
3. The motor and the machine it drives are properly
lined up, bolted down, lubricated, free of obstructions,
and ready to go.
4. Connections are neat, tight, of proper capacity and in
agreement with the diagram.
5. Equipment has been cleaned of dirt, scraps of wire,
tools, and all other foreign material.
6. THE INSULATION LEVEL OF THE STARTER IS
CHECKED AND RECORDED BEFORE THE
STARTER IS ENERGIZED. See GENERAL MAIN-
TENANCE.
14
Reconnect the clevis attached to
the mechanical interlock arm.
Reconnect the isolating switch
auxiliary contact terminal blocks.
Reconnect the contactor control
wire terminal blocks. Refer to
Steps 3 and 4.
15
Install the three power circuit
fuses. Make sure each fuse is
fully seated on the bottom fuse
holder located on the contactor.
7. Enclosure door closes easily. Do not force the door
closed but rather look for improperly positioned
contactor, fuses, or isolating switch.
8. All safety precautions have been taken and the
installation conforms with applicable regulations and
safety practices.
For Isolating Switch. Be sure that:
1. The current-limiting motor-starting power circuit fuses
have been properly installed. See the permanent operat-
ing instructions on the inside of the medium-voltage door.
2. The mechanical interlocking system operates freely,
is properly adjusted, and will provide the intended
protection.
DANGER
OPERATE THE ISOLATING SWITCH ONLY WITH ALL
DOORS CLOSED AND COMPLETELY LATCHED. THE
ISOLATING SWITCH MAY FAIL TO INTERRUPT IF ITS
RATING HAS BEEN EXCEEDED BY AN
UNDETECTED INTERNAL FAULT.

I.B. 48004 Page 15
Effective 11/97
For Contactor. Be sure that:
1. THE FOUR PHASE BARRIERS ARE INSTALLED
WHENPROVIDED.
2. The contactor coil is electrically isolated, to prevent
feedback into a control power transformer and a
hazardous situation.
3. There has been a check, using an extension cord
and a separate source of AC control circuit power, of
the control circuit functions.
Operate the appropriate pushbuttons to close and open
the contactor. If the contactor does not close fully or
does not drop out fully, refer to the CONTACTOR MAIN-
TENANCE section below.
While the contactor is closed, observe the overtravel gap
between the pivot plates on the cross bar and the underside
of the lower bottle nut on each pole. This overtravel gap
should be no less than .075 inch (1.91 mm) when the
contactor is new. If less, refer to Contact Wear Allowance.
While the contactor is open, push the armature rearward
with a long screwdriver or other rod applied to the lower
end of the armature above the coil terminals. The
armature should not move because it should be firmly
against the glass polyester main frame. See Figure 12.
To correct a problem, see Changing Operating Coil
under CONTACTOR MAINTENANCE.
Disconnect the extension cord and restore the plug into
its socket on the contactor chassis.
CHECK-OUT, VACUUM INTERRUPTERS
The dielectric strength of the interrupters should be
checked before the contactor is energized for the
first time and regularly thereafter to detect at the earliest
possible date any deterioration in the dielectric strength
of the contact gap since this may result in an interruption
failure. Although an AC dielectric test is recommended, a
DC test may be performed if only a DC test unit is
available. A good vacuum interrupter will withstand a
16kV-60 Hz test or a 23kV-DC test across a .156-inch
(4-mm) contact gap. This is the nominal contact gap for a
new contactor. When performing DC tests, the voltage
should be raised to test value in discrete steps and held
for a period of one minute. When tested with an AC high
potential tester, expect a capacitance leakage current of
approximately 1.3 milliamperes. For a DC tester expect
5 microamperes. Any spark across the contact gap
indicates failure.
SOME DC HIGH POTENTIAL UNITS, OPERATING AS
UNFILTERED HALF-WAVE RECTIFIERS, ARE NOT
SUITABLE FOR TESTING VACUUM INTERRUPTERS,
BECAUSE THE PEAK VOLTAGE APPEARINGACROSS
THE INTERRUPTERS CAN BE SUBSTANTIALLY
GREATER THAN THE VALUE INDICATED.
When a vacuum bottle is tested with voltage over 5000
volts across its open gap, there is some possibility of
generating X-rays. Test time should be minimized, and
personnel should not be closer than 10 feet (3 meters)
and preferably located behind some barrier. This is a
precaution until such time as the possible hazard is better
understood and standards are published.
Periodic dielectric tests across open contacts should not
be omitted on the basis of satisfactory contactor perfor-
mance since under certain operating conditions, the
contactor may perform satisfactorily even though one
vacuum interrupter has become defective.
The interval between periodic tests depends on the
number of operations per day, environmental factors, and
experience. It is a matter of operator judgment.
CHECK-OUT, MECHANICAL
One of the features of Ampgard®motor control is the
interlocking of the contactor and isolating switch which
prevents opening the isolating switch when the contactor
is closed, and prevents closing the isolating switch if the
contactor is already closed due to some malfunction.
Neither closing nor opening of the isolating switch under
load is permissable. The isolating switch interlock arm
does not move, except when the isolating switch is being
opened or closed.
Similarly, during the opening or closing of the isolating
switch, the interlock rod on the isolating switch drives the
interlock arm of the SJD contactor clockwise so that the
heavy end moves down to keep the contactor from
closing. If the isolating switch interlock rod is not at-
tached to the interlock arm of the contactor by the clevis
shown in Figures 8 and 9, the natural weight of the
interlock arm moves the arm to a position which prevents
the contactor from closing.
All these interlocks are intended to protect against
malfunction. But they should be tested with main
POWER OFF prior to start-up (and at intervals thereaf-
ter) by simulating improper operation and sequencing of
the contactor and isolating switch. Failure to interlock
must be corrected before power is applied.
CAUTION

I.B. 48004
Page 16
Effective 11/97
OPERATE THE ISOLATING SWITCH ONLY WITH ALL
DOORS CLOSED AND COMPLETELY LATCHED. THE
ISOLATING SWITCH MAY FAIL TO INTERRUPT IF ITS
RATING HAS BEEN EXCEEDED BY AN
UNDETECTED INTERNAL FAULT.
GENERAL MAINTENANCE
Ampgard®motor controllers should be operated and
maintained by authorized and qualified personnel only.
Personnel authorized to operate the isolation switch and
those authorized to inspect, adjust, or replace equipment
inside the enclosure should have a complete understand-
ing of the operation of the controller, and must have
thorough training in the safety precautions to be followed
when working with medium-voltage equipment.
MAINTENANCE PRECAUTIONS
There is a hazard of electric shock whenever working on
or near electrical equipment. Turn off all power supplying
the equipment before starting work. Lock out the discon-
necting means in accordance with NFPA70E, “Electrical
Safety Requirements for Employee Safety In the Work-
place.” Where it is not feasible to de-energize the sys-
tem, take the following precautions:
a) Instruct persons working near exposed parts that are
or may be energized to use practices(including
appropriate apparel, equipment and tools) in accor-
dance with NFPA 70E.
b) Require persons working on exposed parts that are
or may be energized to be qualified persons who
have been trained to work on energized circuits.
For the purpose of these instructions, a qualified person
is one who is familiar with the installation, construction, or
operation of the equipment and the hazards involved. In
addition, this person should have the following qualifica-
tions:
a) Be trained and authorized to energize, de-energize,
clear, ground, and tag circuits and equipment in
accordance with established safety practices.
b) Be trained in the proper care and use of protective
equipment such as rubber gloves, hard hat, safety
glasses or face shields, flash clothing, etc., in accor-
dance with established practices.
c) Be trained in rendering first aid.
d) Be knowledgeable with respect to electrical installa-
tion codes and standards, for example, the National
Electrical Code (NEC).
MAINTENANCE PROGRAM
A maintenance program should be established as soon
as the controller has been installed and put into opera-
tion. After the controller has been inspected a number of
times at monthly intervals and the conditions noted, the
frequency of inspection can be increased or decreased to
suit the conditions found.
Before attempting maintenance, consult the specific
circuit diagrams supplied with the controller.
Insulation Level
After installation, and before energizing the controller for
the first time, the insulation resistance between poles,
and from each pole to ground should be measured and
recorded. It is not practical to specify an absolute value
for this reading since it is dependent on other connected
apparatus and conditions of service. However, any
unusually low reading or abrupt reduction in a reading
would indicate a possible source of trouble, and the
cause should be investigated and corrected.
Fuses
Inspect the current-limiting fuses after each fault-clearing
operation, since this is the most severe service to which
they will be subjected. Check the fuse resistance, and
compare this value with a new fuse. A visual sign of an
open fuse is provided by a colored indicator in the top of
the fuse. This indicator pops up and is visible when the
fuse is blown.
Use the fuse puller to remove and replace blown fuses.
The fuse puller is stored alongside the contactor rail. The
correct procedure for replacing fuses is described on the
operating instruction panel which is permanently fastened
inside the door to the medium-voltage compartment.
This instruction panel also lists the correct fuse rating
and fuse part number for that particular starter. The
same type, rating and part number of power circuit fuses
must be used for replacement in all cases. If preferred,
fuses may be removed and replaced by hand.
If for any reason, there is doubt about the condition of a
fuse, a simple test is to check its electrical continuity and
resistance.
DANGER

I.B. 48004 Page 17
Effective 11/97
CONTACTOR MAINTENANCE
All work on this contactor should be done with the main
circuit disconnect device open, and using a separate
source of control power to operate the magnet. Before
applying external control circuit power, make certain that
the contactor coil circuit is electrically isolated, to prevent
feedback into a control power transformer that could be
hazardous. Disconnect power from any other external
circuits. Also, discharge any hazardous capacitors.
The basic principles to be followed in the maintenance of
all electrical equipment are: (1) keep conducting parts as
good conductors and (2) keep insulating parts as good
insulators, i.e., tighten and clean.
Much routine maintenance on the low-voltage portion can
be done with the contactor partially withdrawn to the
balanced position, rather than completely removed.
However, the contactor can also be completely removed
and taken to a bench.
A bottle wrench and a .020-inch (.51-mm) feeler guage
are screw-mounted to the right-hand sidesheet of the
contactor when the Ampgard®controller is shipped. The
feeler gauge is used to determine the vacuum bottle end-
of-life by virtue of contact erosion. One end of the bottle
wrench is used to adjust the operating arm associated
with the Type L64 auxiliary contacts (see Auxiliary
Contact Adjustment below) and the other end of the
wrench is for use with pre-1983 vintage vacuum bottles.
Insulation Level
Refer to the insulation resistance measurements between
contactor poles and from each pole to ground that were
recorded at start-up and subsequent intervals. Measure
the same points in the same manner and record. Investi-
gate any abrupt reduction in resistance or any unusually
low reading.
Dust and moisture are detrimental to electrical equipment
and industrial equipment is designed to tolerate a less-
than-perfect environment. However, excessive dust can
cause trouble, and should be wiped or blown off at
appropriate intervals. If the contactor is wet for any
reason, dry it until the insulation resistance between
poles and from each pole to ground has returned to
normal.
The contacts inside the interrupters are immune to dust
and moisture and require no attention of this type.
Vacuum Interrupters
Gross loss of vacuum is highly unlikely, but it can be
checked easily. With the contactor open, pull upward on
the bottle nuts, one pole at a time, using an effort of
about 20 pounds (9 kilograms). If the bottle nuts move
easily away from their pivot, the vacuum has probably
failed and the bottle sub-assemblies must be replaced.
It is also unlikely, but possible, to have a very slight leak that
does not change the bottle force appreciably, but which
might seriously damage the ability of the bottle to interrupt.
In this regard, it must be remembered that in a three-phase
circuit, it is possible for any two good interrupters to suc-
cessfully interrupt the circuit even if the third interrupter is
weak. But this condition should not be allowed to continue.
It can be detected only by a dielectric test.
Check the dielectric strength of the interrupters before
the contactor is energized for the first time and regularly
thereafter to detect, at the earliest possible date, any
deterioration in the dielectric strength of the contact gap
since this may result in an interruption failure. The
vacuum interrupters should be tested as specified in the
section check-out, vacuum interrupters.
Fig. 15 Controller With Doors Open
HORIZONTIAL
BUS
COMPARTMENT
LOW
VOLTAGE
COMPARTMENT
MEDIUM
VOLTAGE
COMPARTMENT

I.B. 48004
Page 18
Effective 11/97
CONTACTOR MAINTENANCE (Continued)
Contact Wear Allowance
Contact material vaporizes from the contact faces during
every interruption and condenses elsewhere inside the
bottle. This is normal, and is provided for by overtravel,
or wear allowance. When the contactor is fully closed,
there is a gap between the lower bottle nut and a pivot
plate. See Figure 12. As the contacts wear, this gap
decreases. When the gap goes below .020 inch (.51
mm) on any pole, all the bottle subassemblies should be
replaced. Use the .020-inch (.51-mm) thick fork-shaped
overtravel feeler gauge supplied for this measurement,
part no. 5259C11. DO NOT RE-ADJUST THE BOTTLE
NUTS TO RESET OVERTRAVEL AS THE CONTACTS
WEAR. Once placed into service, overtravel should be
checked but not adjusted.
Inspection After Short Circuit Or Overload
The Type SJD contactor is intended to be protected by
power circuit fuses in accordance with the NEC. How-
ever, the magnitude of a short circuit may exceed the
damage threshold of the vacuum bottles. After the
interruption of any short circuit, particularly after a major
one that might have been near the maximum MVArating
of the controller, examine the unit for any apparent
physical damage, or deformation of conductor bars and
cables. If there is any evidence of severe stress, all
bottle subassemblies must be replaced. If the overtravel
has changed significantly (from the last inspection) on
one or more bottles, replace all bottle subassemblies.
A dielectric test does not by itself confirm that the bottles
should be returned to service after a fault. However, if
there is no physical evidence of stress, and if the
overtravel exceeds the .020-inch (.51-mm) minimum, the
bottles can then be dielectrically tested as outlined
previously. If physical stress, overtravel, and dielectric
test results are within acceptable limits, it is reasonable to
return the contactor to service after a fault.
Magnet Operating Range
When properly adjusted as described in previous sec-
tions, the contactor should operate within the ranges
shown in Table II.
Operating Coil
The standard operating coils are shown in Table III. They
should be supplied directly from an AC or DC source with
sufficient volt-ampere capacity to maintain coil voltage
during inrush while closing. No external resistors are
required.
Changing Operating Coil
The contactor operating coil has a pick-up winding which
is intermittently rated. It may burn out in only minutes if
continuously energized at rated voltage and the L63
auxiliary contact does not open correctly.
The coil contains its own rectifier to convert applied AC
into unfiltered full-wave rectified DC. When parts are in
alignment and the coil is at rated voltage, the magnet will
be silent. At reduced voltage, a slight hum is acceptable.
However, the magnet must not chatter.
TABLE II. COIL PERFORMANCE
Rated
Coil
Voltage
Pick-Up-To-Seal
Voltage
Drop-Out-To-
Full-Open
Voltage
Above Below Below Above
110-120 VAC 50 96 75 10
125 VDC 55 100 82 11
220-240 VAC 100 192 150 20
250 VDC 110 200 164 22
TABLE III. OPERATING COILS
Coil Part No. 7860A34G02 7860A34G04
AC Rating 110-120 VAC 220-240VAC
50-60Hz 50-60Hz
AC Inrush 1300VA 1400VA
AC Sealed 25 VA 26 VA
DC Rating 125 VDC 250 VDC
DC Inrush 1500VA 1600VA
DC Sealed 28 VA 29 VA
Replacement 2147A48G11 2147A48G21
Coil Kit Part No.

I.B. 48004 Page 19
Effective 11/97
If for some reason a coil must be changed, proceed as
follows:
1. Deenergize all circuits.
2. Loosen the set screw holding the kickout spring
adjusting screw. See Figure 7.
Loosen the kickout spring adjusting screw until the
kickout spring can be removed easily.
NOTE: Whenever adjusting the kickout spring lever,
put a free hand over the kickout spring as a precau-
tion.
3. Remove leads to coil terminals, noting their position
for later reconnection.
4. Remove the two 0.313-inch magnet mounting bolts.
Remove the bolts completely and set aside until later.
5. Lift magnet and coil upward and out.
6. Remove the coil clip from old coil and install on the
new coil. Note that the coil clip is THREADED.
Remove the coil lock nut before removing the screw.
When installing the clip on the new coil, tighten the
screw only to snug. Then lock the screw into the coil
clip with the lock nut. Note that the head of the screw
must be toward the armature.
7. Re-install the magnet into the coil, and lower both
into position. Do not force. Sometimes it is neces-
sary to jiggle the coil slightly into its sealed position.
8. Install the two magnet mounting bolts, but do not
tighten.
9. Re-connect the coil circuit.
10. After checking for safe operation, energize the coil
and close the contactor. While the magnet is sealed,
tighten the two magnet mounting bolts, using continu-
ing care against shock. Then de-energize the coil.
11. Re-install the kickout spring, making sure to put the
two ends of the spring wire downward, so that the
spring will take a natural bow. Tighten the adjusting
screw until the kickout spring lever is approximately
vertical, and the armature is solidly against its stop
on the molded frame. See Figure 12. When a
screwdriver is pushed against the bottom end of the
armature in the open position, the armature must not
move. If it does, the kickout spring should be tight-
ened further to push the armature to a solid position.
Tighten the set screw to lock the kickout spring
adjusting screw.
If the magnet chatters, look for mechanical interference
that prevents the magnet from sealing. If there is no
interference, then the magnet itself may be misaligned.
The magnet gap can be seen from the left and the right
sides with the help of a flashlight. The stationary magnet
can be aligned with a 0.50-inch (12.7-mm) diameter steel
rod inserted into the two holes in the core of the magnet
and used as a lever to put a corrective set into the
magnet frame. it should not be necessary to do this
unless the contactor has been damaged and it can be
seen that the armature does not fit against the magnet.
A poor magnet-to-armature fit usually produces a high
dropout voltage
and/or chatter.
Mechanical interference can be produced by various
incorrect adjustments. Two specific points to check are:
A. Armature travel incorrect, causing the contact springs
to be compressed into a solid, non-resilient “tube”
that stops the crossbar rigidly. Call Cutler-Hammer
Service for assistance.
B. The auxiliary contact assemblies operating arms are
misadjusted, so that a contact plunger bottoms
solidly before the magnet seals. When the contactor
is fully sealed closed, there should still be a small
amount of travel remaining for these plungers. Adjust
as described below.
Contactor Auxiliary Contacts
Two Type L64 auxiliary contact assemblies are mounted
on the contactor front (right side) to provide four isolated
auxiliary, 600-VAC, 10-ampere, double-break contacts for
use in control circuits. Any combination of normally-open
or normally-closed circuits is available by selection of the
appropriate assembly from Table IV.
The normally-open (NO) L64 auxiliary contacts close just
after the main contacts of the contactor close. The
normally-closed (NC) L64 auxiliary contacts open just
before the main contacts close.
In addition, a single-circuit Type L63 auxiliary contact
(normally-closed) is mounted on the front (left side) and
is connected to coil terminals C and D. This auxiliary
contact (578D461G03) is equipped with permanent
magnet blowouts on the contacts.
TABLE IV. TYPE L64 AUXILIARY CONTACTS
Circuit Combination Provided
Part Number By One Auxiliary Contact
Assembly
843D943G21 One Normally-Open and
One Normally-Closed
843D943G22 Two Normally-Open
843D943G23 Two Normally-Closed

I.B. 48004
Page 20
Effective 11/97
CONTACTOR MAINTENANCE (Continued)
Auxiliary Contact Adjustment
The 0.410 + .010-inch (10.4 + .25-mm) gap shown for the
normally-closed Type L63 auxiliary contact in the insert
picture in the lower portion of Figure 12 is factory set.
The 0.410-inch (10.4-mm) gap is important and must be
held. If the gap is too large, the hold-in winding of the
operating coil will not be inserted as the contactor closes,
causing the pick-up winding in the coil to burn out. The
pick-up winding is intermittent-duty rated. If the 0.410-
inch (10.4 mm) gap is too small, the hold winding will be
inserted too soon, reducing the pull force before the
contactor is closed, producing an oscillation of the
armature similar to an old doorbell.
The Type L64 auxiliary contact adjustment is not as
critical. In the open-contactor position, the L64 plunger
should rest lightly against the operating arm. Neither the
L63 or L64 assemblies should bottom solidly in the
closed contactor position, as discussed under Magnet
Operating Range.
A bottle wrench and a .020-inch (.51-mm) feeler gauge
are screw- mounted to the right-hand sidesheet of the
contactor when the Amgpard®controller is shipped.
After an L64 auxiliary contact is added or replaced,
adjustment can be made by bending the operating arm
with the forked end of the bottle wrench. See Figure 16.
After an L63 auxiliary contact is replaced, gap adjustment
may be made by first loosening the jam nut on the
operating arm with a 0.438-inch open-end wrench.
The gap size is changed by rotating the 0.25"-20 bolt.
Clockwise rotation will increase the gap distance.
Counterclockwise rotation will decrease the gap
distance. Use a Vernier calipers or a 0.410-inch
(10.4-mm) feeler gauge to measure the gap size.
After the gap has been set, tighten the jam nut
against the interlock operating arm. A heavy-duty
contactor closing tool which can be used as a manual
operator is available. Order Part No. 2147A47G17.
Vacuum Bottle Subassembly Replacement
If it becomes necessary to replace vacuum bottles,
obtain Vacuum Bottle Subassembly Replacement Kit part
number 2147A47G03, and follow the enclosed instruc-
tions. This kit includes three bottle subassemblies, as all
bottle subassemblies must be replaced at the same time.
TABLE V - RENEWAL PARTS
Replacement
Item Kit No.
Vacuum Bottle (3) Subassemblies 2147A47G03
Feeler Gauge and Bottle Wrench 2147A47G15
Fig. 16 Adjustment of Type L64 Operator
CONNECTION DIAGRAM
Figure 17 shows the routing of the conductors and
connection points to the internal portion of the SJD
control circuit. The conductor cable pattern shown in
Figure 17 is used for both two-pole and three-pole
contactors. For interconnections with other Ampgard®
components, see the wiring diagram furnished with the
order.
OPERATING ARM
BOTTLE WRENCH
AUXILIARY
CONTACT
Table of contents
Other Cutler-Hammer Controllers manuals
Popular Controllers manuals by other brands

Servotronix
Servotronix softMC 3 installation guide

Artistic Licence
Artistic Licence moody cvz1 quick start guide

DSEGenset
DSEGenset DSE7110 Operator's manual and parts list

Regada
Regada Rematic Installation, service and maintenance instructions

Holiday Brilliant
Holiday Brilliant TY-T7 instruction manual

IVT
IVT ASB 12-S operating instructions