55
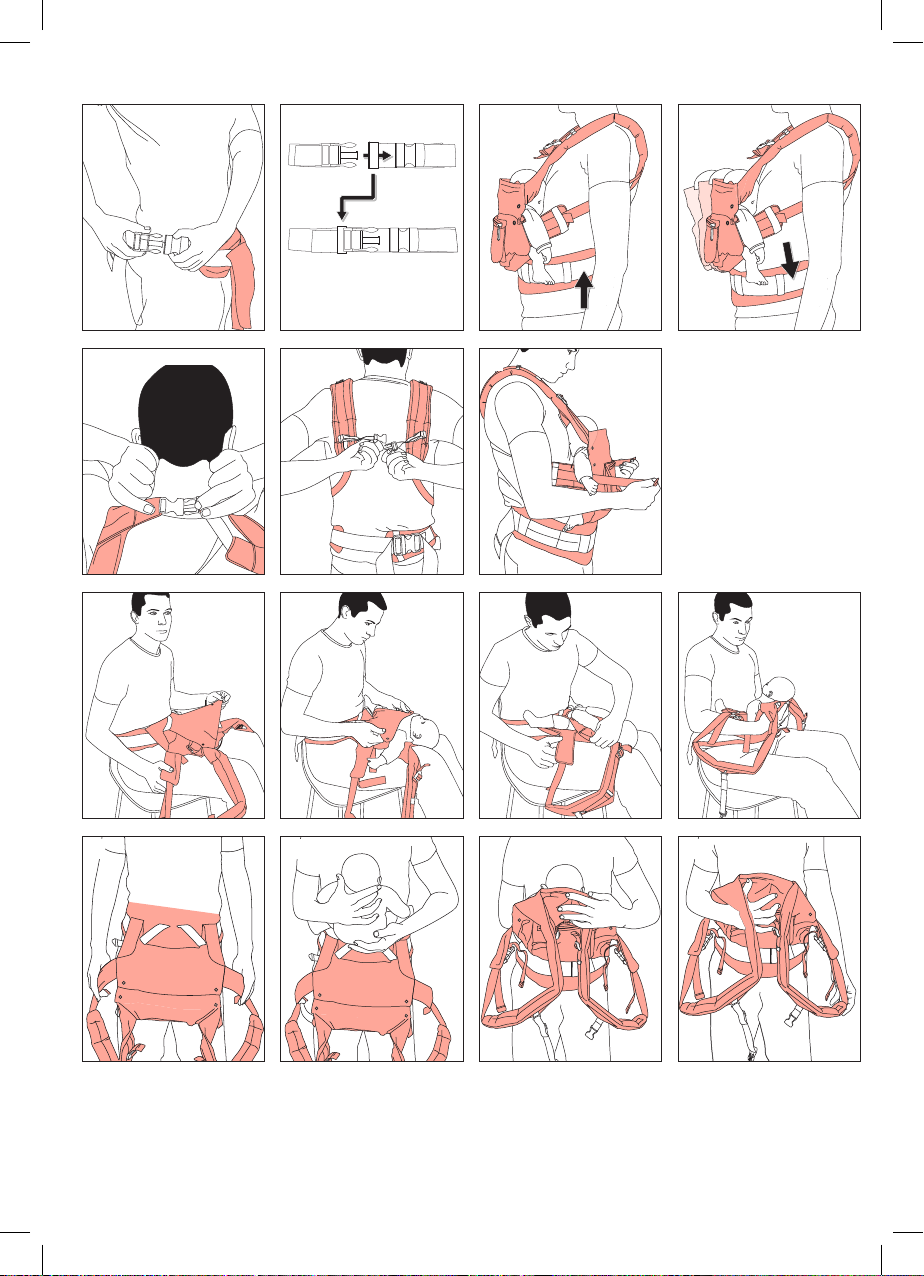
I. Position the waist belt around your waist/hips, fasten the buckle and adjust the length until it sits
tightly. Please ensure that the male part of the buckle is always fed through the elastic safety loop
before fastening the buckle.
Ia. When closing the buckle of the waist belt keep pushing until you hear a loud “CLICK”.
PREPARATION:
• Make sure you read and fully understand the instructions before using the BABY CARRIER.
•
• The BABY CARRIER is for adult use only. A damaged BABY CARRIER must NOT be used!
• Always check that all buckles, loops, straps, buttons and clips are securely fastened and in perfect
functioning condition; if this is not the case, or when in doubt, do NOT use the carrier.
•
• Do not dress your baby too warmly and check regularly to ensure that a comfortable temperature is
maintained.
• For low birthweight babies and children with medical conditions, seek advise from a health professional
before using the product.
• Stop using the carrier if parts are missing or damaged.
•
• Never unbuckle the waist belt while the baby is in the carrier.
II. Height adjustment: The waist belt also functions as a height adjustment system. (a) To carry smaller
children, the belt should be placed around the waist, allowing the child to sit in an elevated position.
(b) For larger children the belt should be placed around the hips. The child is sitting at the right height
III. Connector belt: (a) For ease of use, the connector belt on the shoulder straps can be adjusted both in
length and height. (b) It can be fastened across the chest or across the top of the back.
IV. Width adjustment: Tighten the shoulder straps until they are comfortable for yourself and your baby.
the storage loops.
PLEASE ENSURE YOUR CHILD’S BACK IS SLIGHTLY ROUNDED WHILE SITTING IN THE
CARRIER AND DO NOT, THEREFORE, FASTEN THE SHOULDER STRAPS TOO TIGHTLY.
1. Fasten the waist belt as described under “Preparation”. Push the waist belt buckle around your back
and pre adjust the length of the shoulder straps. Sit down on a chair and spread the back section of
the carrier across your lap. Unfold the infant insert.
2. Position your child on the back section of the carrier. The upper edge of the back section should meet
the neck of your baby – if necessary, use the head rest.
3. Similar to a nappy, pull the infant insert up between your child’s legs which should be slightly tucked
up.
4. Close the press studs and ensure that the child’s feet do not get caught in the waist belt.
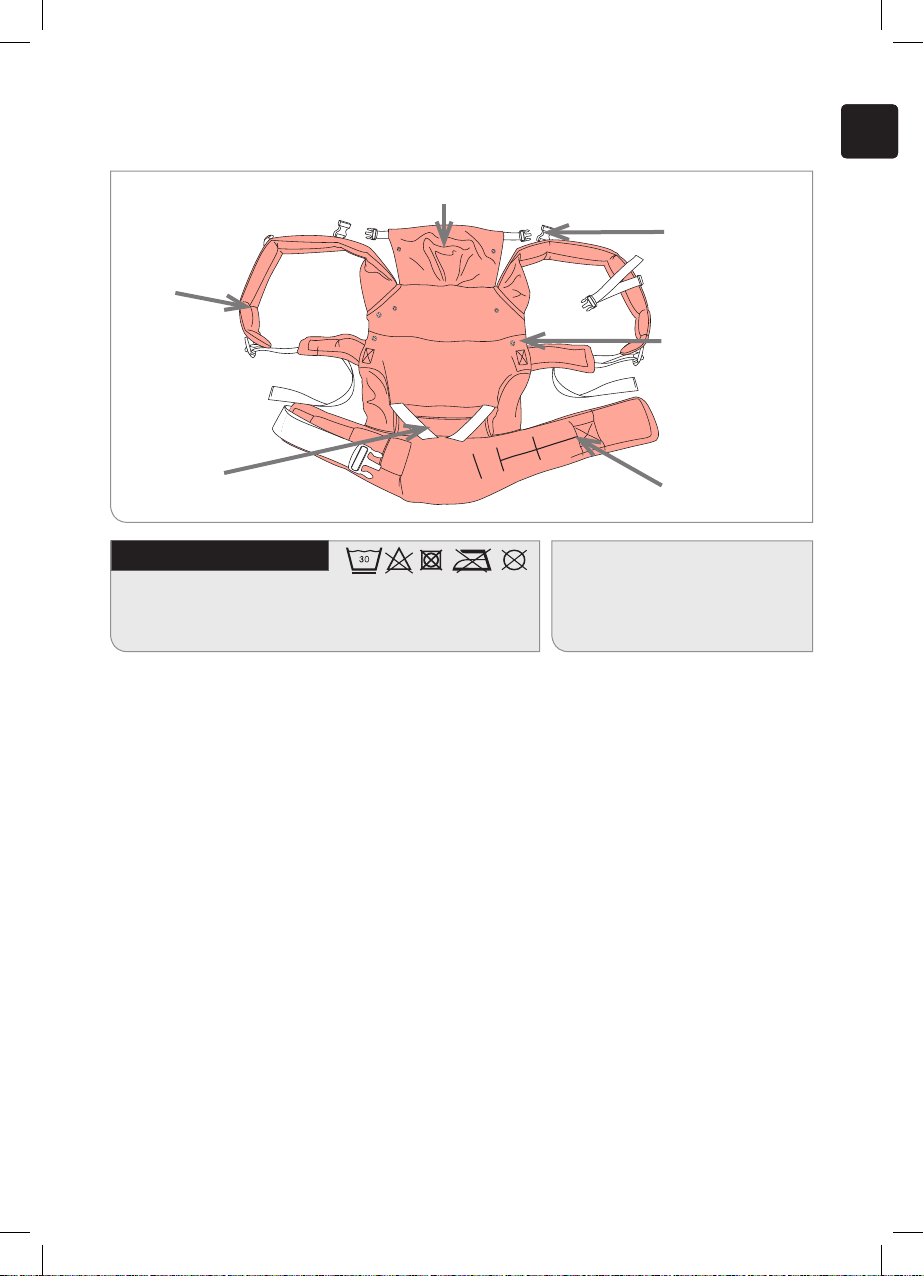
THE BUCKLE MUST ALWAYS BE FED THROUGH THE ELASTIC SAFETY LOOP AND BE
POSITIONED ON THE PADDED BASE.
WARNING:
EN13209-2:2015