Cycplus M2 User manual

01. CYCPLUS Z1/Z2 bike computer
mount (Need to buy separately).
1.Package List
2.About Installation
GPS bike computer
Instruction manual
Rubber padBike computer mount
Rubber band x 3
02. Use bike computer mount.
Cross-fix the mount with
rubber bands.
Type-c
charging cable
GPS BIKE COMPUTER M2
User manual 【13 - 24】
User manual 【01 - 12】
Benutzerhandbuch 【25 - 37】
取扱説明書【38- 52】
Manuale d’istruzione 【53 - 65】
Manuel de l'Utilisateur 【66 - 78】
Manual de usuario 【79 - 91】
01

3.About Function
4.Quickstart
01. Support 10 types of data including speed, time, distance,
altitude (based on barometer), ascent, gradient, ODO,
heart rate, cadence, power.
02. Support count circles (need manual control)
03. Support record gps track (need to save manually)
04. Support sync to 3 apps including Xoss, Strava, Trainingpeaks
05. Auto on/off
01. Press [L1 button ] to start/open
02. Long press [R1 button ] to set time zone
03. Press [L1 button ] to start recording data
04. Press [R1 button ] to switch displaying data
05. Long press [L2 button ] to save the recording data
06. Press [R2 button ] to turn on/off backlight
07. Download XOSS app
08. Connect to app, sync data
02

NOW
5.About Icons
Current
altitude
Current
ascent
Odograph Current
gradient
NO GPS
Recording
Current speed
Connected with
speed sensor
Trip time
Current heart
rate
Current cadence
Current
power
Temperature
Battery
Circle
Speed unit
Trip dist
GPS
O’clock
03

MAX
AVG
Average
altitude
Average
gradient
Average
heart rate Average
power
Average cadence
Average
speed
Pause recording
Connected to phone Temperature unit
Max altitude Max gradient
Max heart rate Max power
Max speed
Max cadence
04

Press [L1 button ] to start searching the ANT sensor
6.About Buttons
7.About Settings
01.Search the ANT+ sensor(C2)
1
2
Long pres [R1 button ] to enter the setting
*The screen displays C2 and the ANT+ indicator is flashing.
*After the right sensor been searched, the screen will back to main
interface and display the sensor data. Time for searching is 10 seconds.
Will quit sensor setting (C2) and return to the main interface if time out.
Supported ANT sensors: Speed sensor, Cadence sensor, Heart rate
monitor, Power meter.
Press Long press
Turn off
Count lap Save record
Turn on/off backlight
Switch display content Enter/Quit settings
Turn on / Start setting
There are 6 pages in settings, long press the right button to enter the
setting, press right button to switch the pages. Details are as follows:
L1 button
R1 button
L2 button
R2 button
Start / Pause recording
---
05

02.Wheel circumference setting(C3)
03.Time zone setting(C4)
Long press [R1 button ] to enter the setting,
then press [R1 button ] once.
*The screen displays C3 and the below 4 digits flash.
Press [L1 button ] to enter setting.
*The first digit flashes, indicating that the current digit can be set.
Press [R1 button ] to modify the digit.
Press [L2 button ] to switch the selected digit.
Long press [R1 button ] to quite.
*The Wheel Circumference only needs to be set when connecting the
ANT+ speed sensor. The unit is MM.
1
2
3
4
5
Long pres [R1 button ] to enter the setting,
then press [R1 button ] twice.
*The screen displays C4 and the 08 (factory setting
time zone) is flashing.
Press [L1 button ] to start setting.
*‘08’ stops flashing.
Press [R1 button ] to modify.
Press [L2 button ] to switch the selected digit.
Long press [R1 button ] to quite.
1
2
3
4
5
06

04.Speed unit setting(C5)
05.Temperature unit setting(C6)
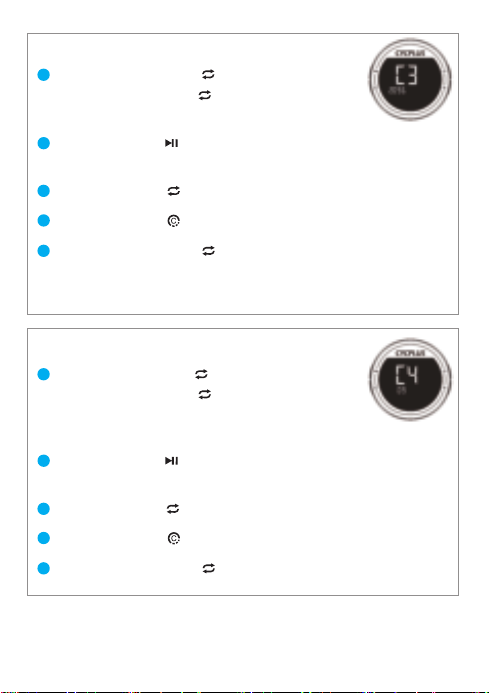
06.Factory reset(C7)
Long pres [R1 button ] to enter the setting,
then press [R1 button ] thrice.
*The screen displays C5 and the KMH is flashing.
1
2
Long press [R1 button ] to quite.
3
4
Long pres [R1 button ] to enter the setting,
then press [R1 button ] quartic.
1
2
Long press [R1 button ] to quite.
3
4
*The first digit flashes, indicating that the current digit can be set.
*‘°C’ stops flashing.
*The screen displays C6 and the ‘°C’ is flashing.
Long pres [R1 button ] to enter the setting,
then press [R1 button ] quintic.
*The screen displays C7 and RECOVER is flashing.
1
2
Long press [L2 button ] to restore factory settings,
and the computer will turn off.
3
Press [L1 button ] to start setting.
* ‘RECOVER’ stops flashing.
Press [L1 button ] to start setting.
Press [R1 button ] to switch between KMH and MPH.
Press [L1 button ] to start setting.
Press [R1 button ] to switch between Celsius and Fahrenheit .
07

01.Download XOSS and Register
Scan QR code or download the APP from Google play or APP
store, register by email. Then open the phone Bluetooth.
02. Connecting M2 computer
① Open “XOSS"
8.About APP
Android User iOS User XOSS APP
② Choose CYCPLUS M2 ③ Click connect
08

03. Connecting STRAVA/Training Peaks
Find Strava / Training Peaks in your personal files and click
connect. Log in Strava / Training Peaks with account and
passwords (Google and Facebook account login is not supported) .
④
choose the paired computer
among the found devices
⑤
connection succeeded
09

04. Updating data and checking the analysis
① Click Sync, the record will be synced to APP. If Strava is
connected, the data will be automatically synced to Strava.
② Choose the activity on the exercise page, you will see the
cycling data.
10

9.About Notes
10.Specifications
01. Battery charging:
When charging with the Type-c, The battery indicator on the
screen will light up and blink, and stop blinking to indicate that
the battery is fully charged.
02. GPS positioning:
After press the [L1 button ] to turn on the computer, the
GPS positioning will automatically start and be done about 35
seconds (will be longer for 1st time).
03. Data recording:
After turning on, press the [L1 button ] to start recording
data. Don't forget long press the [L2 button ] to save the
record after riding.
04. Memory:
After the memory is used up, the computer will overwrite the
previous records according to the chronological order.
Screen Size
Product Size
Product Weight
Battery
2.5 inch LCD
69*69*22mm
68g
1100mAh 3.7V
11

Charging Mode Type-C
Memory Capacity
Endurance Time
16M(Approximately 150 hours of data)
30-35 hours
Charging Time
App Synchronization
Connection
nearly 3.5 hours.
(Support using while charging)
Bluetooth 4.0
Peripheral Connection
Supported Peripherals
Waterproof
ANT+
Speed sensor, cadence sensor,
heart rate monitor, powermeter.
IPX6 (Rain is ok, but don’t soak long
time in water)
Manufacturer:
Chengdu Chendian Intelligent Technology Co., Ltd.
Warranty:
Free replacement or repair in 1 year
After sale email:
11.Factory Info
12

This equipment has been tested and found to comply with the limits for a Class B digital device,
pursuant to part 15 of the FCC Rules. These limits are designed to provide reasonable protection
against harmful interference in a residential installation. This equipment generates, uses and can
radiate radio frequency energy and, if not installed and used in accordance with the instructions, may
cause harmful interference to radio communications. However, there is no guarantee that interference
will not occur in a particular installation. If this equipment does cause harmful interference to radio or
television reception, which can be determined by turning the equipment off and on, the user is
encouraged to try to correct the interference by one or more of the following measures:
•Reorient or relocate the receiving antenna.
•Increase the separation between the equipment and receiver.
•Connect the equipment into an outlet on a circuit different from that to which the receiver is
connected.
•Consult the dealer or an experienced radio/TV technician for help.
Caution: Any changes or modifications to this device not explicitly approved by manufacturer could
void your authority to operate this equipment.
This device complies with part 15 of the FCC Rules. Operation is subject to the following two
conditions: (1) This device may not cause harmful interference, and (2) this device must accept any
interference received, including interference that may cause undesired operation.
RF Exposure Information
The device has been evaluated to meet general RF exposure requirement. The device can be used in
portable exposure condition without restriction.
FCC Statement
Other manuals for M2
1
Table of contents
Other Cycplus Bicycle Accessories manuals