Cynosure, Inc. RadioLASE 3 User manual

Instruction Manual
(English-English)

Copyright Information
©2014 Cynosure, Inc.
Cynosure, Ellman and RadioLase are registered trademarks of Cynosure, Inc.
Caution
Federal law restricts this device to sale by or
on the order of a Physician

CONTENTS
I. INTRODUCTION Page 4
II. SAFETY Page 4
III. TECHNICA INFORMATION Page 7
IV. DESCRIPTION OF CONTRO E EMENTS Page 7
V. PREPARATION FOR USE Page 12
VI. SURGICA DESCRIPTION AND USE Page 12
VII. POWER OUTPUT CHARACTERISTICS Page 14
VIII. TECHNICA SPECIFICATIONS Page 17

4
I. INTRODUCTION
1.0 INTRODUCTION TO RADIOSURGERY®
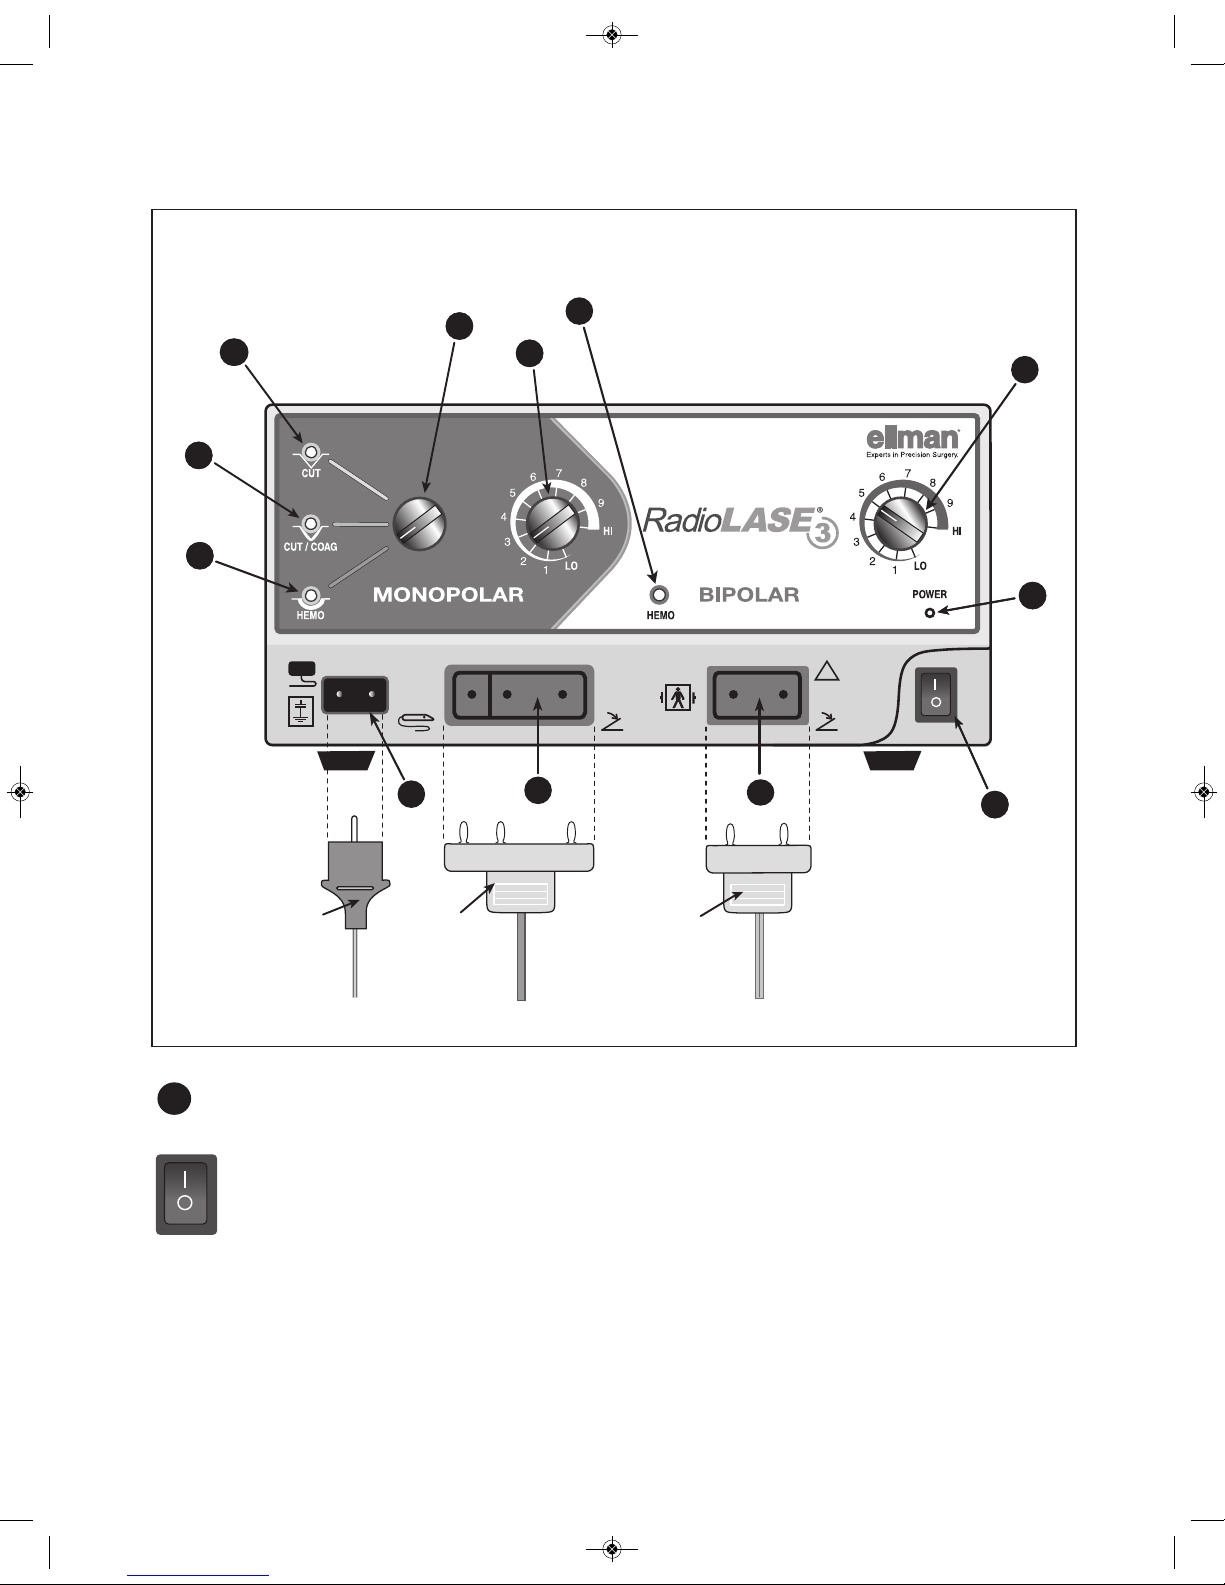
Radiosurgery®with the Radiolase®3 igh Frequency Radio surgical Generator (Generator) is an
excellent method of cutting and coagulating soft tissue. With four waveforms (3 monopolar and 1
bipolar) and a wide selection of electrode tips, the user can easily configure the system for a wide array
of applications.
1.1 INTENDED USE
The intended use for the Radiolase®3 Generator is:
1.1.1 Monopolar Cutting: Skin and Mucosal Incisions, Biopsy, Cysts, Abscesses, Tumors,
Cosmetic Repairs, Development of Skin Flaps, Skin Tags, Nevi, Keratosis, Oculoplastic
Procedures, Blepharoplasty, Aponeurotic Repair, Levator Resection.
1.1.2 Monopolar Blended Cutting & Coagulation: Skin Tags, Papilloma, Keloids, Keratosis,
Verrucae, Basal Cell Carcinoma, Nevi, Fistulas, Epithelioma, Cosmetic Repair, Cysts,
Abscesses, Development of Skin Flaps, Oculoplastic Procedures.
1.1.3 Monopolar emostasis: Control of Bleeding, Epilation, Telangiectasia.
1.1.4 Bipolar emostasis: Pinpoint emostasis in any field (Wet or Dry).
Note: The Radiolase®3 Generator is not indicated for non-ablative treatment of wrinkles.
Furthermore, the Radiolase®3 Generator is neither designed to provide the required power
levels, nor withstand the demands of lengthy non-ablative wrinkle treatment procedures.
The Radiolase®3 Generator will overheat and possibly fail if used for non-ablative treatment
of wrinkles. Such failures will not be covered by warranty.
II. SAFET
Improper use of this, or any high frequency surgical instrument, can result in a patient injury.
Read and become familiar with all instructions and directions before using this product.
2.0 WARNINGS
2.0.1 igh frequency surgical equipment should be used only by persons having adequate
training and familiarity with high frequency surgical equipment and related techniques.
A thorough understanding of the use of high frequency surgical equipment is essential to
avoid shock and burn hazards to both patient and medical personnel and damage to the
device or other medical equipment. Consult medical literature relative to related
techniques, complications, and hazards prior to use of high frequency surgical equipment.
2.0.2 Never increase the power settings without first checking both the active electrode and the
Neutral Pad.
2.0.3 Non-conductive Corneal Eye Shields (Plastic) must be used for any radiofrequency
surgical procedure involving the eyelid and the immediate surrounding areas.
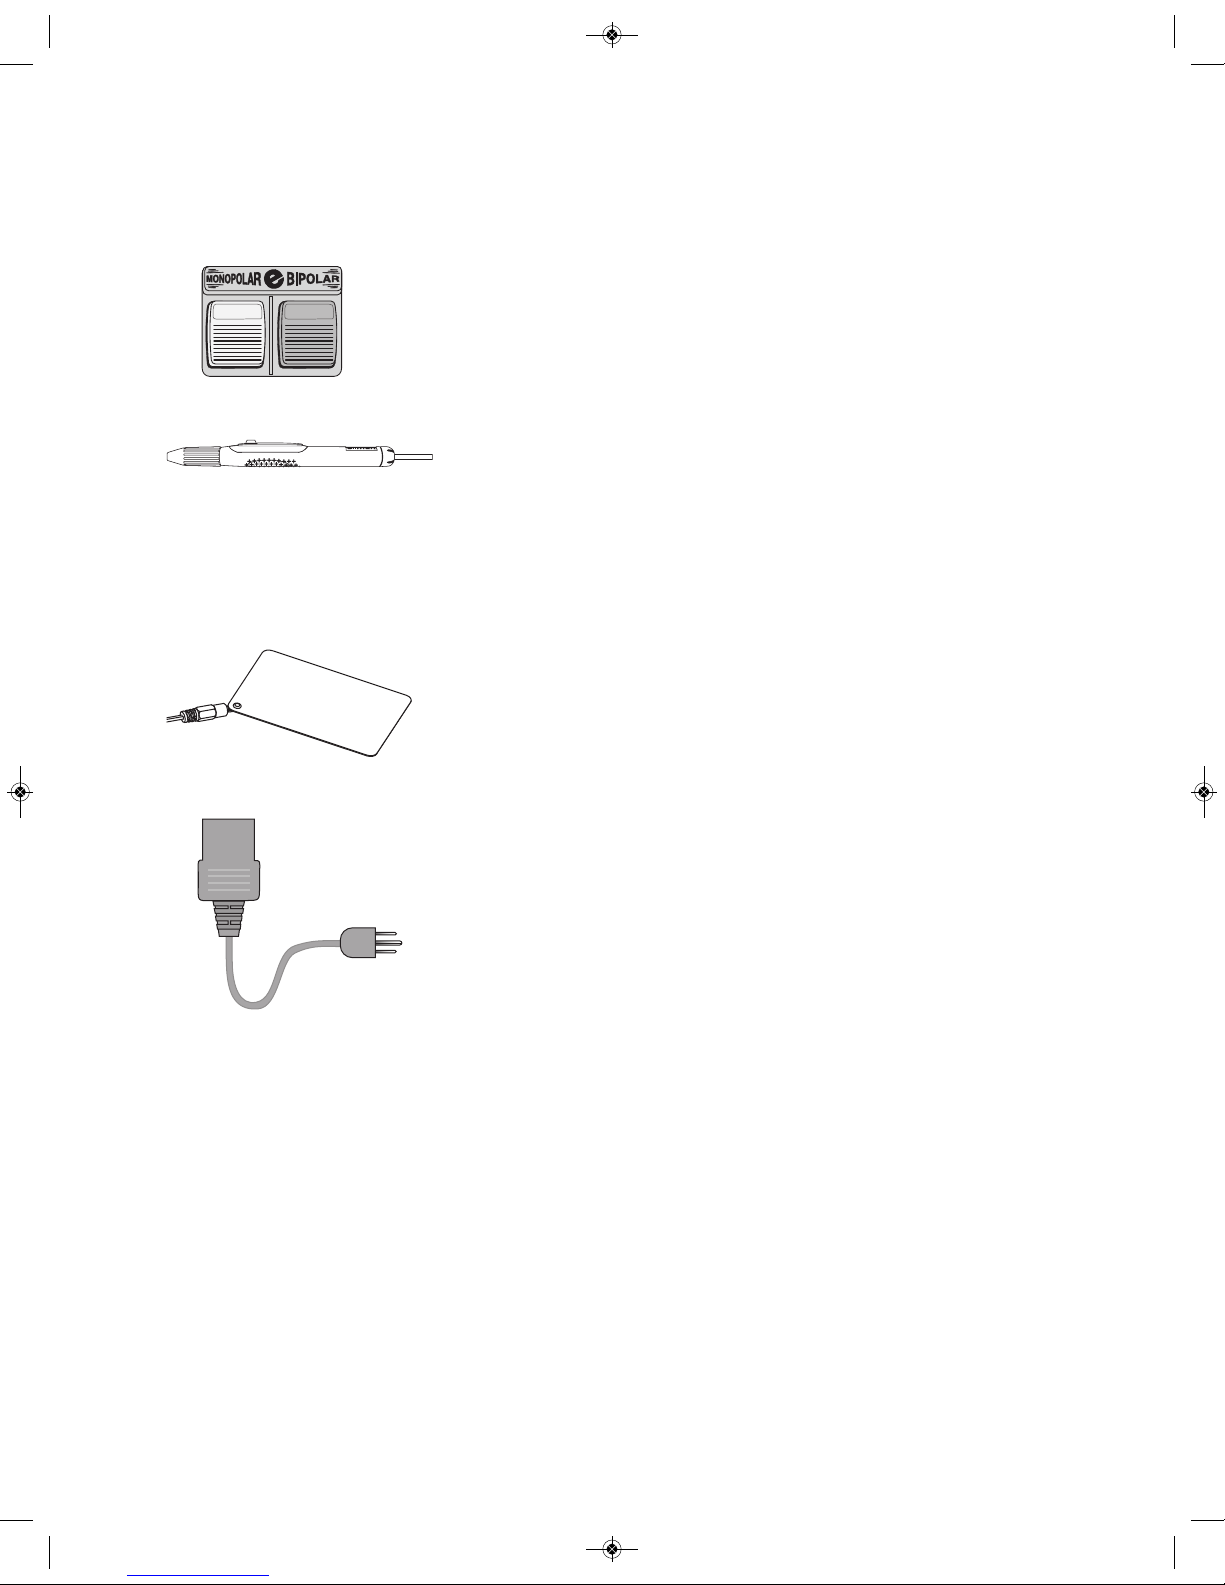
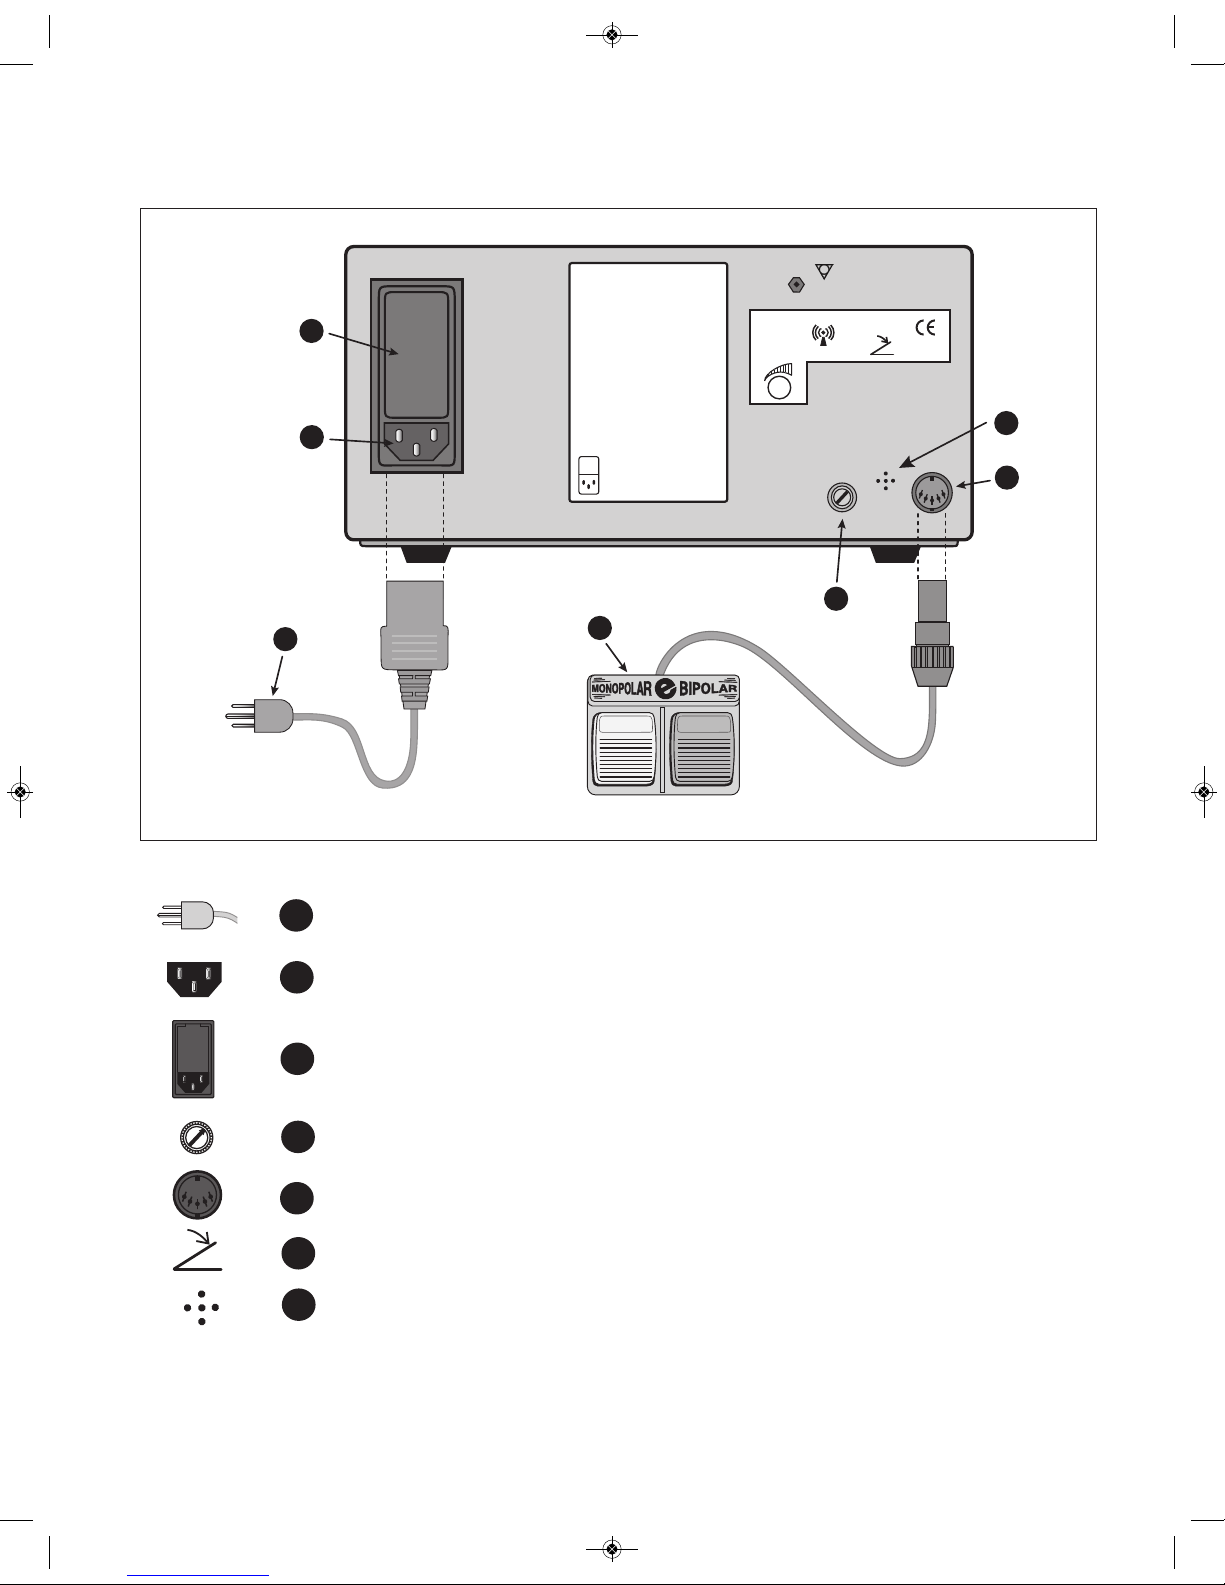
2.0.4 Use only with Ellman accessories including Ellman handpieces, Neutral Pads, cables,
and electrodes.

5
2.1 PRECAUTIONS
2.1.1 General
2.1.1.1 Interference caused by the Generator could adversely affect the operation of other
electronic equipment.
2.1.1.2 Electrical shock hazard. Do not remove cover. Refer to authorized personnel for
service.
2.1.1.3 Generator may present a hazard to patients with pacemakers. Consult qualified
medical personnel.
2.1.1.4 If higher than normal power settings are required, examine all cables, handpieces and
the Neutral Pad for damage and confirm that cables are not wrapped around metal
objects or touching the floor. In the event that higher power is still required, replace the
Neutral Pads and handpieces.
2.1.1.5 Do not cut or modify any cables.
2.1.1.6 The patient should not come into contact with metal parts which are earthed or which
have appreciable capacitance to earth. The use of antistatic sheeting is recommended
for this purpose.
2.1.1.7 Physician to patient skin to skin contact should be avoided. Use of insulating gloves is
recommended.
2.1.1.8 When the Generator is used simultaneously with physiological monitoring equipment on
the same patient, the monitoring electrodes should be placed as far as possible from the
surgical electrodes. Needle monitoring electrodes are not recommended. Monitoring
systems incorporating high-frequency current-limiting devices are recommended.
2.1.1.9 The cables to the surgical electrodes should be positioned in such a way that contact
with the patient or other leads is avoided. Temporarily unused active electrodes should
be stored segregated from the patient.
2.1.1.10 The output power selected should be as low as possible for the intended purpose.
2.1.1.11 Apparent low output or failure of the surgical equipment to function correctly at the
normal operating settings may indicate faulty application of the Neutral Pad or poor
contact in its connection.
2.1.1.12 Before each use inspect the accessories, electrode cables and probes for
possible physical damage.
2.1.1.13 Do not obstruct air circulation vents.
2.1.1.14 For surgical procedures where the high frequency current could flow through parts of
the body having a relatively small cross-sectional area, the use of bipolar techniques
may be desirable to avoid unwanted coagulation.
2.1.1.15 Similar to all energy sources, by-products such as tissue smoke plume and aerosols,
create a health concern about their carcinogenic and infectious potential. Appropriate
protective measures including effective smoke evacuation should always be utilized.
2.1.2 Neutral Pad
2.1.2.1 The use and proper placement of the Neutral Pad is essential to the safe and effective
use of this device in order to prevent burns from the Neutral Pad. The Neutral Pad
should be reliably attached with its entire area attached to the patient’s body as close
as possible to the operating field. Direct skin contact is necessary for a conductive
Neutral Pad. Direct skin contact is not necessary for a capacitive Neutral Pad.
2.1.2.2 The Neutral Pad should not be placed on the patients head or other areas where it
does not make complete skin contact.
2.1.2.3 If patient is repositioned during treatment, check and verify the Neutral Pad is still
making complete contact to the patient. Check the Neutral Pad for signs of heating
during procedures.

6
2.1.3 Flammable Environment
2.1.3.1 Some materials, for example cotton, wool, and gauze when saturated with oxygen may
be ignited by sparks produced in normal use of the equipment.
2.1.3.2 Do not use the Generator in the presence of flammable anesthetics or other flammable
gases, flammable liquids, or flammable objects.
2.1.3.3 Do not use this device in oxygen enriched atmospheres or in the presence of nitrous
oxide (N20).
2.1.3.4 Use only non-flammable agents for cleaning.
2.1.3.5 Flammable agents used as solvents for removing adhesives should be allowed to
evaporate before powering on the Generator. Any flammable fluid pooled under the
patient or in the body depressions should be mopped up prior to using
the Generator. Attention should be called to the danger of ignition of endogenous gases.
NOTE: To ensure safe and reliable operation, the Radiolase®3 Generator unit and relevant
accessories should be checked for wear and tear before operation.
A maintenance contract with the manufacturer or one of its authorized service agents is
recommended after the warranty period.
III. TECHNICAL INFORMATION
3.0 SUPP IER’S INFORMATION
Cynosure, Inc. dba Ellman
400 Karin Lane
icksville, New York 11801 U.S.A.
(516) 594-3333 • (800) 835-5355
Supplier will make the following available upon request; circuit diagrams, component parts list,
description, calibration instructions or other information necessary to assist technical personnel.
3.2 C EANING, DISINFECTING AND STERI IZING THE UNIT AND ACCESSORIES
3.2.1 Use only nonflammable and nonexplosive agents. No moisture or detergents should
enter the unit.
3.2.2 andpiece and Electrodes.
Always clean and disinfect the electrodes prior to sterilization.
Disinfect and sterilize handpieces and electrodes according to the directions supplied
with them.
All autoclavable products should be routinely inspected for any wear, breaks, or
deterioration of the insulation, and should be discarded and replaced if any of these
occurrences exist.
3.2.3 The footswitch is a waterproof unit; it can be cleaned with regular detergent.
ATTENTION: Alcohol must never be used to clean and disinfect the front panel.

7
IV. DESCRIPTION OF CONTROL ELEMENTS
4.0 INTERFACE ACCESORIES
4.0.1 Two Pedal Footswitch
Footswitch for CUT (yellow) and COAG (blue) modes is supplied.
The footswitch may be used with any handpiece compatible with the RF Generator.
4.0.2 Handpieces
A variety of handpieces are available. When using a fingerswitch handpiece, the
depressed button will activate monopolar energy in the mode and power level
selected on the front panel.
4.0.3 IEC Neutral Pad
The IEC Neutral Pad must be used with the RF Generator during activation.
To use, insert the molded plug of the Neutral Pad into the RF Generator as
shown in Figure 4.2.
4.0.4 Power Cord
The power cord connects RF Generator to power supply.

8
4.1 REAR PANEL CONTROL ELEMENTS
Power Cord
Power Socket
Line Fuses
Audio Volume Control
Footswitch Receptacle
Footswitch Pedal
Speaker
16
4
7
FUSE (2)
220-240 VAC : T1.25A, 250V
100/120 VAC : T2.0A, 250V
POWER
ENTRY
5
Cynosure, Inc. dba Ellman
HF RADIO SURGICAL GENERATOR
MODEL
P/N
Operating Frequency 4 MHz
POWER OUTPUT
MONOPOLAR BIPOLAR
500 OHM LOAD 200 OHM LOAD
CUT 50 WATTS
CUT/COAG 50 WATTS
HEMO 35 WATTS 35 WATTS
RATED DUTY CYCLE
20 SEC ON, 30 SEC OFF
SUPPLY RATINGS at 50-60Hz
230-240 VAC 0.80A
220 VAC 0.90A
120 VAC 1.40A
100 VAC 1.70A
3
2
0413
VOLUME
FOOT
SWITCH
Figure 4.1
Rear Panel
6
5
4
3
2
1
7

9
4.2 FRONT PANEL CONTROL ELEMENTS
Power Switch:
NEUTRAL BIPOLAR HANDPIECE
FINGERSWITCH/HANDPIECE
ON / OFF
!
MONOPOLAR
FINGERSWITCH
HANDPIECE
NEUTRAL
PAD
BIPOLAR
HANDPIECE
OR CABLE
1
4a
5a
9
8a
7a
6a
5
3
4
1
9
10
2
8
7
6
11
12
Figure 4.2
Front Panel
1
1 = ON
0 = OFF

10
Power On Indicator:
Neutral Pad Receptacle:
Bipolar Cord Receptacle:
Fingerswitch/Handpiece Receptacle:
Yellow Light (Monopolar Cut Energized) Indicator: The indicator illuminates the
Monopolar when Cut function is selected and has been selected and energized.
Yellow Light (Monopolar Cut/Coag Energized) Indicator: The indicator illuminates when
the Monopolar Cut/Coag function is selected and has been energized.
Blue Light (Monopolar Hemo Energized) Indicator: The indicator illuminates when
Monopolar Hemo function is selected and has been energized.
Monopolar Mode Select Knob
Monopolar Power Intensity Setting Knob: The selected output power will be delivered to
the patient for true output power. See figures in section 8.
Blue Light (Bipolar Hemo Energized) Indicator: The indicator illuminates when Bipolar
Hemo function is selected and has been energized.
Bipolar Power Intensity Setting Knob: The selected power will be delivered to the patient
for true output power. See figures in section 8.
4.3 SYMBOL DEFINITIONS
10
9
8
7
6
5
4
3
2
11
12

11
4.3.1 Type BF defibrillator protection
4.3.2 Refer to manual
4.3.3 Protective earth connection
4.3.4 Neutral electrode floating at high frequency
4.3.5 Fingerswitch control
4.3.6 Footswitch control
4.3.7 Neutral Pad
4.3.8 Non-Ionization radiation
4.3.9 Equipotential Symbol
!

12
V. PREPARATION FOR USE
5.0 PREPARATION FOR USE
5.0.1 On the Generator check to make sure that the power switch is in the OFF position.
5.0.2 Connect the power cord to a 3-wire ground AC power receptacle.
5.0.3 Insert the Neutral Pad plug into the receptacle on the front panel marked “Neutral”.
5.0.4 The Neutral Pad should be reliably attached as per Section 2.1.2.
5.0.5 Plug the handpiece into the appropriate receptacle on front panel.
5.0.6 Make sure that the electrode is seated fully so that no conductive shaft is exposed.
5.1 WAVEFORM SE ECTION
Reference Section 7 – Power output characteristics for more details about waveforms.
5.1.1 CUT - For micro-smooth cutting
5.1.2 CUT/COAG - For cutting with coagulation
5.1.3 EMO - For pure emostasis-Coagulation to control most forms of bleeding.
5.2 SMOKE HAZARD
By-products of high frequency surgical procedures are an occupational exposure hazard.
Standards based policies and procedures must be developed in all practice settings to protect
personnel.
VI. SURGICAL DESCRIPTION AND USE
6.0 EARNING TO USE RADIOSURGERY®
Before making contact with the tissue, the power intensity must be selected and the foot pedal or
fingerswitch must be activated. During the actual cutting, it is important to use a smooth uninterrupted
motion with light, even pressure. The movement should not be too slow. If it is, the build-up of lateral
heat in the tissue may cause charring, followed by necrosis and sloughing (see Preoperative Cutting
Practice Section 6.1). When performing a second or third cut in the same surgical site, allow
approximately ten seconds for the tissue to cool between applications of the electrode to the site.
Unlike a steel scalpel or standard electrosurgery, Radiosurgery®does not use manually applied
pressure to cut. Therefore, a light, smooth, continuous, and brush-like stroke should be developed.
Tissue damage will occur if heat is allowed to accumulate to the point where excessive
dehydration occurs. The spread of lateral heat in tissue depends upon various factors as indicated
in the following formula:
Time x Power
ateral Heat+?–––––––––––––––––
Frequency
Additionally the electrode type and selected waveform impact the thermal build up.
A. Time of Electrode Contact
B. Power Level
C. Frequency – Tissue provides lower resistance to higher frequencies, reducing thermal build up.
D. Electrode Type – A broader electrode tip requires more power and creates greater thermal spread.
E. Nature of the Waveform - See Section 5.1 for details

13
6.1 PRE-OPERATIVE CUTTING PRACTICE
Prepare the Generator for operations as described in Section 5- PREPARATION FOR USE, then follow
the steps below.
A. Select a piece of fresh, lean beef containing very little fat. Allow meat to reach room
temperature.
Note: Do not use veal because it does not change color when cut with an electrode.
B. Place the meat on a Neutral Pad.
C. Insert the electrode of choice (Empire, Loop, Diamond, Vari-Tip, etc.) into the handpiece.
D. Select "MONOPOLAR CUT".
E. Set output power intensity to 5.
F. Depress the “MONOPOLAR” Footswitch pedal or Fingerswitch button.
G. Using a smooth, brush-like motion, make several incisions of various lengths and depths.
If you notice that the electrode will not cut, cuts only with pulling and dragging, or if tissue
shreds adhere to the electrode while cutting, then increase the power gradually until a
smooth cut occurs.
. If the setting is too high then you will notice sparking and discoloration along the electrode
path. Reduce power and repeat the procedure as outlined above.
I. Repeat the above procedure until such a point when no discoloration occurs and there
is no visible sparking. The Radiosurgical tip should not encounter resistance.
The cut should be smooth without sparking and without any drag.
6.2 PRE-OPERATIVE COAGU ATION PRACTICE
Intermittent gentle contact with the tissue is performed until bleeding stops.
Effective coagulation is achieved when the treated area appears on the meat as blanched spot.
Feather-light touching of the ball electrode is recommended to coagulate bleeders efficiently.
A. Select a piece of fresh, lean beef containing very little fat. Allow meat to reach room
temperature.
Note: Do not use veal because it does not change color when cut with an electrode.
B. Place the meat on a Neutral Pad.
C. Insert a ball electrode into the andpiece.
D. Select “MONOPOLAR EMO”.
E. Set the output power intensity to 5.
F. Position the ball electrode in light contact with the beef.
G. Depress the “MONOPOLAR” Footswitch pedal or the Fingerswitch button.
. Adjust power setting for desired results.
Bleeding should be stopped by some form of direct manually applied pressure. When bleeding has
momentarily stopped, final sealing of the vessels can be accomplished by brief application of the
partially rectified modulated waveform.
Bipolar can also be used for coagulation.

14
VII. POWER OUTPUT CHARACTERISTICS
Typical Nominal Plot
Power Output vs. Dial Setting
Monopolar: 500 Ohm load Bipolar: 200 Ohm Load
Figure 7.0
Figure 7.1
Typical Nominal Plot
Monopolar Cut Power Output vs. Resistive oad

15
Figure 7.2
Figure 7.3
Typical Nominal Plot
Monopolar Cut/Coag Power Output vs. Resistive oad
Typical Nominal Plot
Monopolar Hemo Power Output vs. Resistive oad

16
Figure 7.4
Figure 7.5
Typical Nominal Plot
Bipolar Hemo Power Output vs. Resistive oad
Typical Nominal Plot
Voltage Output vs. Dial Setting
(Open Circuit)

17
Mode/ Output Nominal Power Output Power Output Activation
Character Waveform Output Power vs. Setting vs. Load Resistance
Cut 4.0 M z 50W See Figure 7.0 See Figure 7.1 via footswitch or
sinusoid @ 500 Ω fingerswitch
Cut/Coag 4.0 M z with 50W See Figure 7.0 See Figure 7.2 via footswitch or
fully rectified @ 500 Ω fingerswitch
envelope
emo 4.0 M z with 35W See Figure 7.0 See Figure 7.3 via footswitch or
partially rectified @ 500 Ω fingerswitch
envelope
Bipolar 4.0 M z with 35W See Figure 7.0 See Figure 7.4 via footswitch
emo partially rectified @ 200 Ω
envelope
NOTE: The open-circuit output peak-to-peak voltage for all modes is approximately
1200 Volts.
VIII. TECHNICAL SPECIFICATIONS
8.0 OUTPUT CHARACTERISTICS
RF Power-out is within 20% of nominal above (when the dial setting is greater than 1).
RF Power-out is stable within 10% within 10 seconds after activation.
RF output frequency is within 10% of nominal.
8.1 PREVENTIVE INSPECTION AND MAINTENANCE
Regular preventive inspection should be carried out to prevent reduced safety of the unit due to
aging, wear and tear, etc. The cable and electrode must be checked before each use.
The Generator must be inspected for technical safety at least once a year. The required technical
safety inspection is detailed in the Maintenance Manual.
The manufacturer assumes no responsibility for improper changes or repairs carried out on the
unit or its accessories by unauthorized persons, and the warranty of the unit expires immediately.

18
8.2 SAFETY FEATURES
8.2.1 Standard Compliance IEC60601-1
IEC60601-1-2
IEC60601-2-2
8.2.2 Electrical Safety
Electric Shock: Class I
Defibrillator Protection Type BF
8.2.3 Neutral Pad Earthed at F
8.2.9 Defined duty cycle protection 20 sec. ON / 30 sec. OFF
8.2.10 Ingress of water Ordinary equipment.
8.3 INPUT CHARACTERISTICS
8.3.1 Nominal line voltage 100V, 120V / 220V, 240V ~ + 10%
8.3.2 Line frequency 60 z./50 z.
8.3.3 Input current at max output power 0.80A; 230/240VAC
0.90A; 220VAC
1.40A; 120VAC
1.70A; 100VAC
8.3.4 Rating of fuses in the main supply T 1.25A, 250V, 240V, 220V
power T 2.0A, 250V, 120V, 100VAC
8.4 SIZE AND WEIGHT
8.4.1 W x x D 10” x 4.5” x 10.5”
8.4.2 Weight 10 lbs.
8.5 OPERATING CONDITIONS
8.5.1 Ambient Temperature: +10° C - +40° C
8.5.2 Relative umidity: 30% - 75%
8.6 TRANSPORTATION & STORAGE CONDITIONS
8.6.1 Ambient Temperature: -10° C - +50° C
8.6.2 Relative umidity: 10% - 95%
8.6.3 Atmospheric Pressure: 500 hPa - 1060 hPA


DIM-50-54 REV E
8 December 2015
Cynosure, Inc. dba Ellman, 400 Karin Lane, icksville, N.Y. 11801 U.S.A.
Tel: 800 835-5355 • 516 594-3333 • Fax: 516 279-4483 • www.ellman.com
Table of contents
Popular Inverter manuals by other brands

ICMA
ICMA S001 Technical data sheet

Xantrex
Xantrex XDI2048 operating manual

Vector
Vector MAXX SST VEC051GM User's manual & warranty information

Steca
Steca coolcept StecaGrid 3000 Installation and operating instructions

Generac Portable Products
Generac Portable Products 005366-6 owner's manual

Phasak
Phasak Tempus 3P/3P Series manual

Chicago Electric
Chicago Electric 94009 Assembly and operating instructions

Briggs & Stratton
Briggs & Stratton Liquid-Cooled Home Generator System Operator's manual

JS Technik
JS Technik LS-iC5 Operation manual

Medora
Medora SolarBee SB10000PW owner's manual

Nature Power
Nature Power 40066 user manual

Airpax Dimensions
Airpax Dimensions ADI-64/500 owner's manual