D'Orly PCN70 User manual

MANUAL
PCN70

1
Air Coil Nailer MCN70 www.aeroprotools.com
AIR-POWERED COIL NAILER
Model No.: MCN70
Residual risks
Even when the tool is used as prescribed it is not possible to eliminate all residual risk factors. The
following hazards may arise in connection with the tool’s construction and design:
Damage to lungs if an effective dust mask is not worn.
Damage to hearing if effective hearing protection is not worn.
Health defects resulting from vibration emission if the power tool is being used over longer period of time or not
adequately managed and properly maintained.
Wear eye protection.
2014
OPERATING INSTRUCTIONS FOR FASTENER DRIVING
TOOLS OPERATED BY COMPRESSED AIR
IMPORTANT:
Read all safety rules and operating
Instructions carefully before first use it.
Keep this Manual for future reference.

2
Air Coil Nailer MCN70 www.aeroprotools.com
TECHNICAL SPECIFIACTIONS:
Magazine capacity(QTY.)
225-300pcs
Nailer
45-70mm
Operating pressure: 80 to120 PSI(6 to 8 bar)
Maximum pressure: 120PSI (8.3bar)
Air consumption:
0.038CF/CYCLE@90PSI
Air inlet:
1/4”(6.35mm)
Dimensions: 315*128*306mm
Weight: 3.5kgs
SCFM: Standard Cubic feet per minute (the volumetric flow rate of air corrected to standardized conditions of
temperature and pressure).
Environmental Responsibilities
Please recycle unwanted materials instead of disposing of them as waste. All tools, hoses and packaging should be
sorted, taken to the local recycling centre and disposed of in an environmentally safe way.
Safety guidelines
This manual contains information that relates to protecting personal safety and preventing equipment problems.it is
very important to read this manual carefully and understand it thoroughly before using the product.the symbols listed
below are used to indicate this information.
DANGER!
Potential hazard that will result in serious injury or loss of life.
WARRNING!
Potential hazard that could result in serious injury or loss of life.
CAUTION!
Potential hazard that may result in moderate injury or damage to equipment.
Note-The word“
“
note”is used to inform the reader of something he/she needs to know about the tool.
PERSONAL SAFETY
These precautions are intended for the personal safety of the user and others working with the user.please take time
to read and understand them.
TABLE OF CONTENTS:QUICK START GUIDE
TECHNICAL SPECIFIACTIONS
SAFETY GUIDELINES
KEY PARTS DIAGRAM
IMPORTANT INFORMATION
TYPES OF FASTENERS
OPERATING INSTRUCTIONS
MAINTENANCE
TROUBLESHOOTING
EXPLODED VIEW
PARTS LIST
WARRANTY

3
Air Coil Nailer MCN70 www.aeroprotools.com
DANGER!
Potential hazard that will result in serious injury or loss of life.
Keep children away from the work area. Do not allow children to handle power tools.
Keep air hose away from heat, oil, and sharp edges. Check air hose for wear before each use and ensure that all
connections are proper.
Always ensure that the workpiece is firmly secured leaving both hands free to control the tool.
Always ensure that the tool has stopped before putting it down after use,in the interest of safety and to prevent
possible damage to the tool/user.
Keep proper footing at all times in order to ensure correct balance.
Do not use oxygen or any other combustible or bottled gas to power
air-powered tools. Failure to observe this warning can cause explosion and
serious personal injury or death. Use only the compressed air to power the
air-powered tools. Use a minimum of 25’(7.6m) of hose to connect the tools to the
compressor. Failure to comply will result in serious injury or loss of life.
Risk of electric shock: Do not expose a compressor to rain. Store it indoors.
Disconnect the compressor from power source before servicing. Compressor must
be grounded. Do not use grounding adaptors.
Risk of personal injury: Do not direct compressed air from the air hose toward the user or other
personnel.
Risk of inhalation: Never directly inhale the air produced by the compressor.
Risk of bursting: Do not adjust the pressure switch or safety valve for any reason. They have been
preset at the factory for this compressor’s maximum pressure. Tampering with the pressure switch or
the safety valve may cause personal injury or property damage.
Risk of burns: The pump and the manifold generate high temperatures. In order to avoid burns or
other injuries, do not touch the pump, the manifold or the transfer tube while the compressor is running.
Allow the parts to cool down before handling or servicing. Keep children away from the compressor at
all times.
Risk of bursting: Make sure the regulator is adjusted so that the compressor
outlet pressure is set lower than the maximum operating pressure of the tool.
Before starting the compressor, pull the ring on the safety valve to make sure
the valve moves freely. Drain water from tank after each use. Do not weld or
repair tank. Relieve all pressure in the hose before removing or attaching
accessories.
WARNING!
Potential hazard that could result in serious injury or loss of life.
Do not allow unskilled or untrained individuals to operate the air powered tools.
Do not use the air powered tools for any task other than that it is designed to perform.
Do not use the air tools unless you have been trained to do so. Only a qualified person should use the tool.
Locate the compressor in a well-ventilated area for cooling, and must be a minimum of 12”(31cm) away from the
nearest wall.
Protect the air hose and the power cord from damage and puncture. Inspect them for weak or worn spots every
week, and replace them if necessary .
Always wear hearing protection when using the air compressor. Failure to do so may result in hearing loss.

4
Air Coil Nailer MCN70 www.aeroprotools.com
Do not carry the compressor while it is running.
Do not operate the compressor if it is not in a stable position.
Do not operate the compressor on a rooftop or in an elevated position that could allow the unit to fall or be tipped
over.
Always replace a damaged gauge before operating the unit again.
CAUTION!
Potential hazard that may result in moderate injury or damage to equipment.
Always ensure that the tool has stopped before connecting to the air supply.
Do not wear watches, rings, bracelets, or loose clothing when using any air tool.
Do not overload the tool. Allow the tool to operate at its optimum speed for maximum efficiency.
Do not use a tool that is leaking air, with missing or damaged parts, or that requires repairs.Verify that all screws are
securely tightened.
For optimal safety and tool performance, inspect the tool daily in order to ensure free movement of the trigger, safety
mechanisms, and springs.
Always keep your air tools clean and lubricated. Daily lubrication is essential to avoid internal corrosion and possible
failures.
Ensure the floor is not slippery and wear non-slip shoes. Floors should be kept clean can clear.
Always follow all workshop safety rules, regulations, and conditions when using the tools.
Carry the tool by the handle only. Do not carry the tools with a finger on the trigger. Do not carry the tool by the hose,
magazine or any other parts.
Do not use the tool near or below freezing temperatures, as doing so may cause tool failure.
Do not store the tool in a freezing environment to prevent ice formation on the operating valves of the tool, as doing
so may cause tool failure.
Handling and storage of oil: Use with adequate ventilation. Avoid contact of oil with eyes, skin, and clothing. Avoid
breathing spray or mist. Store in a tightly closed container in a cool, dry, well-ventilated area free from incompatible
substances.
CAUTION!
Potential hazard that may result in moderate injury or damage to equipment.
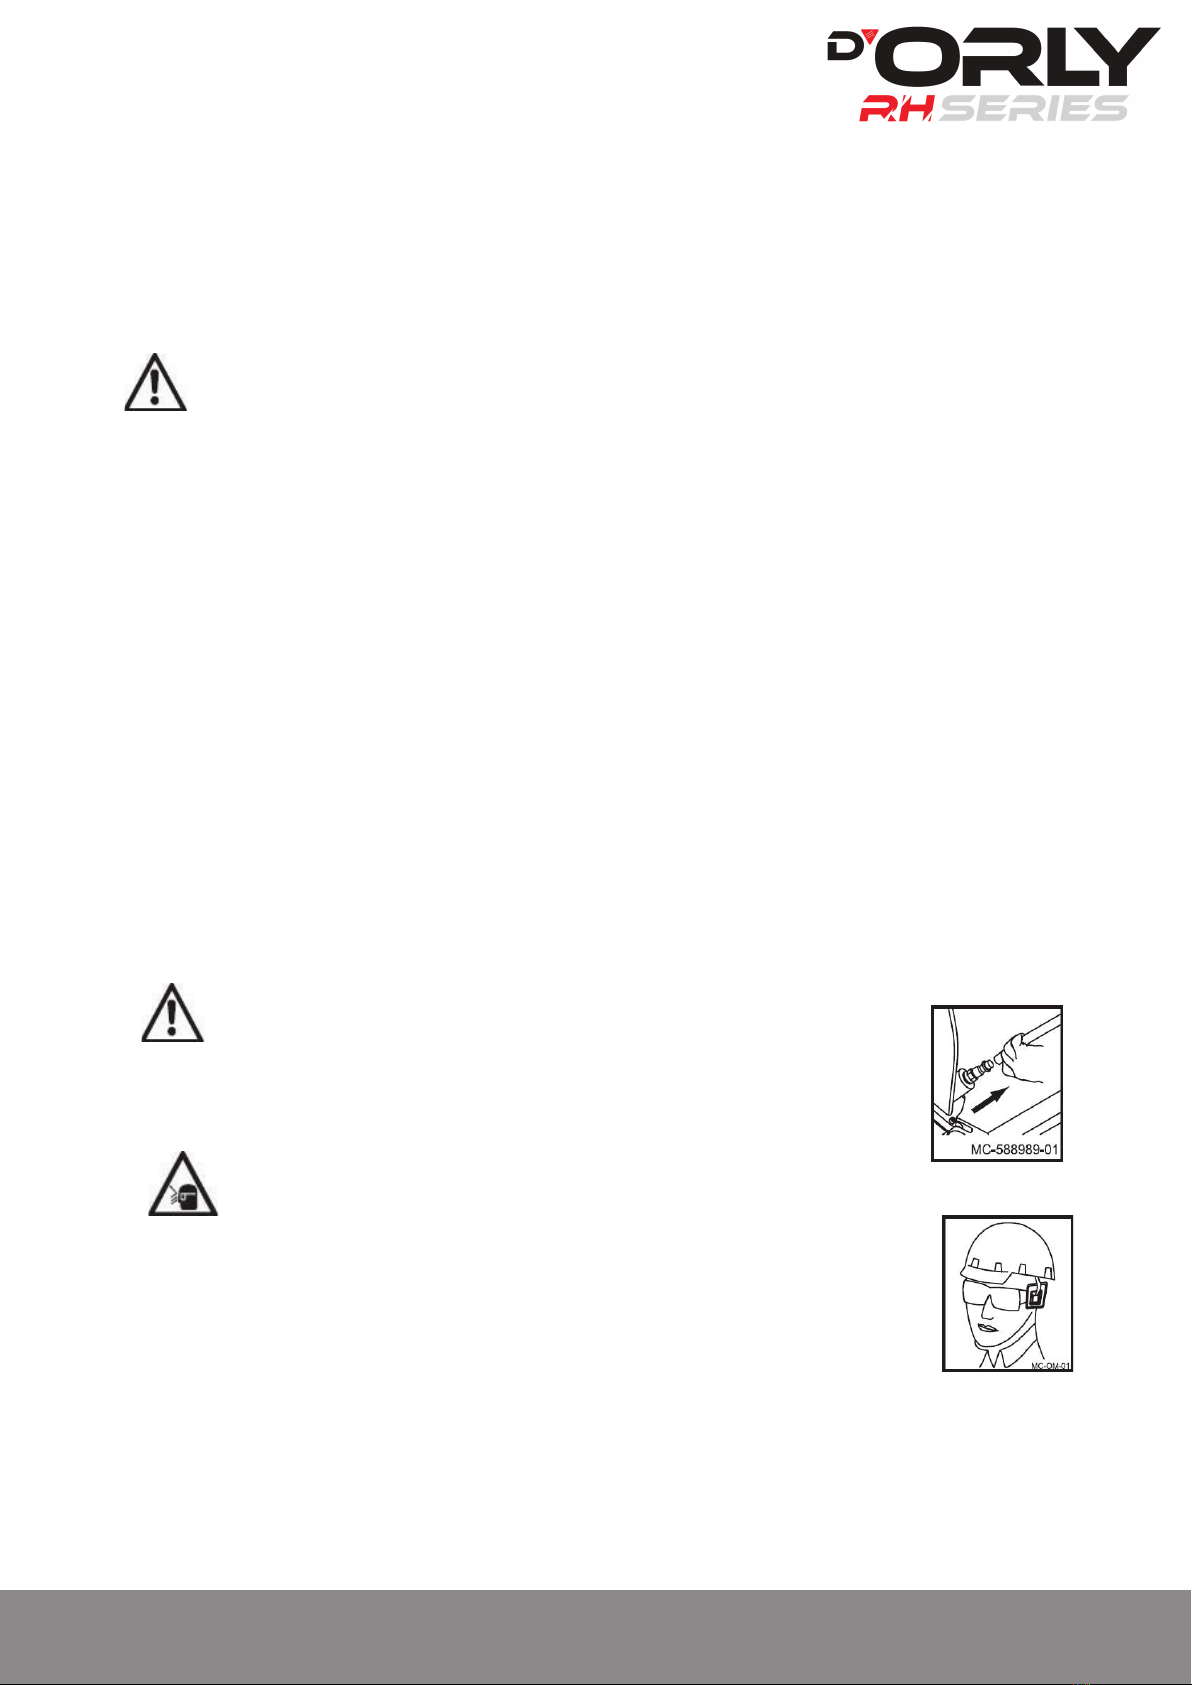
Disconnect tool from the air supply and turn off the compressor before performing any
maintenance, or changing accessories, when the tool is not in use, when it is being handed to
another person, and when it is left unattended. Failure to comply may result in moderate injury or
damage to equipment.
Use safety goggles and ear protection:
Wear safety glasses with side shields when operating the tool/compressor and verify that others in
the work area are also wearing safety glasses. Safety glasses must conform to American
national standards institute (ANSIZ87.1)
Requirements and must provide protection from flying particles from the front and the sides.
Air powered tools are loud and the sound can cause hearing damage. Always wear ear protection
to prevent hearing damage and loss. Failure to comply may result in moderate injury.
NOTE: Recycle unwanted materials father than disposing of them as waste. Sort the tools, hoses, and package into
specific categories and take to the local recycling centre or dispose of them in an environmentally safe way.

5
Air Coil Nailer MCN70 www.aeroprotools.com
KEY PARTS DIAGRAM
IMPORTANT INFORMATION
Compatible compressors
GUIDELINES FOR PROPER USE AND OPERATION
Be sure to use a proper air compressor with air powered tools. The compressor should be able to supply a minimal
air delivery of 6.36SCFM @ 90PSI to ensure the compressor can run continuously with the air nailer.
General use
This nailer drives coil nail 45 to 70mm, If feature a die-cast aluminum housing and a comfortable handle for optimal
control and comfort, even during extended use. It is well balanced for stability, and ergonomically designed with a
longer handle for ease of operation. It also features a hardened driver blade for longer life, and economical air
consumption with low noise. This air powered nailer is specifically designed for professional work.
Air system
Always use clean, dry, regulated, compressed air at 6 to 8 bar(87 to 120psi).
Do not exceed the maximum or minimum pressures. Operating the tool at the wrong pressure(too low or too
high) will cause excessive noise or rapid wear of tool.
WARNING!
Potential hazard that could result in serious injury or loss of life.
Keep hands and other parts of the body away from the tools discharge and working areas when
connecting the air supply. Failure to comply could lead to serious injury or loss of life.
It is recommended that a filter-regulator-lubricator is used and located as close to the tool as possible.
If a filter-regulator-lubricator in not installed, place up to 6 drops of compressor oil into the inlet plug
before each use.
If a filter-regulator-lubricator is installed, keep the air filter clean. A dirty filter will reduce the air pressure
to the tool, which will cause reduction in power, efficiency, and general performance.
For optimal performance, install a quick connector to the tool and a quick coupler on the hose, if
No. Description No. Description
1 Magazine 4 Trigger
2 Gun Body 5 Air inlet plug
3
Cylinder Cap
3
4
5
1
2
3
4
2

6
Air Coil Nailer MCN70 www.aeroprotools.com
applicable.
Verify that all of the connections in the air supply system are sealed in order to prevent air from leaking.
NO. Description NO. Description
1
AEROPRO Air powered Brad nailer
6
Regulator(0 to 8.3 Bar)
2 Quick connector 7 Filter
3 Quick coupler 8 Cut-off valve
4Air Hose 9 Air compressor
5 Lubricator
WARNING!
Potential hazard that could result in serious injury or loss of life.
Do not use the tool if it is not in proper working order.
Do not use oxygen,carbon dioxide or any other combustible, or bottled gas to power this tool.
Do not use this tool in the presence of any flammable liquids or gases.
Keep hands and other parts of the body away from the firing head during use.
Do not point the tool towards the operator or other people.
Never attempt to clear a jammed fastener while the air hose is connected.
Do not drive a fastener on top of an existing fastener. Failure to comply could lead to serious injury or loss of life.
TYPES OF FASTENERS
WARNING!
Potential hazard that could result in serious injury or loss of life.
The use of any other types of fasteners will cause the tool to jam. Failure to comply could lead to serious injury
or loss of life.

7
Air Coil Nailer MCN70 www.aeroprotools.com
OPERATING INSTRUCTIONS
4.1 Preparing a tool for first time operation
Please Read and observe these Operating Instruction before using the tool. Basic safety measures should
always be strictly followed to protect against damage to the equipment and personal injury to the user or
other people working in the vicinity of operation.
4.2 Connection to the compressed air system
Ensure that the pressure supplied by the compressed air system does not exceed the maximum allowable
pressure of the fastener driving tool. Set the air pressure initially to the lower value of the recommended
allowable pressure (see TECHNICAL DATA).
Empty the magazine to prevent a fastener from being ejected at the next stage of work in the event that
internal parts of the fastener driving tool are not in the starting position following maintenance and repair work
or transportation.
Connect the fastener driving tool to the compressed air supply using suitable pressure hose equipped with
quick-action connectors.
Check for proper functioning by applying the muzzle of the fastener driving tool to a piece of wood or wooden
material and actuating the trigger once or twice.
4.3Filling the magazine
Only those fasteners specified under TECHNICAL DATA (see 1.1) may be used
When filling the magazine, hold the tool so that the muzzle is not pointing towards the operator or any other
person or animals.
4.4 Handling the tool
Pay attention to 2-Special Reference-of these operating instructions.
Having checked that the fastener driving tool is functioning correctly, apply the tool to a work piece and
actuate the trigger.
Check whether the fastener has been driven into the work piece in accordance with the requirements.
-if the fastener is protruding, increase the air pressure in increments of 0.6bar, checking the result
after each new adjustment;
-if the fastener is driven into an excessive depth reduce the air pressure I increments of 0.6bar until
the result is satisfactory.
You should endeavor in any event to work with the lowest possible air pressure. This will give you three
significant advantages;
1.energy will be saved,
2.less noise will be produced,
3.a reduction in fastener driving tool wear will be achieved.
Avoid triggering the fastener driving tool if the magazine is empty.
Any defective or improperly functioning fastener driving tool must immediately be disconnected from the
compressed air supply and passed to a specialist for inspection.
In the event of longer breaks in work or at the end of the working shift, disconnect the tool from the
compressed air supply and it is recommended to empty the magazine.
The compressed air connectors of the fastener driving tool and the hoses should be protected against
contamination, the ingress of coarse dust chips, sand etc, will result in leaks and damage to the fastener
driving tool and the couplings.

8
Air Coil Nailer MCN70 www.aeroprotools.com
WARNING!
Potential hazard that could result in serious injury or loss of life.
5. Maintenance
Disconnect the tool from the compressor before adjusting, clearing jams, servicing &maintenance, relocating
and during non operation.
Regular lubrication, if your tool without using the in-liner automatic oilier, place 2 or 6 drops of pneumatic
tool oil into the air inlet before each work day or after 2 hours of continuous use depending in the
characteristic of workpiece or type of fasteners.
Air-operated tools must be inspected periodically, and worn or broken parts must be replaced to keep the
tool operating safely and efficiently. Check and change all worn or damaged O-ring, Seals, etc. Tighten all the

9
Air Coil Nailer MCN70 www.aeroprotools.com
screws and caps to avoid personal injury. This should be done by an expert.
Make regular inspection for free movement of trigger, Spring and safety mechanism to assure safe
system is complete and functional: no loose and missing parts, no building or stocking parts.
Keep magazine and nose of tool clean and free of any dirt lint or abrasive particles.
When temperatures are below freezing, tools should be kept warm by any convenient, safe method.
6. Troubleshooting (See Table 1)
The following chart lists common operating system issues and solutions.please read it carefully and follow all
instructions closely.
DANGER!
Potential hazard that could result in serious injury or loss of life.
SYMPTOM PROBLEM SOLUTIONS
Air leak near top of tool or
in trigger area
1.O-ring in trigger valve are damage.
2.Trigger valve head are damage.
3.Trigger valve stem ,seal or O-ring are
damaged.
1.Check and replace O-ring.
2.Check and replace.
3.Check and replace trigger val
ve stem,
seal or O-ring
Air leak near bottom of tool.
1. Loose screws.
2. Worn or damaged O-rings or bumper.
1.Tighten screws.
2.Check and replace O-rings or bumper.
Air leak between body and
cylinder cap.
1. Loose screws.
2. Worn or damaged O-rings or seals.
1.Tighten screw.
2.Check and replace O-rings or bumper.
Blade driving fastener too
deep.
1. Worn bumper.
2. Air pressure is too high.
1.Replace bumper.
2.Adjust the air pressure.
Tool does not operate well:
can not drive fastener or
operate sluggishly.
1. Inadequate air supply.
2. Inadequate lubrication.
3. Worn or damaged O-rings or seals.
4.Exhaust port in cylinder head is
blocked.
1.Verify adequate air supply.
2.Place 2 or 6 drops of oil into air inlet.
3.Check and replace O-rings or seal.
4.Replace damaged internal parts.
Tool skips fasteners. 1.Worn bumper or damaged spring.
2.Dirt in front plate.
3.Dirt or damage prevents fasteners from
moving freely in magazine.
4.Worn or dry O-ring on piston or lack of
lubrication.
5.Cylinder cover seal leaking.
1.Repalce bumper or pusher spring.
2.Clean drive channel on front plate.
3.Magazine needs to be cleaned.
4.O-ring need to be replaced.
And lubricate.
5.Replace Sealing washer.
Tool jams. 1.Incorrect or damaged fasteners.
2.Damaged or worn driver guide.
3.Magazine or nose screw loose.
4.Magazine is dirty.
1.Change and use correct fastener.
2.Check and replace the driver.
3.Tighten the magazine.
4.Clean the magazine.
Table 1

10
Air Coil Nailer MCN70 www.aeroprotools.com
Explode drawing & Parts list

11
Air Coil Nailer MCN70 www.aeroprotools.com
NO. CODE DESCRIPTION Qty
.
NO. CODE DESCRIPTION Qty.
103.04.28.092 cylinder cap 1 53 03.04.08.183 nail head 1
203.04.05.049 bolt M6x35 1 54 03.04.01.277 O-ring 4.2x1.6 1
303.04.40.353 cylinder cap plug 1 55 03.04.36.012 Compressed spring 1
4
03.04.16.118 safety frame 2
56
03.04.16.120 safety frame 1
5
03.04.06.131
sealing gasket
1
57
03.04.35.071
protective film
1
6
03.04.40.367
spring seat
1
58
03.04.40.052
rubber plug
1
7
13.04.36.274
compressed spring
1
59
03.04.05.056
bolt M8x30
4
8
03.04.01.157
O-ring 41.7x3
1
60
03.04.05.050
bolt M6x40
1
9
03.04.20.043
swift valve
1
61
03.04.10.053
stem
1
10 03.04.01.273 O-ring 56.8x3 2 62 03.04.36.272 compressed spring 1
11 03.04.39.12.044 piston assembly 1 63 03.04.13.177
movable cover
plate
1
12
03.04.01.274
O-ring 43x4.9
1
64
03.04.29.187
pin shaft
3
13 03.04.19.162 sealing gasket 1 65 03.04.31.005 shaft pin 1
14 03.04.27.130 cylinder 1 66 03.04.05.190 spring pin 3x12 1
15 03.04.01.188 o-ring 56x3.1 1 67 03.04.36.273 compressed spring 1
16 03.04.19.163 stain ring 1 68 03.04.17.122 limited blocker 1
17
03.04.01.211 o-ring 88x3 1
69
03.04.24.029 torsion spring 1
18
03.04.01.275 o-ring 56x5.7 1
70
03.04.33.015 nail pusher 1
19
03.04.26.210
gun body
1
71
03.04.31.119
shaft pin
1
20
item no.
72
03.04.01.061
O-ring 939x2.4
1
21
05.04.08.316
warning label
73
03.04.40.368
pusher piston
1
22
03.04.29.096
handle grip
1
74
03.04.01.099
O-ring 20.4x2.4
1
23 75 03.04.19.097 wahser 1
24 03.04.01.187 o-ring 56x2.65 1 76 03.04.34.079 spring 1
25 03.04.11.089 end cap 177 03.04.32.004 spring seat 1
26 03.04.05.193 spring pin 3x20 1 78 03.05.03.031 elastic collar 1
27 03.04.05.352 spring pin 3x25 3 79 03.04.40.369 magazine seat 1
28
80
29
03.04.05.157-02
nut M6
2
81
30
03.04.02.131
safety sheild
1
82
03.04.32.067
hook seat
1
31
03.04.05.191
spring pin 3x16
1
83
32
03.04.03.086
treigger
1
84
03.04.22.035
tension spring
1
33 03.04.16.119 slid plate frame 1 85 03.04.39.12.005
nail pusher
assembly
1

12
Air Coil Nailer MCN70 www.aeroprotools.com
NO. CODE DESCRIPTION Qt y. NO. CODE DESCRIPTION Qty.
34
03.04.40.351
switch assembly
O-ring 15.8x1.8 1 86
35 valve seat 1 87 03.04.32.025
nail length
adjusting seat
1
36 O-ring 11.3x1.85 1 88 03.04.05.049 bolt M6x35 1
37 O-ring 19x2.5 1 89 03.04.06.089 rubber gasket 1
38 switch seat 1 90 03.04.31.122 shaft pin 1
39 pin 2x15 2 91 03.04.40.370 magazine 1
40
O-ring 6x1.9 1
92
03.04.40.358 nail head protecter 1
41
O-ring 6.4*2
1
93
03.04.29.188
gasket shaft
1
42
Valve bush
101
03.04.06.130
gasket
1
43
O-ring 8.9x1.9
102
03.04.05.198
spring pin 3x22
1
44
compressed spring
103
quick coupler
1
45
O-ring 2.5*1.5
104
03.04.05.071
bolt M5X5
1
46 switch shaft 1
47 Switch sleeve 1
48 03.04.19.107 outer bumper 2
49 03.04.19.106 inner bumper 1
50
03.04.40.360 Sealing end 1
51
03.04.40.359 Shaft Pin 1
52
03.04.01.276
O-ring 35.5*1.5
1
If any parts are missing or damaged, or if you have any questions, please contact to produce company.
This manual suits for next models
1
Table of contents
Other D'Orly Power Tools manuals