Dürr Technik SICOLAB mini ENDO User manual

EN
SICOLAB mini ENDO
Installation and operating instructions
1015100100L02
*1015100100L02*
2107V005


Contents
Important information
1About this document .. . . . . . . . . . . . . 3
1.1 Warnings and symbols .. . . . . . . 3
1.2 Copyright information .. . . . . . . . 4
2 Safety .. . . . . . . . . . . . . . . . . . . . . . . . . 4
2.1 Intended purpose .. . . . . . . . . . . 4
2.2 Intended use .. . . . . . . . . . . . . . . 4
2.3 Improper use .. . . . . . . . . . . . . . . 4
2.4 General safety information .. . . . . 4
2.5 Specialist personnel .. . . . . . . . . 5
2.6 Electrical safety .. . . . . . . . . . . . . 5
2.7 Essential performance charac-
teristics .. . . . . . . . . . . . . . . . . . . 5
2.8 Notification requirement of seri-
ous incidents .. . . . . . . . . . . . . . . 5
2.9 Only use original parts .. . . . . . . . 5
2.10 Transportation and storage .. . . . 5
2.11 Disposal .. . . . . . . . . . . . . . . . . . 6
Product description
3Overview .. . . . . . . . . . . . . . . . . . . . . . . 7
3.1 Scope of delivery .. . . . . . . . . . . . 7
3.2 Spare parts and accessories .. . . 7
3.3 Accessories for the compressed
air pistol .. . . . . . . . . . . . . . . . . . 8
4Technical data .. . . . . . . . . . . . . . . . . . . 9
4.1 Basic data .. . . . . . . . . . . . . . . . . 9
5Evaluation of conformity .. . . . . . . . . . 10
6 Operation .. . . . . . . . . . . . . . . . . . . . . . 10
6.1 Unit details .. . . . . . . . . . . . . . . . 10
7Type plate .. . . . . . . . . . . . . . . . . . . . . . 11
Assembly
8Requirements .. . . . . . . . . . . . . . . . . . . 12
8.1 Installation/setup room .. . . . . . . 12
8.2 Pressure vessel test .. . . . . . . . . 12
9 Commissioning .. . . . . . . . . . . . . . . . . . 13
9.1 Remove the packaging .. . . . . . . 13
9.2 Quick-release coupling – operat-
ing panel .. . . . . . . . . . . . . . . . . 13
9.3 Establishing the compressed air
connection .. . . . . . . . . . . . . . . . 13
9.4 Switch cycles .. . . . . . . . . . . . . . 13
9.5 Condensate .. . . . . . . . . . . . . . . . 13
9.6 Electrical installation .. . . . . . . . . 13
9.7 Overtemperature protection .. . . 14
9.8 Checking the safety valve .. . . . . 14
Usage
10 Operation .. . . . . . . . . . . . . . . . . . . . . . 15
10.1 Taking out of use .. . . . . . . . . . . . 15
10.2 Switching the unit on/off .. . . . . . 15
10.3 Start-up cycles .. . . . . . . . . . . . . 15
10.4 Notes on the compressed air
pistol .. . . . . . . . . . . . . . . . . . . . 16
10.5 Setting the pressure reducer .. . . 16
11 Maintenance .. . . . . . . . . . . . . . . . . . . . 17
11.1 Maintenance schedule .. . . . . . . . 17
11.2 Disinfecting and cleaning the
surfaces .. . . . . . . . . . . . . . . . . . 18
11.3 Checking the fan .. . . . . . . . . . . . 18
Troubleshooting
12 Tips for operators and service techni-
cians .. . . . . . . . . . . . . . . . . . . . . . . . . . 19
Contact
13 Addresses .. . . . . . . . . . . . . . . . . . . . . . 20
13.1 Returns / Repairs .. . . . . . . . . . . 20
13.2 To order spare parts .. . . . . . . . . 20
13.3 Service .. . . . . . . . . . . . . . . . . . . 20
Contents
1015100100L02 2107V005 1
EN

Important information
1 About this document
These installation and operating instructions rep-
resent a part of the unit.
In the event that the instructions and
notes in these installation and operating
instructions for are not observed, Dürr
Technik accepts no warranty or liability of
any kind for the safe operation and relia-
ble function of the units.
The German version of the installation and oper-
ating instructions is the original manual. All other
languages are translations of the original manual.
These operating instructions are valid for SICO-
LAB mini, order number: 1015100001.
1.1 Warnings and symbols
Warnings
The warnings in this document are intended to
draw your attention to possible injury to persons
or damage to machinery.
The following warning symbols are used:
General warning symbol
Warning – dangerous high voltage
Warning – hot surfaces
Warning - automatic start-up of the unit
The warnings are structured as follows:
SIGNAL WORD
Description of the type and source of
danger
Here you will find the possible conse-
quences of ignoring the warning
❯Follow these measures to avoid the
danger.
The signal word differentiates between four levels
of danger:
–DANGER
Immediate danger of severe injury or death
–WARNING
Possible danger of severe injury or death
–CAUTION
Risk of minor injuries
–NOTICE
Risk of extensive material/property damage
Other symbols
These symbols are used in the document and on
or in the unit:
Note, e.g. specific instructions regarding
efficient and cost-effective use of the unit.
Refer to Operating Instructions.
CE labelling
Manufacturer
Date of manufacture
Order number
Serial number
Medical device
Dispose of correctly in accordance with
EU Directive 2012/19/EU (WEEE).
Disconnect all power from the unit.
Protective ground connection
Air
Weight
Recycling
Important information
1015100100L02 2107V005 3
EN

AC current
On/off switch
Fuses
This way up / store and transport in an
upright position
Fragile, handle with care
Keep away from sunlight
XX
YY
Comply with the lower and upper temper-
ature limits
no condensation
XX
YY
Lower and upper humidity limits
XX
YY
Lower and upper atmospheric pressure
limits
1.2 Copyright information
All names of circuits, processes, names, software
programs and units used in this document are
protected by copyright.
The reprinting of the installation and operating
instructions, even in extracts, is only permitted
with the written permission of Dürr Technik.
2 Safety
Dürr Technik has developed and constructed the
units in such a way that danger is to a large
extent excluded if the units are used as intended.
Nevertheless, residual risks can remain. You
should therefore observe the following notes.
2.1 Intended purpose
The unit is an oil-free compressor for com-
pressed air. SICOLAB mini ENDO is intended to
be used with attachments for the drying of MIC
instruments and their accessories, including
hoses, valves, Luer Lock adapters and cannulas.
2.2 Intended use
The unit is designed to supply compressed air for
the drying of prepared endoscopes and MIC
instruments.
The unit aspirates ambient air. The sucked-in
ambient air must be suitable for the drying of
endoscopes and MIC instruments that are used
on patients and must not contain any pollutants
or harmful substances.
2.3 Improper use
Any other usage or usage beyond this scope is
deemed to be improper. The manufacturer
accepts no liability for damage resulting from
such use. In such cases, the user/operator will
bear the sole risk. The unit must not be used to
compress any other media or any combustible or
explosive mixtures.
2.4 General safety information
❯When operating this unit, always observe all
directives, laws, and other rules and regula-
tions applicable at the site of operation.
❯Check the function and state of the unit prior to
each use.
❯Do not convert or modify the unit.
❯Comply with the specifications of the Installa-
tion and Operating Instructions.
❯Ensure that the unit operator has access to the
Installation and Operating Instructions at all
times.
Important information
4 1015100100L02 2107V005
EN

2.5 Specialist personnel
Operation
Unit operators must ensure safe and correct han-
dling based on their training and knowledge.
❯Instruct or have every operator instructed in the
handling of the unit.
Installation and repairs
❯Always arrange for any assembly work, read-
justments, alterations, extensions, and repairs
to be performed by Dürr Technik or by person-
nel authorised and trained by Dürr Technik.
Qualified personnel are defined as those
trained by Dürr Technik; who are familiar with
the unit technology; and are aware of the dan-
gers presented by the unit.
2.6 Electrical safety
❯Observe and comply with all the relevant elec-
trical safety regulations when working on the
unit.
❯Replace any damaged cables or plugs immedi-
ately.
2.7 Essential performance char-
acteristics
The SICOLAB mini ENDO unit does not have any
essential performance characteristics in accord-
ance with EN/IEC 60601-1 section 4.3.
The unit complies with the requirements accord-
ing to IEC 60601-1-2:2014.
2.8 Notification requirement of
serious incidents
The operator/patient is required to report any
serious incident that occurs in connection with
the device to the manufacturer and to the com-
petent authority of the Member State in which
the operator and/or patient is established/resi-
dent.
2.9 Only use original parts
❯Only use accessories and special accessories
that are specified or approved by Dürr Technik.
❯Only use original working and spare parts.
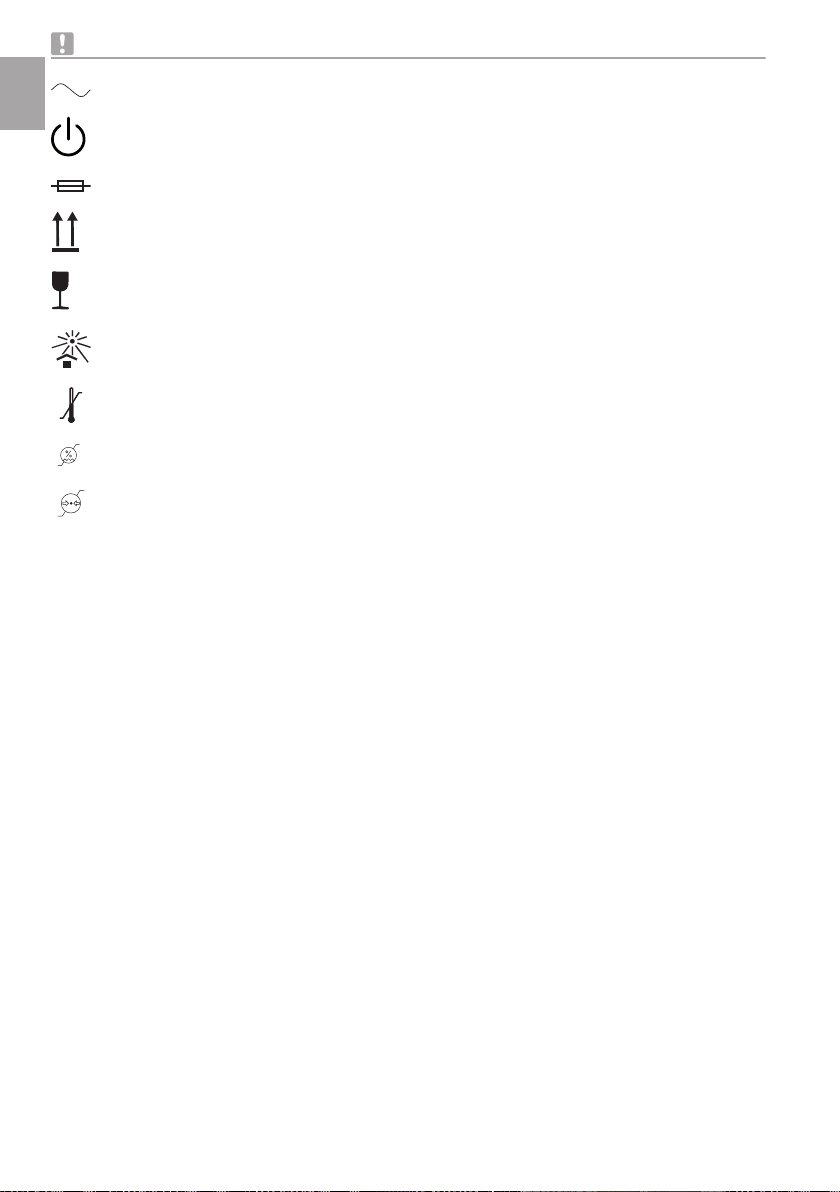
WARNING
Risk of explosion of the pressure ves-
sel and pressure hoses
The unit is pressurised and may explode
if you do not comply with the notice.
❯The pressure vessel and the pressure
hoses must be vented before they are
stored or transported.
❯Protect the unit from moisture during
transportation.
❯Always transport the unit in an upright
position.
Dürr Technik accepts no liability for dam-
age resulting from the use of non-
approved accessories, special accesso-
ries or any working parts or spare parts
other than original parts.
The use of non-approved accessories,
special accessories or non-genuine work-
ing parts / spare parts (e.g. power cord)
can have a negative effect on the electri-
cal safety and EMC.
2.10 Transportation and storage
The original packaging provides optimum protec-
tion for the unit during transport.
Dürr Technik will not accept any responsi-
bility or liability for damage occurring dur-
ing transport due to the use of incorrect
packaging, even where the unit is still
under guarantee.
– Only transport the unit in its original packaging.
– Keep the packing materials out of the reach of
children.
The unit may be stored in its original packaging
– in warm, dry and dust-free rooms;
– protected from contaminants.
If possible, retain the packaging material.
Ambient conditions during storage and trans-
port
Ambient conditions during storage and
transport
temperature °C -20 to +70
Rel. humidity % 0 to 99
Important information
1015100100L02 2107V005 5
EN

Ambient conditions during storage and
transport
Air pressure hPa 100 to 1100
Please refer to the labels on the packaging pad-
ding.
2.11 Disposal
Unit
The unit must be disposed of properly.
Within the European Union, the unit must
be disposed of in accordance with EU
Directive 2012/19/EU (WEEE).
❯Please contact Dürr Technik if you have any
questions regarding the proper disposal of the
unit.
Packaging
Dispose of the packaging material in an
environmentally responsible manner.
– Note current disposal routes.
– Keep the packing materials out of the reach of
children.
Important information
6 1015100100L02 2107V005
EN

Product description
3 Overview
3.1 Scope of delivery
The following items are included in the scope of delivery (possible variations due to country-specific
requirements and/or import regulations):
SICOLAB mini ENDO scope of delivery, article number:1015100001
includes the following compo-
nents:
SICOLAB mini ENDO .. . . . . . . . . . . . . . . . . . . . . . 1015100001
with power cord
Compressor
station SICO-
LAB mini
ENDO .. . . . . . . 1015100005
Stainless steel
compressed air
pistol with
hose .. . . . . . . . 1015200004
Including hose nozzle and
attachment 1015200007
Fine filter
assembly .. . . . 1015200014
Installation and Operating Instructions .. . . . . . . . . 1015100100
Reprocessing instructions for the compressed air
pistol .. . . . . . . . . . . . . . . . . . . . . . . . . . . . . . . . . . 1015200050
3.2 Spare parts and accessories
The following wearing parts need to be replaced at the specified maintenance intervals (see "11.1 Main-
tenance schedule").
Spare parts
SICOLAB
mini ENDO
Remark
Filter set SICOLAB mini ENDO .. . . . . . . . . . . . . 1015200015 Filter set comprising: air
intake filter cartridge 3 µm,
fine filter cartridge 0.01 µm,
fine filter cartridge 5 µm
Compressed air hose 2 m .. . . . . . . . . . . . . . . . . . 1015200019
Fuses (mains fuse) SICOLAB mini ENDO .. . . . . . . . . . . . . . . . . . . . . . . . . . . . . . . . . . . 9000-115-0012
powercord (RW-F3G1,00; length 2,5m), CN plug - IEC .. . . . . . . . . . . . . . . . . . . . . . . . . . . 8012100014
powercord (H05VV-F3G1,00; length 2,5m); UK plug - IEC .. . . . . . . . . . . . . . . . . . . . . . . . . 8012100015
Vibration insulation mat .. . . . . . . . . . . . . . . . . . . . . . . . . . . . . . . . . . . . . . . . . . . . . . . . . . . . . 0654 0035
Product description
1015100100L02 2107V005 7
EN

3.3 Accessories for the compressed air pistol
The compressed air pistol is available as an accessory for SICOLAB mini ENDO units and is
operated with compressed air.
Operating instructions for safe handling of the compressed air pistol and cleaning and reproc-
essing instructions are available as a download "Operating instructions for cleaning pistols
made of stainless steel" from www.reinigungspistolen.de.
1
2
45
3
6
Accessories for the compressed air pistol Item no.
Stainless steel compressed air pistol with hose .. . . . . . . . . 1015200004 1
Set of attachments with 5 screw-on attachments for the
compressed air pistol .. . . . . . . . . . . . . . . . . . . . . . . . . . . . 1015200011
2,3,4,5,6
Spray nozzle .. . . . . . . . . . . . . . . . . . . . . . . . . . . . . . . . . . 1015200007 2
Luer-Lock connector .. . . . . . . . . . . . . . . . . . . . . . . . . . . . . 1015200009 3
Luer adapter .. . . . . . . . . . . . . . . . . . . . . . . . . . . . . . . . . . . 1015200008 4
Hose adapter, size 6 .. . . . . . . . . . . . . . . . . . . . . . . . . . . . . 1015200006 5
Spray nozzle .. . . . . . . . . . . . . . . . . . . . . . . . . . . . . . . . . . 1015200017 6
Compressed air hose with Y-adapter and 4 x Luer Lock
adapters .. . . . . . . . . . . . . . . . . . . . . . . . . . . . . . . . . . . . . . 0715100721
-
Product description
8 1015100100L02 2107V005
EN

4 Technical data
4.1 Basic data
Electrical data SICOLAB mini ENDO A038
1015100005
Electrical frequency Hz 50 60
Nominal voltage V 230 230
Rated power P1 (kW) 0.3 0.3
Nominal current A 1.7 1.4
Nominal pressure bar / MPa 1 / 0.1 1 / 0.1
Mains fusing A 2 2
General data
Pressure vessel volume L 2 2
Delivery quantity at 0 bar (0 MPa) l/min 36 38
Delivery quantity at 1 bar (0.1 MPa) l/min 31 33
Duty cycle % 100 100
Preset nominal pressure downstream
from pressure reducer
bar / MPa 1 / 0.1 1 / 0.1
Maximum nominal pressure down-
stream from pressure reducer
bar / MPa 5 / 0.5 5 / 0.5
Switch-on/cut-off pressure bar / MPa 5 - 7 / 0.5 - 0.7 5 - 7 / 0.5 - 0.7
Safety pressure PS bar / MPa 8 / 0.8 8 / 0.8
Speed min-1 1300 1600
Noise level (at nominal pressure) dB (A) 50 52
Weight kg 16 16
Dimensions* (L x W x H) mm 396 x 321 x 295 396 x 321 x 295
*Dimensions without quick-release coupling and hose nozzle
Ambient conditions during operation
temperature °C +5 to +40 +5 to +40
Relative humidity % 0 - 95 0 - 95
Classification
Medical Device Class I
Product description
1015100100L02 2107V005 9
EN

5 Evaluation of conformity
This unit has been subjected to a conformity
assessment procedure in accordance with the
current relevant European Union guidelines. The
Class I device complies with the required essen-
tial requirements of the EU Medical Device Regu-
lation 2017/745.
6 Operation
The unit draws in atmospheric air and com-
presses it. The oil-free compressed air is then
transported to the pressure vessel. The oil-free
and filtered air is made available to the consum-
ers in the pressure vessel.
If compressed air is removed for a consumer, the
pressure in the vessel drops. When the switch-on
pressure is reached, the unit is automatically
switched on again via the pressure switch. When
the cut-off pressure is reached, the unit is auto-
matically switched off. A safety valve prevents the
maximum permissible vessel pressure from being
exceeded.
6.1 Unit details
1
2
3
4
6
5
7
Fig. 1: Top view (without unit cover)
1 Pressure vessel
2 Safety Valve
3 Pressure switch
4 Air intake filter
5 Pressure reducer with condensate separa-
tor and fine filter 5 µm
6 Soleinoid valve
7 Operating time counter
Product description
10 1015100100L02 2107V005
EN

10
9
24
12
11
8
Fig. 2: SICOLAB mini ENDO – view of the front
8 Quick-release coupling
9 On/Off switch
10 Pressure gauge
11 Unit cover
12 Unit cover lock
24 Fine filter 0.01 µm
13
14
15
Fig. 3: View of the rear
13 Carry handle
14 Condensate drain
15 Power plug with fuses
7 Type plate
The type plate is located on the rear of the unit.
REF Order number
SN Serial number
This information is also required when order-
ing spare parts.
Product description
1015100100L02 2107V005 11
EN

Assembly
8 Requirements
8.1 Installation/setup room
The room chosen for set up must fulfil the follow-
ing requirements:
– Closed, dry, well-ventilated room.
– Should not be a purpose-made room (e. g.
boiler room or wet room).
– Set up the unit on a clean, level and sufficiently
stable surface (take the weight of the unit into
account).
– Set up or install the unit so that the type plate
can be easily read and the unit is easily acces-
sible for operation and maintenance.
– Set up the units so that the socket to which
the units is connected is easily accessible.
– Room temperature: +5°C to +40°C.
– Ensure that there is sufficient distance to the
wall so that the air can flow in and out without
any obstruction.
The air is filtered when it is sucked in. This
does not alter the composition of the air.
The source of the air taken in should be
free of any harmful substances (e.g. do
not draw in air from an underground
garage or directly next to a suction
machine).
NOTICE
Risk of overheating due to insufficient
ventilation
The units generates heat. Possibility of
heat damage and/or reduced service life
of the unit.
❯Do not cover the unit.
❯Air must be able to flow in and out
unobstructed.
❯Ventilation openings must be suffi-
ciently large.
❯Installed units may require an inde-
pendent ventilation system in unfavour-
able cases.
The unit must only be operated on a stable, even
base. The unit must not be used as a climbing
aid. Danger of breakage! Place a collector tray
under the condensate drain (14) on the rear of
the unit to collect any condensate that is blown
out.
13
14
15
WARNING
Do not reach into the fan grille with
your fingers or any objects
Risk of injury from fan blades.
❯
8.2 Pressure vessel test
The owner must comply with the national
directives.
Example for Germany: German Ordinance on
Industrial Safety and Health (BetrSichV)
Assembly
12 1015100100L02 2107V005
EN

9 Commissioning
9.1 Remove the packaging
The unit is securely protected with packaging
material to ensure safe transportation.
❯Remove the packaging material.
❯Remove the protective film.
❯Check the unit for damage in transit.
❯Only lift the unit using the transport handles
and/or from the bottom.
9.2 Quick-release coupling –
operating panel
The compressed air connection to the
pressure reducer has a constant pressure
of 1 bar (set at the factory).
The pressure can be adjusted at the pres-
sure reducer in the unit – see "10.5 Set-
ting the pressure reducer".
❯Compressed air is extracted at the quick-
release coupling (7.2 mm) via a hose adapter
piece on the operating panel of the unit.
❯Secure the pressure hose to the hose adapter
piece using a hose clip.
❯Connect the hose adapter piece to the quick-
release coupling.
9.3 Establishing the compressed
air connection
The unit has a 7.2 mm quick-release coupling on
its outer side. The matching hose nozzle for a
connecting hose with an internal diameter of
6 mm is included in the scope of delivery.
CAUTION
Damage to the quick-release coupling
if the cover of the unit is open
The quick-release coupling can be dam-
aged due to high compressive forces
during connection of the pressure hose.
❯The cover of the unit must be closed
and locked.
9.4 Switch cycles
The motors in the device are designed for 20
starts/stops per hour. More frequent switching
will lead to increased wear.
9.5 Condensate
When air from the surrounding atmosphere is
compressed, different amounts of condensate
will accumulate in the pressure vessel depending
on the humidity and temperature of the air. This
condensate is collected via the integrated con-
densate separator, which is located between the
pressure vessel and the compressed air connec-
tion. As soon as a certain fill level is reached in
the condensate separator, the condensate is
drained off to the outside via the condensate
drain.
❯Place a collector tray under the condensate
drain.
14
14 Condensate drain
9.6 Electrical installation
❯Connect the power cord to the mains socket
on the rear of the unit
❯Connect the power cord to a properly installed
mains socket with PE conductor.
❯Route the power cord in such a way that it is
not under any mechanical tension.
❯Before commissioning, verify that the power
supply voltage complies with the voltage speci-
fications of the type plate.
Assembly
1015100100L02 2107V005 13
EN

DANGER
Risk of electric shock due to dam-
aged power cord or plug
Electric shocks can cause severe inju-
ries.
❯Do not start up the unit if the power
cord or plug is damaged.
❯Replace the damaged power cord.
9.7 Overtemperature protection
The motors in the units are equipped with a tem-
perature switch that switches the unit off if it
overheats. If this happens, you will first need to
determine the cause of the fault and then remedy
it.
If the unit is switched off via the tempera-
ture switch, the fan of the unit will con-
tinue to run.
NOTICE
Automatic start-up of the unit after
cooling down
❯Allow unit to cool down
9.8 Checking the safety valve
The safety valve must be checked/vented when
the unit is started up for the first time and once
a year after that.
At the factory, the safety valve is set to 10
bar (1 MPa) or 8 bar (0.8 MPa) (depend-
ing on the maximum pressure), inspected
and stamped (see also "4 Technical
data").
DANGER
Risk of explosion of the pressure ves-
sel and
pressure hoses
❯Do not change the safety valve set-
tings.
WARNING
Risk of damage to the safety valve
Risk of explosion of the pressure vessel
and pressure hoses due to a defective
safety valve
❯Do not use the safety valve to vent the
pressure vessel.
❯Switch on the unit at the pressure switch and
fill the pressure vessel to the cut-off pressure.
❯Rotate the cap of the safety valve a few turns
anti-clockwise until the valve begins to blow
off. Only allow the safety valve to blow for a
short period.
❯Turn the cap clockwise as far as it will go.
The valve is closed.
Assembly
14 1015100100L02 2107V005
EN

Usage
10 Operation
Prior to working on the unit or in case of
danger, disconnect it from the mains.
DANGER
Risk of electric shock due to defective
cable connections and risk of burns
due to hot surfaces if the unit is oper-
ated with the cover open.
During operation, the unit is under a live
voltage and its surfaces get hot.
❯The cover of the unit must be closed
during operation.
❯Regularly check cable connections for
damage.
10.1 Taking out of use
Taking the unit out of use
If the unit is not to be used for a prolonged
period of time, we is recommend that it be
decommissioned.
❯Switch on the unit and wait until the cut-off
pressure is reached (see "4 Technical data").
❯Switch off the unit.
❯Disconnect the unit from the mains power sup-
ply and secure it so that it cannot be switched
on inadvertently.
❯Release all of the pressure from the pressure
vessel. To do this, pull the trigger of the com-
pressed air pistol until the unit is depressurised.
❯Disconnect the compressed air pistol with hose
from the quick-release coupling of the unit.
Before taking the unit back into operation,
have a service carried out and the filter
replaced by a service engineer/technician
qualified by Dürr Technik.
Storage of the unit
WARNING
Risk of explosion of the pressure tank
and pressure hoses
❯The pressure tank and the pressure
hoses must be vented before they are
stored or transported.
❯Protect the unit against moisture, dirt and
extreme temperatures during transport (refer to
the section on "Ambient conditions").
❯Only store the unit when it has been completely
emptied.
10.2 Switching the unit on/off
9
9 On/Off switch
❯The unit is switched on by pressing the on/off
switch (9).
The unit starts up and the pressure vessel is fil-
led. When the cut-off pressure is reached the
unit switches off automatically.
❯The unit is switched off by pressing the on/off
switch (9) again.
Maximum operating
pressure:
8 bar
Switch-on/cut-off pres-
sure:
5 /7 bar
10.3 Start-up cycles
The motors in the compressor stations are
designed for 10 starts/stops per hour. More fre-
quent switching will lead to increased wear.
Usage
1015100100L02 2107V005 15
EN

10.4 Notes on the compressed air
pistol
The compressed air pistol is available as
an accessory for SICOLAB mini ENDO
units and is operated with compressed
air.
Operating instructions for safe handling of
the compressed air pistol and cleaning
and reprocessing instructions are availa-
ble as a download "Operating instruc-
tions for cleaning pistols made of
stainless steel" from www.reinigung-
spistolen.de.
NOTICE
Excessively high pressure on the unit
can cause damage to the endo-
scopes.
If the pressure settings on the unit are
higher than the pressure specifications
provided by the endoscope manufac-
turer, the endoscopes can be damaged.
❯Adjust the pressure settings in accord-
ance with the information provided by
the endoscope manufacturer.
Due to design-related differences in the
channel diameters of the endoscopes to
be dried, the drying times can vary.
Note: When drying medical devices such
as endoscopes, always follow the appli-
cable specific regulations from the manu-
facturer or from the Robert Koch Institute.
WARNING
Risk of injury due to improper use of
the compressed air pistol if the com-
pressed air pistol is pointed at parts
of the body or orifices while it is used.
The pressure of the air flow can cause
injuries.
❯During operation, the compressed air
pistol must not be directed at parts of
the body or orifices.
CAUTION
Risk of material damage due to
attachments becoming detached from
the compressed air pistol during oper-
ation.
If the attachments become detached
from the compressed air pistol during
operation, this can cause material dam-
age.
❯Before using the unit, make sure that
the attachments are properly secured
on the compressed air pistol.
10.5 Setting the pressure reducer
The compressed air connection to the pressure
reducer has a constant pressure of 1 bar (set at
the factory).
10
8
9
5
5 Pressure reducer
8 Quick-release coupling
9 On/Off switch
10 Pressure gauge
The pressure reducer (5) regulates the desired
working pressure at the quick-release coupling
(8).
The pressure reducer (5) can be adjusted. The
maximum constant operating pressure is 5 bar.
Adjusting the pressure reducer:
The constant operating pressure can be adjusted
by turning the pressure reducer (5). The pressure
can be read off at the pressure gauge (10).
❯To increase the supply pressure: Turn the
pressure reducer (5) clockwise towards "+".
❯To decrease the supply pressure: Turn the
pressure reducer (5) anti-clockwise towards
"-".
Usage
16 1015100100L02 2107V005
EN

11 Maintenance
De-energise the unit prior to working on it or in the event of potential danger (e. g. pull the mains
plug) and prevent it from being switched back on again.
Perform an inspection and maintenance no later than after one year or 5000 operating hours. If
needed, service the unit at shorter intervals.
Maintenance and repair work may be done only by Dürr Technik or Dürr Technik-qualified per-
sonnel/service engineers.
11.1 Maintenance schedule
Maintenance
interval
Maintenance work
Monthly ❯Disinfect and clean the surfaces.
❯Check the fan.
Annually / after
5000 operating
hours
❯Servicing of the unit and replacement of the air intake filter and the fine filters in
the condensate separator and in the fine filter assembly.
❯Servicing to be performed only by a Dürr Technik-qualified service engineer/
technician.
Usage
1015100100L02 2107V005 17
EN

11.2 Disinfecting and cleaning the
surfaces
The surface of the unit can be disinfected with
disinfectant wipes. Preparations from the group
of surface disinfectants should be used for this
purpose. For reasons of materials compatibility,
preparations based on the following agents are
suitable:
- Aldehydes
- quaternary ammonium compounds.
The following preparations on the basis of:
- phenol-containing compounds
- halogen-releasing compounds
- strong organic acids
- oxygen-releasing compounds.
are not suitable because of possible damage
to the materials.
We recommend the following disinfectants for
cleaning the surfaces:
üB 60 Disinfectant wipes
❯Comply with the operating instructions for the
disinfectant wipes.
11.3 Checking the fan
Perform a monthly visual inspection of the fan to
check that it moves freely. If a fan is locked the
unit must be taken out of operation. The fans run
constantly when the compressor is operational.
16
16
16 Ventilator
Usage
18 1015100100L02 2107V005
EN
Other manuals for SICOLAB mini ENDO
1
Table of contents
Other Dürr Technik Laboratory Equipment manuals
Popular Laboratory Equipment manuals by other brands

Bruker
Bruker IFS 125M user manual

VERDER
VERDER Carbolite Gero HTMA 7/95 Installation, operation and maintenance instructions

Conair
Conair 18 Series user guide

Lafayette
Lafayette 2LIGHT manual

Westlab
Westlab 663-890 product manual

Thermo Scientific
Thermo Scientific Lindberg/Blue M Mini-Mite TF55030 Installation and operating manual