DAELIM ROADWIN 125 FI User manual


OOWWNNEERR’’SS MMAANNUUAALL
11. 2003 PRINTED
11. 2003 PUBLICATION
NNOOCCOOPPYY
●OPERATOR AND PASSENGER
This motorcycle is designed to carry the operator and one passenger.
●ON-ROAD USE
This motorcycle is designed to be used only on the road.
●READ THIS OWNER'S MANUAL CAREFULLY
Pay special attention to statements preceded by the following words:
Indicates a strong possibility of severe personal injury or death if instructions are not followed.
Indicates a possibility of personal injury or equipment damage if instructions are not followed.
Gives helpful information.
This manual should be considered a permanent part of the motorcycle and should remain with the motorcycle when resold or otherwise
transferred to a new owner or operator.
IMPORTANT NOTICE
WARNING
CAUTION
NOTE

SPECIFICATION·······································
OPERATION INSTRUCTION ····························
SAFETY PRECAUTIONS································
PRIOR TO STARTING VEHICLE ···························
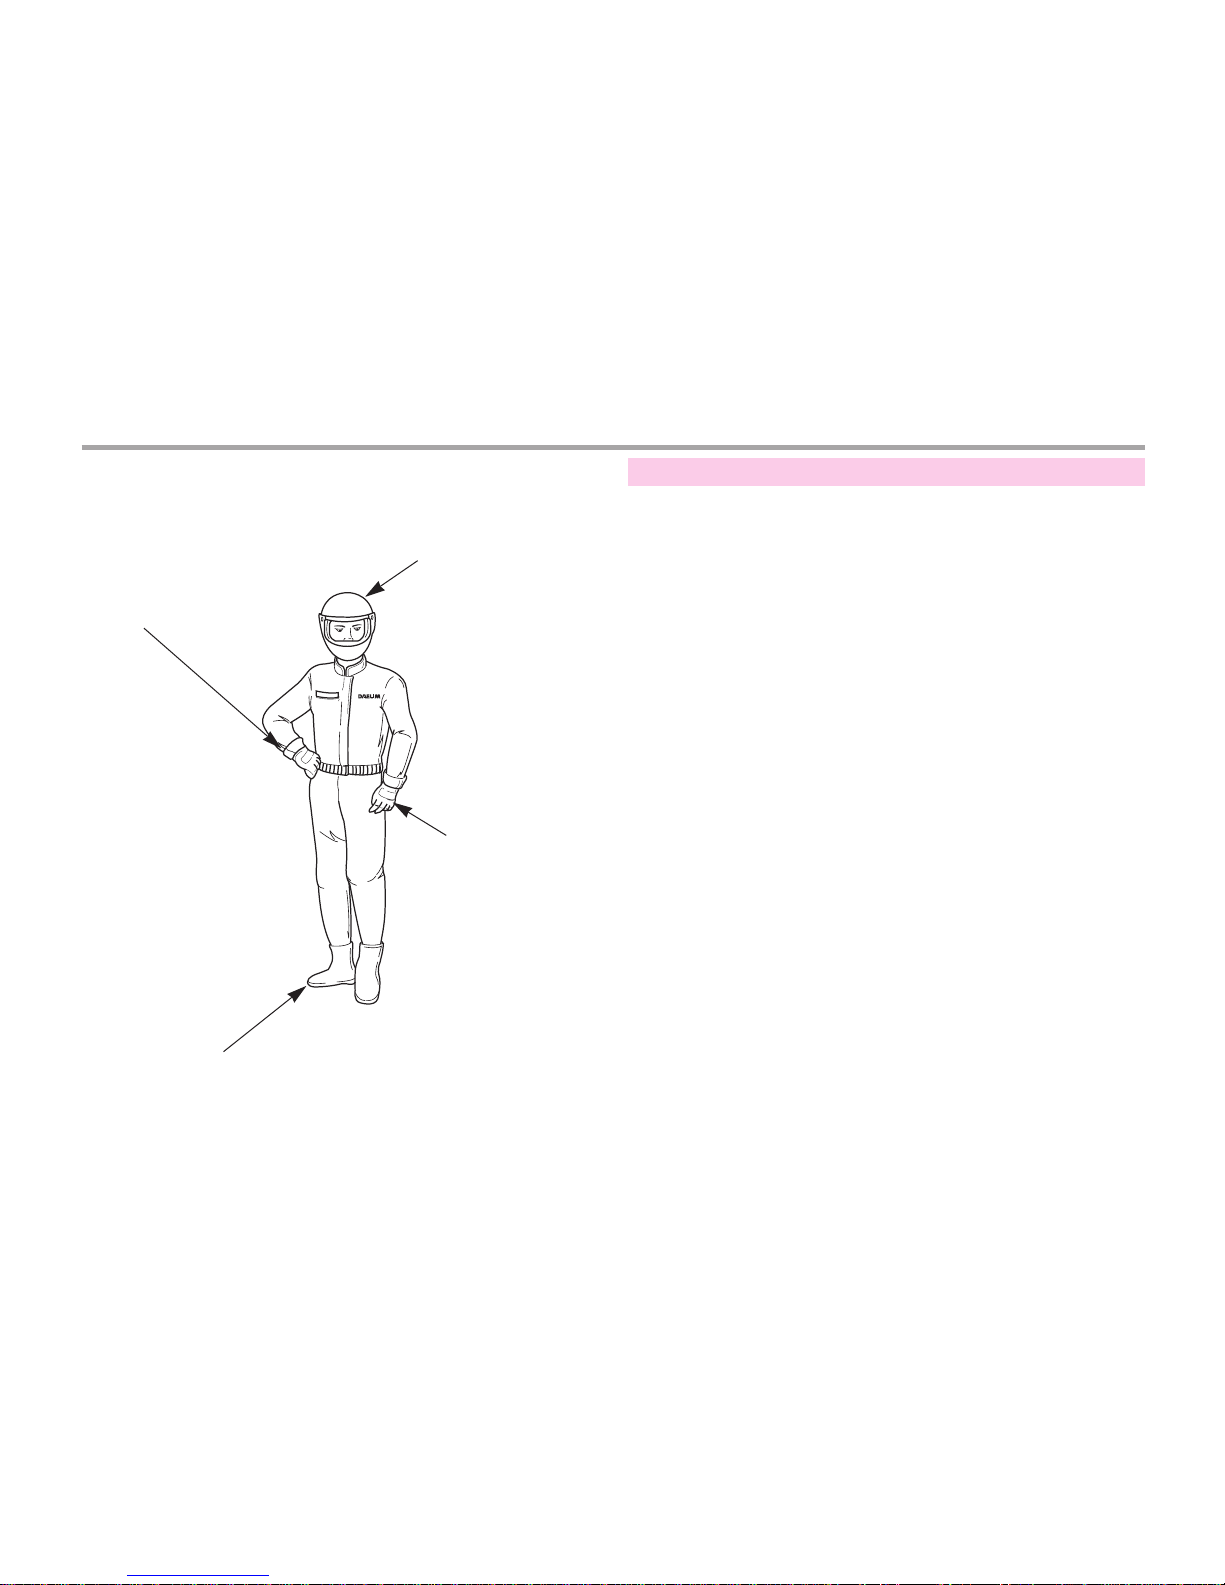
CORRECT ATTIRE ·····································
OPERATION ··········································
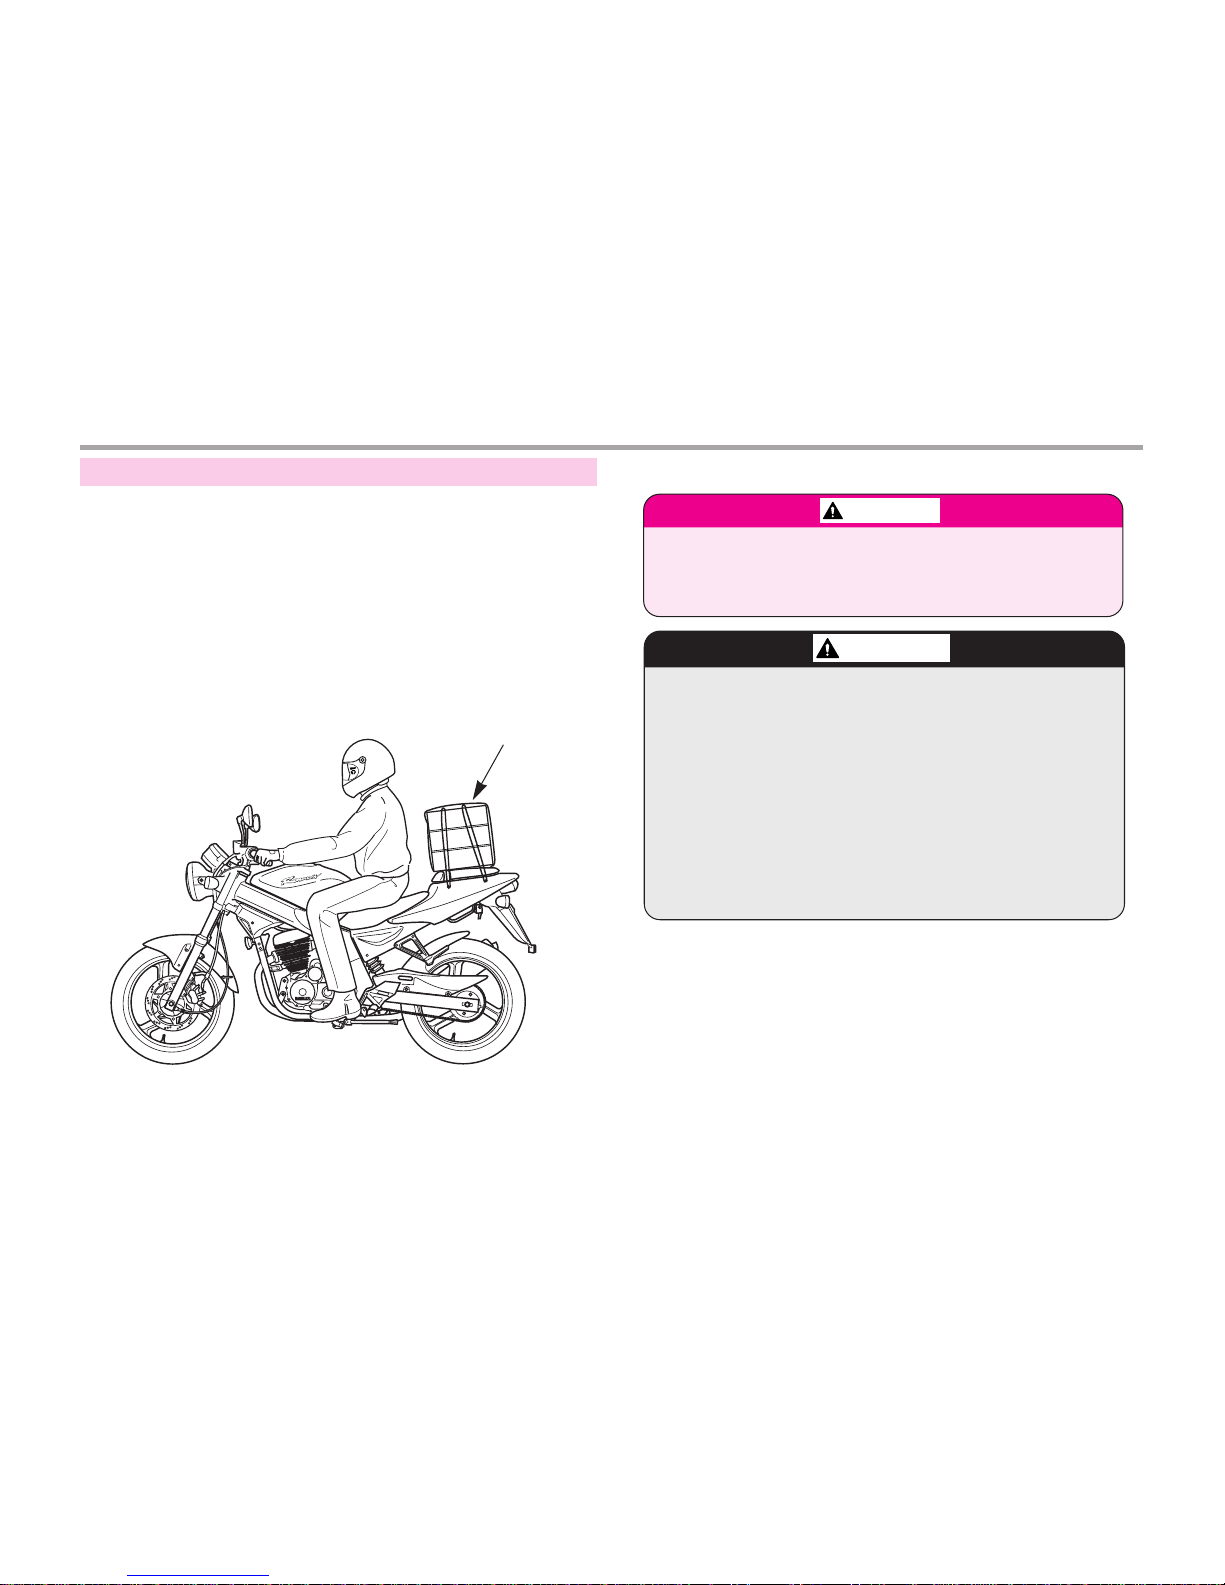
CARGO ·············································
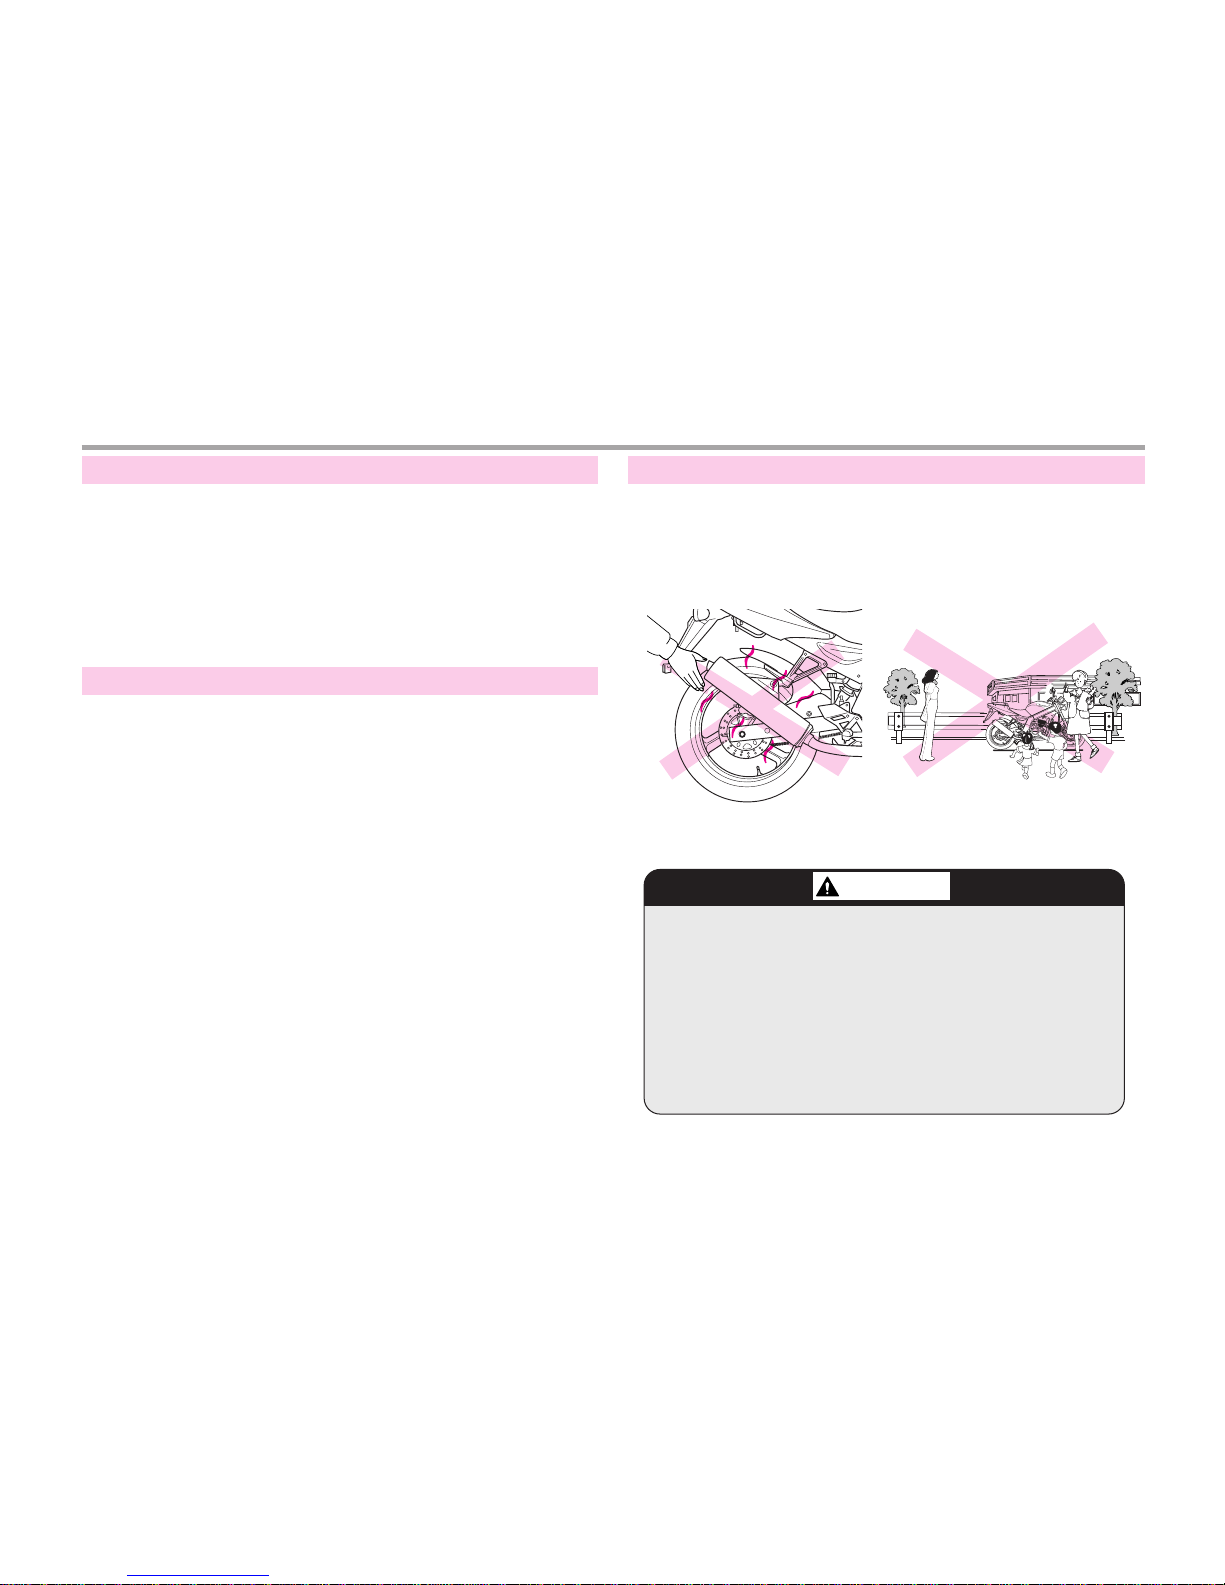
MODIFICATION········································
ATTACHMENT ········································
MUFFLER············································
PARTS LOCATION ····································
METER READING AND USAGE ··························
METER ·············································
TACHOMETER ········································
FUEL GAUGE ·········································
INDICATOR LAMPS ·····································
SWITCH OPERATION ··································
MAIN SWITCH ········································
KEYS ··············································
HEADLIGHT ··········································
STARTER BUTTON ·····································
WINKER SWITCH ······································
HORN BUTTON········································
EQUIPMENT USAGE ···································
STEERING LOCK ······································
SEAT ···············································
HELMET HOLDER ······································
STORAGE COMPARTMENT ·······························
SELF INSPECTIONS BEFORE OPERATION ···············
BRAKES·············································
TIRES ··············································
CLUTCH·············································
FUEL ···············································
ENGINE OIL ··········································
LIGHTS AND WINKER ···································
BACK MIRROR ········································
LICENSE PLATE ·······································
OPERATION ··········································
PRE-RIDE INSPECTION··································
STARTING THE ENGINE ·································
IF ENGINE CANNOT BE STARTED ··························
RUNNING-IN··········································
RIDING ·············································
BRAKING ············································
PARKING ············································
1
CONTENTS
3
4
4
5
5
6
7
8
8
8
9
12
12
12
13
13
14
14
15
15
16
16
16
17
17
17
18
18
19
19
21
23
24
25
25
26
26
26
26
27
28
28
29
30
30

MAINTENANCE········································
MAINTENANCE SCHEDULE ·······························
TOOL KIT ············································
FRAME AND ENGINE NUMBERS ····························
MAINTENANCE PRECAUTIONS ····························
THROTTLE OPERATION ·································
AIR CLEANER ·········································
ENGINE OIL ··········································
SPARK PLUG ·········································
DRIVE CHAIN ·········································
WHEEL REMOVAL ······································
BRAKE PAD WEAR ·····································
IDLE SPEED ··········································
SIDE STAND ··········································
BATTERY ············································
FUSE REPLACEMENT ···································
BULB REPLACEMENT ···································
CABLE RUBBER PART ··································
CLEANING ···········································
STORAGE GUIDE ······································
SAFE DRIVING ········································
PREPARATION BEFORE DRIVING ·····················
DRIVING METHOD ··································
DRIVING POSITION ···································
PRECAUTION WHEN DRIVING ···························
STARTING ·········································
TURNING METHOD ··································
PRINCIPLE OF TURN ··································
EFFECT OF SPEED ···································
3 POSITIONS OF TURNING ·····························
TURNING METHOD ···································
PRECAUTION WHEN TURNING ··························
BRAKING METHOD··································
BASIC PRINCIPLE OF BRAKE(FRICTION FORCE)··············
RESTRAINT OF BRAKING EFFECT (INERTIA)·················
BRAKING METHOD ···································
COMPARISION OF BRAKING DISTANCE ····················
IMPACT WHEN COLLISION······························
WIRING DIAGRAM ·····································
2
31
32
34
34
35
35
36
37
38
39
41
43
44
44
45
46
47
49
49
50
51
51
52
52
53
54
55
55
55
56
57
58
59
59
59
60
60
60
61

3
LENGTH×WIDTH×HEIGHT
WHEEL BASE
GROUND CLEARANCE
SEAT HEIGHT
DRY WEIGHT
PASSENGER
ENGINE TYPE
PISTON DISPLACEMENT
BORE AND STROKE
STARTING SYSTEM
TRANSMISSION TYPE
IGNITION SYSTEM
BATTERY CAPACITY
2,010×740×1,040mm
1,380mm
150mm
780mm
130kgf
OPERATOR AND ONE PASSENGER
AIR & OIL COOLED
4 CYCLE, SOHC
124.1cc
56.5×49.5mm
START MOTOR
5 STEPS RETURN
DC-C.D.I
12V 10Ah(MF TYPE)
16.0ℓ
1.1ℓ
110/70-17 54P
140/60-17 69P
TELESCOPIC
SINGLE ARM
HYDRAULIC DISK
HYDRAULIC DISK
CR8EH-9
15A
12V 35W/35W
12V 21/5W
12V 10W×4
12V 5W
ITEM DATA ITEM DATA
FR.
RR.
FR.
RR.
FR.
RR.
SPARK PLUG
FUSE
HEADLIGHT BULB
STOP/TAIL LIGHT BULB
WINKER BULB
POSITION LIGHT BULB
FUEL TANK CAPACITY
ENGINE OIL CAPACITY
TIRE SIZE
SUSPENSION
BRAKE
SPECIFICATION

This manual describes matters pertaining to correct operation,
safe operation and simple maintenance of the vehicle you
purchased.
To ensure more comfortable and safer operation, make sure to
read this manual carefully prior to operation.
●The photographs and drawings shown in this manual may
differ from those of actual vehicles due to changes in vehicle
specifications and modifications made.
●This motorcycle is designed for 2 riders including the
operator.
●Careful driving and the wearing of proper attire and safety
equipment are the most important factors in the safe operation
of the vehicle. Please obey traffic regulations and do not be
hurried and careless.
●Many new vehicle owners operate their newly purchased
vehicles with great care and attention to safety factors.
However, after becoming accustomed to the operations are
often discarded, which can lead to accidents. Please don't let
this happen to you and always approach the operation of your
vehicle with the safety considerations needed.
When operating the motorcycle, always keep in mind and
obey the notes of precaution printed on the
““Safety
Precaution Label””
attached to the motorcyle.
4
OPERATION INSTRUCTION SAFETY PRECAUTIONS
CAUTION
●Do not use polluted gasoline.
Using polluted gasoline will cause rust inside the
fuel tank, and will close the supply of fuel to the
carburetor, leading to an improper engine starting
or may cause serious damage to an engine.
●Do not use polluted or low-grade oil.
Always use genuine oil to protect and extend
motorcycle performance and its life span.
●If any failure occurs due to the use of polluted
gasoline or oil, such failure will be excluded from
being eligible for repairs under the warranty.
●Always wear helmet.
●Always put on gloves.
●Observe posted speed limits.
●Park the motorcycle away from people (especially
children) as the muffler can get very hot.
●For safety, do not illegally modify the vehicle.
●Regularly conduct specified maintenance
inspections.
<Maintenance Inspection Points>
Brakes, Tires, Oil, Lights, Horn, Instruments

●Read user's manual carefully.
●Conduct maintenance checks prior to operation.
●Always maintain motorcycle in clean status and carry out
specified maintenance checks.
●Make sure to stop engine and stay away from fire when
fueling.
●Exhaust gas contains harmful substance such as carbon
monoxide. Start engine in well-ventilated places.
●Always make sure to wear helmet for safety. Wear gloves and
safety goggles.
●Do not wear uniforms which might hinder operation. It is
dangerous if the uniform is caught by brake lever or by the
rotating part of drive chain.
●Do not wear slippers which might obstruct brake operation or
transmission gear operation.
●Many automobile/motorcycle accidents happen because the
automobile driver does not “see” the motorcyclist.
Make yourself conspicuous to help avoid the accident that
wasn’t your fault :
- Wear bright or reflective clothing.
- Don’t ride in another motorist’s “blind spot”.
5
PRIOR TO STARTING VEHICLE CORRECT ATTIRE
WARNING
●Not wearing a helmet increases the chance of serious
injury or death in a crash.
●Be sure you and your passenger always wear a helmet,
eye protection and other protective apparel when you
ride.

●Operators should naturally fix bodies to keep smooth driving.
●Please check whether or not you are unnaturally strained and
strung up.
●Driving pose has a great influence on safe operation.
Please always maintain the center of your body in the middle of
seat. Especially do not sit at the rear seat because it may lessen
the weight of front wheel and cause trembling steering wheel.
●A passenger should hold on to the vehicle or the operator with
both hands and keep both feet on the pillion step bar.
●When wanting to turn, slightly lean to body toward the
direction of the turn. It is unsafe if the body is not moved in
union with the vehicle.
●Curvy roads and poor, unpaved roads constantly change in
surface quality. Driving on these roads can be unsafe if certain
safety precautions are not followed.
●In order to safely drive through these driving conditions,
anticipate coming road conditions, slow down to at least half
the normal speed, and relax your shoulders and wrists while
securely holding the handles.
●Driving with one or both hands not holding the handles or the
front wheel lifted can cause severe injury or death of the driver
resulted from the turnover of the vehicle.
6
OPERATION
A helmet should always be
worn and the helmet chin
strap should be securely
fastened.
Always put on gloves.
Correct shirts or jackets with
tight-fitting sleeves should be
worn,
Shoes should fit properly, and shoes having little or
no heel should be worn.

●When carrying cargo, you must keep in mind that operating the
motorcycle, especially when turning, will be different.
●Make sure not to overload the motorcycle with goods as this
can make the motorcycle unstable during operation.
7
CARGO
CAUTION
●Only load cargo in or on designated areas as
placing or fastening cargo to other areas can cause
damage to the vehicle.
●Do not place articles between the frame body
cover and engine as this can burn the goods.
●Do not attach large or heavy items (such as a
sleeping bag or tent) to the handle bars or fork.
Unstable handling or slow steering response may
result.
MAXIMUM LOAD : 30kg
WARNING
●Overloading or improper loading can cause a crash and
you can be seriously hurt or killed.
●Follow all load limits in this manual.

8
●Modification of vehicle structure of function deteriorates
manipulatability or causes exhaust noise to become louder
shortening the vehicle life. These modifications are not only
prohibited by law but also are the acts harmful to other people.
Modifications are not covered by warranty.
●Except designated attachment by DAELIM MOTOR CO.,
LTD., don't attach any extra lighting device, because it may
cause an early discharging of battery.
●Carefully inspect the accessory to make sure it does not
obscure any lights, reduce ground clearance and banking angle,
or limit suspension travel, steering travel or control operation.
●Do not add electrical equipment that will exceed the
motorcycle’s electrical system capacity. A blown fuse could
cause a dangerous loss of lights or engine power.
●This vehicle was not designed to pull a sidecar or trailer.
Handling may be seriously impaired of so equipped.
●Pay particular attention to fellow passenger so that he/she can
prevent getting burnt by the hot muffler during travel.
ATTACHMENT
MUFFLER
CAUTION
●Do not park in the place where many pedestrians
are passing through. Pedestrians or children can be
burned by contacting with the muffler.
●Fellow passenger care must pay enough attention
not to be burn by contacting with the muffler.
●If haystack or vinyl is stuck to the muffler, fire can
be occurred.
MODIFICATION

9
PARTS LOCATION
km/h
x1000rpm
mph
0
0
F
E
2
3
4567
8
9
10
11
20
40
60 80
120
140
160
100
N
BACK MIRRORBACK MIRROR
CHOKE LEVER
PASSING SWITCH
CLUTCH LEVER
HEADLIGHT
DIMMER SWITCH
WINKER SWITCH
HORN BUTTON FUEL FILLER CAP
HEADLIGHT SWITCH
FRONT BRAKE FLUID
RESERVOIR
MAIN SWITCH
FRONT BRAKE LEVER
THROTTLE GRIP
STARTER BUTTON
FUEL GAUGE
TACHOMETER
SPEEDOMETER

10
PARTS LOCATION
REAR BRAKE PEDAL OIL FILLER CAP/DIPSTICK
MAIN STEP BAR
PILLION STEP BARMUFFLER
BATTERY
REAR TIRE
CALIPER
BRAKE DISK
REAR BRAKE FLUID RESERVOIR
HEADLIGHT
FRONT TIRE

11
PARTS LOCATION
RADIATOR
MAIN STAND SIDE STAND MAIN STEP BARGEAR SHIFT PEDAL
BRAKE DISK
CALIPER
PILLION STEP BAR
REAR CUSHION
HELMET HOLDER
TOOL BOX

<SPEEDOMETER>
Shows riding speed.
<ODOMETER>
Shows accumulated mileage.
<TRIPMETER>
Shows mileage per trip.
To reset the tripmeter, turn the tripmeter
knob to the direction of arrow.
Shows engine revolutions per minute.
<TACHOMETER RED ZONE>
Never allow the tachometer needle to
enter the red zone, even after the engine
has been broken in.
x1000rpm
F
E
N
x1000rpm
F
E
N
12
METER READING AND USAGE
METER
TACHOMETER
SPEEDOMETER TACHOMETER
FUEL GAUGEINDICATOR LAMPS
SPEEDOMETER ODOMETER
ODOMETER
TRIPMETER
TRIPMETER RESET KNOB
TACHOMETER RED ZONE
TACHOMETER
TRIP METER
CAUTION
●Running the engine beyond
recommended maximum engine
speed (the beginning of the
tachometer red zone) can damage the
engine.

Indicates amount of gasoline in fuel tank.
(The fuel gauge needle always indicates
gasoline level regardless of whether main
switch is in "OFF" position or in "ON"
position.) If needle is within E mark,
immediately fill gasoline. Balance at this
time is approximately 1.2 litres.
<HIGH BEAM INDICATOR>
Lights when the headlight is on high
beam. (blue)
<NEUTRAL INDICATOR>
Lights when the transmission is in neutral.
(green)
<LEFT WINKER INDICATOR>
Flashes when the left turn signal operates.
(green)
<RIGHT WINKER INDICATOR>
Flashes when the right turn signal
operates. (green)
13
x1000rpm
F
E
x1000rpm
F
E
N
TACHOMETER
NEUTRAL INDICATOR HIGH BEAM INDICATOR
LEFT WINKER
INDICATOR
LEFT WINKER
INDICATOR
RIGHT WINKER
INDICATOR
FUEL GAUGE
FUEL GAUGE INDICATOR LAMPS
WARNING
●To avoid running out of fuel that
may result in a sudden stop.

14
The main switch is used to turn on or turn
off engine.
The main switch is below the indicator
panel.
LOCK
OFF
ON
PUSH
I
G
N
I
T
I
O
N
MAIN SWITCH
SWITCH OPERATION
CAUTION
●Prior to dismounting from the
motorcycle, make sure to lock the
steering wheel and remove key.
●If the key is left in "ON" position
without starting engine, battery is
discharged.
●Do not use a number of keys together
with a metal key holder. The keys
and the key holder may cause
scratches or other damage to the
cover while operating the motorcycle.
(Recommend cloth or leather key
holders)
MAIN
SWITCH
ON
OFF
KEY
LOCK
WARNING
●Do not manipulate main switch key
during operation. If the main switch
key is placed on "Off" or "Lock"
position, all electrical system will not
function. Never operate the main
switch key during travel as it might
cause unexpected accidents, If it is
necessary to remove the main switch
key, stop the vehicle first prior to
removing.
Starts engine. Power
is supplied to
electrical circuits.
Key
cannot be
removed
ON
OFF
LOCK
Key
can be
removed
Key
can be
removed
Stops engine. Cuts
off all electrical
circuits.
Locks steering
wheel. Cuts off all
electrical circuits
and steering wheel
is locked.
Key
position Function Key
Removal

This motorcycle has two keys and a key
number plate.
You will need the key number if you ever
have to replace a lost key. Store the plate
in a safe place.
<HEADLIGHT SWITCH>
The headlight switch has three positions;
, and OFF marked by a dot to the
below of .
: Headlight, taillight, position
light and meter lights on.
: Position light, taillight and
meter lights on.
OFF (dot) : Headlight, taillight, position
light and meter lights off.
<
HEADLIGHT DIMMER SWITCH
>
Push the dimmer switch to (HI) to
select high beam or to (LO) to select
low beam.
<
PASSING LIGHT CONTROL SWITCH
>
When this switch is pressed, the headlight
flashes on to signal approaching cars or
when passing.
15
HEADLIGHT
NOTE
●Do not drop the keys or set heavy
objects on them.
●Do not grind, drill or in any way alter
the original shape of the keys.
●Keep the keys away from magnetic
objects.
CAUTION
●Use the high beam only in the
suburban road or when the usage of
the high beam not hinder the safe
driving of the car ahead.
D
D
KEYS
KEY NUMBER PLATE HEADLIGHT SWITCH
PASSING LIGHT CONTROL
SWITCH
HEADLIGHT DIMMER SWITCH

The starter button is next to the throttle
grip.
When the starter button is pressed, the
starter motor cranks the engine. See page
24 for the starting procedure.
Move to ⇦(L) to signal a left turn, ⇨(R)
to signal a righ turn. Press to turn signal
off.
Press the button to sound the horn.
16
STARTER BUTTON WINKER SWITCH HORN BUTTON
STARTER BUTTON
WINKER SWITCH
CAUTION
●The winker switch does not auto-
matically turn back to its original
position after completing the turn.
Please set the switch back to its
center position after turning.
CAUTION
●Do not press starter button repeatedly
because it consumes great amount of
power causing battery to be
exhausted sooner.
HORN BUTTON

To lock the steering, turn the handlebars
all the way to the left or right, turn the key
to LOCK while pushing in.
Remove the key.
To unlock the steering, turn the key to
OFF while pushing in.
<
FRONT SEAT
>
To remove the front seat, insert the
ignition key into the seat lock.
Turn the ignition key counterclockwise,
and then pull the seat back and up.
To install the front seat, insert the tab into
the recess under the frame and push down
on the rear of the seat.
<
REAR SEAT
>
To remove the rear seat, remove both
front seat and center cover, remove the
seat mounting bolt, and then pull the seat
front and up.
To install the seat, insert the tab into the
recess under the frame and tighten the
mount bolt scurely.
17
STEERING LOCK SEAT
EQUIPMENT USAGE
Push in
Turn to LOCK
KEY
KEY
CENTER COVER
MOUNTING BOLT
FRONT SEAT
FRONT SEAT
TAB
REAR SEAT
WARNING
●Do not turn the key to LOCK while
riding the vehicle; loss of vehicle
control will result.

The helmet holder is on the left side below
the seat. Insert the ignition key and turn it
clockwise to unlock.
Hang your helmet on the holder pin. Turn
the key counterclockwise to lock the
holder and then remove the key.
The storage compatment is under the seat.
This owner’s manual and the tool kit
should be stored in the compartment.
Remove the front seat (page 17).
Pull out the center cover while turning the
lever to the left.
Reinstall the center cover by aligning its
tabs and turning the lever to the right.
HELMET HOLDER STORAGE COMPARTMENT
18
KEY
HELMET HOLDER
HOLDER PIN
TOOL KIT
CENTER COVER
WARNING
●The helmet holder is designed for
helmet security while parked. Do not
ride with a helmet attached to the
holder; the helmet may interfere with
safe operation and result in loss of
control.
NOTE
●When washing your motorcycle, be
careful not to flood this area with
water.
●This compartment is for light weignt
items.
This manual suits for next models
1
Table of contents
Other DAELIM Motorcycle manuals

DAELIM
DAELIM ROADWIN VJ125 - SERVICE User manual

DAELIM
DAELIM VS125 User manual

DAELIM
DAELIM DAYSTAR VL125E User manual

DAELIM
DAELIM DAYSTAR - User manual

DAELIM
DAELIM VJF125 User manual

DAELIM
DAELIM Roadwin 250R Fi User manual

DAELIM
DAELIM Roadwin R User manual

DAELIM
DAELIM VJF125 User manual

DAELIM
DAELIM ROADWIN - User guide

DAELIM
DAELIM ROADWIN FI - CATALOG User manual