SYMBOL SYMBOLMEANING MEANING
Indicates dangerous areas.
Serious accidents may result if instructions are not
followed.
Indicates important work. Minor injury or vehicle part damage
may result if instruction are not followed
Indicates general cautions. Provides safety and
appropriate handling procedures.
The following symbols are used in this manual to represent job-related warnings or cautions
The following abbreviations are used in this manual.
ASS’Y
LH.
RH.
Assembled part
Left
Right
In case of special greases not written on above, they have not any specific symbols.
Indicates oil applying. If there is no specific oil indicated, use the designated or recommended engine oil
Indicates molybdenum solution applying. Molybdenum solution is made by mixing engine oil and molybdenum
grease as 1:1 mixing ratio.
Indicates to apply grease(NLG 1#2)
Indicates to apply molybdenum grease(Containing more than 30% molydenum disulfide, NLG 1#2 or equivalent)
Indicates to apply molybdenum best(Containing more than 40% molydenum disulfide, NLG 1#2 or equivalent)
Indicates to apply silicone grease.
Indicates to apply ointment onto screw lock.
If not designated, use medium strength one.
Indicates to seal
Indicates the replacement part as new one whenever disassembly
Indicates to apply brake fluid. Use the recommended one(DOT3 or DOT4)
Indicates to apply the recommended oil
Indicates to use special tools
Indicates to use optional tools. Because this kind of tool is dealt as spare part, refer to the parts list to check the correct
tool number.
Indicates the reference. For left example, indicates the reference 3-1.
( 3-1)
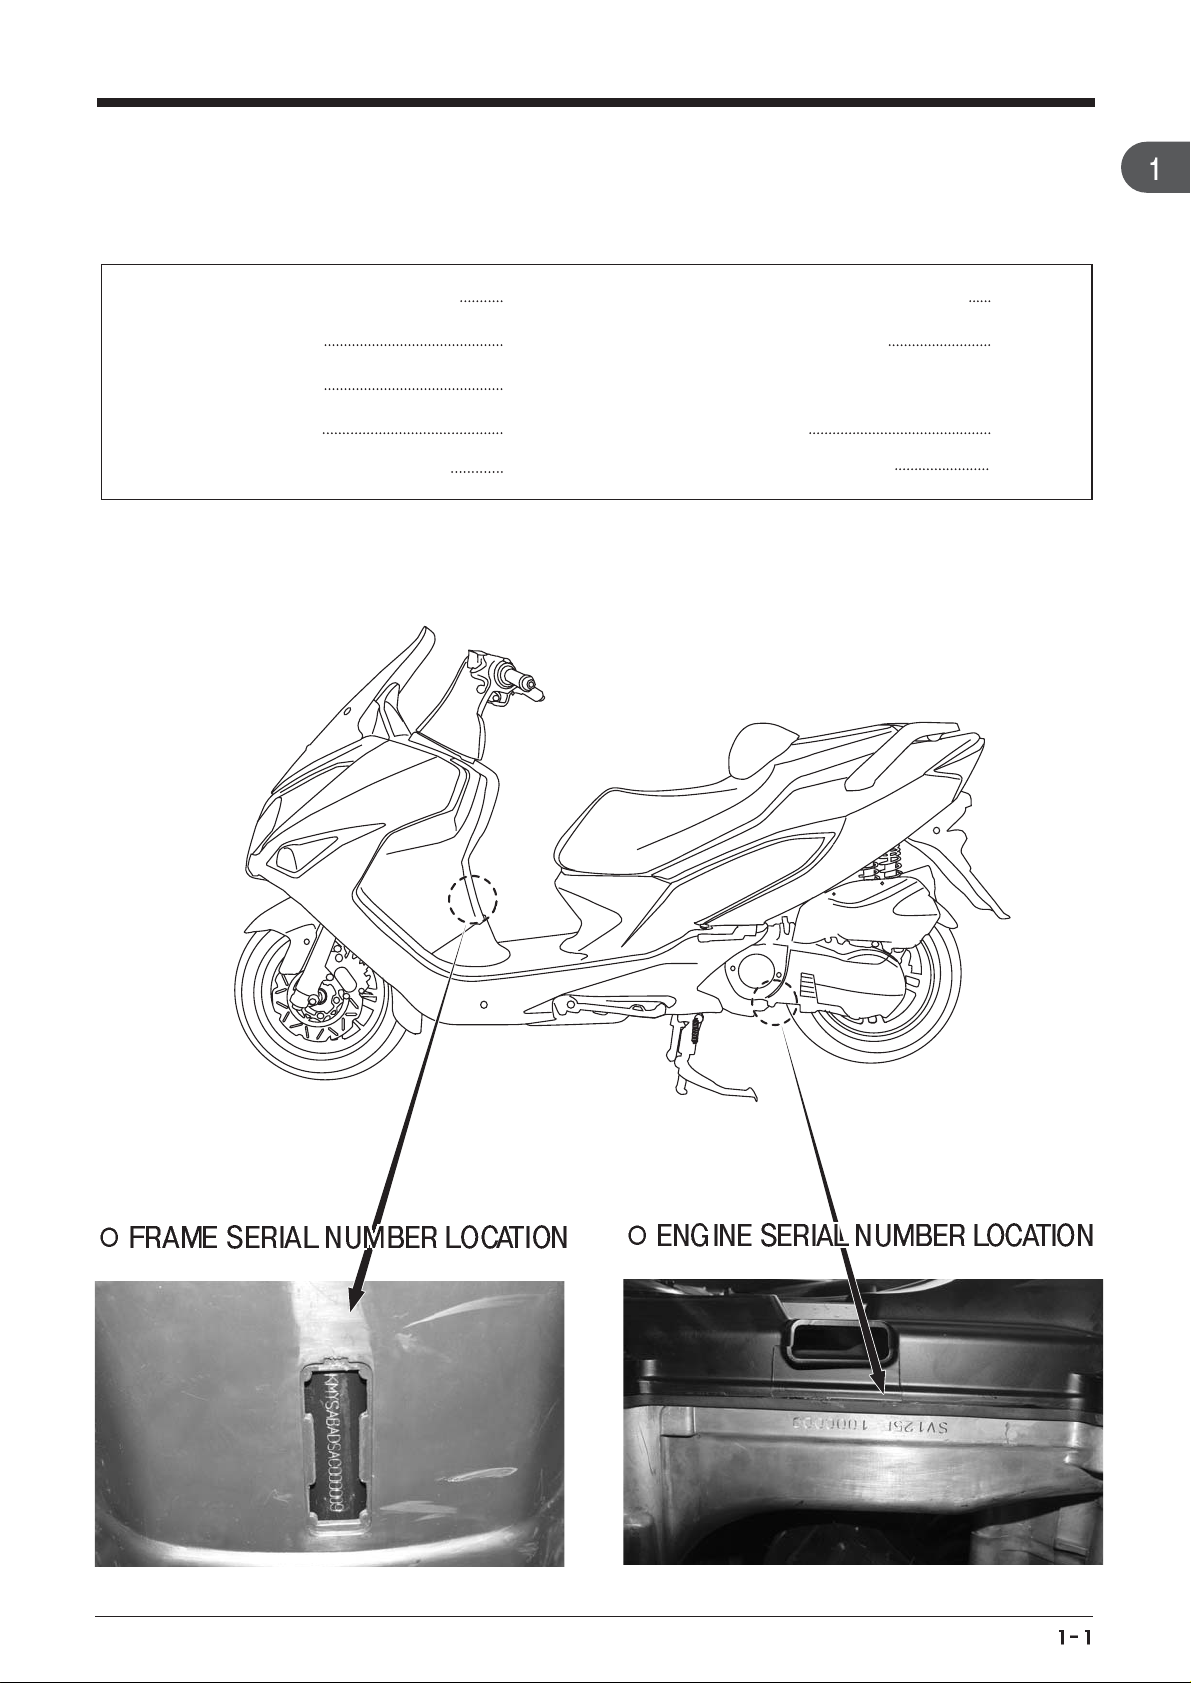
SYMBOLS /ABBREVIATIONS
SERVICE INFORMATION
WARNING WARNING
WARNING


 Supplementary service manual")