1
CONTROL PANEL
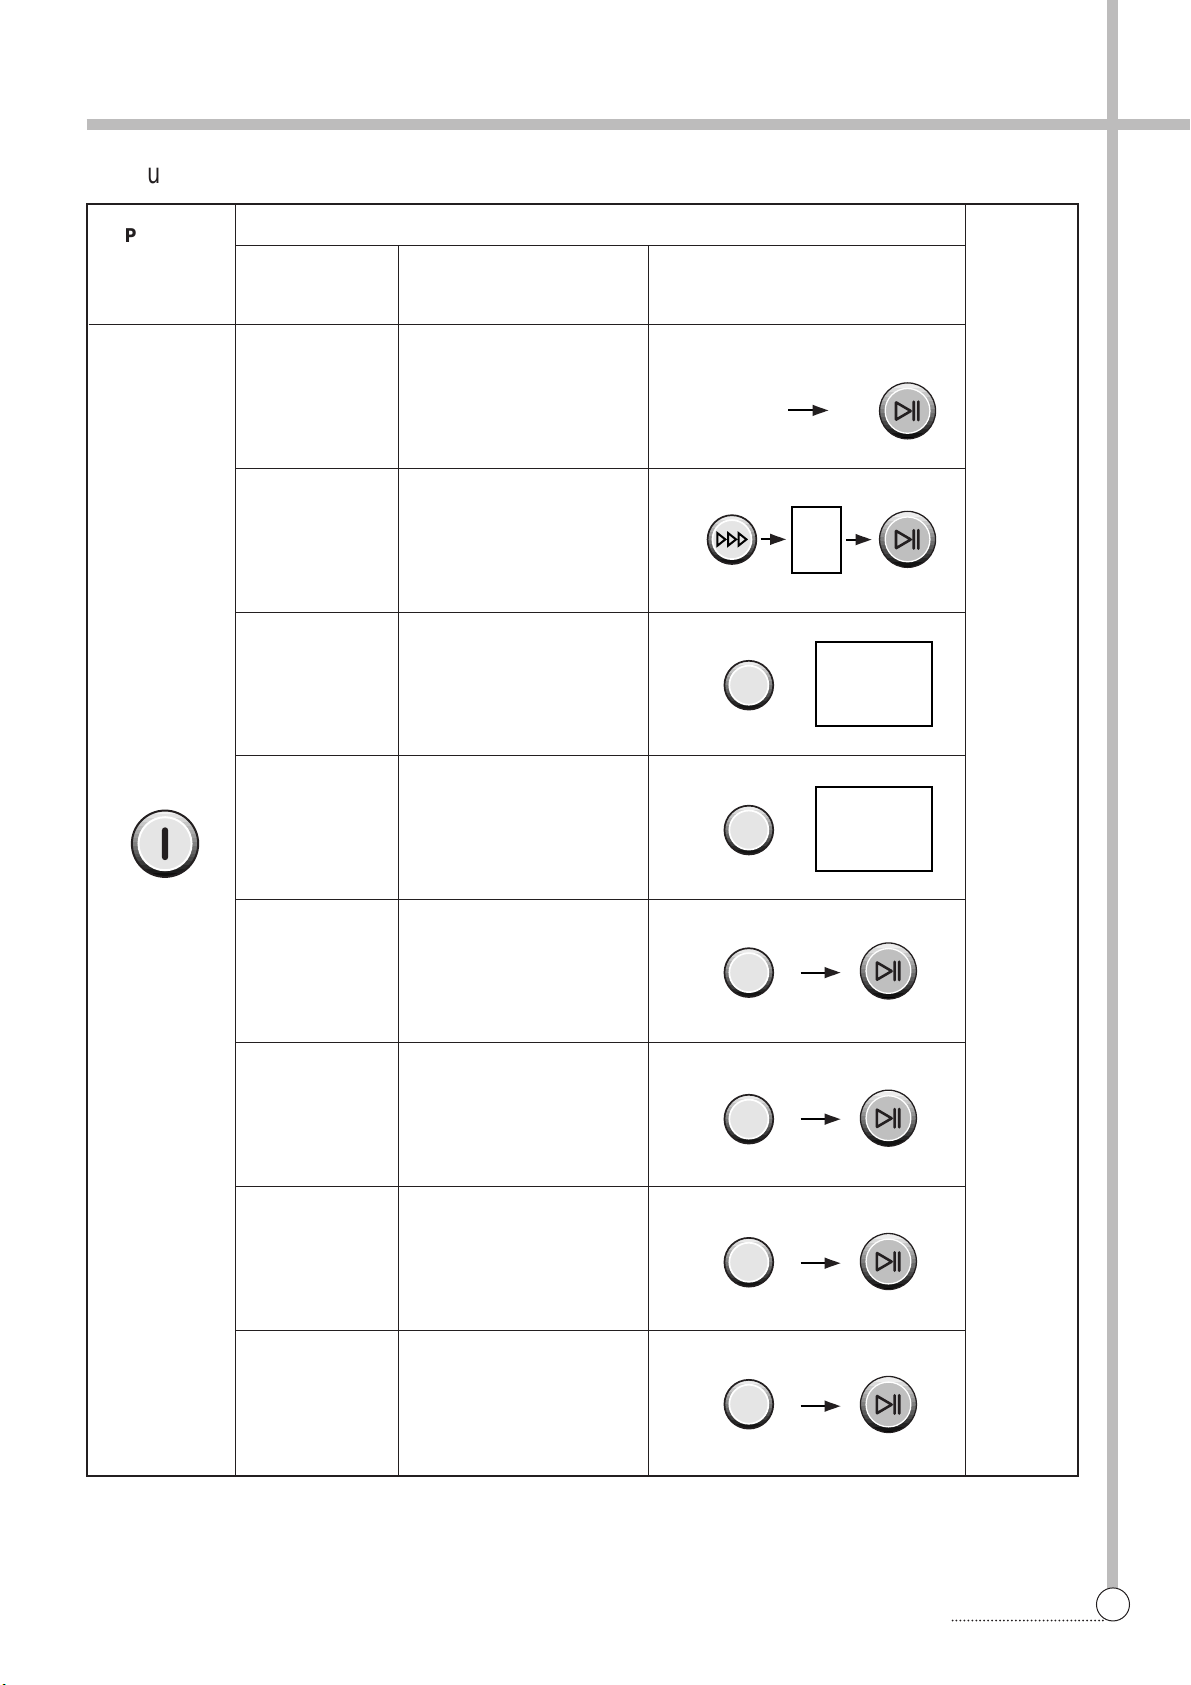
3. FUNCTIONS OF THE CONTROL PANEL
TIME DISPLAY
• The lamps easily indicate the
option selection of washing
program and process by letters.
START/HOLD BUTTON
• Operation and temporary stop
are repeated as it is pressed it
will be repeated¡‚Operation¡„,
¡‚Temporary stop¡„according to
the one time pressing or two
times pressing.
When you want to change
course in operating;
- Press the S/H button.
- Select the course that you
want to change.
- Press the S/H button again!
WASH TEMPERATURE
SELECTOR
• It can be used to choose water
temperature to be supplied.
• As the button is pressed, it will
be repeated following sings ;
COLD ¤AHOT ¤AWARM
• In case of the single valve
model, there is no water
FEED
• In case of the pump model,
there is no FEED function.
TEMP. : TEMPERATURE
WARM :
COLD+HOT WATER
COLD : COLD WATER
HOT : HOT WATER
WATER LEVEL SELECTOR
• It can be used to adjust amount
of water according to the size of
the load to be washed.
• As the button is pressed. Water
level is selected by
H.¤AM.¤AL.¤AS.¤AE.S
LEVEL. : WATER LEVEL
H. : HIGH LEVEL
M. : MIDDLE LEVEL
L. : LOW LEVEL
S. : SMALL LEVEL
E.S. : EXTRA SMALL LEVEL
COURSE SELECTOR
• It can be used to select the full-
automatic course.
• As the button is pressed, it will be
selected following order:
MEM.¤ADRY¤ASILK¤AECO.¤A
STRO.¤ANIGHT¤ABLAN¤AFUZZY
COURSE
MEM : MEMORY
DRY : DRY
SILK : SILK
ECO. : ECONOMICAL
STRO. : STRONG
NIGHT : NIGHT
BLAN : BLANKET
FUZZY : FUZZY
ALL AUTOMATIC WASHER
AERO FUZZY & AIR POWER
POWER START/
HOLD
CANCEL WASH RINSE SPIN
COURSE
WATER LEVEL
WASH TEMP.
1
4
6
10 359
1
2
3
4
5
12
14 18
FUZZY MEM. DRY
SOAK
FEED
SILK ECO. STRO. NIGHT BLAN
WASH
RES.
RINSE
SPIN
HOUR
MIN.
TIME
H.
M.
L.
S.
E.S
WARM
COLD
HOT
RES.
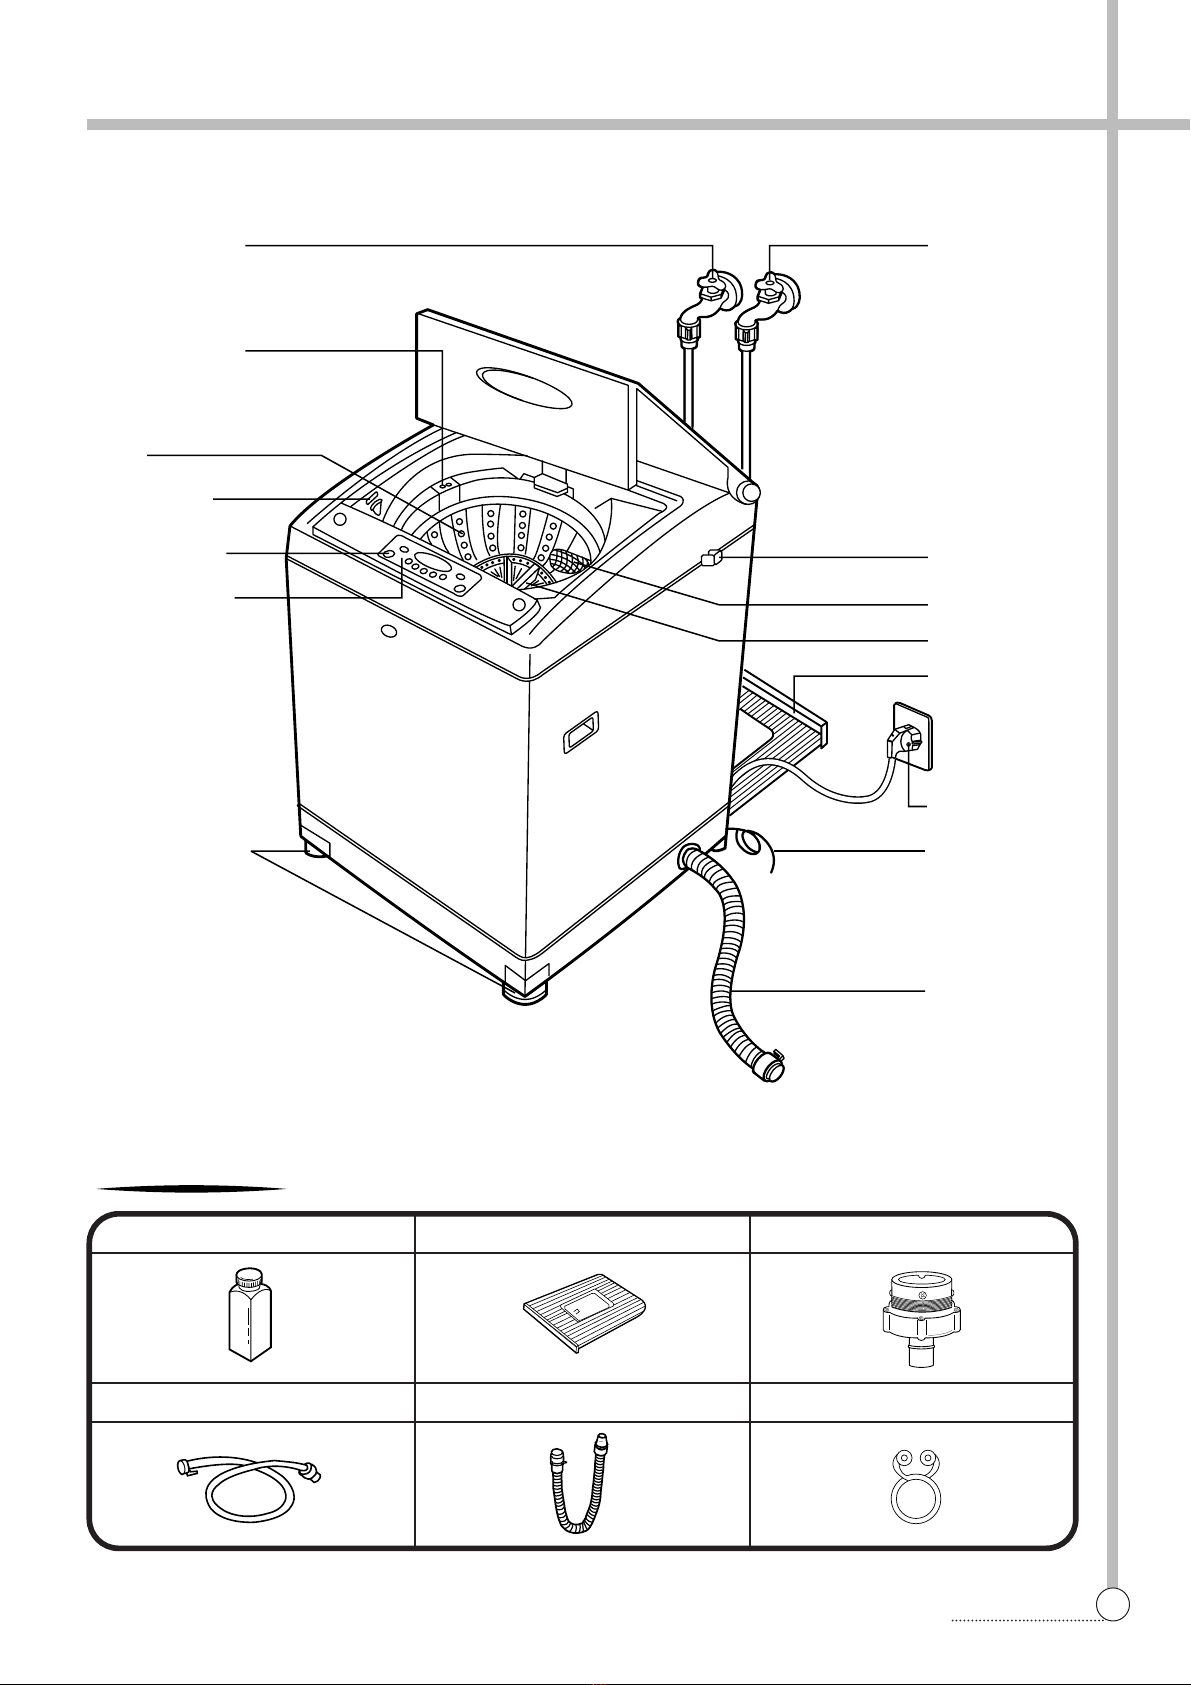
HOW TO USE SWITCH
• Press this Switch to turn the
power ON or OFF .
After turning OFF the power,
wait for more than 3 seconds
and then turn it ON again.
It has micom sensor.
As the buttons are pressed, the
lamps indicating the selection
of you desired washing
program will light up.
PRE-ENGAGEMENT
• It can be used to pre-engage
time for wash
BUTTON FOR PROGRAM
CANCEL
• It can be used to cancel the full-
automatic course.
• When the button is pressed the
display will be light down. If you
want to wash, rinse or spin, you
can press one of the button.
WASHING TIME
• It can be used to adjust washing
time
• As the button is pressed, you’ll
see the repeated.
4¤A6¤A10¤A12¤A14¤A18¤A
SOAK.
RINSE TIME SELECTOR
• This button selects the number
or times you want to rinse.
• As the button is pressed, it will
be repeated
* Non-pump Model
¤A1 time rinse ¤A1 times feed
¤A2 time rinse ¤A2 times feed
¤A3 time rinse ¤A3 times feed
¤A4 time rinse ¤A4 times feed
¤A5 time rinse ¤A5 times feed
* Pump Model
¤A1 time rinse ¤A2 times rinse
¤A3 times rinse ¤A4 times rinse
¤A5 times rinse
SPIN TIME SELECTOR
• It can be used to change spin
time.
• As the button is pressed, it will
be repeated
1¤A3¤A5¤A9 signs.
Rinse : Normal Rinse
Feed : Feed Rinse
Control Panel