IMPORTANTINFORMATION
TOAVOIDSERIOUSPERSONALINJURY,ALLUSERSAND
EMPLOYERS/OWNERSMUSTREADAND UNDERSTAND
ALL INSTRUCTIONSINTHISMANUALBEFOREOPERATING
ORMAINTAINING THISTOOL.
1
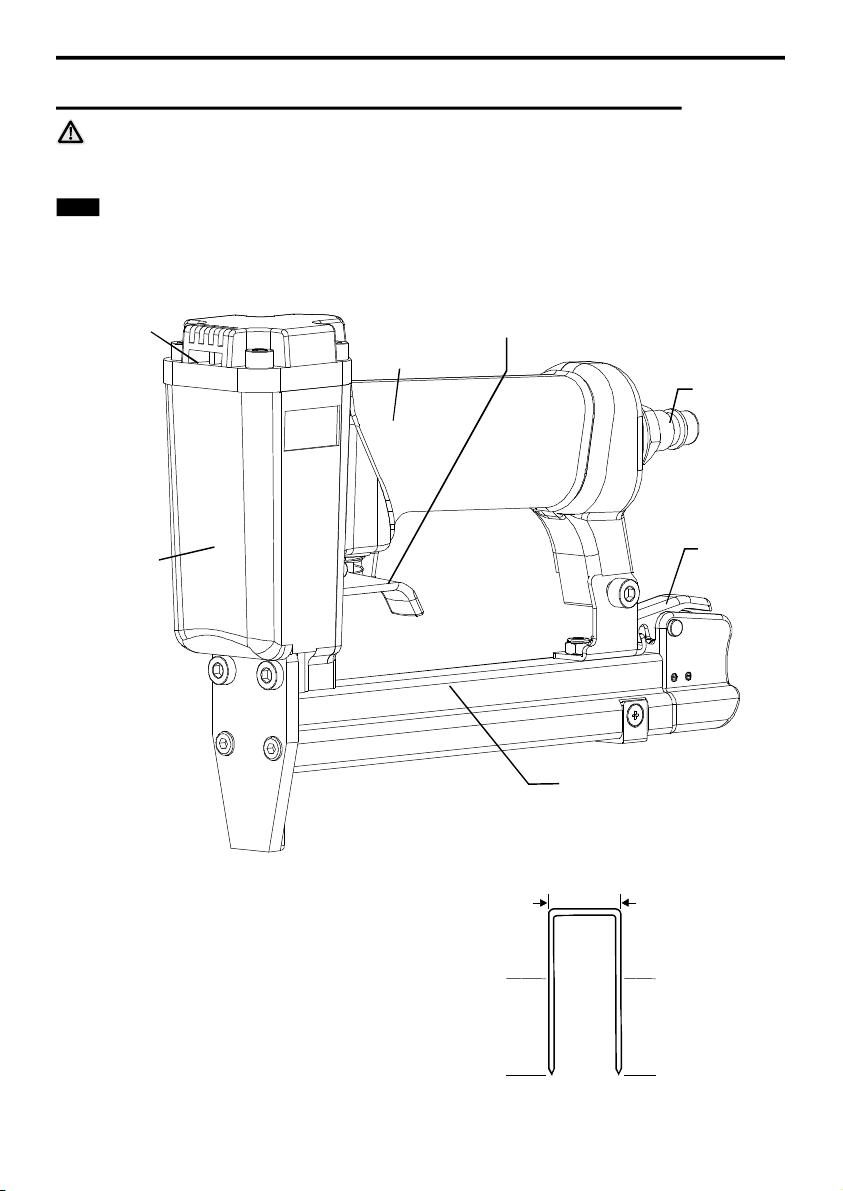
EXPLANATION OF
THENAILING ACTION
SINGLE ACTUATION MECHANISM:
CONTACTACTUATIONMECHANISM:
FULLSEQUENTIAL ACTUATIONMECHANISM:
First,press thesafetyagainstthe wood;next,pullthe
triggertodrivethe fastener.Afterfasteningonce,
fastening willnotbe possibleagainuntil thetriggeris
releasedandpressedagain.
First,press thesafetyagainstthe wood;next,pullthe
triggertodrivethefastener.First.Pullthe trigger;next,
pressthesafetyagainstthewood todrivethefastener.If
thetriggerisheldback,afastenerwillbe driveneach
timewhenthesafetyispressedagainstthe wood.
First,press thesafetyagainstthe wood;next,pullthe
triggertodrive thefastener.Followthe samesequence
tocontinuedrivingfasteners.
Anactuating
systeminwhich thedrivingoperationsarecarriedout
foraslongas thetriggerremainsactuated.Nosafety
yoko ispresent.
CONTINUOUSACTUATIONMECHANISM:
GENERALSAFETY RULES
PERSONALSAFETY
Safetyglassesmustconformtothe requirementsof
AmericanNationalStandardsInstitute,ANSIZ87.1and
provideprotectionagainstflyingparticlesbothfromthe
frontandside.Theemployermustenforce theuse of
safetyglassesby thetooloperatorandothersinwork
area.
Always
wearearprotectiontoprotectyourearsfromloudnoise,
Alwayswearhead protectiontoprotectyourheadfrom
flyingobjects.
Adustmask,non-skidsafety
shoesandahardhatmustbe usedforthe applicable
conditions.Wearafullface shieldifyou areproducing
metalfilings orwood chips.
Donotwearlooseclothingor
jewelry. Containlonghair. Keepyourhair, clothing,and
glovesawayfrommovingparts.Loose clothes, jewelry,
orlong haircan becaughtinmovingpartsandincreases
theriskofinjury.
Donotuse toolwhiletired orundertheinfluenceof
drugs,alcohol,ormedication.Amomentofinattention
whileoperating thetoolmay causeseriousinjury.
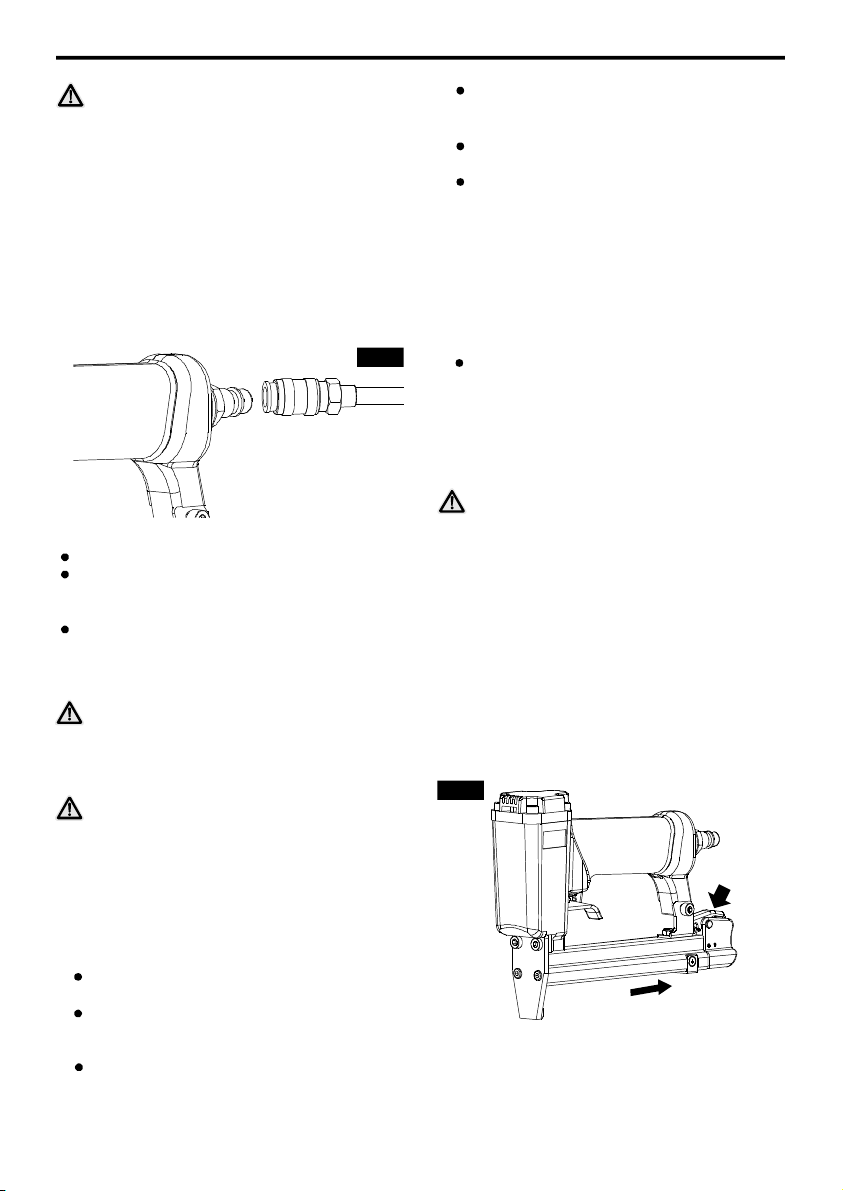
Keep fingersawayfrom
triggerwhennotdrivingfasteners,especiallywhen
connecting thetooltothe airsupply.
keepproperfootingandbalance
atalltimes.Properfooting andbalanceenablebetter
controlofthetoolinunexpectedsituations.
Entangledorsnarledhoses can
causealoss ofbalance orfootinginadditionto
unintentionaltooloperation.Attachthehose tothe
structuretoreduce theriskofloss ofbalance ofthehose
shifts.
ALWAYS WEAREARANDHEADPROTECTION.
USESAFETY EQUIPMENT.
DRESSPROPERLY.
STAYALERT,WATCH WHATYOUAREDOINGANDUSE
COMMON SENSEWHENOPERATING APOWERTOOL.
AVOIDUNINTENTIONALFIRING.
DONOTOVERREACH.
MAKESUREAIRHOSEISFREEOFSNAGSAND
OBSTRUCTIONS.DONOTATTACHANAIRHOSEOR
TOOLTOYOUR BODY.
WORK AREA
KEEPTHEWORK AREACLEANANDWELLLIGHTED.
Cluttered benchesand darkareas increasetherisksof
accidents.
suchas inthepresenceofflammable
liquids,gases,ordust.The toolcreatesasparkwhich
mayigniteflammableliquids,gasesordust.
Donotletvisitorshandlethe
tool. All visitorsshouldbekeptsafetyawayfromwork
area.
Respectthetoolasaworkingimplement.
DONOTOPERATETHETOOLINEXPLOSIVE
ATMOSPHERES,
KEEPVISITORSAWAY.
NEVERENGAGEINHORSEPLAY WITHTHETOOL.
WARNING
keepthismanualforthe safetywarningsand precautions,
operating, inspection, maintenance.Keepthismanualand
thereceiptinasafeanddryplaceforfuturereference.
OPERATORSANDOTHERSINWORK AREAMUST WEAR
SAFETY GLASSES WITH SIDESHIELDS. Whenoperating
thetool,always wearsafetyglasses withsideshields,
and makesureothersinworkareawearsafetyglasses.
TOOLUSEANDCARE
NEVERPOINTTOOLATYOURSELFOROTHERSIN
WORKAREA.
KEEPFINGERSAWAYFROMTRIGGERWHENNOT
DRIVING FASTENERSTOAVOIDACCIDENTALFIRING.
NEVERMODIFY ORALTERATOOL.
KNOWTHISTOOL.
Alwaysassumethetoolcontains
fasteners.Neverpointthetoolatyourselforothers,
whetheritcontainsfastenersornot.If fastenersare
mistakenlydriven,itcanlead tosevereinjuries.Never
engageinhorseplay withthetool. Respectthetool as a
working implement.
Nevercarrythetoolwithfingeron triggersinceyou
coulddriveafastenerunintentionallyand injureyourself
orsomeoneelse.Alwayscarrythetoolbythe handle
only.
Doingso maycause
ittomalfunctionandpersonalinjuriesmayresult.
Readmanualcarefully,learnits
applications andlimitations,as wellas the specific
potentialhazardsrelatedtothistool.