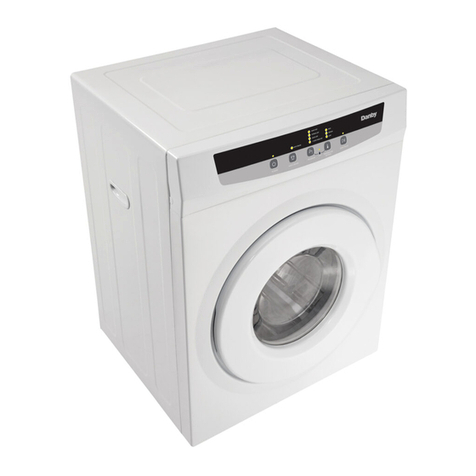
Danby DCD5505W-1 USA ONLY User manual

OWNER'SMANUAL
MANUELD'UTtLtSATION
Model,Mod61e
DCD55_-I
SAVE THESE iNSTRUCTiONS
CAUTION:ReadandfoRowaBsafety
rules and operatinginstructions
beforefirstuseofthisproducL
PRLCAUTION:Veunlezlifeattentive-
mentlesc0nsignesdes6curit6etles
instructionsd'utilisationavantI'utili-
sationinitialedeceprodu_.
\\
CLOTHES DRYER
Owner's Manual ..................... 3-15
•Important Safety Instructions
•Electrical Requirements
• Installation Instructions
• Control Panel Features
•Operation
Manuel d'utilisation .................. 17-29
- Importantes instructions de S6curit6
- Sp6cifications Electriques
• Instructions d'lnstallation
•Panneau de Commandes
• Fonctionnement
DanbyProductsLimited,POBox1778,Ontario,Canada N1H6Z9
DanbyProductsInc., POBox669,Findlay,Ohio,USA 45839-0669
DCDSSOSW0702

CLOTHES DRYER
LimitedProductWarranty(in-HomeService)
Thisqual_yproductiswarrantedtobefreefrommanufacturer'sdefectsinmaterialandworkmanship,providedthattheunitisusedunder
thenormaloperatingconditionsintendedbythemanufacturer,
Thiswarrantyisava_ableonlytothepersontowhomtheunitwasoriginallysoldbyDanbyorbyanauthorizeddistrbutorof Danby,and
isnon-t_ansferable_
TERMSOFWARRANTY
Thelimitedwarrantyperiodlistedbelowisbasedupontheselectionofbrandnameofproductpurchased.
Anyelec_calpartsofthisproductfoundtobedefectivewli]berepairedorreplaced,includinglabour,atwarrantor'soptionfortheORIGI-
NALpurchaser,cover_ servicelistedbelowperproductseloction_Consumableparts(Le_tightbulbs)arenotwarrantedorguaranteed
foranylengthoftime
Theproductwarrantycoverageisasfollows:
PartsandLabourCoverage One(1)Year
CorrosiononCabinet(Nolabourafter2ridyear) Five(5)Years
StainlessSteelDrum(PartsOnly) Lifetime
TOOBTAINSERVICE
Contactyourdealerfromwhomyourun_waspurchased,orcontactyournearestauthoffzedDanbyservicedepot,whereservicemustbe
performedbya qualifiedservicetechnician,tfserviceisperformedontheufittbyanyoneotherthananauthorizedservicedepot,orthe
unLisusedforcommerciaIapplication,allobligationsofDanbyunderthiswarrantyshallbeatanend
EXCLUSIONS
Saveashereinprovided,therearenootherwarranties,conditions,representationsorguarantees,expressor implied,madeorintended
byDanbyProductsLimited(Canada)orDanbyProductslnc,(US,A)oritsauthorizeddis_'_utorsandallotherwarranties,conditions,
represer_ationsorguarantees,includinganywarranties,conditions,representationso[guaranteesunderanySaleof GoodsA_ orRe
legislationorstatuteisherebyexpresslyexcluded.
Saveashereinprovided,DanbyProductsLim'r_ed(Canada)or DanbyProducts]nc.(U.S.A),shallnotberesponsiblefor anydamagesto
personsorproperty,includingtheunititself,howsoevercausedoranyconsequentialdamagesadsingfromthemalfunctionoftheunit
andbythepurchaseoftheunit,thepurchaserdoesherebyagreetoindemnifyandsaveharmlessDanbyProductsLimitedfromany
claimfordamagestopersonsorprope_,causedbytheunit.
GENERALPROVISIONS
Nowarrantyorinsurancehereincontainedorsetoutsha_lapplywhendamageorrepairiscausedbyanyofthefollowing:
1) PowerFailure
2) Damageintransitorwhenmovingtheappliance
3) Improperpowersupplysuchasbwvoltage,defectivehousewiringorinadequatefuses.
4) Accident,alteration,abuseormisuseoftheappliancesuchasinadequateairdrculationintheroomorabnormaloperatingcorn
d_ons,(extremelyhighortowroomtemperature).
5) Useforcommercialorindustrialpurposes.
6) Re, waterdamage,theft,war,riot,hostility,actsofGodsuchashurricanes,floodsetc
7) Servicecal]sresultingincustomereducation,
8) Damagetoporcelaintubsduetoforeignobjects
Proofofpurchasedalewinbe requiredforwarrantyclaims;so,pleaseretainbnlofsate.Intheeventwarrantyserviceisrequired,pres-
ent_s documenttoourAUTHOREEDSERVICEDEPO_orcontact:
DanbyProductsLh_ed
POBox177&Gu_ _o, CanadaN1H6Z9
Tetephon_,(stg)B37_20FAX:(S19)_7-0_
Dar_byProductslnc°
POBox689,F]ncRay,Oh}o,U,S,/L458390669
Telephone:(419)425-8627FAX:(419)425-8829
IMPORTANT:PleasecompleteandreturntheenclosedregistrationcardwithintNrtydaysfor warrantycoverage.
O7O2

nS CHEUSE
Garantie Limit6e (Domicile)
CetappareildequaY6estgerant]eexemptdetoutvicedemati6repremiereetdefabrication,s'nestut}s6dansloscond'diansno[males
recommand_esparlefabdcant
CettegarantieNestoffertequ'&f'acheteurinitialdel'apperei[venduparDanbyoupar{'undessosdistrinuteursagr66seteDenepout
6tretr_sf6r6e
CONDITIONS
Lap6fiodedegarantieEmit6eestbas6esurlecho_xdelamarquedefabrk:lueduprod_ achet6.
Teuteslospi_ces61ec_quesde cotappare_quis'av6rentd6fectueusesserontr6per6esouremplac6es,ycomprislamiarr-d'oeuvre,
solontechoixdufabricantpourieproduitchoisL
Lagamatiedupredb;tcouvre:
Pi6cesetmain-d'oeuvre Un(1)an
Corrosionducaisson(aucunegarantiedemain-d'oeuvreapr6s2 arts) Cinq(5)ans
Cureenacierinoxydable(Pi6cesseulement) Garantie_ vie
POURB&N_FIClERDUSERVICESOUSGARANTIE
S'adresseraud6taiflantquia vendul'appareH,ou&lastationtechniqueagr66edeservicelaplusproche,o,_tesr6parationsdoivent_tre
effeetu6esperuntechnicienquaY6.Silesr6para_onssenteffec[u6esperquieonqueau_equelastationdeserviceagr66eoQ_des
fhs commerciales,routeslosobligationsdeDanbyenvertudecettegarntieseronthUllOSetnoavenues
EXCLUSIONS
Envertudelapr6sent.e,_n'existeaucuneautregarantie,conditionourepr6sentation,qu'ellesoitexprb16eoutacite,defa_onmaKrleste
ouinten_onneUe,parDanbyProducfsUmit6e(Canada)ouDanbyProductsInc.(E.-U.d'A) ousesdistr_uteursagr_6soDem6me,sent
excluesroutesfesautresgaranlies,conditionsourepr6sentations,ycomprislosgaranties,cond_onsourepr6sentaUonsenvertude
routeloir6gissantlaventedeproduitsouderoutea_e 16gisia_onour_glementsemblabtes.
Envertudetapr6sente,DanbyProductsLimitee(Canada)ouDanbyProductsinc(E- U.d'A.)nepout6tretenueresponsableencas
deb[essuresco[poreliesoudesd6g_tsmat6riels,ycompds_.i'appereil,quellequ'ensoi_loscauses.Danbynepeutpas6tretenue
responsabtedesdommagesind'rectsdusaufonctionnementd_fectueuxdel'appereiLEnachetantl'appereil,I'acheteuraceeptedemet-
_e &couvertetded6gagerDanbyProductsLimit6ederouteresponsab_T_encasder6elamationpourtouteblessurecorporel]eou[out
dbg&tmaterielcaus6parcotapperei]
CONDITIONSG#_.N_RALES
Lageranlieouassuranceci-dessusnes'appliquepassilosd_g&tsour6parationssentdusauxeassuivant_
1} Pannede courant;
2) Dommagesubispendantletransportouled6placementdet'appareiL
3) Aflmentation61ectriqueineorrec_e(tensionfainle,cAblagedbfectueux,fusiblesincorrects);
4) Accident,modifieatbn,emploiabusffouincorrecldel'apparei];
5) Ut]lisationdartsunbutcommercialouindustrief;
6) Incendie,dommagecaus6sparreau,vol,guerre,6meute,hosSr_t6s,casdeforcemaieure(ouragan,inondation,etc);
7) Visitesd'untechnicienpoure×piiquertefonctionnementdeI'appareilaupropri6Iaire.
Unepreuved'achatdolt6trepr_ent6epourroutedemandeder6parat_onsousgarantie.Pri_redegarderlere_;uPourfairehonorerla
garantie,pr6sentercedocument_ I_staliontechniqueagr_6eous'adresser_:
Da_byP[oductsLl_It6e DanbyP_od_ctsInc.
POBox_, F_ay,Ohio,U,S,t__B,_9-O_
T_phone:(419)425-B627FAX:(4t9)425._6'29
IMPORTANTE:Pd6rede rempliretderenvoyerla carted'enregistrementdansIes30jourspourvaliderla garantie.
7/02

INSTRUCTIONS FOR USE
Tumble Dryer
............................... = 1,11 ,H,,,HH=,,,,= ,,,
:: Thank you for your trust and forbuying our tumb!e drier, We hope it will successfully : :[
1
[:::: :serve its purpose for many years:: :: :::, : [
This appliance was designed for drying clothes,
for home use only
IMPORTANT: Please read and follow all
instructions provided inside this manual and
observe all safety rules and operating
instructions before attempting to use this
producL SAVE THESE INSTRUCTIONS:
Before Use ................................................... 4
Important Warnings ................................... 4
Important Safety Instructions ................... 5
Positioning and Installation ....................... 6
Door ............................................................... 9
Drying .................................................... 10-12
Cleaning and Maintenance ...................... 13
Trouble Shooting Guide ............................ 14
Instructions for Use 3

INSTRUCTIONSFORUSE
Before Use
Wipe the [ntedor of the drum with a soft cloth and
mild liquid detergent Do not use aggressive
cleaning agent which could damage the surface
WHEN YOU FIND YOUR APPLIANCE IS OUT
OF USE AND NO LONGER NEEDED, TRY NOT
TO BURDEN THE ENVIRONMENT WITH 1T
CALL THE NEAREST AUTHORIZED
"COLLECT'NG SERV'CE FOR USED
APPL'ANCES"
Useful Hints
Avoid drying large laundry loads, as this causes
garments to easily crease and dry unevenly E_
maximum drying load should not exceed lxNbs
dry-weighlF
Drying very delicate laundry items such as
woolens and silk garments is not recommended
as they may shrink or lose their shape
Synthetic curtains, fabrics with metal threads,
nylon stockings, as well as lingerie with prevailing
foam rubber components or rubber-like materials,
shoutd be dried at a low temperature setting
Edelicate laundry programs or time setting
programsE Place delicate fabrics in a laundry
sack, when drying together with other laundry
When drying is finished, immediately remove all
laundry from the dryer to avoid excessive
creasing
When drying laundry in the dryer, there is no
need to add conditioners Conditioners are added
only when rinsing synthetics to neutralize static
electricity
When buying clothes, especially underwear, do
not forget that they may shrink during washing as
well as during drying
Clothes marked with a"no tumble dry" label, are
not suitable for tumble drying
Energy consumption when drying laundry is
essentially increased if the spin speed of your
washing machine is set to operate lower than
U00 r p m
Important W arn!,ngs
• Only laundry washed with water can be dded in
this dryer Never try to dry laundry washed or
cleaned with any flammable cleaning agents,
Eeg. benzine, tfichlor ethyleneFas it may cause
an explosion
, Close supervision of children is always
necessary when any appliance is being used
Never let children play on or near this
appliance while it is operational
o Frequent cleaning of the lint filter is necessary
when using a clothes dryer,, We recommend
cleaning the filter after each time a load is
finished Bt only takes a couple of secondsF
After cleaning, the lint filter must be reinstalled
back inside the air duct, located in the inner
door panel., Operating the dryer with damaged
filter or without the filter is dangerous and can
cause fire
• Never let children or pets enter (the drum
of) the dryer
After use always switch the tumble dryer off
and cut the power supply to the appliance
. All service interventions on the machine should
be left to an expert Never attempt to service
the dryer yourself Call an authorized service
agent if your dryer is in need of service For the
location of the closest service agent in your
area, check the service listing enclosed with
the appliance, or contact the retailer, or contact
the manufacturer direct at 1 800 26 DANBY for
customer service.
, The data plate with all essential E[echnicalF
information about the dryer is located on the
front side of appliance
4 Instructions for Use

INSTRUCTIONSFORUSE
Important safe instructions
i H i iii i, n ,i,lu,,i.. ...........
WARNING -To reduce the risk of fire, electric
shock, or injury to persons when using your
appliance, follow basic precautions, including the
following:
Save these instructions
1 Read all instructions before using the
appliance
2 Do not dry articles that have been previously
cleaned in, washed in, soaked in, or spotted
with gasoline, dry-cleaning solvents, or other
flammable or explosive substances, as they
g,ive off vapours that could ignite or explode
3 Do not allow children to play on or in the
appliance, Close supervision of children is
necessary when the appliance is used near
children
4 Before the appliance is removed from service
or discarded, remove the door to the drying
compartment
5 Do not reach into the appliance if the drum is
moving
6 Do not install or store this appliance where it
will be exposed to the weather
7 Do not tamper with controls
8, Do not repair or replace any part of the
appliance or attempt any servicing unless
specifically recommended in the user-
maintenance instructions or in published user-
repair instructions that you understand and
have the skills to carry out
9 Do not use softeners or product to eliminate
static unless recommended by manufacturer
of the fabric softener or product
10 Do not use heat to dry containing foam rubber
or similarly textured rubber-like materials
11 Clean tint screen before or after each load,
12 Keep area around the exhaust opening and
adjacent surrounding areas free from the
accumulation of lint, dust, and dirt,
13 The interior of the appliance and exhaust duct
should cleaned periodically by qualified
service personnel
14 Do not place items exposed to cooking oils in
your dryer. Item contaminated with cooking
oils may contribute to a chemical reaction that
could cause a load to catch fire
GROUNDING INSTRUCTIONS
This appliance must be grounded In the event of
malfunction or breakdown, grounding will reduce
the risk of electric shock by providing a path of
least resistance for electric current This
appliance is equipped with a cord having an
equipment-grounding conductor and a grounding
plug The plug must be plugged into an
appropriate outlet that is properly installed and
grounded in accordance with all local cordes and
ordinances
WARNING-Improper connection of the
equipment-grounding conductor can result in a
risk of electric shock Check with aqualified
electrician or serviceman if you are in doubt as to
whether the appliance is properly grounded
Do not modify the plug provided with the
appliance-if it wiII not fit the outlet, have a proper
outiet installed by a quallfied electrician
fnstructions for Use 5

INSTALLATIONINSTRUCTIONS
Positioning and Installation
i i u l i mira u ii I I n, Hn,n
.... ........ ;i
Moist Air Outlet
Your clothes dryer must be placed in a room with
adequate ventilation
Choosing the Right Place
The most appropriate space is a room with a
window or built-in ventilation fan (Figure 1)
In closed, smaller rooms without adequate
ventilation there is too much moisture in the air,
the drying time is increased and so is energy
consumption.
If during the drying procedure there isn't
adequate ventilation in the room, we recommend
you direct moist air out in the open by means of
vent pipe (Fig 2)
The ventilation opening for venting out humid air,
is located at the rear side of the dryer, Fig 4-5
(bottom left-hand corner) The ventilation opening
is designed to accept standard 4 inch, flexible or
solid exhaust pipe, (not included with the dryer)
The ventilation exhaust can be purchased at any
local hardware store
The distance between the dryer and venting
opening (air duct or window) must not exceed 80
inches, otherwise condensation can accumulate
in the tube, (Fig 5)
! ...........
Vent pipe can be bought in any local hardware
store I Solid Piping
2 Flexible pipe
This dryer is a self standing appliance and can
stand alone, or it can be placed either together
with a washing machine or in the kitchen as a
kitchen unit
tf the floor is uneven, use the adjustable feet to
level the machine
Undo the nuts Rotate the feet to level the
machine (fig 3)
Lock the nuts (fig 3a)
. Do not remove the adjustable feet The
machine must be placed horizontally
o Do not put the dryer on a thick rug thus
preventing the possibility of air circulation
6 Instructions for Use

INSTALLATION
Connecting to power supply
IMPORTANT NOTE: This dryer does not come
complete with an electrical power cord Electrical
power cord kits must be purchased by the
consumer and are available at most local
hardware stores Before purchasing a power
cord kit for your dryer, you must first establish
which type of power cord plug is required
(compatible) to fit the electrical receptacle in your
laundary room. i e 3 wire - 4 wire (See Fig. 6)
When purchasing a 3-wire or 4-wire power cord
kit with strain relief, make sure the cord meets
the following requirements:
o UL listed dryer cord kit
- 240 V minimum rated
= 30 A rated
. type SRD or SRDT
• minimim five feet long
° closed-loop terminals or open-end spade lugs
with upturned ends
This dryer has a pre-installed (rear mount)
external junction box to facilitate easy connection
of the power cord kit with suitable plug
4-wirereceptacle
(t4-30 R)
3-wire receptacle
(10-30 R)
if you have 4-wire
receptacle, like this. a
4-wire dryer cord must
be purchased locally
If you have 3-wire
receptacle, like this, a
3-wire dryer cord must
be purchased locally
Fig 6
Electrical connection
INSTRUCTIONS
an area where local codes do NOT permit
grounding through the neutral° Use _FOUR-
WIRE CONNECTION_{ instructions.,
Four-wire connection
spade
lerminats with
upturned ends
3/4" U L,4isted NEUTRAL (white)
NEUTRAL strain relief ",.... "_
I
groundprong groundwire -_-"......... ,,'
(green) /
ring terminals
Four-wire power suppfy cord must have four, No-
10 copper wires and match a four-wire receptacle
of NEMA Type 1430R The fourlh wire (ground
conductor) must be identified with a green cover
and the neutra! conductor by a whtte cover
Junction box
DO NOT plug end of dryer power cord into a live
receptacle before connecting dryer power cord
to dryer terminals and closing junction/splitter
box as described below,
DO NOT reuse old power supply cord
WARNING:
This dryer is manufactured with the cabinet-
ground conductor connected to the
NEUTRAL (center) of the supply cord at the
terminal block.
Only a 4-conductor cord shall be used when
the appliance is installed in a mobile home or
Fig 7
To connect power cord:
• Remove the screws from the cover of the
junction box located at the top rear of the dryer
. Loosen/remove the two screws on the strain
relief clamp and remove from 4-wire supply
cord
o The strain relief splits into two indentical parts,
oinsert the large flange of both sections into the
hole iocated on the left side of the junction box
housing The short flange of both sections and
screws must remain positioned on the external
side of the junction box housing
Instructions for Use 7

INSTALLATIONINSTRUCTIONS
° Insertthe4- wiresupplycordthroughboth
sectionsofthestrainreliefandre-installstrain
reliefscrews,donotfullytightenuntilelectrical
connectionsare complete
, Attach the power cord ground conductor (green
wire) to the ground terminal marked with the
ground symbol Tighten screw until ground
conductor is secure (See Fig 7)
° Attach the power cord neutral conductor (white
wire) to the neutral terminal. (marked N)
Tighten screw until neutral conductor is secure
(See Fig 7)
, Attach the power cord phase conductor (black
wire) to the phase terminal (marked L3)
Tighten screw until power conductor is secure
(See Fig. 7)
o Attach the power cord phase conductor (red
wire) to the phase terminal (marked Lt)
Tighten screw until power conductor is
secure.(See Fig 7)
° Tighten the screws on the strain relief so that
the power cord cannot be moved
• Re-install the cover of the junction box and
secure with four screws removed earlier
° The dryer is now ready to be connected to the
power supply receptacle
Three-wire connection
lemtlnals with _._-_.-_2
upturnedends _,L=_9
ringterminals
Thisbladeconnected \
.//" to thisconduclor -_.__!\
"\. /
NEUTRAL /
3/4_UL. - NEUTRAL
listedstrain (whiteor center)
relief
Three-wire power supply cord mus! have three,
No -!0 copper wires and match a three-wire
receptacle of NEMA Type 10-30R
Junction box
Fig 8
To connect power cord:
. Remove the screws from the cover of the
junction box located at the top rear of the dryer
° Loosentremove the two screws on the strain
relief clamp and remove from 3-wire supply
cord
• The strain relief splits into two indentical parts
° Insert the large flange of both sections into the
hole located on the left side of the junction box
housing The short flange of both sections and
screws must remain positioned on the extema!
side of the junction box housing
• Insert the 3- wire supply cord through both
sections of the strain relief and re-install the
strain relief screws, do not fully tighten until
electrical connections are complete
° Attach the power cord ground conductor (green
wire) to the ground terminal marked with the
ground symbol Tighten screw until ground
conductor is secure (See Fig 8)
• Attach the two remaining power cord phase
conductors ( left = black wire and right = red
wire ) to the phase terminals (marked L3 & LI)
Tighten screws so that the power conductors
are secure (See Fig 8)
• Tighten the screws on the strain relief so that
the power cord cannot be moved
° Re-install the cover of the junction box and
secure with four screws removed earlier
• The dryer is now ready to be connected to the
power supply receptacle.
Note:
The receptacle should be located so that the plug
and receptacle will be accessible with the dryer in
its installed position
Additional Grounding Procedure
Some local codes may require a separate
ground In such cases, the required accessory
ground wire, clamp and screw must be
purchased separately
Never ground the dryer to plastic plumbing lines,
gas lines or hot water pipes
8 Instructions for Use

INSTALLATION INSTRUCTIONS
Door ii i,, u, ,,,, ,,,,, ,,,,, ,,,,,,,, i,,u,,ul,
Door of the dryer can be opened by pressing the
door frame against the machine, as shown in the
figure,
The door is closed in the same way, if the door is
not closed propedy the machine will not operate
Be careful not to pinch the laundry with the door
as it might get damaged.
IMPORTANT
• The door may be opened dudng the drying
process The program is interrupted and is
resumed as soon as the door is closed again
and the START button is pressed
Instructions for Use 9

OPERATINGINSTRUCTIONS
Dryingprogramselectionelementsaresetinthe
controlpanelaswellastheindicatorlightwhich
isonduringtheoperationofthemachine
Preparing the Laundry for
Sort the laundry before drying according to type
of the laundry
* Fasten buttons, zippers, tie loose strings and
turn pockets inside out
.Very delicate laundry (fine underwear with
laces) should prier to drying be put in a special
sack so that it won't get damaged by buttons,
zippers and pins
. We recommend loading the drum with items of
different size Larger pieces of laundry can get
tucked during drying So we recommend you
take them out, shake them and then put them
back,
. When drying large sheets (bed sheets, table
cloths) put 2 to 3 pieces for one load and when
drying delicate smaller items (shirts, blouses)
fill onty 5 to 6 pieces for one load (max 4,5 tbs)
- Never put ddpping wet laundry inside the dryer
(electrical hazard)
° Most clothes nowadays have labels marked
with recommended drying mode
[]
[]
[]
[]
[]
D
DRYING
Drying in tumble drier allowed
Wring, hang on clothes line and dry
No wringing, drip dr,'
Wring, dry flat
Drying in tumble dder not allowed
Drying at normal temperature
Drying at lower temperature
Signal lamp operation
Signal lamp illuminates when the appliance is in
operation
Prior drying
° Switch the dryer on by pressing the ONIOFF
button
°Before first selecting a drying program, set the
program selector knob to the STOP/0 position
(for 1second)
,, Set the program selector knob to the desired
drying program The signal lamp, adjacent to
the selected program will illuminate (except
when using timed dry programs)
• Press the "START' button to start the program,
The beginning of operation is signaled by a
beep, The program signal light goes off and
actual humidity level indicator light turns on
°If you wish to change the selected drying
program after the machine has been put into
operation, set the program selector knob back
to the STOP/{) position (for t second) You may
select any desired drying program, and start it
by pressing the START button. In case this
procedure is not performed, the machine will
continue executing the originally selected
program, notwithstanding the position of the
program selector
If the preceding program has been completed
(indicator light END and ANTI-CREASE signal
light will illuminate), you may select a new
program and start it with the START button It
is not necessary to set the program selection
button to the STOP/0 position,
Dry g program selection button
The appropnate program is selected by operating
the program selector knob, which may be turned
in either direction There is a basic choice of
three drying groups:
Regular laundry (5 programs), with
automatic moisture measuring
___ Delicate laundry (4 programs) with
automatic moisture measuring
Preset (timed) drying for both resistant and
k....J delicate laundry
The appliance is switched on and off by pushing
the ONIOFF button
10 Instructions for Use

OPERATINGINSTRUCTIONS
Thedryingtemperatureisselectedautomatically
bytheselectionofthedryingprogram,anditis
lowerfordelicatelaundrythanfortheresistant
one.Dudngthedryingprogramwithpresettime
thetemperatureisthesameforboththedelicate
andresistantlaundry
666 Dampformachineironing
66 Damp for ironing
6 Mildly damp
......Dryforstora,ge
4_, Very dry
_ Anti crease
"_ I End
The drying stage indicator displays the actual
drying stage at any given moment This is
signaled by the indicator light, illuminated
adjacent to a particular drying stage symbol The
end of drying is signaled by the indicator light
END or ANTI-CREASE
laundry and the extent of moisture present in the
laundry (after the final spin stage of the wash
program).
Actual stage of moisture during the program is
indicated by the moisture stage display, so you
may remove particular pieces of clothing you
wish to remain damp at any time during the
program When you open the door (add or
remove pieces of laundry) the drying program
stops automatically and the drum interior is
illuminated When you close the door the light
goes off and the program continues by pressing
the START button
tn case of a power failure during a selected
program, the drying operation stops When the
power is reinstated, you must to press the
START button to continue the program
Each program concludes with a 10 minute
cooling down period, to prevent extracting hot
laundry from the appliance and to improve the
anti-crease function
Drying programs are complete when the signal
Eees \j:_unG)#DnG _ inGcDkR_J_hVv'( 1D" DqG
"A1 T'-CR( AS( " i(_p inD'_ DVV_ enG R_ '¢fe
program This indicates that the laundry is dried
to the point of the preset moisture stage, or the
preset drying time has expired The drum stops
and laundry may be removed from the machine
NOTE: If the laundry is not removed immediately
after the drying cycle is completed, (and the
machine is not switched off) the dryer will
automatically start a special anti crease program
ANTI-CREASE PROGRAM: Consist of:
, 5 p inuW"O) )" (('_tP Dn_/cyc@
• 5 V_cRnG"OI "_ E(_iqgcyc(_ (hR hedger'
This program helps to prevent laundry from
sitting idle in the same position and helps to
LeGuce CLCD_inglwl_qN_g The "Dn_LeD've"
program stops automatically after one hour of
operation, but may be interrupted at any time by
opening the door or turning the appliance off
This button starts the operation of the appliance
In case of program interruption (open door,
voltage failure, condensation receptacle full), it
serves to continue the actual program, after the
cause for interruption had been removed
o Open the dryer door Remove and clean the lint
filter,, If the filter is not cleaned regularly, the air
circulation is obstructed This obstruction will
increase the drying time and may cause the
unit to overheat and fail
o Reinsert the filter
, Remove laundry from the drum
,, Close the door and disconnect the power
supply
Drying time depends upon the selected program
and the quantity of laundry, If you selected time
defined drying the machine stops upon the expiry
of set time If you selected any of the programs
for automatic determination of moisture, drying
time wilt largely depend upon the quantity of
Instructions for Use 11

OPERATINGINSTRUCT!ONS
The program chart
Program I Type of laundry
,Wh!te/colored regular laundry _#_
Very dry _.' Thick or multNayer laundry
requiring to .be dried out
Dr,] for storage _.? Equally thick laundry, not
requzr_n_ron!ng
Mildly damp 6 Thin laundry, needing
ironing
Damp for ironing &6 Cotton or flax, normally thick
Damp for machine ironing b6& Cotton or flax for machine ironing ...........
Synthetic and mixed fabric laundry, improved laundry _._
Very dry _ Thick or multi-layer laundry need to
be dried out
Dry for storage _.-: Thin laundry, not needing
ironing ._
Mildly damp _ Thin laundry, needing
ironing
Damp for ironing 66 Laundry, needing ironing
Preset timed programs
20 to 60 minutes Single pieces of thick laundry,
requiring to be dried out
Airing of laundry
cR s -- I0p utev ÷
Example of laundry
(1)
loading: 11 Ibs
Terry cloth, bath robes,
etc.
Terry cloth, knitted wear
Knitted wear laundry, thin cotton
T_shirts
Bed linen, table cloth, etc.
(1)
loading: 4,5 Ibs
Pullovers, suits, blankets
Shirts, blouses, bed linen, socks,
children clothes, etc.
Knitted wear, T-shirts, table cloth,
etc_
Shirts, blouses, bed linen, table
cloth, etc.
(1)
loading: !t Ibs
Bath robes, bathing towels,
I pullovers, small quantity of
_ry (up to 0,5 Ibs) etc.
Laundry needing to be aired, or]
straightening of mildly creased ]
clothes [
(1) weight of dry laundry;
(2) drying temperature is lower, like for the mixed laundry programs
Economic use of the dryer
Time and energy will be saved with your dryer, if
the following is considered:
o_ tKe _#unG.y DV PucK DV SRvvLEO - tKe
higher the number of spin revolutions the
shorter the drying time, the lower the energy
consumption;
° by setting the adequate drying temperature,
over-drying of laundry can be avoided and
consequently difficult ironing;
• Always toad the dryer maximally as this is the
most economical. At the same time you can dry
tKe _unGy IRU"GLY, L.eD_ tREe _tt_eG' DnG
"pt:_t 1RUIg_nlag" Ey tDNag tKe _teuRut wKen
it is still adequately moist for ironing;
° By regular cleaning of the filter an optimum
drying time with minimum energy consumption
can be ensured.
,, Dryer consumption when used at a lower
electric power rate can save additional energy
cost
12 Instructions for Use

USER-MAINTENANCEiNSTRUCTIONS
,Cleanin,g,,,,,a,nd Maintenance
Before cleaning, always disconnect the appliance Lint Filter
from power supply
Wipe the cabinet with a soft wet cloth and mild
cleaning agent Do not use aggressive cleaning
agents which could damage the paint surface
Cleaning d ...... :
ryer :
If your drier is installed in a room with poor air
circulation or if operates daily, dust deposits will
accumulate in the interior bottom of the appliance
and in the ventilation exhaust pipe, This
accumulation of dust can lead dryer
malfunctions So once a year, clean the dust in
the intedor of the dder with a damp cloth and
check the exhaust ventilation for blockage
After each drying cycle, remove the lint filter trap
located inside the inner door and gently wipe
over the filter with a soft cloth or soft brush to
remove any accumulated tint Clean the filter
cabinet as well,
The lint filter can also be cleaned under running
water; however, it must be thoroughly dried
before being replaced.
Cleaning procedure
- Disconnect the dryer from the power supply
- Undo the screws and remove the cover (B)
-Clean (with a vacuum cleaner) the bottom of
the dder and parts on the bottom
- Reinserl the cover in reverse order
B
0 0
NOTE
The accumulation of lint on the lint filter is a
consequence of normal (wear and tear)
laundering and has nothing to do with drying in
the machine,
Instructions for Use 13

USER-MAINTENANCEINSTRUCTIONS
Trouble Shooting Guide
Some problems are minor in nature and can be If you are unable to resolve the problem after
easily resolved without having to call for service, checking this guide, col[ our Toll Free Number (f
The following guide fist some of the problems you 800 26 DANBY) and ask for assistance
should check before calling for service.
Malfunction
The machine doesn't
operate!
The socket is energized, but
the drum doesn't rotate:
;Wet laundry:
Laundry not uniformly dried:
Check the following:
- Check the supply in the outlet socket and the fuse
- Make sure the cable cord !s correctly plugged into the socket.
-Is the door correctly closed (if not, push them towards the
machine)
- if the program is started by pressing the START button;
-if the correct drying time is set, or if appropriate program is
selected.
-Is the fluff filter clean?
- is the amount of loaded laundry too large?
- ls the vent pipe too long?
- if the laundry loaded into the appliance had been dried enough,
or if the appropriate program has been selected: ..........
- Is the amount of loaded laundry too large?
- Does the toad consist of only large pieces of laundry (always toad
smaller and larger pieces together)
-Does the load consist of laundry made of different materials
(always load clothes made of similar fabrics).
After you have considered all the above stated
instructions and the problem still cannot be
eliminated Please call the nearest Danby
authorized service agent or call our Toll Free
Number (1 800 26 DANBY) and ask for customer
assistance
Any claim or malfunction caused by improper
installation or misuse is not covered by the
manufactures warranty A!l repair costs shall be
covered by the user
WE RESERVE THE RIGHT FOR MODIFICATIONS
WITH NO INFLUENCE ON THE OPERATION OF
THE APPLIANCE
THIS INSTRUCTION MANUAL CANNOT BE A
REASON FOR A COMPLAINT
14 Instructions for Use

S chedinge tambour
............................................... i
Nous::i:: vous remereionS vivement: de la Confiance que vous nous:::avez t_moign_e::::en achetant
Un S_che-linge de notre marque. Nous esp_rons qu,il ioUs donnera enti_re satisfaction
: i :durantdelo.gneS_nn_eS:: :
Cet appare[I, destine au s_chage du linge, est
con(_u exclusivement pour un usage domestique
IMPORTANT: Nous vous invitons & lira
attentivement tousles conseils contenus dans
ce p Rde d'ep p_,i avant d'ufi_iger VRh-e nRuveO
appareil et & toujours observer les
instructions de fonctionnement et les
consignes de s6curitb, CONPERSEZ CE
MANr Ei.
Avant la mise en service ........................... 18
Important !.......................................................18
Consignes de s_eurit_ importantes ......... 19
Emplacement et installation ..................... 20
Le hublot ..................................................... 23
S_chage ......................................................... 24
Nettoyage et entretien ............................... 27
D_pannage .................................................. 28
Mode d'emploi ! 7

Avant la raise en service
i i ,u HUHm,,,,,,,,,,,,,,,,,,,,,,,, ,
Essuyez l'intPdeur du tambour avec un chiffon
doux et un dPtergent liquide IPger. 1'utilisez pas
de produits agressifs qui pourraient endommager
sa surface
il opnrb sI rp Nb Sl rp PbOSfObZ _rp
ab sl qob MACefNb bq nrb s I rp
s[ raobZSl rp bN abBAOOAPPbO, bSlqbZ
nr,biib N'bNCr MBOb i'bNSfOl NNbMbNq
ObMbqqbZ-iAArU I OdAN_MbP eABfi _lbP
n! ro iA CI iibCqb abP Arm'AObfiP
MbNAd bop "r PAd bP".
Conseilsutiles : : : :::
evitez de mettre trop de linge dans I'appareil car
it se froisserait et ne serait pas uniform&ment
sec E acharge maximale ne dolt pas exc6der
1llbs de linge sec)
'1 n'est pas recommandP de faire sPcher darts
rappareil les lainages ou soides, car its
fisqueraient de r6tr6cir ou de se deformer
i es voilages en synth_tique, [es vetements
contenant des fits metalliques, les bas nylon, la
lingede comportant du caoutchouc ou des
matieres 6quivalentes doivent 6tre seches
faible temp6rature Fq3rogramme linge deticat ou
programme avec r6glage de la dur6e e s&chage)
Pi vous faites secher du iinge delicat avec
d'autres piqces plus rPsistantes, mettez-te clans
une housse sp6ciale i orsque le sechage est
termine, retirez imm6diatement tout le linge afin
d'Pviter qu'iI ne se froisse trop.
i orsque vous utilisez vetre seche-linge, il est
inutile d'a'_uter un produit de traitement. Ces
produits doivent etre employes exclusivement
lors du dngage des synth_tiques pour neutraliser
l'PlectriciU3statique
n uand vous achetez des vetements, et en
particulier des sous-vrtements, pensez qu'ils
peuvent r6trecir au lavage et au s6chage i es
articles podant l'Ptiquette {{ ne pas faire sPcher
clans un seche-linge _>ne doivent pas etre mis
s6cher dans votre appareil
sous augmenterez la consommation electrique
Iors du s6chage si vous essorez votre linge darts
votre machine a laver a une vitesse inf_fieure
800 tourstmin
Important !ii_,H mH,,mHU
• Seul le linge [avP a I'eau peut r tre sPchP darts
le s6chedinge. Ne mettez _mais dans votre
seche-linge des vetements nettoyes avec des
solvants inf}ammab[es F:par exemple benzine,
triclorPthylqne), if y aurait un risque d'explosion
•fl est conseil[e de surveitler attentivement les
enfants lots du fonctionnement d'un apparei[
m&nager Ne laissez _amais Ies enfants muer
proximitY, de cet appareil au cours de son
utilisation
ofl est n_cessaire de nettoyer fr_quemment le
filtre & peluches du s_che-linge. Nous
conseillons de nettoyer ce filtre apres chaque
utilisation EC,ela ne prend que quelques
secondes) Apr_s nettoyage, le filtre _ peluches
doit etre replace dans le conduit _ air, situ6
HntPr_eur, dans le panneau de la porte '1 est
dangereux d'utitiser [e sqche-ilnge sans filtre ou
avec un filtre endommage; cela peut
provoquer un incendie
•Ne laissez jamais tes enfants ou les
animaux domestiques p6n6trer darts le
tambour du s_che-linge
l_teignez tou_urs le sbche-linge apr6s
utilisation et coupez Fa[imentation Ptectrique de
i'appareil
•ta maintenance de rappareil dolt toLi_urs rtre
effectuPe par un professionnel l'essayez
&mais de r_parer le s_che-linge vous-m#.me
Pi votre apparei[ a besoin de r_parations,
appelez un professionnel agree rrour trouver te
prestataire de services le plus proche de chez
vous, veuillez consulter la liste des
professionneis M_inte & l'appareil ou contactez
votre revendeur Sous pouvez 8gatement
appeler directement le service apr_s-vente du
fabricant au 1B00 26 DANBY
• i a plaque signatetique comportant les
caract6dstiques principales du seche-linge se
trouve sur la face avant de f'appareil
18 Mode d'emploi

Consignes de s6curit6 importantes
............................................. i i i in n
ATTE1TIO1 - Afin de rPduire los risques
d'incendie, d'Plectrocution et d'accidents
corporels Iors de l'utilisation de votre appareil,
veuitlez prendre fes pr6cautions 616mentaires de
s_curit6 et respecter les consignes suivantes :
1 Avant l'utilisation fisez l'enti_re notice
d'utilisation
ONe faites pas s6cher dans l'appareil des
v_.tements qui ont 6t6 nettoy6s_ mouill6s ou
arrests auparavant avec de I'_ssence i des
solvants pour }e nettoyage & sec ou flutres
nettoyants inflammables car les vapeurs
peuvent s'enflammer ou m_me exploser
3 Ne permettez pas aux enfants de se jouer sur
ou dans I'appareil n uand les enfants se
trouvent au voisinage de rappareU en service t
il faut les surveiller avec une attentiod
extraordinaire
4 i orsque vous n'utilisez plus votre s_che-linge
et d6sirez vous en d6barrasser I d_montez te
hublot
5 Ne restez pas _ proximit6 du seche-linge
pendant son foncfionnement
6 N'installez ou ne mettez pas l'appareil au×
endroits qui sent exposes aux influences de
temps
T Ne jouez pas avec tes manettes de
commande
8 Ne d_pannez ou remplacez aucune piece de
I'appareil par vous-m_mes et ne faites aucune
maintenance sauf si cela est expressement
conseill_ dans la notice de maintenance pour
l'utilisateur ou dans la notice publi_e des
r6paratiens tesquelles peuvent _tre faites par
f'utitisateur qui los comprend et peut les faire
appliquer
9 i ors du lavage pr_c_dant fe s_chage dans
i'appareil_n'utilisez pas d'assouptissants ni de
produits _imilaires pour neutraliser t_lectdcit6
statique sauf s'its sent recommand6s par le
fabricant des textiles ou v_tements
10 N'utilisez pas le s_che-linge pour s6cher du
linge ou des objet contenant du caoutchouc
mousse ou autres mat_daux similaires
11 Avant et apr_s chaque s&chage I debarrassez
le _tre des fibres recueillies
I0 Enlevez r_guli_rement les fibres la poussi_re
et les salet_s qu saccumu ent dans I orifice
d'a6ration et &proximit_
13 i 'int_rieur de rappareil et le conduit d'a_ration
dolvent _tre nettoy_s de temps en temps par
un professionnet du service apr_s-vente
14. N'introduisez dens le s_che-linge ni textiles ni
objets comportant des traces d'huile de table
car cela pourrait entraTner une r_action
chimique capable d'enflammer le contenu de
l'appareii
CI NPfdNEP PI r o iAMfPEAiAqEOOE
Cet appareil doit _tre branch6 b, une prise de
terre En cas de panne ou de fonctionnement
d6fectueux fe branchement _ une prise de terre
rPdu ra les risques d Pfectrocution en foumissant
un chemin de moindre r_sistance au courant
Plectrique Cet appareil est punt d'un c&Ele de
raccordepent j la terre et d'une prise de ter're
m_le Cette prise doit etre branch6e sur une
prise femele appropriee correctement instalf_e
et reli_e & ta terrell conformement & la
r_gtementation en viguet]r
ATTE1 TIOI - It y a risques d'Plectrocution en
cas de raccordement inad6quat du c&ble & la
terre s euiltez faire contrBler ta mise & la torte de
votre installation electrique par un electricien
qualifie ou un prestataire de service agr_
I e p odifiez pas la prise foumie avec I'appareil si
elle ne s'adapte pas j votre installation Faites
installer une prise femelle adequate par un
61ectricien qualifl_,
Mode d'emploi 19

Emplacemen t et,,,installation
Votre seche-linge dcit 6tre plac_ dans un local
suffisamment a6r6
Choisir le ben emplacement
L'endroit le pluv appropfiP eg une piece
dik_poVant d'une fenrtre ou d'un ventilateur.
(Cigure 1)
aans des pi_ces petites et fermees, ne disposant
pav d'une aPration vJfflvante, I'humiditP
ambiante augmente la dur6e du sechage et, par
cons6euent, ia consemmation d'PlectricitP
Pi la ventilation de fa pi6ce est insuffisante en
courv de ,vPchage, nouv con_eillonv d' Pvacuer
rhumiditP _ FextPrieur au moyen d'un tuyau 0 ig
2)
2 n peut trouver dev tuyaux d'Pvacuation danv
routes les euincaitlerles
e : _ * :
vacuatlon de Fair humlde
L'ouverture pour ['Pvacuation de I'air humide e'vt
vtuPe f I'arfi6re (en bav, f gauche) du _che-
[inge (cig 4-5) Cette ouverture est con_ue pour
accepter un tuyau d'Pvacuatien d'air flexible ou
dgide _tandard, de 4 inch Ce tuyau n'e_t Pav
fourni avec le "veche-linge, on peut Ven procurer
dans toutes les _uincailledes
i a distance entre le s&che-linge et la fenetre ou
[a conduite d'air ne dolt PaV excPder 80 inchev,
kJnon la condenv_tien ri'vque de ,#accumuler
dans le tuyau (cig 5)
I quyau rigide
2 quyau flexible
Ce seche-linge est un appareil en pose libre et
peut etre installe seuf, place pros de la machine
& laver ou int_gre & ta cuisine.
Si le V31n'e_t pavplan, mettez I'appareil a niveau
& I'aide devPiedvrPgfableV.
a6vissez les 6crous. Caites toumer les pieds
pour mettre la machine &niveau (cig 3)
Oevissez tes 6crous (cig. 3a)
• 1e retirez pav lev piedv rPglablev L'appareil
doit r tre placP a t'hodzontale
• 1'ink,tallez pavle _6che-linge wr une moquette
6paisse afin de ne pas g6ner la circulation de
l'air
20 Mode d'emploi

Connexion au secteur
IMPORTANT: ce s_che linge n'est pas fvr_ avec
un cordon secteur L'utilsateur devra se procurer
un kit de connexion au secteur, disponibIe dans
la plupart des quincatledes Avant d'acheter le kit
de connexion pour votre s_cheqinge, vous
devrez d6terminer quel type de fiche raccord6e
au c_bte est compatible avec la prise secteur de
votre buanderie, par exemple 3 fils ou 4 ills (voir
fig 6).
Lorsque vous ach_terez votre kit de connexion 3
RU4 [1_ avec serre-ckb@, veL(_z & ce Tu'LQ_Lt@s
caracteristiques suivantes :
Kit de connexion seche-tnge cerlfi6 r L
= 240 s minimum
. 30A
" type SRa ou SRaT
. minimum 5 pieds de long
. terp_alsRns avec cRsses lerpPes (& cet_ RU
ouvertes (& fourches _ extr6mit6s recourb6es)
Ce sqcKe-([bge a PtP PTuLSO d'une bRYce de
_nction exteme sur le panneau arri#re aln de
lacL(_er @ cF_nextRn du ckb_} d'a(lpentat_k_q
)ourvu de ta fiche convenable
Prise 4 ills
(!4-30 R)
Prise 3ills
(10-30 R)
Si vous avez une prise
secteur 4 ills cornme ci-
cont[e,procurez-vous UF1
cordon secteur 4 fi}s pour
re|re seche-Snge
Si yeas avez one prise
secteur 3 fits comme
chcon[re, procurez =
VOUS aft cordon
secteur 3 ills pour
vatre seche-linge
cig 6
Raccordement 61ectrique
sila r6glementation locale ne 6ermet 6as une
raise & ta terre 6ar le neutre. Seuil|ez suivre
darts ce cas les instructions concernant le
RACCORaEMENT nAR UN CAB| E 4 cli S.
Raccordement par un cfible 4 ills
COSSeS a................. ]................
fourche & i
exfr6mit6s
recaurb6es
NEUTRE se_e-c_b_e NEUTRE (blanc)
,3/4' certh_ U£\ '\
(..... !, 'I ...... ;'_
"\ fi_deterre ................. >{_i]:
broche de terre (vert) //
cossesaceil
Le cordon secteur 4 ills doll avoir 4 fits de cuivre
n° 10 et sa pdse rn_le del correspondre aune
prise secteur 4 ills de type NEMA I430R Le
quatdeme fil ( conducleur de Ietre) est idenffi6 par
une gaine vede et le conducleur neu|re par une
gaine blanche
Boite de jonction
NE BRANCHEZ PAS la fiche du c_bIe
d'alimentation & une prise secteur avant d'avoir
raccord6 l'autre extr6mi|e du c&ble au s_che
tnge et ferm6 [a bole de jonclon comme
indiqu6 ci-dessous
NE REUTILISEZ PAS un ancien cordon secteu_.
ATTENTION
Ce s_che-linge est livr6 avec une raise & la
terre raccord6e au NEUTRE (centre)
GextLdmit_ du CRUClRnsecteutJ
Seul un c&ble 4 ills 6ourra 6|re utilis6 si
QSSaLeiQ_st insta(l_ dons un mREi(_ hRme Ru
cig 7
Pour raccorder Ie cordon secteur
,. Retirez ]es vis du couvercle de la bole de
mnction situ6e en haut du panneau art|ere du
s_che tinge.
,. aesserrez/retrez les 2 vis du serre-c_ble et
enIevez-le du cordon secteur 4 ills.
•.Le serre-c&bte se divise en 2 parties
idenfques
- Inserez le grand c6t6 des 2 parties dans le trou
situ6 sur le c5t6 gauche du logement de ia
bole de _nction Le petit c6te des 2 parties et
les vis doivent rester postionn6es sur la face
exteme du Iogement de [a bole de _onction
Mode d'emploi 21
Table of contents
Languages:
Other Danby Dryer manuals