manuals.online logo
Brands
  1. Home
  2. •
  3. Brands
  4. •
  5. Danfoss
  6. •
  7. Thermostat
  8. •
  9. Danfoss RT2-RF User manual

Danfoss RT2-RF User manual

1
RT2-RF
Remote Electronic Room Thermostat with Radio
Frequency Communication (Independently Surface Mounted)
USER INSTRUCTIONS
RT2-RF NIGHT SETBACK FEATURE
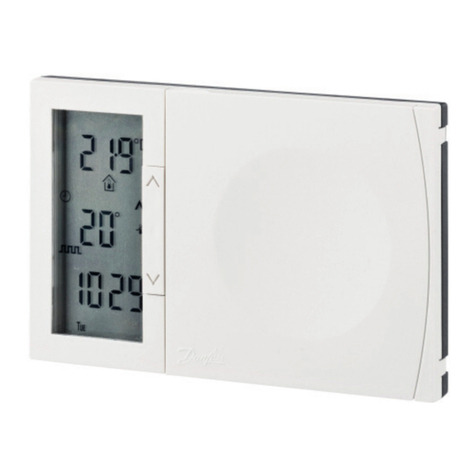
The RT2 incorporates an easy to use, manually selected night setback
feature which allows the user to put the thermostat into setback mode.
The setback feature self cancels at a time programmed in by the user.
SETTING UP AND USING THE THERMOSTAT
1. Slide the battery cover to the left to reveal
the batteries. Remove the paper insulator
from between the batteries and the battery
contacts. The blank display will change to
show actual temperature in the large
characters and required temperature in the
smaller characters. ig 1 shows a typical
display where the actual room temperature is 21°C and the required
temperature is 20°C. Note the "d" symbol on the left hand side of
the display which signifies that the thermostat is in normal "Day"
mode.
2. Press the PROG key - the display changes
to show Time ( ig 2). Use the s and t
keys to set the display to the current time of
day.
3. Press PROG a second time. The display
changes to that shown in ig 2. Use the s
or t buttons to adjust the time at which the
set-back is to be cancelled. Once selected,
this time applies to each day.
Note: This time setting can be adjusted at
any time by repeating steps 2-3 above.
4. IMPORTANT: Press PROG for a third time to return the thermostat
to the run mode before using the s and t button to adjust the
daytime set temperature to the required level. This can be adjusted
between 30°C and 5°C. Please note that the thermostat can also
be set to "Off", should this be required.
5. If the room temperature drops below the selected temperature, a
flame symbol will light to indicate that the thermostat has switched
on.
6. The thermostat will control at the selected set temperature until
the settings are changed or set-back mode is selected.
SELECTING SETBACK MODE
7. To select setback mode, press both s and
t buttons together. The display will change
to show actual temperature and set-back
temperature. An "n" symbol is also lit to
signify that the thermostat is now in set-
back mode. ig 3 shows a typical display.
8. Use the s and t buttons to adjust the setback temperature to
the required value. This can be adjusted between 30°C and 5°C.
Please note that the thermostat can also be set to "Off", should
this be required.
Note: This setback temperature value will be used every time the
thermostat is put into set-back mode unless it is altered at any
time when the thermostat is in setback mode.
9. If the room temperature drops to below the selected setback
temperature, a flame symbol will light to indicate that the thermostat
has switched on.
CANCELLING THE SET-BACK MODE
10. The setback mode will cancel automatically the next day at the
time set in section 3 above. The setback can also be cancelled
manually at any time by pressing both the s and t buttons
together for a second time.
ESTABLISHING COMMUNICATION BETWEEN THE RT2-RF
THERMOSTAT AND ITS RX1 RECEIVER MODULE
Once the programming has been completed, communication between
the thermostat and the receiver module has to be established.
SINGLE ZONE S STEM WITH RX1 RECEIVER
1 - Press and hold the t and + buttons of the RT2-R for at least 3
seconds. The thermostat will now transmit a continuous signal which
contains its unique identity for a period of 5 minutes.
2 - Within the 5 minute period go to the RX1 receiver module and press
both "PROG" and "CH1" buttons together and hold for at least 3
seconds, then release.
During this process the RX1 receiver will have learnt the unique
transmission code of the thermostat and will in future react to all
transmissions from that thermostat.
To stop the continuous transmission on the RT2-R unit press the
s button.
TWO ZONE S STEM WITH RX2 RECEIVER
1 - Repeat as above for zone one (CH1).
2 - Repeat steps one and two above for zone two, remembering to
press "PROG" and "CH2" on the RX2 receiver.
THREE ZONE S STEM WITH RX3 RECEIVER
1 - Repeat as above for zones 1 and 2 (CH1 and CH2).
2 - Repeat as above for zone 3, remembering to press "PROG" and
"CH3" on the RX3 receiver.
BATTER REPLACEMENT
When the batteries approach the end of their life a battery symbol will
flash on the left hand side of the display (see fig 5). When this symbol
appears both batteries should be replaced with high quality alkaline
cells. Having replaced the batteries the required temperature should
be re-set using the s and t keys.
ig. 5
ig. 1
ig.
2
ig. 4
ig. 3
d
2
INSTALLATION INSTRUCTIONS
NEW INSTALLATION
Choose a fixing position where the RT2-RF will sense the
room temperature without being affected by draughts or
heat sources such as radiators, open fires or direct sun-
light, see Fig 5. Fix at a height of approximately .5 metres
from the floor. Refer to Fig 6 for dimensions.
The RT2-RF is a wireless device which communicates
with its receiver module via radio frequency communica-
tion.
The maximum range of the transmitter with the thermostat
is 30 metres under normal conditions.
Fig. 5
TECHNICAL SPECIFICATION - RT2-RF
Power supply - 2 x AA/MN 500/LR6 High Quality Alkaline Batteries
Output From Thermostat - Radio Communication to RX /2/3 Receiver Unit
Range of Transmitter - Max. 30 metres
Transmitter Frequency - 433.92MHz (Licence exempt)
Control Temperature Range - 5-30°C
Maximum Ambient Temperature - 45°C
Temperature Accuracy - ± °C
Timing Accuracy - ± minute/month
Designed to meet - BS EN60730-2-9, EN 300-220- , ETS 300-683
Overall Dimensions (mm) - 99W, 8 H, 34D
Enclosure Rating - IP30
Control Pollution Situation - Degree 2
Software Classification - Class A
Ball Pressure Test - 75°C
RT2-RF
Fig. 6
60 mm
fixing
centres
110 mm
minimum from
nearest
obstruction
Danfoss Randall can accept no responsibility for possible errors in catalogues, brochures and other printed material. Danfoss Randall reserves the right to alter its products without notice. This also
applies to products already on order provided that such alterations can be made without subsequent changes being necessary in specifications already agreed.
Danfoss Randall Ltd
Ampthill Road
Bedford MK42 9ER
Tel: (01234) 364621 ax: (01234) 219705
Email: [email protected]
Website: www.danfoss-randall.co.uk
This product complies with the following EC Directives
:
Electro-Magnetic Compatibility Directive.
(EMC) (89\336\EEC), (92\31\EEC)
Low Voltage Directive.
(LVD) (73\23\EEC), (93\68\EEC)
Part No 3901 Iss. 5 07/01

Other Danfoss Thermostat manuals

Danfoss ECL Comfort 210 User manual

Danfoss

Danfoss ECL Comfort 210 User manual

Danfoss 3020P Assembly Instructions

Danfoss

Danfoss 3020P Assembly Instructions

Danfoss ECL Comfort 310, A302 User manual

Danfoss

Danfoss ECL Comfort 310, A302 User manual

Danfoss DEVIreg 610 User manual

Danfoss

Danfoss DEVIreg 610 User manual

Danfoss FH-RT Manual

Danfoss

Danfoss FH-RT Manual

Danfoss RET M Operating instructions

Danfoss

Danfoss RET M Operating instructions

Danfoss TP75M User manual

Danfoss

Danfoss TP75M User manual

Danfoss WT-DR User manual

Danfoss

Danfoss WT-DR User manual

Danfoss DEVIreg Touch User manual

Danfoss

Danfoss DEVIreg Touch User manual

Danfoss DEVIreg Smart User manual

Danfoss

Danfoss DEVIreg Smart User manual

Danfoss ECL Comfort 210 User manual

Danfoss

Danfoss ECL Comfort 210 User manual

Danfoss ECtemp 535 User manual

Danfoss

Danfoss ECtemp 535 User manual

Danfoss ECL Comfort 310, P314 User manual

Danfoss

Danfoss ECL Comfort 310, P314 User manual

Danfoss TP5001 series User manual

Danfoss

Danfoss TP5001 series User manual

Danfoss Link FT User manual

Danfoss

Danfoss Link FT User manual

Danfoss TP9 User manual

Danfoss

Danfoss TP9 User manual

Danfoss RET 230 User manual

Danfoss

Danfoss RET 230 User manual

Danfoss ECtemp 610 User manual

Danfoss

Danfoss ECtemp 610 User manual

Danfoss ST-S2 User manual

Danfoss

Danfoss ST-S2 User manual

Danfoss TP5001M User manual

Danfoss

Danfoss TP5001M User manual

Danfoss ECtemp 531 User manual

Danfoss

Danfoss ECtemp 531 User manual

Danfoss KP61 User manual

Danfoss

Danfoss KP61 User manual

Danfoss RT 270 User manual

Danfoss

Danfoss RT 270 User manual

Danfoss Link DBR User manual

Danfoss

Danfoss Link DBR User manual

Popular Thermostat manuals by other brands

Honeywell RTH8500WF Quich start guide

Honeywell

Honeywell RTH8500WF Quich start guide

Honeywell Home T5 Smart Quick install guide

Honeywell Home

Honeywell Home T5 Smart Quick install guide

Honeywell Lyric installation guide

Honeywell

Honeywell Lyric installation guide

EVE Degree Get started

EVE

EVE Degree Get started

Arduino R205 Series instruction manual

Arduino

Arduino R205 Series instruction manual

Hitachi ATW-RTU-09 instruction manual

Hitachi

Hitachi ATW-RTU-09 instruction manual

Energate FZ100 quick start guide

Energate

Energate FZ100 quick start guide

KIOUR ICE V3 instructions

KIOUR

KIOUR ICE V3 instructions

HaiLin Controls HA202 user manual

HaiLin Controls

HaiLin Controls HA202 user manual

Cordivari Heat Manager user manual

Cordivari

Cordivari Heat Manager user manual

Sonder Siesta-TA RF instruction manual

Sonder

Sonder Siesta-TA RF instruction manual

Theben RAMSES 811 top3 manual

Theben

Theben RAMSES 811 top3 manual

Saswell T11FHL-0(N) user manual

Saswell

Saswell T11FHL-0(N) user manual

Ecobee ecobee4 user manual

Ecobee

Ecobee ecobee4 user manual

Honeywell PC8900A manual

Honeywell

Honeywell PC8900A manual

Elko TEV-4 manual

Elko

Elko TEV-4 manual

EPH Controls CDTP2 operating instructions

EPH Controls

EPH Controls CDTP2 operating instructions

OJ Electronics 29071 user manual

OJ Electronics

OJ Electronics 29071 user manual

manuals.online logo
manuals.online logoBrands
  • About & Mission
  • Contact us
  • Privacy Policy
  • Terms and Conditions

Copyright 2025 Manuals.Online. All Rights Reserved.