10
Modalità di funzionamento LED RGB
Mode of operation of the RGB LED
IT - Colori in sequenza nelle due modalità :7
Sequenza: Bianco - Rosso - Verde - Blu - Giallo - Fucsia - Azzurro.
Modo Manuale
In Modo Manuale è possibile selezionare un colore sso tra i 7 colori disponibili.
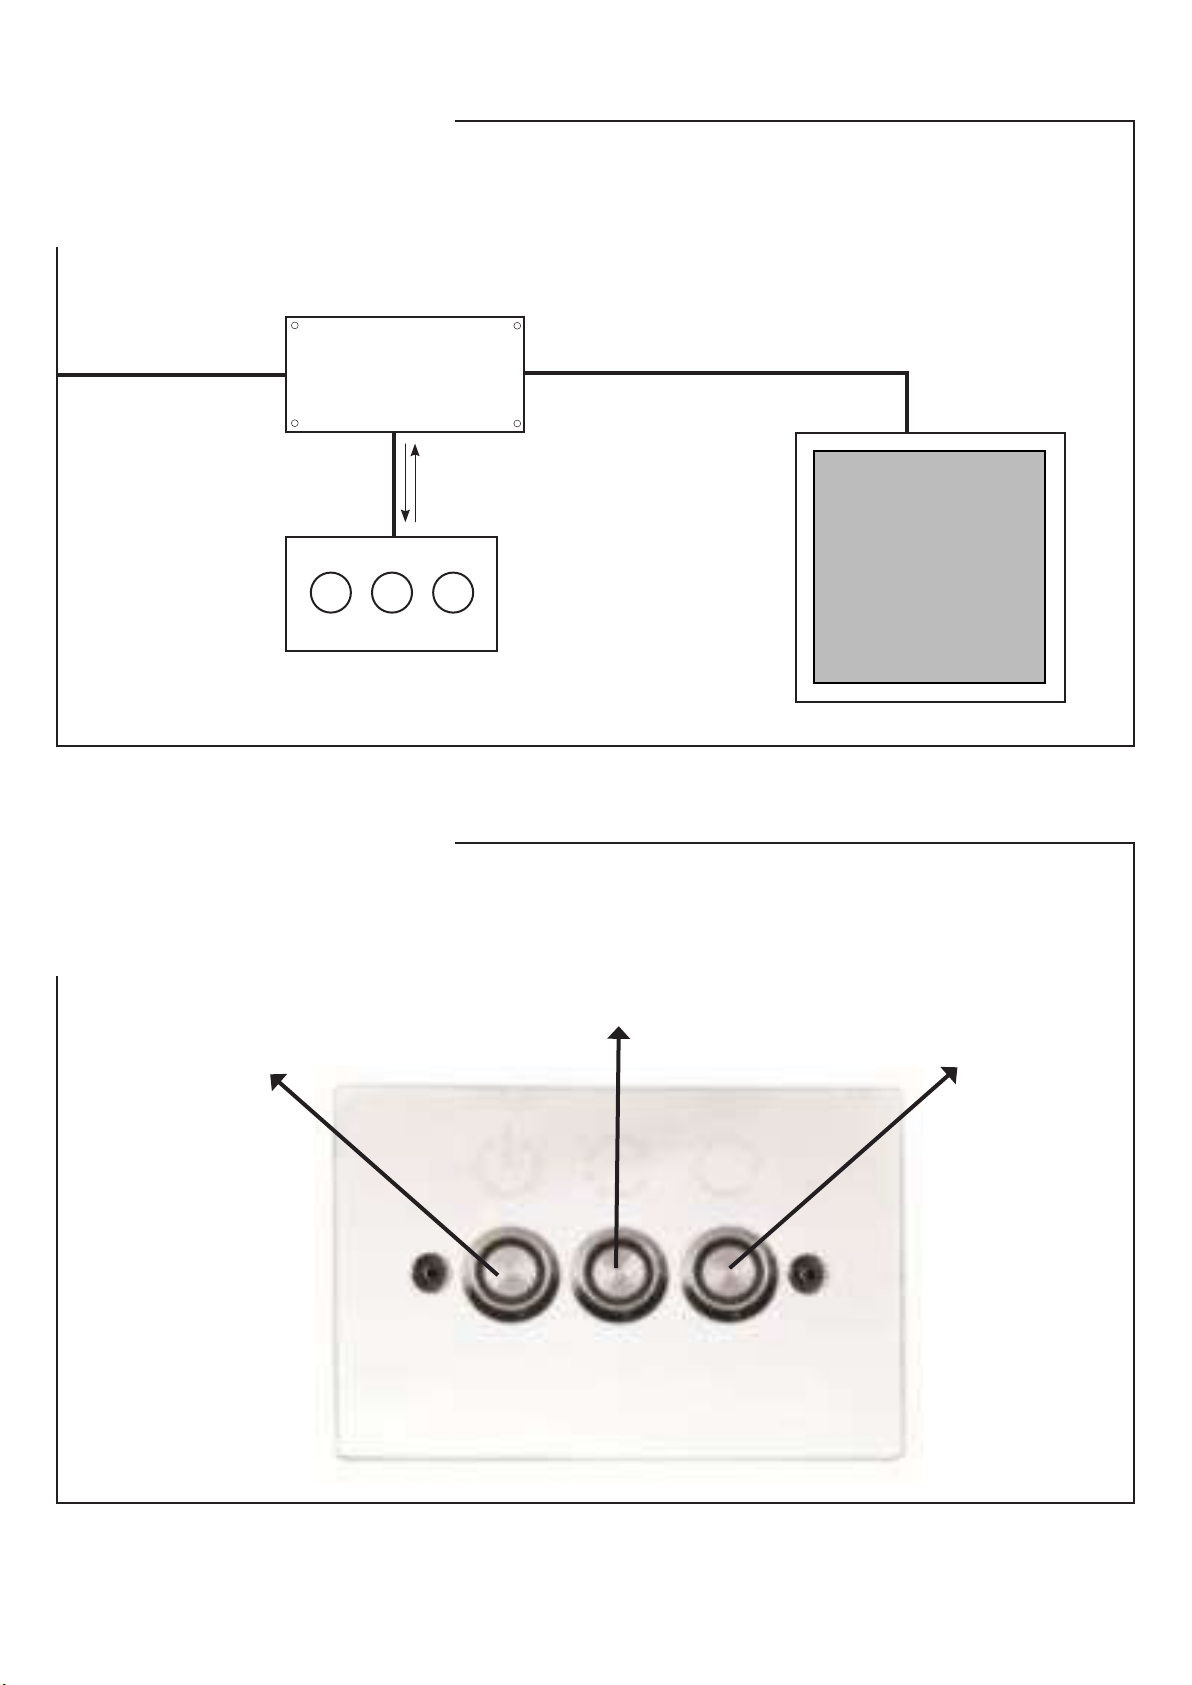
Dopo aver acceso la cromoterapia utilizzando il pulsante Accensione (Pag.9) avremo la luce bianca come impostazione di partenza
. Ad ogni pressione del pulsante centrale Scelta Colore (Pag.9)
passeremo al colore successivo no a selezionare il colore desiderato seguendo la sequenza.
Il passaggio da un colore al successivo sarà netto ed istantaneo.
Modo Automatico
In Modo Automatico il cambio colore avviene in maniera autonoma rispettando la sequenza sopra descritta ma con il cambio che
avverrà in modo graduale con le gradazioni intermedie dei colori.
Il giro completo dei colori avviene in circa 1 minuto con una suddivisione identica tra i colori stessi.
Dopo aver acceso la cromoterapia utilizzando il pulsante Accensione (Pag.9) avremo la luce bianca come impostazione di partenza.
Con una sola pressione del pulsante Cromoterapia Automatica (Pag.9) si attiverà l’automatismo che potrà essere interrotto sia
con il pulsante Scelta Colore (Pag.9) per tornare in Modo Manuale sia con il pulsante Accensione (Pag.9) per interrompere la
cromoterapia.
EN - Number of colours available in the two modes: 7
Order: White – Red – Green – Blue – Yellow – Fuchsia – Bright Blue
Manual Mode
In Manual Mode it is possible to select one single colour amongst the seven available.
Once having turned the chromotherapy on by using the Switch ON button (pg. 9) we shall have White light as the starting set-
ting. Each pression of the central button Colour Choice (pg. 9) will move forward to the next colour in the colour sequence.
The transition from one colour to the next one will be immediate and sharp.
Automatic Mode
In Automatic Mode the colour changes autonomously following the sequence order listed above with a smooth transition and
also showing intermediate shades between colours.
Once having turned the chromotherapy on by using the Switch ON button (pg. 9) we shall have White light as the starting
setting.
With one single pression of the button Colour Choice (pg. 9) the automatism will be be activated and can be stopped either by
pressing the button Colour Choice (pg. 9) to return to Manual Mode, or by pressing the button Switch ON (pg. 9) to stop the
chromotherapy.