EN EN
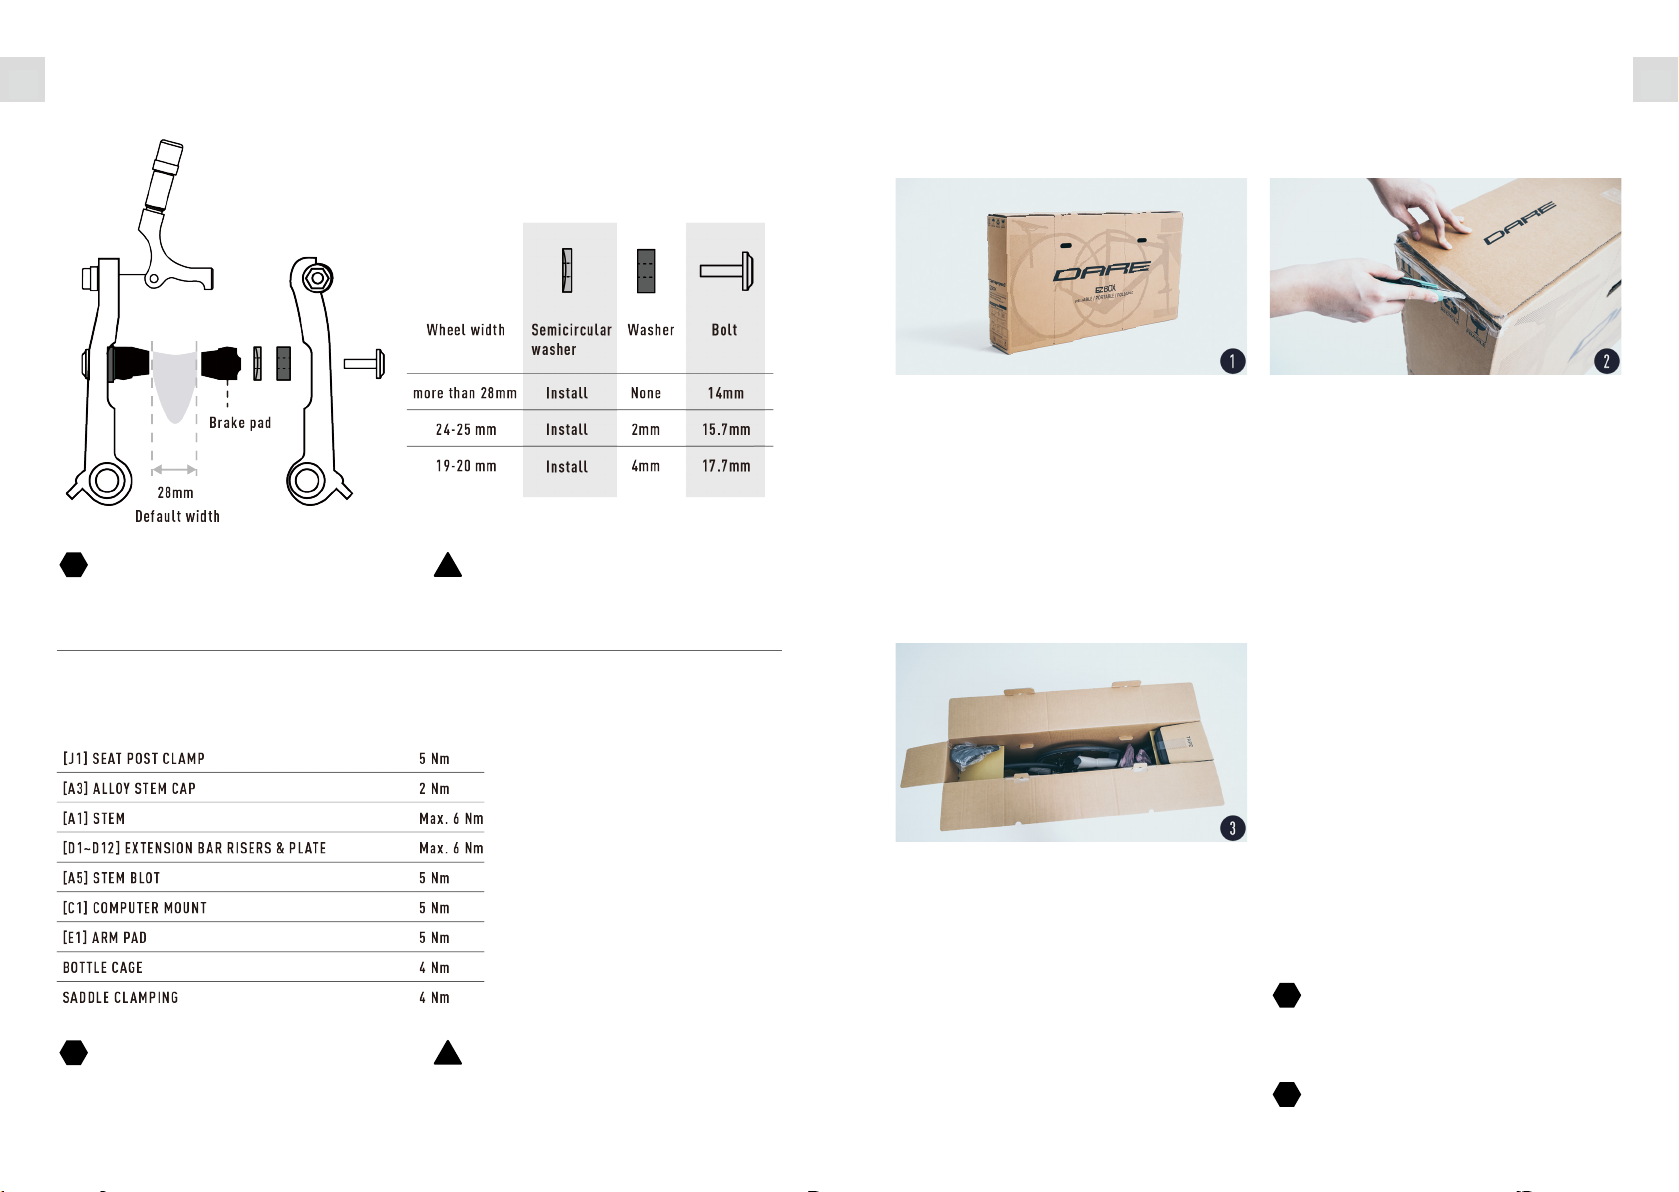
Front Brake Adjustment
Screw Torque Value Guide
Fitting trial assembly and final assembly
are both recommended to follow torque
values when tightening the srews.
Recommended torque value is applicable
under most circumstances. Since such in-
formation is not specified by DARE, please
refer to the sign on the bike or the gadget
instruction manuals for details.
Front brake is already assembled on the
fork. Default rim width is 28mm.
To ensure brake efficiency and safety,
please follow the chart below and use
the correct washer and bolt with the
corresponding wheel width.
The DARE EZBOX is a carton which is designed for
transportation. Its purpose is to allow the user
to transport their bicycle frequently whilst min-
imising storage space. The packing and storage
instructions are detailed on the box itself. (The
image is just for reference) Please refer to these
instructions to pack the bicycle properly. An EZ-
Box wheels can be purchased separately to allow
the box to be transported more easily. See more
details on www.dare-bikes.com/download.
It is very easy to unpack the carton. Please follow
the instructions step by step to avoid any mistake
result in injury or damage. Begin by using a small
knife such as a utility knife to cut the tape. Be sure
to use a suitable knife to prevent damage to the
bike.
Once opened you will see that 85% of the bicycle
has been assembled (including the rear wheel
and main components). The front wheel, seat-
post and handlebars are packed separately, and
there's also a tool box within the carton which
includes spare hangers, screws, a front wheel
quick release skewer, carbon friction paste, a
5NM torque wrench set, bicycle reflectors, some
small parts, a DARE Manual and any additional-
ly-purchased products (the Di2 accessories will
include a battery charger).
Each model will have different components.
Please refer to the specification on the web-
site.
Unboxing & Assembly
When assembling the bike, it will be easier
and quicker to do so with another person.
Although it can be done by yourself with a
bike rack or the EZBOX.
16 17