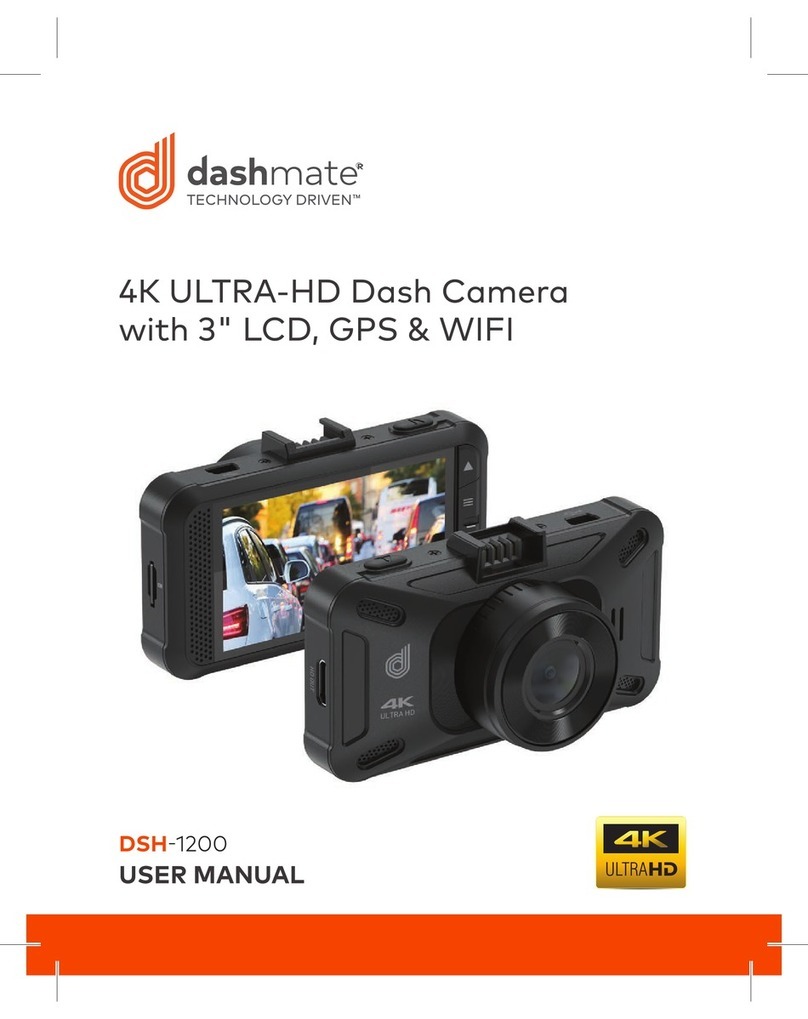
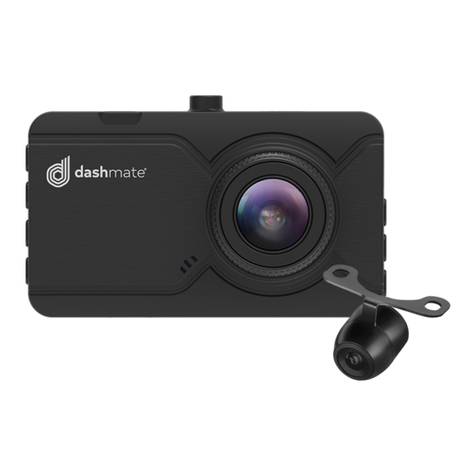
Dashmate DSH-882 User manual

720p Resolution
Rear Camera
DSH-882 | USER MANUAL
Full HD Dash Camera
With Park mode & G Sensor
1080p
Resolution
GPS
Logger
WiFi
Connectivity


3
CONTENTS
CAUTION ..............................................................................................5
BATTERY WARNING ...........................................................................6
NOTES ON INSTALLATION................................................................6
1. INTRODUCTION...............................................................................6
2. FEATURES........................................................................................7
3. PACKAGE CONTENTS....................................................................7
4. PRODUCT OVERVIEW....................................................................7
5. GETTING STARTED........................................................................ 8
5.1 INSERTING A MICRO SD CARD............................................. 8
5.2. REMOVING MICRO SD CARD .............................................. 8
5.3. MOUNTING YOUR DSH882..................................................9
5.4. GPS RECEIVER........................................................................9
5.5. REAR CAMERA......................................................................10
5.6. WIRING DIAGRAM................................................................10
5.7. WIFI CONNECTION ..............................................................10
5.8. RECORDING ...........................................................................11
5.9. TIME AND DATE .....................................................................11
6. INITIAL SETTINGS......................................................................... 12
6.1. G SENSOR .............................................................................. 12
6.2. FORMATTING YOUR MICRO SD CARD ............................. 12
7. APP OPERATION ........................................................................... 13
7.1. CAMERA VIEWFINDER ......................................................... 13
7.2. SETTINGS............................................................................... 14
7.2.1. Connection Settings......................................................... 14

4
7.2.2. Camera Sounds................................................................ 14
7.2.3. LDWS.................................................................................. 15
7.2.4. FCWS ................................................................................. 15
7.2.5. Resolution .......................................................................... 16
7.2.6. Loop Recording ................................................................ 16
7.2.7. Park Mode ......................................................................... 16
7.2.8. G Sensor............................................................................. 17
7.2.9. Motion Detection.............................................................. 17
7.2.10. Exposure........................................................................... 18
7.2.11. Format SD Card.............................................................. 18
7.2.12. Restore to Default .......................................................... 19
8. SD CARD FILES........................................................................ 19
8.1. Playback ............................................................................... 20
8.2. Deleting Videos .................................................................. 20
8.3. Transferring Videos to Your Smart Device .................... 21
9. PLAYBACK SOFTWARE ............................................................... 21
9.1. PLAYBACK ..............................................................................22
10. WARRANTY TERMS & CONDITIONS........................................23

5
CAUTION
• Ensure you are using your Dash Cam within your countries’ road
laws. Please make sure you are familiar with your local road
legislation before use.
• Avoid leaving your Dash Cam in direct sunlight for extended
periods of time in an unventilated space.
• Please set time and date before you use this device to record.
• The notiications given by the Dash Cam are suggestions only,
please drive to the actual conditions.
• The results of GPS positioning are only for reference. The Dash
Cam will lose GPS positioning abilities when signal is blocked
(eg driving through tunnels, enclosed car parks).
• GPS positioning accuracy may vary depending on weather
and surroundings such as dense cities, tunnels, or forests. GPS
satellite signals cannot pass through most solid materials.
Tinted windows may also affect the GPS signal.
• The values displayed in this system, such as speed, position,
and the distance warning, may be affected by the surrounding
environment.
• The system is to be used only for non-commercial use, within
the limits permitted by the relevant laws
• Wi-Fi Signal is designed to be used in close proximity to your
smartphone. The longest range of the Wi-Fi signal is 10m.
• Wi-Fi Operation Channels List: Ch1~Ch11.
• Avoid using the Dash Cam in the vicinity of any devices that
emit radio interference (eg. Microwave Ovens).
• Please note that other devices using 2.4GHz band may interfere
with the Wi-Fi signal of the Dash Cam, and result in the
connection speed of both devices slowing down.
• It is considered normal operation for the Dash Cam to get
warm during use.

6
BATTERY WARNING
• Always charge the Dash Cam using the provided charger.
Improper charging of the Dash Cam and may result in failure of
the internal battery.
• Never dismantle the Dash Cam or expose the internal battery.
• Do not dispose of the Dash Cam in ire.
• Dispose of the Dash Cam observing local regulations being
mindful of the internal battery.
• Do not attempt to replace or expose the internal battery.
NOTES ON INSTALLATION
1. It is advised that the Dash Cam is installed near the rear
view mirror, at the top centre of the windshield for optimal
operation.
2. Make sure that the lens is within the range of the windscreen
wiper to ensure a clear view when it rains.
3. Do not touch the lens with your ingers. Finger prints left on the
lens will result in unclear videos or photos. If photos or videos
are blurred, please clean the lens gently with a microibre cloth.
4. Do not install the device on a tinted window. Doing so may
damage the tint ilm and restrict the Dash Cam’s GPS signal.
5. Make sure that the installation position does not hinder or block
the ield of view or GPS signal.
6. Only use the included charging cable to power the Dash Cam.
1. INTRODUCTION
Thank you for purchasing a Dashmate Dash Cam. We are
certain that our product will give you trouble free operation while
providing you with safety features that enhances your driving
experience. Our products, like most after-market safety enhanced
devices, are designed to assist and aid the driver, not to replace
the manual function of the person operating the vehicle. Please
read through these instructions before attempting to install this
product. For the latest manual and product updates, please visit
our website at www.dashmate.com.au or www.dashmate.co.nz

7
2. FEATURES
Recording Full HD 1080P footage
140° ield of view
720P Rear Facing Camera
GPS logger module
Built in wireless smart phone connectivity
Built in G Sensor
3. PACKAGE CONTENTS
1. Dash Cam
2. Rear Camera
3. GPS Module
4. USB DC Power Adapter
5. USB Power Cable
6. Rear Camera Loom
7. Rear Camera Cable
4. PRODUCT OVERVIEW
1. Recording LED
2. Reset Button
3. Mount
4. Wide angle lens
5. GPS Connection
6. Micro SD Card Slot
7. USB Rear Camera Loom
Connection
04
02
01
03
05
06
07

8
5. GETTING STARTED
5.1 INSERTING A MICRO SD CARD
Please note that the Micro SD card can only go into your device
one way.
Attempting to install the card other than how it’s described
below will cause damage to either your card, device, or both.
Do not force your card into the slot. If force is required, it is
likely that your card is in the wrong way. A correctly inserted
card will require you to use your inger nail to push the card into
the slot until a click sound is heard/felt.
Instructions
Ensure that your DSH-882 is not connected to any power.
Position the Micro SD card with the gold contacts facing the
front of the camera. The gold contact ends of your memory
card should always go into the slot irst. Use your ingernail to
press the card into the slot until a click is heard.
Note:
• Do not insert or remove a Micro SD card while your DSH-
882 is powered up or recording. This may damage your
Micro SD card.
• Please use Class 10 rated Micro SD cards up to 32GB
• Please format the Micro SD card before initial use (in FAT 32
format if you are using a computer to format your Micro SD
card). The card can also be formatted using the App.
• To quickly delete all items on your Micro SD card you can
format the card in the settings menu of the App
5.2. REMOVING MICRO SD CARD
Ensure that your DSH-882 is powered off. Using your ingernail
press the SD card until a click is heard and release. The card
should eject from the slot. Please ensure you always handle
your Micro SD Card with care.

9
5.3. MOUNTING YOUR DSH882
Please read through all mounting instructions for all
components before you attempt to mount your DSH-882.
It is recommended that you install the DSH-882 in a position
behind your rear-view mirror, ensuring that your front driving
view is not obstructed. Once you have mounted your camera
using your preferred method it is recommended that you run
the power cable around your windscreen under your vehicles
interior trim in the driver’s side direction ensuring to connect
the camera to power via the included Rear Camera Loom cable.
5.4. GPS RECEIVER
The GPS received included with the DSH-882 is designed to be
connected to the Dash Cam and mounted on the interior of
your vehicles windscreen. Once this is correctly mounted and
connected to the Dash Cam the Dash Cam will record the GPS
data when recording video. Do not mount the GPS logger on
any tinted section of window as this may block the GPS signal.
Note:
• GPS will be unavailable in covered or built up areas (e.g.
tunnels, parking buildings, tall buildings, dense forest).
When in these conditions the GPS signal may be blocked.
• The GPS module may take up to 2 minutes to start up after
the camera powers up. In this time GPS data will not be
recorded.
• If you receive a memory card error, please ensure that you
are using a class 10 Micro SD card that is up to 32GB. Please
also ensure that the Micro SD card is formatted in the
FAT32 format.

10
5.5. REAR CAMERA
The DSH-882s rear camera is used to record the trafic
and any incidents that may happen behind your vehicle. It is
required that you use the 5.5m rear camera cable, rear camera
will not work when plugged directly into the Rear Camera
Loom.
It is suggested when the Rear Camera is installed that you run
all cabling under your vehicles upholstery.
5.6. WIRING DIAGRAM
5.7. WIFI CONNECTION
All settings on the DSH-882 are edited through the
DHS-882 App. The system requirements for your smart phone
are noted below.
iPhone: iPhone 5 or later using iOS 8.0 and above.
Samsung Galaxy: S3 and later using Android 4.2.2 and above.
For you to correctly connect your smart device to your
DSH-882 you will need to have the DSH-882 App from the App
store. You will also need to connect your smart phone to the
DSH-882’s WiFi signal using your smartphones WiFi settings.
For a step by step guide on connecting to your Dash Cam
please follow the steps below.
GPS
REAR CAMERA
REAR CAMERA LOOM
5.5M REAR CAMERA CABLE
GPS MODULE
POWER CABLE
USB DC POWER
ADAPTER

11
1. On your smart device download the DSH-882 App from the
Google Play store if you are using an Android device, or the
iOS App store if you are using an iPhone.
2. Power up the DSH-882 and allow 2-3 minutes for the WiFi
connection to start.
3. Once the App is downloaded and installed on your phone
and the Dash Cam is powered up, open your phones WiFi
settings and connect to the wireless connection named
DSH882.
4. When prompted enter the password 1234567890
SSID: DSH882
PASSWORD: 1234567890
5. Once the connection has been made, open the DSH-882
App. You will now be able to access the live screen view for
the front and rear cameras, the stored videos, and the Dash
Cams settings.
5.8. RECORDING
The DSH-882 is designed to start recording as soon as your
vehicle powers up. The lashing blue REC led on the rear of
the camera the DSH-882 will record video onto the inserted
Micro SD Card until the card is full. Once the card is full the
Dash Cam will record over the oldest recorded ile. If there is an
impact to your vehicle the Dash Cam will save the video as an
emergency iles away from the regular loop recording so that it
will not be saved over.
5.9. TIME AND DATE
The Dash Cams time and date are set every time the camera
wirelessly connects to your smart device. If your car has not
been started in a week or longer it is recommended that
you connect your smart device to your dash cam using the
instructions in the WiFi Connection section of this manual.

12
6. INITIAL SETTINGS
Before using the Dash Cam we recommend Formatting the
inserted Micro SD Card and setting the Dash Cams G Sensor.
6.1. G SENSOR
The G Sensor setting sets the sensitivity needed to trigger an
emergency recording. It is recommended that you customise
this setting when you irst use the DSH-882 as different
vehicles will require different sensitivities (smaller vehicles
require lower sensitivities; larger vehicles require higher
sensitivities).
To set the G Sensor setting please follow the steps below.
1. Connect your smart device to the DSH-882 using the
instructions laid out in the WiFi Connection section of this
manual.
2. In the opening page of the App press the (settings)
button.
3. Find and tap the G Sensor setting.
4. Pick your required setting.
6.2. FORMATTING YOUR MICRO SD
CARD
Formatting your micro SD card deletes all data on the card
and prepares it for use with the DSH-882
It is recommended that you format your Micro SD Card before
you use the DSH-882 or if you use a different Micro SD Card to
ensure correct operation.
To format your Micro SD Card, please follow the instructions
below.
1. Connect your smart device to the DSH-882 using the
instructions laid out in the WiFi Connection section of this
manual.
2. In the opening page of the App press the (settings)
button.

13
3. Find and tap the Format SD Card setting.
4. Tap ‘Conirm’ to proceed.
5. The card will now format, this will take up to a minute.
7. APP OPERATION
To use the DSH-882 App your smart device will need to be
connected to the Dash Cams wireless connection. For instructions
on connecting please see the section of the manual named WiFi
Connection.
Settings
This is used to edit your Dash Cams settings.
SD Card Status
Displays the capacity and free space of the inserted Micro SD
Card.
Camera Viewinder
Displays the view from your cameras front and rear cameras.
SD Card Files
Allows you to view the iles stored on the Micro SD Card.
Local Files
Allows you to view the iles stored on your smart device.
7.1. CAMERA VIEWFINDER
1. Recording Mode
2. Snapshot/Record Button
3. Photo Mode
4. Front/Rear View Switch

14
The Camera Viewinder screen displays the cameras live view.
To manually start or stop recording tap the Recording Mode (1)
button, and then use the Snapshot/Record Button to toggle
recording start and stop.
To take a snapshot tap the Photo Mode button and use the
Snapshot/Record Button to take a photo.
To switch the displayed view between the front and rear
camera use the Front/Rear View Switch button.
7.2. SETTINGS
7.2.1. CONNECTION SETTINGS
Allows you to change the wireless connections name and
password.
To edit the connection settings please follow the instructions
below.
1. Connect your smart device to the DSH-882 using the
instructions laid out in the WiFi Connection section of this
manual.
2. In the opening page of the App press the (settings)
button.
3. Find and tap the Connection Settings setting.
4. Set your required connection name and/or password.
7.2.2. CAMERA SOUNDS
Camera Sounds allows you to mute the Dash Cams chime
sounds.
To mute or unmute the Dash Cam please follow the steps
below.
1. Connect your smart device to the DSH-882 using the
instructions laid out in the WiFi Connection section of this
manual.
2. In the opening page of the App press the (settings)
button.

15
3. Find the Camera Sounds setting and use the toggle to
switch this setting ON or OFF.
7.2.3. LDWS
The Lane Departure Warning System (LDWS), which will warn
you if you are drifting out of your lane.
To activate LDWS please follow the steps below
1. Connect your smart device to the DSH-882 using the
instructions laid out in the WiFi Connection section of this
manual.
2. In the opening page of the App press the (settings)
button.
3. Find the LDWS setting and use the toggle to switch this
setting ON or OFF.
7.2.4. FCWS
The Forward Collision Warning System (FCWS) notiies you
when you are traveling too close to the vehicle ahead and
notiies you until you there is safe breaking distance between
your vehicle and the trafic ahead.
To Activate FCWS please follow the steps below.
1. Connect your smart device to the DSH-882 using the
instructions laid out in the WiFi Connection section of this
manual.
2. In the opening page of the App press the (settings)
button.
3. Find the FCWS setting and use the toggle to switch this
setting ON or OFF.

16
7.2.5. RESOLUTION
Resolution allows you to set the recording resolution of
the camera.
To edit this setting please follow the instructions below.
1. Connect your smart device to the DSH-882 using the
instructions laid out in the WiFi Connection section of this
manual.
2. In the opening page of the App press the (settings)
button.
3. Find and tap the Resolution setting.
4. Set your required Resolution.
7.2.6. LOOP RECORDING
The Loop Recording setting allows you to set the duration the
camera will record for before starting a new video ile.
To edit the Loop Recording setting please follow the
instructions below.
1. Connect your smart device to the DSH-882 using the
instructions laid out in the WiFi Connection section of this
manual.
2. In the opening page of the App press the (settings)
button.
3. Find and tap the Loop Recording setting.
4. Set your required loop duration.
7.2.7. PARK MODE
Park Mode will detect impacts to your vehicle after you have
parked. If an impact is detected Park Mode will switch the
camera on and start a recording.
To edit the Park Mode recording please follow the steps below.
1. Connect your smart device to the DSH-882 using the
instructions laid out in the WiFi Connection section of this
manual.

17
2. In the opening page of the App press the (settings)
button.
3. Find and tap the Park Mode setting.
4. Set your required G Sensor sensitivity for Park Mode.
7.2.8. G SENSOR
The G Sensor setting sets the sensitivity needed to trigger an
emergency recording. It is recommended that you customise
this setting when you irst use the DSH-882 as different
vehicles will require different sensitivities (smaller vehicles
require lower sensitivities; larger vehicles require higher
sensitivities).
To set the G Sensor setting please follow the steps below.
1. Connect your smart device to the DSH-882 using the
instructions laid out in the WiFi Connection section of this
manual.
2. In the opening page of the App press the (settings)
button.
3. Find and tap the G Sensor setting.
4. Pick your required setting.
7.2.9. MOTION DETECTION
Motion Detection will stop recording when no movement is
detected in front of the camera, and resume recording when
the action resumes conserving space on your Micro SD Card.
To set Motion Detection please follow the steps below.
1. Connect your smart device to the DSH-882 using the
instructions laid out in the WiFi Connection section of this
manual.
2. In the opening page of the App press the (settings)
button.
3. Find and tap the Motion Detection setting.
4. Pick your required setting.

18
7.2.10. EXPOSURE
The Exposure setting is used to manually set the cameras
exposure.
To edit the exposure settings please follow the steps below.
1. Connect your smart device to the DSH-882 using the
instructions laid out in the WiFi Connection section of this
manual.
2. In the opening page of the App press the (settings)
button.
3. Find and tap the Exposure setting.
4. Pick your required setting.
7.2.11. FORMAT SD CARD
Formatting your micro SD card deletes all data on the card
and prepares it for use with the DSH-882
It is recommended that you format your Micro SD Card before
you use the DSH-882 or if you use a different Micro SD Card to
ensure correct operation.
To format your Micro SD Card, please follow the instructions
below.
1. Connect your smart device to the DSH-882 using the
instructions laid out in the WiFi Connection section of this
manual.
2. In the opening page of the App press the (settings)
button.
3. Find and tap the Format SD Card setting.
4. Tap ‘Conirm’ to proceed.
5. The card will now format, this will take up to a minute.

19
7.2.12. RESTORE TO DEFAULT
Restore to Default restores the camera to factory settings.
To restore your Dash Cam please follow the instructions below.
1. Connect your smart device to the DSH-882 using the
instructions laid out in the WiFi Connection section of this
manual.
2. In the opening page of the App press the (settings)
button.
3. Find and tap the Restore to Default setting.
4. Tap ‘Conirm’ to proceed.
8. SD CARD FILES
The SD Card Flies screen is used to playback and transfer
videos from the Dash Cams installed Micro SD Card to your
smart device.

20
8.1. PLAYBACK
To playback videos from the inserted Micro SD Card, please
follow the steps below.
Please note, video playback may take a few seconds to buffer.
1. Connect your smart device to the DSH-882 using the
instructions laid out in the WiFi Connection section of this
manual.
2. In the opening page of the App press the (SD Card Files)
button.
3. Select either Front Video or Rear Video depending on the
video that you want to play.
4. Select the video you want to play.
5. Press the Open button (3) to begin playback.
8.2. DELETING VIDEOS
To delete videos please follow the steps below.
1. Connect your smart device to the DSH-882 using the
instructions laid out in the WiFi Connection section of this
manual.
2. In the opening page of the App press the (SD Card Files)
button.
3. Select either Front Video or Rear Video depending on the
video that you want to Delete.
4. Select the video using the checkbox on the right.
5. Tap the Delete button (2) to delete the videos
Table of contents
Other Dashmate Dashcam manuals
