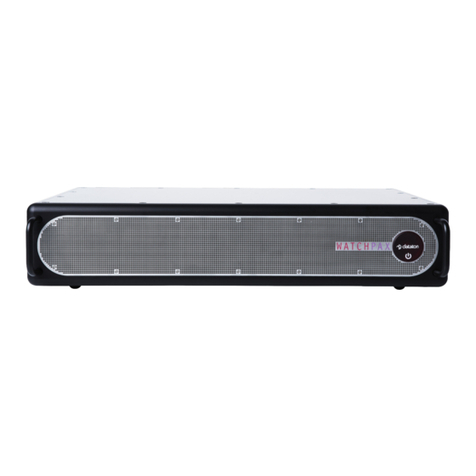
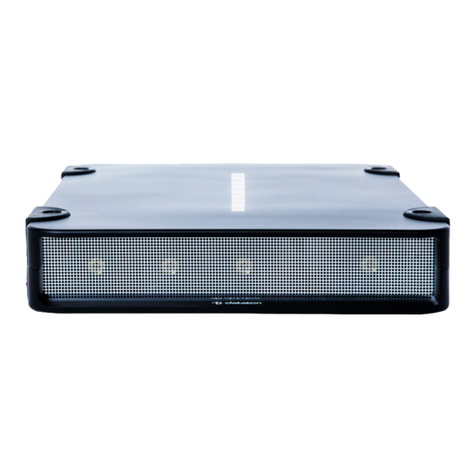
Dataton Watchpax 4 User manual

1.3

DATATON WATCHPAX 4 – USER’S GUIDE TABLE OF CONTENTS
1. INTRODUCTION 3
What’s WATCHOUT? 3
SYSTEM OVERVIEW 4
WATCHPAX 4 In Your Rig 4
Display Devices 4
TECHNICAL SPECIFICATION 5
Dimensions 5
Connectors 5
Environmental 5
DISPOSAL 6
2. INSTALLATION AND OPERATION 7
BEFORE USING YOUR WATCHPAX 4 7
Safety First 7
FCC Notice 8
VENTILATION 8
INSTALLATION 9
Standalone 9
In 19-inch rack 9
OPERATION 9
Power On 9
Power Off 9
Wake-On-Lan 9
GETTING STARTED 10
IP Number Assignment 10
Set Native Resolution 11
Auto Start 11
DELETE FILES 11
REBUILD SHOW CACHE 11
DATATON WATCHPAX 4 – USER’S GUIDE
This manual is © Copyright 2017, DATATON
AB (“Dataton”). All rights reserved.
Dataton, the Dataton logo, WATCHPAX,
WATCHOUT and WATCHMAX are registered
trademarks/trademarks of DATATON AB. All
other company and product names are trade-
marks or registered trademarks of their respec-
tive owners. Use of a term in this publication
should not be regarded as affecting the validity
of any trademark.
The information in this manual has been
checked and is believed to be accurate. How-
ever, Dataton assumes no responsibility for any
inaccuracies or errors in this manual or the
products described. In no event will Dataton be
liable for direct, indirect, special, incidental, or
consequential damages resulting from any
defect or omission in this manual, even if
advised of the possibility of such damages. The
technical information contained herein regard-
ing features and specications is subject to
change without notice.
Products or manufacturers mentioned do not
constitute a recommendation or endorsement
by Dataton.
Document number: 3785/1.2

INTRODUCTION 3
1. INTRODUCTION
WATCHPAX 4 is a dedicated display server with four video outputs and a built-in Dataton
WATCHOUT license. It features a high-performance specication designed solely with WATCHOUT
shows in mind. The four DisplayPort outputs support 4K (UHD) playback, making it a powerful and
portable alternative to display servers in a multi-display setup.
WATCHPAX 4 is a locked-down unit, precongured for playback of WATCHOUT shows and, there-
fore, ready to be used straight out-of-the-box. Multiple units can be installed together in a rig or mixed
with Dataton’s other display servers WATCHMAX or WATCHPAX 2.
WATCHPAX 4 is compact, sturdy and stackable. Each unit weighs just under 3 kg, making it easy to
transport. Other practical details include a strap handle, rubber bumpers and Kensington security slot.
Two units may also be mounted together and installed in a 19-inch rack.
WHAT’S WATCHOUT?
Dataton WATCHOUT is the leading multi-display production and presentation software. Use
WATCHOUT to orchestrate images, video, lighting, 3D and interactivity into a single impressive show.
The essential components of a WATCHOUT show are the software, display servers and display
devices, all running on a standard network. In an operational setup, WATCHOUT license keys are
required for each display server. This license key is built into WATCHPAX 4.
WATCHOUT shows can be presented with multiple projectors for large, seamless images or used with
monitors, LED walls or other creative screen arrangements. WATCHOUT also has a strong set of pro-
jection and pixel-mapping features for applying content to complex three-dimensional objects.
Download WATCHOUT for free from the Dataton website: www.dataton.com

INTRODUCTION 4
SYSTEM OVERVIEW
WATCHPAX 4 is used as part of a WATCHOUT multi-display system.
Production Computer
Network Switch
Video Signals
WATCHPAX 4
A small WATCHOUT system with WATCHPAX 4
In the illustration above, there is a laptop (production computer) running WATCHOUT software and
equipped with a WATCHOUT license key. This connects to a network switch which, in turn, connects
to a Dataton WATCHPAX 4 player (acting as the display computer). The WATCHPAX unit connects
and manages the display devices. In the example, these consist of four LED screens.
HINT: When connecting a single display computer to the production computer, a network switch may
not be required.
WATCHPAX 4 IN YOUR RIG
The WATCHPAX has four DisplayPort outputs. Used as is, it will manage four display devices in your
presentation. Splitters may also be used to increase the number of display devices managed.
As you increase the number of display devices in your show, add WATCHPAX units as needed.
Each WATCHPAX 4 has a built-in WATCHOUT license. That means that if you use Dataton’s dedicated
media players/servers (WATCHPAX, WATCHPAX 4 or WATCHMAX) the only additional license key
required is for your production computer. If you are not using a Dataton WATCHPAX 2, WATCHPAX 4
or WATCHMAX you would need a WATCHOUT license key for each display computer.
DISPLAY DEVICES
In the illustration above,four LED screens are used as the display devices. However, WATCHOUT can
be used with virtually any display device that can be connected to a computer (such as projectors,
LCD panels, LED walls etc).

INTRODUCTION 5
TECHNICAL SPECIFICATION
DIMENSIONS
Width 214 mm
Height 43 mm
Depth 276 mm
Weight 2950 g
CONNECTORS
The picture above shows the rear panel of the WATCHPAX 4 unit.
Power connector
IEC C14 power inlet
Input voltage 85 to 264 VAC, 50 to 60 Hz
Power consumption max 250 W (internal 3.14 A fuse)
Unit contains a 3 V coin-cell battery to power the RTC (real-time clock) circuitry
Ethernet port
RJ45 Gbit Ethernet
USB ports
Two USB 3.0 connectors
Audio
3.5 mm stereo audio out connector
Video outputs
Four full-size DisplayPort outputs, 4K (UHD) playback
ENVIRONMENTAL
Temperature range
Operating 0 to +40 °C.
Storage and transportation -20 to +50 °C.
Relative humidity
Operating, storage and transportation 10 to 90 % (non-condensing).
Altitude
Operating max 2000 m above sea level.
Storage and transportation max 12000 m above sea level.
Display outputs
Ethernet port Audio out
Power connector USB3 ports

INTRODUCTION 6
DISPOSAL
Only for European Union and EEA (Norway, Iceland and Liechtenstein)
This symbol indicates that this product is not to be disposed of with your household waste,
according to the WEEE Directive (2012/19/EU), the Battery Directive (2006/66/EC) and/or
national legislation implementing those Directives.
If a chemical symbol is printed beneath the symbol shown above, in accordance with the Battery
Directive, this indicates that a heavy metal (Hg = Mercury, Cd = Cadmium, Pb = Lead) is present in
this battery or accumulator at a concentration above an applicable threshold specied in the Battery
Directive.
This product should be handed over to a designated collection point, e.g., on an authorized one-for-
one basis when you buy a new similar product or to an authorized collection site for recycling waste
electrical and electronic equipment (EEE) and batteries and accumulators. Improper handling of this
type of waste could have a possible impact on the environment and human health due to potentially
hazardous substances that are generally associated with EEE. Your cooperation in the correct disposal
of this product will contribute to the effective usage of natural resources.
For more information about the recycling of this product, please contact your local city ofce, waste
authority, approved scheme or your household waste disposal.

INSTALLATION AND OPERATION 7
2. INSTALLATION AND OPERATION
BEFORE USING YOUR WATCHPAX 4
Please read the manual thoroughly before operation. WATCHPAX 4 is a plug-and-play unit – do not
open, modify or repair the unit yourself. This invalidates the warranty and presents a risk for the user.
SAFETY FIRST
Thisproductmustbegrounded.Ensureyouconnectthepowerplugtoagrounded power socket.
• To reduce risk of electrical shock, do not remove cover. Refer all servicing to Dataton. The unit shall
be connected to a grounded outlet.
• High voltage runs through the product. Do not attempt to disassemble, repair, or modify the product
on your own. Any attempt to do so will void the warranty.
• Do not use a damaged power cord or plug.
• Do not touch the power plug with wet hands.
• Insert the power plug all the way in, so it is not loose.
• Do not place the power cord or product near heat sources.
• Avoid installing the product in a narrow space with bad ventilation. Always keep front and back of
unit clear, minimum 200 mm.
• Always keep plastic packaging away from children.
• Do not install the product on an unstable or vibrating surface.
• Do not suspend the unit using the strap handle or use the strap as an anchor point.
• Do not install the product in a place where it is exposed to dust, moisture, oil or smoke.
• Take care not to drop the product when moving it.
• When installing the product on a shelf, ensure the bottom edge of the product does not protrude.
• Installing the product in an unusual place (e.g., where the product is exposed to a lot of dust, chemi-
cals, high temperatures, presence of moisture etc) may seriously affect its performance and lifetime.
• To move the product, rst disconnect all the cables from it.
• If the product emits a burning smell, or smoke, remove the power cord immediately and contact Dataton.
• If the product falls, or the exterior is damaged, remove the power cord and contact Dataton.
• If there is a risk of thunderstorm or lightning strike, turn off the power and disconnect all cables.
• Ensure the front and back of unit are not blocked in any way. These are necessary for proper ventila-
tion and require a clear space of minimum 200 mm.
• Do not insert a metallic object or inammable object into any opening of the product.
• Only use the supplied screws and brackets for mounting in 19” rack.
• Unplug this product from the AC power supply before cleaning with a dry or very slightly damp
cloth. Do not use liquid or aerosol cleaners on the product.
• After storage in cold conditions, let the product acclimatise to normal temperature for two hours
before powering on.

INSTALLATION AND OPERATION 8
FCC NOTICE
This device complies with Part 15 of the FCC Rules. Operation is subject to the following conditions:
(1) This device may not cause harmful interference, and
(2) this device must accept any interference received, including interference that may cause undesired
operation.
Note: This equipment has been tested and found to comply with the limits for a Class B digital device,
pursuant to Part 15 of the FCC Rules. These limits are designed to provide reasonable protection
against harmful interference in a residential installation. This equipment generates, uses and can
radiate radio frequency energy and, if not installed and used in accordance with the instructions, may
cause harmful interference to radio communications. However, there is no guarantee that interference
will not occur in a particular installation. If this equipment does cause harmful interference to radio or
television reception, which can be determined by turning the equipment off and on, the user is encour-
aged to try to correct the interference by one or more of the following measures:
• Reorient or relocate the receiving antenna.
• Increase the separation between the equipment and receiver.
• Connect the equipment into an outlet on a circuit different from that to which the receiver is
connected.
• Consult the dealer or an experienced radio / TV technician for help.
Use of a shielded Ethernet cable is required to comply with class B limits in Subpart B of Part 15 of
FCC Rules.
Do not make any changes or modications to the equipment unless otherwise specied in the instruc-
tions. If such changes or modications should be made, you could be required to stop operation of the
equipment.
VENTILATION
IMPORTANT: Airow is critical for the correct operation of WATCHPAX 4. There are four built-in fans
which maintain airow and cooling during operation. Air ows from the front of the unit to the rear.
Keep therefore both front and rear panels clear of obstruction at all times. In an installation, there
should be a minimum of 200 mm clear space at front and 200 mm at back of the unit.
Air inlet: do not block.
Keep a minimum 200 mm clear space at front of unit
Air outlet: do not block.
Keep a minimum 200 mm clear space at rear of unit

INSTALLATION AND OPERATION 9
INSTALLATION
STANDALONE
Place the unit at. The base is the side of the unit showing the serial number and Dataton logo.
IN 19-INCH RACK
Two WATCHPAX 4 units may be joined together and inserted into a 19-inch rack.
IMPORTANT: The two units are attached with brackets at the front. The rack must therefore be
equipped with a shelf at the back to support the units.
• Using a hex key, remove the rubber bumpers on both units and retain the screws. Save the bumpers
in case you wish to re-mount them at a later date.
• Place the two units side-by-side and join them along the center line with the connection discs. Using
the screws from the bumpers, rst mount two discs on the top of the units. Carefully turn the unit over
and mount the remaining two discs along the center line on the underside of the units.
• IMPORTANT: Always mount all four discs to ensure the units are safely joined together.
• Mount the two rack brackets (or ears) on the front corners of the joined units. These can be tted
facing forward or backward, depending on the airow, and cabling.
OPERATION
POWER ON
There is no on/off switch on a WATCHPAX 4. The unit is turned on by inserting the power cord.
NOTE: The rst time you power up the unit, WATCHPAX 4 will initiate an installation routine which
typically takes about ve minutes to complete.
POWER OFF
Unplug the power cord to turn off the unit.
WAKE-ON-LAN
WATCHPAX 4 supports WakeOnLAN which enables users to remotely power on a computer or to
wake it up from sleep mode by a network message from WATCHOUT or WATCHNET. Please see
WATCHOUT and WATCHNET user guides for more information.
Connection discs,
four in total

INSTALLATION AND OPERATION 10
GETTING STARTED
• Connect the displays to the WATCHPAX 4.
NOTE: Both active and passive DisplayPort adapters to DVI/VGA/HDMI can be used with
WATCHPAX 4. Use a passive adapter if you can guarantee continuous power-on for the projector/
display or are certain it will already be powered up when you connect the WATCHPAX. Use an active
adaptor if there is a risk that the projector/display will shut down while connected to a powered
WATCHPAX.
• Connect the network to the WATCHPAX 4 using the Ethernet port.
• Insert the power cord to turn on the WATCHPAX 4. (Unit shall be connected to a grounded outlet.)
• Start WATCHOUT software on the production computer which is on the same network. Make sure
you are using version 6.1.3 or higher.
• The WATCHPAX and any WATCHOUT display computers on the local network will be listed in
Window > Network. Assign display and cluster names (if required) by double-clicking an item in the
list, see screenshot.
IP NUMBER ASSIGNMENT
WATCHPAX automatically retrieves an IP address via a DHCP server. If no DHCP server is available,
the WATCHPAX will get a self-assigned IP address in the range 169.254.x.y
If you are using a control system, you may want to use a xed IP address for WATCHPAX. Still in
WATCHOUT, assign a xed IP through the WATCHOUT protocol command “setIP” in the Startup
Script as shown below:
authenticate 2
setIP 192.168.0.32
Make sure you choose an IP address in the correct subnet range. To remove the xed IP number, use
the same command but with an empty string parameter, as below:
authenticate 2
setIP
WATCHPAX and display computers
on the network

INSTALLATION AND OPERATION 11
SET NATIVE RESOLUTION
Double-click the display in the Stage window and set the native resolution of your screen or projector,
see screenshot.
AUTO START
A WATCHOUT production computer has to be connected when you compose or create your show.
Once that’s done, you can replace the production computer with an external control
system, or auto-start the WATCHPAX by using the built-in Startup Script.
NOTE: Use Edit Startup Script in WATCHOUT to dene initial WATCHPAX settings. This lets you load
shows and perform other WATCHOUT protocol commands. For more information, please see the
WATCHOUT User’s Guide, Command Line Options, “Display Software”.
DELETE FILES
To remove unused les from the WATCHPAX unit, open WATCHOUT on the production computer on
the network. Go to the Stage menu, as below:
Stage > Manage Display Computer > Delete Other Shows
This deletes les from online display computers for all shows, with the exception of the current (open)
show.
REBUILD SHOW CACHE
WATCHOUT usually manages the cached data associated with the current (open) show automatically.
This ensures that the les stored on your WATCHPAX 4 reect the latest version of the show.
Occasionally, for example if the les on the WATCHPAX 4 have been corrupted in some way, you
may want to force the show cache to rebuild.
Open WATCHOUT on the production computer on the network. Go to the Stage menu, as below:
Stage > Manage Display Computer > Re-build Show Cache
This removes and rebuilds all cached data associated with the current show.
Set display resolution
Table of contents
Other Dataton Server manuals
Popular Server manuals by other brands

HP
HP Integrity rx2800 - i2 Software guide
Silicon Graphics International
Silicon Graphics International SGI UV 30 user guide

Radware
Radware APSolute Vision Installation and maintenance guide
Opengear
Opengear SD4001 quick start guide
Harmonic
Harmonic Spectrum X installation guide

Supermicro
Supermicro 2027R-E1R24L user manual
