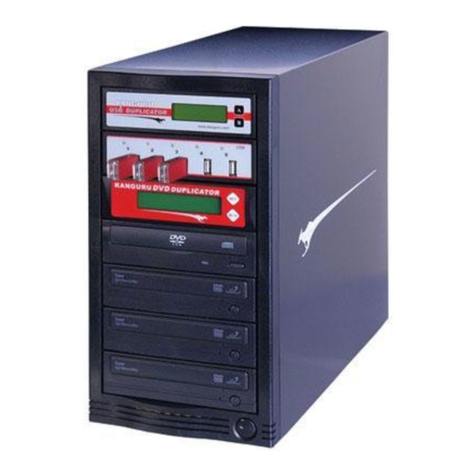
Datatronics DA-5500 Series User manual

DA-5500 Series Automatic Disc Duplicator User’s Guide V 6.1
D
Da
at
ta
at
tr
ro
on
ni
ic
cs
s
T
Te
ec
ch
hn
no
ol
lo
og
gy
y,
,
I
In
nc
c.
.
D
DA
A-
-5
55
50
00
0
S
Se
er
ri
ie
es
s
A
Au
ut
to
om
ma
at
ti
ic
c
D
Di
is
sc
c
D
Du
up
pl
li
ic
ca
at
to
or
r
U
Us
se
er
r’
’s
s
G
Gu
ui
id
de
e
V
Ve
er
rs
si
io
on
n
6
6.
.1
1
1
M
Mo
od
de
el
ls
s:
:
D
DA
A5
55
50
00
0-
-6
62
25
52
2
C
CD
D
d
du
up
pl
li
ic
ca
at
to
or
r
w
wi
it
th
ho
ou
ut
t
H
HD
DD
D
D
DA
A5
55
50
00
0-
-6
62
29
92
2
C
CD
D
d
du
up
pl
li
ic
ca
at
to
or
r
w
wi
it
th
h
H
HD
DD
D
D
DA
A5
55
50
00
0-
-7
72
25
52
2
C
CD
D/
/D
DV
VD
D
d
du
up
pl
li
ic
ca
at
to
or
r
w
wi
it
th
ho
ou
ut
t
H
HD
DD
D
D
DA
A5
55
50
00
0-
-7
72
29
92
2
C
CD
D/
/D
DV
VD
D
d
du
up
pl
li
ic
ca
at
to
or
r
w
wi
it
th
h
H
HD
DD
D

DA-5500 Series Automatic Disc Duplicator User’s Guide V 6.1
T
Ta
ab
bl
le
e
o
of
f
C
Co
on
nt
te
en
nt
ts
s:
:
1
1.
.
I
In
nt
tr
ro
od
du
uc
ct
ti
io
on
n
------------------------------------------------------------------------------------------------
4
4
2
2.
.
R
Re
em
mi
in
nd
de
er
rs
s
-------------------------------------------------------------------------------------------------
4
4
3
3.
.
G
Ge
et
tt
ti
in
ng
g
S
St
ta
ar
rt
te
ed
d
--------------------------------------------------------------------------------------------
4
4
3
3.
.1
1.
.
W
Wi
it
th
h
H
Ha
ar
rd
d
D
Dr
ri
iv
ve
e
I
In
ns
st
ta
al
ll
le
ed
d
-----------------------------------------------------------------------
4
4
3
3.
.2
2.
.
W
Wi
it
th
ho
ou
ut
t
H
Ha
ar
rd
d
D
Dr
ri
iv
ve
e
I
In
ns
st
ta
al
ll
le
ed
d
-------------------------------------------------------------------
5
5
4
4.
.
M
Ma
ai
in
n
F
Fu
un
nc
ct
ti
io
on
ns
s
--------------------------------------------------------------------------------------------
5
5
4
4.
.1
1.
.
C
Co
op
py
y
--------------------------------------------------------------------------------------------------
5
5
4
4.
.2
2.
.
C
Co
op
py
y
+
+
C
Co
om
mp
p
---------------------------------------------------------------------------------------
5
5
4
4.
.3
3.
.
E
Em
mu
ul
la
at
te
e
----------------------------------------------------------------------------------------------
6
6
4
4.
.4
4.
.
E
Em
mu
u+
+
C
Co
op
py
y
-----------------------------------------------------------------------------------------
6
6
4
4.
.5
5.
.
L
Lo
oa
ad
d
--------------------------------------------------------------------------------------------------
6
6
4
4.
.6
6.
.
C
Co
om
mp
pa
ar
re
e
--------------------------------------------------------------------------------------------
6
6
4
4.
.7
7.
.
Q
Qu
ui
ic
ck
k
E
Er
ra
as
se
e
----------------------------------------------------------------------------------------
6
6
4
4.
.8
8.
.
V
Ve
er
ri
if
fy
y
-------------------------------------------------------------------------------------------------
6
6
4
4.
.9
9.
.
C
Co
ou
un
nt
te
er
r
---------------------------------------------------------------------------------------------- 6
5
5.
.
S
Su
ub
b
F
Fu
un
nc
ct
ti
io
on
ns
s …
……
……
……
……
……
……
……
……
……
……
……
……
……
……
……
……
……
……
……
……
……
……
……
……
……
……
……
……
……
……
…
7
7
5
5.
.1
1.
.
S
Se
et
tu
up
p
…
……
……
……
……
……
……
……
……
……
……
……
……
……
……
……
……
……
……
……
……
……
……
……
……
……
……
……
……
……
……
……
……
…
7
7
5
5.
.1
1.
.1
1.
.
C
CD
D
t
to
o
C
CD
D
…
……
……
……
……
……
……
……
……
……
……
……
……
……
……
……
……
……
……
……
……
……
……
……
……
……
……
……
….
.
7
7
5
5.
.1
1.
.2
2.
.
H
HD
DD
D
P
Pa
ar
rt
ti
it
ti
io
on
n
G
Gr
ro
ou
up
p
…
……
……
……
……
……
……
……
……
……
……
……
……
……
……
……
……
……
……
……
……
……
……
….
..
.
7
7
5
5.
.1
1.
.3
3.
.
H
HD
DD
D
P
Pa
ar
rt
ti
it
ti
io
on
n
o
of
f
A
A
(
(B
B)
)…
……
……
……
……
……
……
……
……
……
……
……
……
……
……
……
……
……
……
……
……
……
……
….
.
7
7
5
5.
.1
1.
.4
4.
.
W
Wr
ri
it
te
e
M
Me
et
th
ho
od
d
…
……
……
……
……
……
……
……
……
……
……
……
……
……
……
……
……
……
……
……
……
……
……
……
……
……
……
…
7
7
5
5.
.1
1.
.5
5.
.
C
CD
D
W
Wr
ri
it
te
e
S
Sp
pe
ee
ed
d
…
……
……
……
……
……
……
……
……
……
……
……
……
……
……
……
……
……
……
……
……
……
……
……
……
……
….
.7
7
5
5.
.1
1.
.6
6.
.
H
HD
D
t
to
o
C
CD
D
W
Wr
ri
it
te
e
S
Sp
pe
ee
ed
d
…
……
……
……
……
……
……
……
……
……
……
……
……
……
……
……
……
……
……
……
……
……
……
….
.
7
7
5
5.
.1
1.
.7
7.
.
D
DV
VD
D
W
Wr
ri
it
te
e
S
Sp
pe
ee
ed
d
…
……
……
……
……
……
……
……
……
……
……
……
……
……
……
……
……
……
……
……
……
……
……
……
……
….
.
7
7
5
5.
.1
1.
.8
8.
.
S
Sh
ho
ow
w
D
Dr
ri
iv
ve
es
s
…
……
……
……
……
……
……
……
……
……
……
……
……
……
……
……
……
……
……
……
……
……
……
……
……
……
……
…
7
7
5
5.
.1
1.
.9
9.
.
L
Lo
oa
ad
d
N
No
on
nb
bl
la
an
nk
k
D
Di
is
sc
c
…
……
……
……
……
……
……
……
……
……
……
……
……
……
……
……
……
……
……
……
……
……
……
….
..
.
7
7
5
5.
.1
1.
.1
10
0.
.
C
CD
D
+
+
G
G
…
……
……
……
……
……
……
……
……
……
……
……
……
……
……
……
……
……
……
……
……
……
……
……
……
……
……
……
……
…
7
7
5
5.
.1
1.
.1
11
1.
.
R
Re
ea
ad
d
C
CD
DD
DA
A
I
In
nd
de
ex
x0
0…
……
……
……
……
……
……
……
……
……
……
……
……
……
……
……
……
……
……
……
……
……
……
……
….
.
7
7
5
5.
.1
1.
.1
12
2.
.
S
Sk
ki
ip
p
R
Re
ea
ad
d
E
Er
rr
ro
or
r
…
……
……
……
……
……
……
……
……
……
……
……
……
……
……
……
……
……
……
……
……
……
……
……
……
….
.
7
7
5
5.
.1
1.
.1
13
3.
.
P
Po
ow
we
er
r
O
On
n
W
Wa
ai
it
t…
……
……
……
……
……
……
……
……
……
……
……
……
……
……
……
……
……
……
……
……
……
……
……
……
……
….
.
8
8
5
5.
.1
1.
.1
14
4.
.
S
St
ta
ar
rt
tu
up
p
C
Co
om
mm
ma
an
nd
d
…
……
……
……
……
……
……
……
……
……
……
……
……
……
……
……
……
……
……
……
……
……
……
……
…
8
8
5
5.
.2
2
E
Ed
di
it
t
…
……
……
……
……
……
……
……
……
……
……
……
……
……
……
……
……
……
……
……
……
……
……
……
……
……
……
……
……
……
……
……
……
……
….
.
8
8
5
5.
.2
2.
.1
1.
.
W
Wi
it
th
h
H
Ha
ar
rd
d
D
Dr
ri
iv
ve
e
I
In
ns
st
ta
al
ll
le
ed
d
…
……
……
……
……
……
……
……
……
……
……
……
……
……
……
……
……
……
……
……
……
……
…
8
8
5
5.
.2
2.
.2
2.
.
W
Wi
it
th
ho
ou
ut
t
H
Ha
ar
rd
d
D
Dr
ri
iv
ve
e
I
In
ns
st
ta
al
ll
le
ed
d
…
……
……
……
……
……
……
……
……
……
……
……
……
……
……
……
……
……
……
……
….
.
9
9
5
5.
.3
3.
.
D
De
el
le
et
te
e
…
……
……
……
……
……
……
……
……
……
……
……
……
……
……
……
……
……
……
……
……
……
……
……
……
……
……
……
……
……
……
……
……
…
1
10
0
5
5.
.4
4.
.
C
Cl
le
ea
ar
r
…
……
……
……
……
……
……
……
……
……
……
……
……
……
……
……
……
……
……
……
……
……
……
……
……
……
……
……
……
……
……
……
……
….
.
1
10
0
5
5.
.5
5.
.
P
Pa
ar
rk
k
…
……
……
……
……
……
……
……
……
……
……
……
……
……
……
……
……
……
……
……
……
……
……
……
……
……
……
……
……
……
……
……
……
….
..
.
1
10
0
5
5.
.6
6.
.
B
Bu
ur
rn
n
i
in
n
…
……
……
……
……
……
……
……
……
……
……
……
……
……
……
……
……
……
……
……
……
……
……
……
……
……
……
……
……
……
……
……
….
.
1
10
0
5
5.
.7
7.
.
U
Up
pd
da
at
te
e
…
……
……
……
……
……
……
……
……
……
……
……
……
……
……
……
……
……
……
……
……
……
……
……
……
……
……
……
……
……
……
……
….
.
1
10
0
6
6.
.
I
In
ns
st
ta
al
ll
la
at
ti
io
on
n
a
an
nd
d
S
Se
et
t
U
Up
p
…
……
……
……
……
……
……
……
……
……
……
……
……
……
……
……
……
……
……
……
……
……
……
……
……
……
……
…
1
10
0
6
6.
.1
1.
.
I
In
ns
sp
pe
ec
ct
ti
in
ng
g
t
th
he
e
S
Sh
hi
ip
pm
me
en
nt
t
f
fo
or
r
D
Da
am
ma
ag
ge
e
…
……
……
……
……
……
……
……
……
……
……
……
……
……
……
……
……
……
……
…
1
10
0
6
6.
.2
2.
.
U
Un
np
pa
ac
ck
ki
in
ng
g
a
an
nd
d
V
Ve
er
ri
if
fy
yi
in
ng
g
S
Sh
hi
ip
pm
me
en
nt
t
C
Co
on
nt
te
en
nt
ts
s
…
……
……
……
……
……
……
……
……
……
……
……
……
……
……
….
..
.
1
10
0
6
6.
.3
3.
.
S
Se
et
tt
ti
in
ng
g
U
Up
p
…
……
……
……
……
……
……
……
……
……
……
……
……
……
……
……
……
……
……
……
……
……
……
……
……
……
……
……
……
……
….
..
.
1
11
1
6
6.
.4
4.
.
L
Lo
oa
ad
di
in
ng
g
D
Di
is
sc
cs
s
…
……
……
……
……
……
……
……
……
……
……
……
……
……
……
……
……
……
……
……
……
……
……
……
……
……
……
……
……
…
1
11
1
6
6.
.5
5.
.
U
Un
nl
lo
oa
ad
di
in
ng
g
A
Ac
cc
ce
ep
pt
te
ed
d
D
Di
is
sc
cs
s
…
……
……
……
……
……
……
……
……
……
……
……
……
……
……
……
……
……
……
……
……
……
……
….
..
.
1
11
1
2
6
6.
.6
6.
.
U
Un
nl
lo
oa
ad
di
in
ng
g
R
Re
ej
je
ec
ct
te
ed
d
D
Di
is
sc
cs
s
…
……
……
……
……
……
……
……
……
……
……
……
……
……
……
……
……
……
……
……
……
……
……
……
…
1
11
1

DA-5500 Series Automatic Disc Duplicator User’s Guide V 6.1
7
7.
.
M
Ma
ai
in
nt
te
en
na
an
nc
ce
e
…
……
……
……
……
……
……
……
……
……
……
……
……
……
……
……
……
……
……
……
……
……
……
……
……
……
……
……
……
……
……
….
..
.
1
12
2
7
7.
.1
1.
.
G
Ge
en
ne
er
ra
al
l
M
Ma
ai
in
nt
te
en
na
an
nc
ce
e
…
……
……
……
……
……
……
……
……
……
……
……
……
……
……
……
……
……
……
……
……
……
……
……
……
……
…
1
12
2
8
8.
.
T
Tr
ro
ou
ub
bl
le
es
sh
ho
oo
ot
ti
in
ng
g
…
……
……
……
……
……
……
……
……
……
……
……
……
……
……
……
……
……
……
……
……
……
……
……
……
……
……
……
……
……
…
1
12
2
9
9.
.
R
Re
ef
fe
er
re
en
nc
ce
es
s
…
……
……
……
……
……
……
……
……
……
……
……
……
……
……
……
……
……
……
……
……
……
……
……
……
……
……
……
……
……
……
……
….
.
1
13
3
9
9.
.1
1.
.
W
Wa
ar
rr
ra
an
nt
ty
y
…
……
……
……
……
……
……
……
……
……
……
……
……
……
……
……
……
……
……
……
……
……
……
……
……
……
……
……
……
……
……
….
..
.
1
13
3
3

DA-5500 Series Automatic Disc Duplicator User’s Guide V 6.1
1
1.
.
I
In
nt
tr
ro
od
du
uc
ct
ti
io
on
n
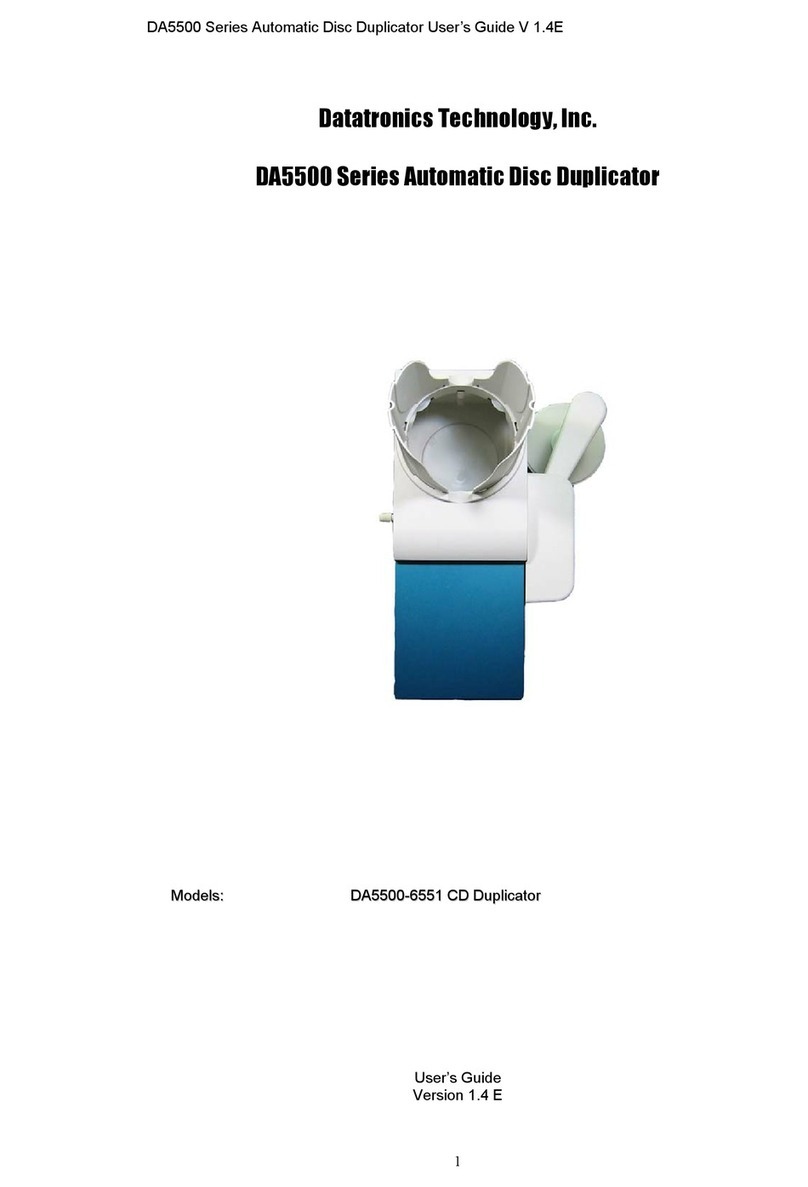
Thank you for purchasing Datatronics Technology DA-5500 series automatic disc duplicator.
The DA-5500 series is a stand-alone unattended duplicator that requires no computer connection during
operation. It consists of robotic mechanism that can automatically move discs from an input bin to the
burner, then to the output bin after recording is finished. If any disc does not pass, the robotic arm will
pick it up and drop it to the Reject bin.
Especially designed for office applications, the DA-5500 series is based upon a controller with LCD
displays, which makes all steps easy to follow during duplication. Furthermore, we have included
combined manuals for end users and assemblers. Should you encounter any difficulty, please refer to
“Trouble Shooting” or contact Datatronics Technology Service Department.
Low cost, high performance, the DA-5500 series is the best choice to fulfill your duplication requirements.
2
2.
.
R
Re
em
mi
in
nd
de
er
rs
s:
:
We strongly suggest you to locate your DA-5500 in a dust free environment in order to eliminate
contamination of discs that cause duplication rejects. Please also allow enough space around the unit to
make sure it can work properly.
For media selection, we recommend you to choose the branded discs, i.e. Verbatim, TDK, Sony,
Samsung, Ricoh, Maxell, etc., and make sure to reserve some discs for possible troubleshooting tool in
the future.
Under any circumstance, Datatronics Technology does not encourage users duplicate copy protected
materials.
3
3.
.
G
Ge
et
tt
ti
in
ng
g
S
St
ta
ar
rt
te
ed
d
(
(E
EA
AS
SY
Y
C
CO
OP
PY
Y)
)
Once turn on the power, DA-5500 will automatically run a self-testing procedure.
3.1 With Hard Drive Installed (DA5500-6292, DA5500-7292)
OPTION 1: Users who wish to copy single master disc from Hard Drive instead of copying from
the reader directly, (audio in particular), please follow the instructions as follows:
a. After self-testing procedure, the duplicator will automatically detect the hard drive and create partitions
for it.
b. Press the “MODE” switch for 5 seconds then release the switch, go to “CD to CD” in “Setup” menu,
make sure the setting is “NO”, then go to “HDD Partition Group” to select which partition to store the
data or copy from.
c. If there is no data stored in present/selected partition of hard drive, press the [MODE] switch for 5
seconds then release to go back to the main functions. Select “Load” function and place the master
disc into the reader to load data into the present/selected partition. The master disc will be ejected
when loading is completed. In case of error, the LCD will show “error” and the master disc will NOT be
ejected automatically.
d. When ready, go to “Copy”. Place the blank disc into Input bin, press the [START] switch and operation
will start instantly.
*Only the exact number of discs to be copied should be put into the Input bin if counter is not set.
4
e. When copy is completed, the passed disc will be picked up by the robotic arm automatically and
dropped into the output bin.

DA-5500 Series Automatic Disc Duplicator User’s Guide V 6.1
f. Failed disc(s) will be picked up by the robotic arm and dropped into the Reject bin.
g. The DA-5500 will prompt you an error message when you try to copy a partition that contains no data.
In this case, go to “Load” to load data first.
h. Do not press any switch during operation as interruption/termination of operation will cause error and
might cause the duplicator to hang up. The discs will be ruined and cannot be used again.
OPTION 2: Users who wish to copy multiple master discs from Hard Drive, please follow the
instructions as follows:
a. Place master disc A on the Input bin, then the blank discs A1 of which you wish to copy on top of A.
b. Place master disc B on top of A1, then the blank discs B2 of which you wish to copy on top of B.
c. Follow the same procedures to copy all master discs and make sure total masters plus blank discs do
not exceed 100 discs.
d. Press the “MODE” switch for 5 seconds then release the switch, go to ‘Setup” menu, make sure “CD to
CD” setting is “NO”, and “Load Nonblank Disc” setting is “YES”.
e. Press the “MODE” switch for 5 seconds then release the switch, go to “Copy” and press “START”,
operation will start instantly.
OPTION 3: Users who wish to copy single master disc from the reader directly, please follow
the instructions as follows:
a. Press “MODE” switch for 5 seconds and release the switch, go to “CD to CD”, make sure the setting is
“YES”.
b. Place the master disc in the reader, then blank discs in the Input bin.
c. Press “START”, the operation will start instantly.
3.2 Without Hard Drive Installed (DA5500-6252, DA5500-7252)
Units without Hard Drive WILL NOT be able to perform multiple master discs copy.
a. Go to “Copy”. Place the master disc in the reader.
b. Place the blank discs into Input bin, press the [START] switch and operation will start instantly.
*Only the exact number of discs to be copied should be put into the Input bin if counter is not set.
c. When copy is completed, the passed disc will be picked up by the robotic arm automatically and
dropped into the output bin.
d. Failed disc will be picked up by the Robotic Arm and dropped into the Reject bin.
5

DA-5500 Series Automatic Disc Duplicator User’s Guide V 6.1
4
4.
.
M
Ma
ai
in
n
F
Fu
un
nc
ct
ti
io
on
ns
s
(
(Functions may vary by different models)
4.1 Copy
Please check 3. Getting Started for instructions. Note that CD/DVD-RW discs can also be copied if the
burner installed is capable of CD/DVD-RW writing. Data stored in the disc will be quickly erased
automatically before copying new data, with no special setting or procedure required.
4.2 Copy + Compare
Under this function, the passed disc in copying will be ejected and re-inserted again automatically for
compare purpose. The passed disc will be ejected automatically after comparison. The failed disc will
remain in the burner. Press [MODE] switch will eject those failed disc.
Only data CD will be compared with the master. VCD or music CD will be “verified” instead of being
compared with the master even “Compare” is selected.
4.3 Emulate
This function can test if disc and other devices shall work perfectly. Disc will remain blank when
emulation is completed. For CD/DVD-RW discs that contain data, emulate will do quick erase of all old
data before emulation. Thus, never do emulate on CD/DVD-RW disc that contain important data.
*Notice: DVD+R/RW discs cannot be emulated.
4.4 Emulate + Copy
After emulation is finished, the duplicator will start copying instantly.
*Notice: DVD+R/RW discs cannot be emulated.
4.5 Load
This function is to transfer data from reader to hard drive. Please place master disc into reader, then it will
automatically load the data to the selected partition.
4.6 Compare
This function does data comparison between master and target disc. But only data disc will be compared
fully. VCD and music CD will be verified only instead of being compared with the master.
4.7 Quick Erase
Data on CD/DVD-RW will be erased.
4.8 Verify
Target disc and master disc will be verified together.
4.9 Counter
Users can set up the number of blank discs for the task as long as it is under “main functions”.
a. Press [START] continuously then press [MODE] together, the unit will start beeping.
b. Release the buttons, the display will show:
c. Press [MODE] then release, the number will add 1 at a time.
Press [MODE] continuously then release, the number will add 10 at a time.
When number is set, press [START] back to main functions and choose the function you need. Please
note that default is 0, which means the unit will continue the task until all blank discs are finished. The
maximum number is 100. If number set exceeds 100, the counter will start from 0 again. Attempts to
cancel the number set previously, please go to counter again or reboot the unit.
6
Set Disc Count
[+] 0 [Quit]

DA-5500 Series Automatic Disc Duplicator User’s Guide V 6.1
5
5.
.
S
Su
ub
b
F
Fu
un
nc
ct
ti
io
on
ns
s
Press [MODE] button for 5 seconds, the Main function menu will switch to Sub function menu and vice
versa.
5.1 Setup
We suggest you use the default settings during the whole process and do not make any change unless
you are familiar with the functions.
5.1.1 CD to CD
Set “Yes” to copy directly from reader to burner or set “No” to copy from selected partition of hard drive.
5.1.2 HDD Partition Group
Once hard drive is installed, you can select partition to transfer data to or copy data from.
Press [MODE] to change the setting and press Enter to exit. Partitions differ from A to Z.
5.1.3 HDD Partition of A (B)
It depends on the capacity of hard drive. The partition capacity for CD is 900MB and 5GB for DVD. For
example, if the capacity is 30GB, then HDD Partition Group will be A and B for your selection. If you
purchase 6292, while choosing Group A, it shows A~Z (900MBx26) partition and shows A~G (900MBx7)
partition in Group B to store your data.
5.1.4 Write Method
Disc at once vs Track at once
5.1.5 CD Write Speed
Default setting is “32”, which means the writing speed will be the highest. Please lower the speed to 16X
or less if audio disc is to be copied.
5.1.6 HD to CD Write Speed
Default setting is “Max”, which means the writing speed will be the highest. Please lower the speed to
16X or less if audio disc is to be copied.
5.1.7 DVD Write Speed
Default setting is “Max”, which means the writing speed will be the highest. Please lower the speed to
16X or less if audio disc is to be copied.
5.1.8 Show Drives
The LCD will display all devices connected with the duplicator, i.e. reader, burner, and hard drive.
5.1.9 Load Nonblank Disc
If the setting is “Yes”, 6292 and 7292 support multiple master discs duplication. Please check 3.1 for
instructions. (Please do not choose Emulate)
5.1.10 CD+G
Change default to “Yes” will activate the copy capability of CD+G format.
* Burner must support this format.
5.1.11 Read CDDA Index0
The setting controls the copying of data existed in index 0. Set to “Yes” will copy the data and set to “No’
will make it empty.
5.1.12 Skip Read Error
7
This setting controls error skipping during source reading. If the setting is “No”, when an error is detected
during loading, the duplicator will stop loading and display read error message. If the setting is “Yes”,
there will be no message shown even there is an error in reading. You can use this function to copy
disc with errors.

DA-5500 Series Automatic Disc Duplicator User’s Guide V 6.1
5.1.13 Power On Wait
This setting allows users to control the devices detection time when the power is on. The default setting
is set at 15 sec; lower time setting might cause some devices not being recognized.
5.1.14 Start Up Command
This setting specifies the first function appeared when duplicator is turned on so as to avoid repeated
selection on the same all the time.
5.2 Edit
This function enables you to collect songs from different discs and copy them into one disc.
5.2.1 With Hard Drive Installed (DA5500-6292, DA5500-7292)
a. Place ONE blank disc in the Input bin.
b. Go to “Clear” (5.4) function first to delete the data stored in the current hard drive.
c. Then switch to “Edit” and place your master disc into the reader. Duplicator will analyze the master disc
then show total tracks on LCD display and finally stop at:
d. Press [MODE] switch to change the number of track that you wish to start with and then press [START]
switch to quit. After quitting, the LCD display will stop at:
e. Select end track, press [START] switch to quit.
i.e. Master disc A: Song No2, 4, 6,7,8
Begin track 2, press [START] to quit. End track 2, press [START] to quit.
Begin track 4, press [START] to quit. End track 4, press [START] to quit.
Begin track 6, press [START] to quit. End track 8, press [START] to quit.
Repeat the same procedure if more tracks will be selected.
If no more tracks on master disc A will be selected, press [START] switch directly at “Begin track” and
press once again [START] at “End track” to exit.
f. Automatically, duplicator will start loading those music tracks selected into the current partition of hard
drive.
g. When loading is completed, the master disc will be ejected automatically and LCD will display “Pass”.
At this moment, please do not press [START] switch. Simply place the second master disc into the
reader, and run the same procedures again to gather more music tracks from different master discs.
h. When collection is completed, do not press [START] switch. Simply press [MODE] for 5 seconds
to switch to “Copy” and press [START].
Please note that the accumulated length of music tracks may not exceed the capacity of your blank disc.
When it exceeds, the LCD will show over xx minutes. When this occurs, please go to “Delete” function to
remove extra tracks until it fits.
8
Begin track
[+] 0 [Quit]
End track
[+] 0 [Quit]

DA-5500 Series Automatic Disc Duplicator User’s Guide V 6.1
5.2.2 Without Hard Drive Installed (DA5500-6252, DA5500-7252)
a. Go to “Write Method” and choose “Track at once”.
b. Switch to “Edit” and place your master disc into the reader. Then place ONE blank disc in the Input bin,
press [START], the duplicator will analyze the master disc, then show total xx tracks on LCD display and
finally stop at:
c. Press [MODE] switch to change the number of track that you wish to start with and then press [START]
switch to quit. After quitting, the LCD display will stop at:
d. Select end track, press [START] switch to quit.
i.e. Master disc A: Song No.2, 4, 6, 7,8
Begin track 2, press [START] to quit. End track 2, press [START] to quit.
Begin track 4, press [START] to quit. End track 4, press [START] to quit.
Begin track 6, press [START] to quit. End track 8, press [START] to quit.
Repeat the same procedure if more tracks will be selected.
e. When selection of music tracks from master disc A in the reader is completed, press [START] again at
the duplicator will prompt you the message:
f. Press [START] switch to quit and the duplicator will start to copy the music tracks you have chosen and
displays “Pass” very quickly afterwards.
g. When complete, the master disc A will be ejected automatically. At this moment, please do not
press [START], simply place the second master disc in to reader and run the same procedures again to
gather more music tracks from different master discs.
h. When all selection of music tracks is completed, press [START] again at
i. The duplicator will prompt you the message:
Press [MODE] to switch to Yes and press [START].
9
Finalize
[+] No [Quit]
Begin track
[+] 0 [Quit]
End track
[+] 0 [Quit]
Begin track
[+] 0 [Quit]
Begin track
[+] 0 [Quit]
Finalize
[+] No [Quit]

DA-5500 Series Automatic Disc Duplicator User’s Guide V 6.1
j. When complete, the robotic arm will pick up the disc and put it in the output bin.
Please note that the accumulated length of music tracks may not exceed the capacity of your blank disc.
When it exceeds, the LCD will show over xx minutes. When this occurs, please go to “Delete” function to
remove extra tracks until it fits.
5.3 Delete
You can switch to “delete” and press Enter switch to delete the last track stored in the current partition of
hard drive.
5.4 Clear
If you want to edit new songs, please switch to “Clear” first and the master data stored in the current
partition of hard drive will be cleared.
5.5 Park
Please set to Park before moving the unit to prevent hitting the robotic arm.
5.6 Burn In
This function allows you to test if the duplicator is working properly. Please make sure the master disc is
in the reader.
5.7 Update
Load the disc containing the latest firmware data (BIOS CD disc) into reader and the duplicator will find
the data and update its firmware automatically. During updating, don’t turn off the power of machine since
the update will not be finished till machine reset itself. (Turning off the machine during updating might
cause severe result such as no booting, etc.)
6
6.
.
U
Un
np
pa
ac
ck
ki
in
ng
g
&
&
I
In
ns
st
ta
al
ll
la
at
ti
io
on
n:
:
6.1 Inspecting the Shipment for Damage
Your Datatronics DA-5500 series is supplied in two cartons. If the carton shows any signs of shipping
damage you should notify the shipping company immediately.
6.2 Unpacking and Verifying Shipment Contents
The Datatronics DA-5500 series automatic disc duplicator carton contains the following items:
Datatronics DA-5500 series automatic disc duplicator
User’s guide
An AC Power Cord
If any of these items are damaged or missing, please contact your dealer directly.
10

DA-5500 Series Automatic Disc Duplicator User’s Guide V 6.1
6
6.
.3
3
Setting up
Setting up
Please follow the procedures:
A. Remove all parts from the carton. B. Insert the reject bin.
C. Insert the input bin. D. Insert the input bin.
.
E. Attach the plate to the unit. F.Install the whole output bin.
6.4 Loading Discs
Wear lint free gloves whenever you handle discs to avoid fingerprints that can affect recording. Make
sure the first 5 discs have to be leveled while inserted. You can add discs to the input bin while the
system is running. (Capacity: 100pcs)
6.5 Unloading Accepted Discs
It is the responsibility of the operator to keep passed discs away from “Rejected” discs.
6.6 Unloading Rejected Discs
It is the responsibility of the operator to keep Rejected discs away from passed discs and master disc.
11

DA-5500 Series Automatic Disc Duplicator User’s Guide V 6.1
7
7.
.
M
Ma
ai
in
nt
te
en
na
an
nc
ce
e:
:
7.1 General Maintenance
To clean the outside cabinet and plastic panels:
Turn off the AC power switch.
Use a clean lint free cloth moistened with warm water.
Dry the unit immediately with a clean lint free cloth.
Make sure your masters and blanks are covered whenever you clean the unit.
8
8.
.
T
Tr
ro
ou
ub
bl
le
es
sh
ho
oo
ot
ti
in
ng
g:
:
There are no end user serviceable components in the DA-5500 series automatic disc
duplicator. Please contact the store where you purchased the unit.
Q1. Discs cannot be emulated but was dropped into the reject bin.
DVD+R/RW cannot be emulated.
Q2. “Loader NG Overflow” shown on LCD and the unit stopped.
Message is shown when the reject bin is full. Please remove the discs in the reject bin (Capacity:
30pcs) and press [START] to continue.
Q3. No display on LCD and the unit does not operate when power on.
Please check if the power cord is connected properly and the utility power is supplied.
Please check if the fan of power supply is rotating. If not, it might be broken.
Turn off the unit and open the case to see if the power cord is fixed.
Q4. Error message shown on LCD:
Reboot the duplicator.
Change master disc and try again
If there is no device connected, the duplicator will show error message before entering the main
menu.
Q5. Reader doesn’t read disc and shows error message.
Check the format of master disc.
Use other Master disc or other reader to test
Q6. Switches do not function.
Task busy. Please wait.
Button malfunction.
Faulty board.
Q7. Copy completed but disc is not readable/executable.
Use “Compare” to check.
To test with another reader.
Q8. Failure rate is high.
Lower writing speed and try again.
Quality of blank disc is poor.
To update the latest BIOS version
Q9. Can’t boot up or upgrade BIOS.
Contact your dealer
12
Check if the BIOS program is correct.

DA-5500 Series Automatic Disc Duplicator User’s Guide V 6.1
13
Q10. Some functions are missing.
Please reboot the unit and press [MODE] for 3 seconds at the same time.
Q11. Disc jam during operation.
Please check if the disc is standard size. (120mm)
Please make sure that discs are leveled while inserted.
Please loosen discs completely if they are wrapped in plastic.
Please do not mix discs of different sizes together.
Please load less blank discs if they are very sticky.
Q12. The power switch does not work every time.
Allow 5 seconds interval between turn on/off.
Q13. Robotics arm fails to pick up the discs.
Please check if the disc is standard size. (120mm)
Please make sure discs are not out of shape.
Q14. Dropping 2 or more discs at the same time.
Please make sure discs are leveled while inserted.
Please loosen discs completely if they are wrapped in plastic.
Q15. Discs can not be dropped into the rod.
Please make sure the unit is placed in a flat area.
Please make sure the rod is attached to the unit properly.
Q16. All discs are dropped into reject bin.
Please change your source or blank disc. Bad disc will not be able to copy or load properly.
For 6292/7292, please check if HDD contains data as source, or source is bad.
For 6292/7292, please clear the data in HDD before upgrade the firmware.
9
9.
.
R
Re
ef
fe
er
re
en
nc
ce
es
s
9.1 Warranty
Datatronics Technology, Inc. offers one year standard warranty programs for our DA-5500 series
automatic disc duplicator (except drives). Please send the unit in its original shipping carton to the store
you purchased. Prior to shipping the unit back, you must refer to their RMA policy to assure proper
processing. You are responsible for the shipping charges on equipment returned for analysis or repair.
Other manuals for DA-5500 Series
2
This manual suits for next models
4
Table of contents
Other Datatronics Disc Duplicator manuals
