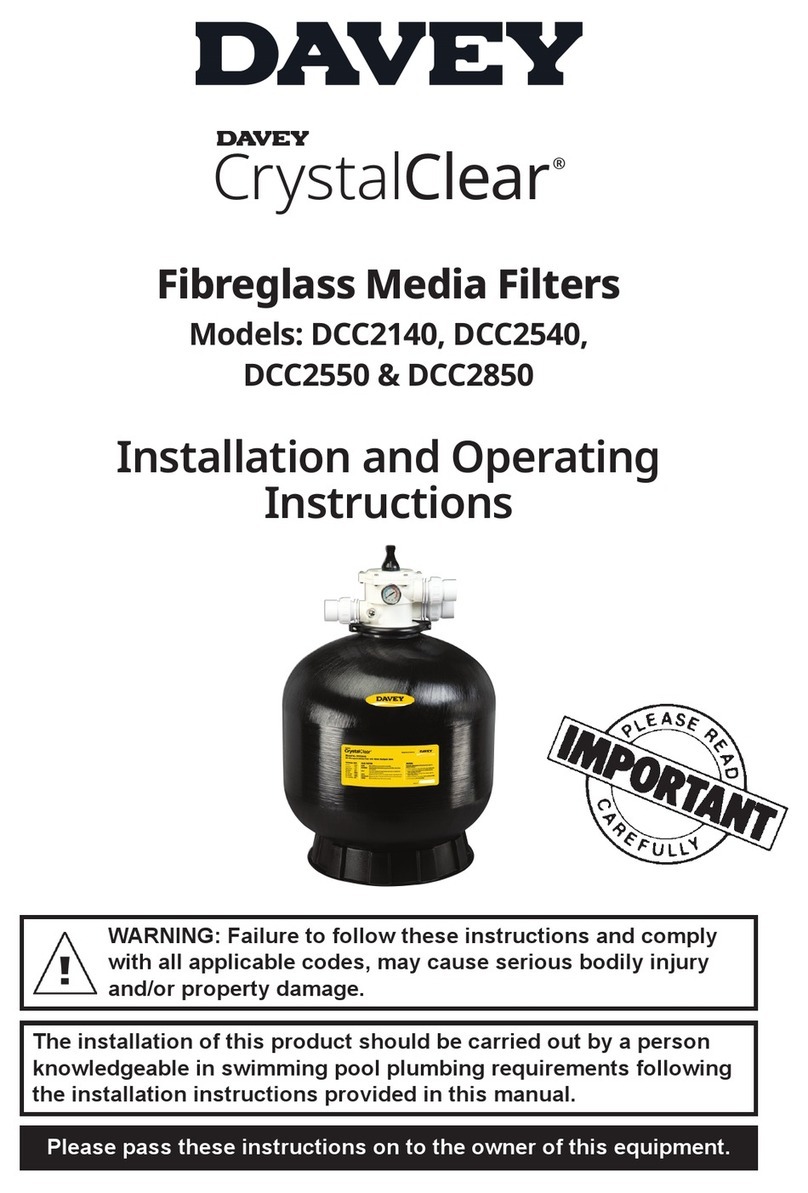
Davey EcoPure DEP2540 User manual

Please pass these instructions on to the owner of this equipment.
The installation of this product should be carried out by a person
knowledgeable in swimming pool plumbing requirements following
the installation instructions provided in this manual.
WARNING: Failure to follow these instructions and comply
with all applicable codes, may cause serious bodily injury
and/or property damage.
Fibreglass Media Filters
Models: DEP2140, DEP2540, DEP2850,
DEP3250, DEP3650 & DEP4050
Installation and Operating
Instructions
Eco
Pure
®

– 2 –
Your Davey EcoPure Media Filter
Congratulations on your purchase of a quality product from the Davey Water
Products range of Pool and Spa Equipment. You are assured of many years of
reliable and efcient performance from your Davey EcoPure Media Filter backed by
Davey’s Ten Year Tank Guarantee and Three Year Valve Guarantee.*
*Refer to guarantee statement on page 8 for full details.
Davey Media Filters have been specically designed for the ltration of swimming
pool water in conditions set out in the Australian Standard for swimming pool water
quality (AS 3633) or equivalent. They should not be used for any other purpose
without rst consulting your Davey Dealer or Davey Water Products Pty Ltd.
The EcoPure Water Difference
Media ltration is nature’s own proven method of ltration. Pool water enters the
lter and passes through graded media where the suspended particles are trapped
and the water is returned to the pool. As the build-up of dirt in the media increases,
so the water pressure rises and the ow decreases. When the pressure reaches
an unacceptable level, the ow must be reversed to clean the lter media bed in a
process called “backwashing” which discharges the dirt to waste.
Installation Location
The lter should be placed in its permanent location, preferably as close to the pool
as practicable. Position the lter tank and pump on a level concrete slab or similar
base with minimum dimensions of 900mm x 600mm (3’ x 2’). Do not use sand to
level the concrete slab, as it may wash away and cause vibration and inefcient
performance. Allow sufcient space around the lter for routine maintenance and
provide for adequate lter drainage and pump ventilation.
Place the pump in position on the slab and locate the lter tank alongside with the
multiport valve “PUMP” port oriented toward the pump.
A minimum clearance of 400mm above the multiport valve is required to permit easy removal.
Weather Protection
Davey Media Filter tanks are made from UV stabilised materials. However to
ensure years of reliable service, it is recommended that every effort be made to
ensure the ltration system is adequately protected from the weather. For proper
care and maintenance of your lter, see section on “Filter Care”.
Assembly
1. Undo the V-band clamp or ange nuts and remove the multiport valve.
2. Look inside the tank and ensure the laterals are secure inside the hub assembly
and that the stand pipe is inserted with the o-ring correctly into the under drain of
the valve.
3. Half ll the tank with water to provide a cushion for the media.
4. Make certain the under drain assembly is correctly located onto it’s stand at the
base of the tank.
5. Place the sand guide in the top of the lter opening.
6. Pour the correct amount of media into the tank (refer specications), evenly
distributing it around the central pipe. Level out the top of the media bed.
7. Remove the sand guide and all traces of media from the tank ange.

– 3 –
8. Ensure the closure o-ring is clean and in the correct position. If necessary, apply
a thin lm of oring lubricant to the o-rings. Assemble the multiport valve to the
tank aligning the ports to the appropriate plumbing.
9. Connect barrel unions utilising O-Rings supplied on ttings and screw into the
multiport valve body.
10. Connect the pressure gauge to the air bleed port utilising the supplied O-ring on
the air bleed plug. Do not apply Telfon tape to the pressure gauge thread as it
may damage the valve.
CAUTION
• A non return valve is required between pump and pool on the inlet side.
• On installations where the waste line is more than 3 metres below pool
water level and more than 12 metres in length, a vacuum break valve
must be tted in the waste line close to the lter.
• If an auxiliary pump is installed in line downstream of the lter, it should
be protected against causing negative pressure in the lter tank. A ow
or pressure switch which only enables the auxiliary pump to run when
the main lter pump is running will achieve this.
• If the pump and lter are located below pool water level, it is necessary
to t isolating valves in the pipe between the pump and the skimmer
box and in the return pipe from the multiport valve to the pool. This
prevents water draining from the pool during maintenance.
FAILURE TO COMPLY WITH THE ABOVE CAUTIONS MAY RESULT IN FILTER
DAMAGE NOT COVERED BY THE GUARANTEE.
Pipe Connections
Use Teon tape on all male threads. Piping should be independently supported and
not impose heavy loads on the lter or pump. Use 40mm or 50mm (11/2” or 2”) pipe
from the pump to the skimmer box, return pipe for the multiport valve to the pool and
from the multiport valve to the drain.
DO NOT OVERTIGHTEN
The ttings and multiport valve on this product are constructed of
ABS. Some PVC jointing compounds are incompatible with ABS.
Check compound suitability before use.
For models that use the 40mm (1.5”) valves, i.e. DEP2140, DEP2540
If the pipe length in the installation, is less than 15m, use the supplied 40mm barrel
unions as provided with 40mm PVC pipe.
If the pipe length in the installation is greater than 15m, 50mm PVC pipe is
recommended and the supplied unions should be adapted to suit. 50-40 reducing
adapters will need to be purchased at your local building/plumbing supplier.
For models that use the 50mm (2”) valves, i.e. DEP2850, DEP3250, DEP3650, DEP4050
It is recommended to use 50mm PVC pipe, regardless of the length of the pipe.
50mm barrel unions are provided with the multiport valve for connection of PVC pipe
to “pump”, “pool return” and “waste”
NOTE:
Ensure pipework is connected to appropriately labelled multiport
valve connections.

– 4 –
Typical Installation
One Way
Valve
*Vacuum
Breaker
Media Filter
Water Pump
* Vacuum breaker required if installation is greater than 3m above pool water line
and is greater than12m in length.
Commissioning Filter
Refer to “operating instructions” below for safety warning and multiport valve
control prior to the lter start-up. The pool should be slightly overlled and the lter
backwashed and then run on RINSE to prevent dust and ne particles in the media
bed returning to the pool.
1. Backwash the lter for up to 2 to 3 minutes, then stop the pump.
2. Position the valve handle to “RINSE”.
3. Start the pump and run until the water in the valve sight glass becomes clear.
4. Stop the pump and position the valve handle to “FILTER”.
5. Start the pump. The Filter is now in ltration mode.
6. To determine the correct operating conditions, check the pressure gauge
reading is 80kPa or below. Record the clean operating pressure of your lter.
Operating Instructions
WARNING - FILTER OPERATES UNDER HIGH PRESSURE
• Ensure all lids / closures / clamps are correctly secured before
operating system.
• Never adjust clamps or change valve settings with the system
under pressure.
• Relieve all pressure from system before working on lter.
Multiport Valve Control
The ow of water through the lter is controlled by the multiport valve on the top
of the lter tank. The handle on top of the valve can be moved to any one of six
positions, which have the following functions:

– 5 –
Valve Position Function
FILTER Normal ltration and vacuuming through lter.
BACKWASH Clean the lter.
RINSE Used on initial lter start-up and after backwash to
prevent dirt in the sand returning to the pool.
WASTE By-passes the lter; used for vacuuming to waste, or
draining the pool.
RECIRCULATE By-passes the lter to circulating water to the pool or to
boost spa jets.
CLOSED Shuts off all ow to the lter. Do not run pump.
CAUTION:
Never shift the valve handle position while the pump is running.
This lter tank must not be operated under vacuum. Should leaf
baskets or suction lines become clogged, blocked or closed, lter
damage not covered by guarantee may occur (particularly if an
auxiliary pump is installed in line down stream of the lter).
Normal Filter Cycle
1. Set the valve to FILTER and start the pump.
2. With a clean lter, record the pressure gauge reading or mark the needle
position on the pressure gauge.
3. Operate the lter each day for a sufcient time to turn over the water in the pool
once every day. The lter should also be operated at all times the pool is in use and
for about one hour afterwards. During the winter, the running time may be reduced.
4. When the pressure gauge reading is 40 - 50kPa higher than the clean lter
gauge reading as in (2) above, it will be necessary to clean or backwash the
lter (see section on Backwashing the Filter).
Backwashing the Filter
When the lter gauge reading is 40 - 50kPa above the clean lter gauge reading,
cleaning or backwashing is required. To perform the backwash operation:
1. Shut off the pump. Be sure to disconnect any automatic Vacuum Cleaner.
2. Shift the valve handle to BACKWASH.
3. Start the pump and run until the water appears clean through the sight glass
(this will take two or three minutes).
4. Shut off the pump and turn the valve handle to RINSE.
5. Start the pump and run for approximately one minute.
6. Shut off the pump and turn the valve handle to FILTER.
7. Start the pump; a new lter cycle has now begun.
8. If a backwash cycle does not reduce the operating pressure of the lter, the
media will need to be changed. Contact your local pool shop.
CAUTION: Most lter media contains dust and ne particles that
must be backwashed from media before lter is set to ‘Filter’.
CAUTION:
Never vacuum while backwashing.

– 6 –
Technical Data
DIMENSIONS (mm)
Model
A B C D E
Inlet
PVC
Outlet
PVC
Waste
PVC
DEP2140
844 708 648
486
510 40
DEP2540
967 831 771 635
DEP2850
1080 926 846 700
50
DEP3250
1180 1026 946 714 820
DEP3650
1285 1131 1051 920
DEP4050
1406 1252 1172 720 1016
D
E
C
B
A
Filter Care
The Davey media lter is the heart of the pool equipment installation. Proper care
and maintenance will add many years of service and enjoyment to your pool. Keep
the exterior of the lter clean, using a mild detergent and water.
Water Quality
Maintaining balanced water chemistry is important to the life of your pool equipment.
This lter is designed to be used with Pool & Spa water, balanced in accordance with
Langlier Saturation Index, with a pH level of between 7.2 and 7.6 and is regularly
treated with a chlorine sanitising agent with the level not exceeding 3PPM.
Please consult your local pool shop regularly to have your water tested.
Trouble Shooting
Problem Action
Reduced ow of water into pool. Check lter pressure gauge. If 40-50kPa above clean
lter reading, perform backwash (page 5).
If still reduced ow after
backwashing.
Check for blocked or plugged lines which could
restrict ow.
Large quantities of media
returning to the pool.
One of the lower laterals may be damaged. To
correct this condition, the media must be removed
and the lateral replaced.
Pump is operating noisily.
Investigate for a possible air leak in the suction
line, blocked pipes or rubbish in the pump strainer
basket. (Refer to pump manual)
In the event of installation or operation difculties with your product, contact the
supplier from whom the equipment was purchased or your nearest authorised
Davey Pool Equipment Service Centre. For assistance in locating your nearest
Dealer contact the Davey Support Centre.
FIBREGLASS – OPERATING PERFORMANCE & MEDIA REQUIRED
Model
Sand
Required
(kg/bags)
Zelbrite
Required
(kg/bags)
Glass Required Max. Flow
Rate
(lpm)
Min
Backwash
Flow Rate
(lpm)
6 Hour
Turnover
(litres)
Filtration
Area
(m2)
Max. Water
Temp. (°C)
/Operating
Pressure (kPa)
Fine
/Medium
(kg/bags)
Medium
/Course
(kg/bags)
DEP2140
85/5 64/5 45/3 30/2 185 123 66,600 0.22
40/320
DEP2540
155/8 117/8 75/5 45/3 260 173 93,600 0.32
DEP2850
210/11 158/11 90/6 60/4 325 217 120,960 0.41
DEP3250
250/13 188/13 105/7 75/5 415 277 149,400 0.53
40/370
DEP3650
350/18 263/18 165/11 105/7 520 347 187,200 0.66
DEP4050
600/30 450/30 300/20 150/10 650 433 234,000 0.81

– 7 –
Removal of Filter
Should it be necessary to remove the lter, the following procedure should be adopted:-
1. Switch off the pump and remove the plug from the power point.
2. Open all air bleeds in system.
3. Close isolating valves where tted.
4. Remove: piping connection to the pump
piping connection to the pool return
piping connection to waste
NOTE: When making any enquiries about your Davey Filter, be certain to
quote the Model Number from the nameplate on the equipment.
WARNING! Pump suction is hazardous and can trap and drown or disembowel
bathers. Do not block suction. Do not use or operate swimming pools, spas
or spa baths if a suction cover is broken, missing or loose. Two suction covers
and inlets must be provided into every pump to avoid suction entrapment.
Routine Maintenance tasks – to maximise the life of your pool equipment & personal
safety, use this checklist once a week. Turn pump off rst.
a. Make sure that any pressure gauges are in working condition and the operating
pressure is within limits as specied on the product.
b. Make sure that each suction inlet, and main drain has a cover that is securely attached
and in safe working condition.
c. Make sure that all skimmer covers are securely attached and in safe working condition.
These should be replaced every 3 to 4 years.
d. Remove any obstructions or debris from the main drain cover.
e. Ensure the skimmer baskets and the pump hair and lint pots are free of leaves and
debris at least once a week.
f. Remove obstructions and combustibles from around the pump motor.
g. Make sure all wiring connections are clean and that all wiring and electrical equipment
is in good condition. Damaged wiring must be repaired or replaced by a qualied
electrician as soon as damage is discovered.
h. Check water balance and sanitiser levels at your local pool shop.
Small children using the pool or spa must ALWAYS have close adult
supervision.
DANGER - Hazardous suction. Do not block water entry into ltration
system with any part of your body as the pressure can trap hair or body
parts, causing severe injury or death. Do not block suction. Turn off
pump immediately if someone becomes trapped.
Caution! Do not add chemicals directly to the pool skimmer. Adding
undiluted chemicals may damage pump and lter and void warranty.
To avoid explosion and possible severe or fatal injury, lter pressure must
not exceed 280kPa. Do not test lter with compressed air. Check that all
clamps and fasteners are in good condition and are rmly secured before
pressurising system. Never adjust clamps or fasteners while lter is
pressurised.
WARNING:
Always relieve pressure from system before performing any
service work.

® Davey is a trademark of Davey Water Products Pty Ltd. © Davey Water Products Pty Ltd 2022.
Davey Water Products Pty Ltd
Member of the GUD Group
ABN 18 066 327 517
NORTH AMERICA
Ph: 1-888-755-8654
Email: [email protected]
AUSTRALIA
Head Offi ce
6 Lakeview Drive,
Scoresby, Australia 3179
Ph: 1300 232 839
Fax: 1300 369 119
Email: sales@davey.com.au
daveywater.com
NEW ZEALAND
7 Rockridge Avenue,
Penrose, Auckland 1061
Ph: 0800 654 333
Fax: 0800 654 334
Email: [email protected]
EUROPE
7 rue Eugène Héna 69200
Vénissieux, France
Ph: +33 (0) 4 72 13 95 07
Fax: +33 (0) 4 72 33 64 57
Email: info@daveyeurope.eu
MIDDLE EAST
Ph: +971 50 6368764
Fax: +971 6 5730472
Email: [email protected]
402086-3
Davey Warranty
Davey Water Products Pty Ltd (Davey) warrants all products sold will be (under normal use and service) free of defects in material
and workmanship for a minimum period of one (1) year from the date of original purchase by the customer as marked on the
invoice, for specic warranty periods for all Davey products visit daveywater.com.
This warranty does not cover normal wear and tear or apply to a product that has:
• been subject to misuse, neglect, negligence, damage or accident
• been used, operated or maintained other than in accordance with Davey’s instructions
• not been installed in accordance with the Installation Instructions or by suitably qualied personnel
• been modied or altered from original specications or in any way not approved by Davey
• had repairs attempted or made by other than Davey or its authorised dealers
• been subject to abnormal conditions such as incorrect voltage supply, lightning or high voltage spikes, or damages from
electrolytic action, cavitation, sand, corrosive, saline or abrasive liquids,
The Davey warranty does not cover replacement of any product consumables or defects in products and components that have
been supplied to Davey by third parties (however Davey will provide reasonable assistance to obtain the benet of any third-party
warranty).
To make a warranty claim:
• If the product is suspected of being defective, stop using it and contact the original place of purchase. Alternatively, phone
Davey Customer Service or send a letter to Davey as per the contact details below
• Provide evidence or proof of date of original purchase
• If requested, return the product and/or provide further information with respect to the claim. Returning the product to the
place of purchase is at your cost and is your responsibility.
• The warranty claim will be assessed by Davey on the basis of their product knowledge and reasonable judgement and will be
accepted if:
- a relevant defect is found
- the warranty claim is made during the relevant warranty period; and
- none of the excluded conditions listed above apply
• The customer will be notied of the warranty decision in writing and if found to be invalid the customer must organise
collection of the product at their expense or authorise its disposal.
If the claim is found to be valid Davey will, at its option, repair or replace the product free of charge.
The Davey warranty is in addition to rights provided by local consumer law. You are entitled to a replacement or refund for a
major failure and compensation for any other reasonably foreseeable loss or damage. You are also entitled to have the goods
repaired or replaced if the goods fail to be of acceptable quality and the failure does not amount to a major failure.
For any internet connected products the consumer is responsible for ensuring a stable internet connection. In the event of a
network failure the consumer will need to address the concern with the service provider. Use of an App is not a substitute for
the User’s own vigilance in ensuring the product is working to expectation. Use of a Smart Product App is at the User’s own risk.
To the fullest extent permitted by law Davey disclaims any warranties regarding the accuracy, completeness or reliability of App
data. Davey is not responsible for any direct or indirect loss, damage or costs to the User arising from its reliance on internet
connectivity. The User indemnies Davey against any claims or legal actions from them or others relying on internet connectivity
or App data may bring in this regard.
Products presented for repair may be replaced by refurbished products of the same type rather than being repaired. Refurbished
parts may be used to repair the products. The repair of your products may result in the loss of any user-generated data. Please
ensure that you have made a copy of any data saved on your products.
To the fullest extent permitted by law or statute, Davey shall not be liable for any loss of prots or any consequential, indirect or
special loss, damage or injury of any kind whatsoever arising directly or indirectly from Davey products. This limitation does not
apply to any liability of Davey for failure to comply with a consumer guarantee applicable to your Davey product under local laws
and does not aect any rights or remedies that may be available to you under local laws.
For a complete list of Davey Dealers visit our website (daveywater.com) or call:
This manual suits for next models
5
Table of contents
Other Davey Water Filtration System manuals

Davey
Davey microlene MCS User manual

Davey
Davey Crystal Clear 39075 Manual

Davey
Davey EcoSalt MC12ORP Manual

Davey
Davey aquashield centurion ASC50 User manual

Davey
Davey CrystalClear DCC2140 User manual

Davey
Davey CrystalClear DCC2550 User manual

Davey
Davey Microlene UV68-CA User manual

Davey
Davey Steriflo UV130 User manual

Davey
Davey AquaReviva DAR20C Manual

Davey
Davey STERIFLO SF1000S mkII User manual