Days GoGo 09 154 8494 User manual

GoGo Light Aluminium Rollator Gebruiksaanwijzing
maximaal
09 154 8494 &É
Ruggensteun
Knoppen om
de hoogte van
de handvatten
in te stellen
Mandje
Stokhouder
lnklap-systeem
drempelhulp
Ruggensteun
ontgrendeling
frame van
aluminium
I
1
,l
lt
t
I
ti
buis voor mandle
in te leggen
ManuÍactured for Patterson Medical Ltd.
Nunn Brook Road, Huthwaite,
Sutron-in-AshÍield. Notl rghamshire.
NG]7 2HU, UK.
UK: Tel: 08444 124 330 Fax. 08448 730 1 000
w\rwv.pattersonmed jcal.co. uk
lnternational: Ie|. +44 1623 448 706
Fax. +44 1623 448 784
Patterson Medical Products, lnc.
281 00 Torch Parkway Suite 700,
Warrenville lL 60555-3938.
Tel: 1-800-323-5547 Telefax: 1-800-547-4333
Patterson Medical Australia
Unit 3, 3 Basalt Road, Pemulwuy
NSW, Australia 2145.
Telr 1 300 473 422 Fax. 1300 766 473
Patterson Medical France
Zone lndustrielle de N/ontjoly,
1 1 Avenue de l'lndustrie - CS 40712
08013 Charieville-Mézières Cedex, France
Tel: 03 24 52 61 15 Fax. 03 24 5290 34
71 21 6 ls1 O Patterson lvledical Ltd 2014

@ Gebruiksaanwijzing
Knop om de ruggensteun
makkelilk te verwijderen Een handvat bevestigd aan
de voorz lde van het zitle zorgt
ervoor dat met 1 beweging zowel
het zitje omhoog klapt maar ook
de rollator zelf inklapt.
TPR(rubber) wie en voor een
stabrele ligging op een
hobbe ige weg
Een opk apbare drempelhulp
vergemakkeli jkt tevens het
opgaan van stoepen en
verhogingen.
Gebruik en veiligheidsinÍormatie:
L Om de rollator uit te klappen, duw het handvat aan de voorzijde van de z tting omlaag totdat het zitje
geheel omlaag geklapt en vergrendeld is Zorg ervoor dat de rollator volledig s uitgeklapt (zitting naar
beneden) totdat de clips aan de onderzijde van de zitting bevestrgd zijn aan de rollatorbuis
Om de rollator in te klappen kunt u het handvat aan de voorzijde van de zitting omhoog trllen totdat de
rollator volledig is ingeklapt.
2. Het lnstalleren van de rugleuning, duwbuizen, handgrepen en mandje:
a. Het inslalleren van de rugleuning: Duw op de knopjes aan de zijkant van de rugleuning en steek de
rugleun ng in de daarvoor bestemde gaten aan de voorkant van het frame van de rollator. Eenmaal
goed geinstalleeld zal de rugleuning in de gaten moeten steken enzal deze vastklikken.
b. Steek de duwbuizen in het frame van de rollator, de juiste hoogte is als u rechtop staat naast de
rollator met uw armen langs uw lichaam. De hoogte is goed wanneer het polsgewricht op gelijke
hoogte komt met de handgreep van de duwbuis. Zorg ervoor dat de kabels zich aan de buitenkant van
het frame bevinden.
c. Stel de handgreep n op een hoogte zoals voorgeschreven door uw arts, tysiotherapeut of getrainde
profess onal. Steek de bout n de binnenkant van het Írame, zodat het zeszildige bouthooÍdje goed
past in de zes zildige gat rn het Írame.
d. Aan de buitenkant van het Írame, plaats u de ring op de bout en draai de knop aan totdat de knop
volledig is aangedraaid, zorg ervoor dat de bout hoofd nog steeds stevig verzonken is in het zes
z jdige gat in het Írame.
e. Bevestig het mandje aan de voorkant van de rollator door gebruik te maken van de uitstekende
verticale haken aan het mandje (zie foto 1)

@ Gebruiksaanwijzing
c! *,,'::ï.iïï.il$ïí;iï** &
Ëebruik dete rollatcr niel. a.ls rolstoel r:í als transp+rL-
middel. Inkel Eebruiken als loophulpmiddel I
G*bruik steel alleen ur:or stil le ritten.
Duw nouiI vsorui[ met uw vsetËrl terwijl u rit up de
rullator. f,a nur:it de {rnl}trap op oí aÍ.
Laat u nsail tluwen ten*ijl u op de rollator ril.-
&É g*iHsi"n"*"'
Zorg ervoor dat het apparaat volledig is uitgekapt (zitting naar beneden) totdat de clips aan de onderz jde
van de zitting bevestigd zijn over de rollatorbuis
s Om de veillgheid te garanderen moet u er voor zorgen dat beide handgrepen/duwbuizen op de zelfde
hoogte ingesteld zijn. Tevens is het zaak om te control eren dat alle onderdelen van de rollator rn juiste
staat verkeren voor in gebruik name van de rollator.
s Zorg ervoor dat de rn hoogte verstelbaar knoppen volledig zln aangedraad en de handvatten op gelilke
hoogte zijn ingesteld. Test de rollator op haar stabiliteit voordat u uw volle gewicht op de handgrepen/
duwbuizen zet.
Test de remmen alvorens in gebruik name van de rollator. Als de achterwielen op de parkeerrem staan, dan
zouden de achtenruielen niet mogen draaien Als de wielen toch draaien terwijl de remmen zijn geblokkeerd,
neem de rollator mee terug naar de dealer voor de aanpassing/ aÍstelling. Wanneer de parkeenem is
ontgrendeld, moeten de wielen vrij kunnen draaien. Vervang banden als ze vers eten oÍ beschad gd zijn.
Loop rechtop achter de rollator tussen de 2 wrelen in,zo heeft u de optimale ondersteuning.
Als duwhandvatten worden blootgesteld aan extreme temperaturen, hoge luchtvocht gheid en / of nat worden,
zorg er dan voor, dat de handgrepen goed vast blijven zitten op het Írame. Mochten deze losdraaien, de
rollator niet langer gebruiken. Dit kan schade oÍ letsel veroorzaken.
Alle wielen rnoeten ten alle tijden in contact komen met de ondergrond tijdens het gebruik. Dit zal ervoor
zorgen dat het toestel goed in evenwicht blijft,dit om kantelen wat kan resulteren in letsel en/of schade te
voorkomen.
a. Probeer NIET om objecten te bereiken, door vooruit te gaan a1s u de rollator gebruikt in de zitstand.
b. Hang niets aan het frame van de rollator. ltems moeten worden geplaatst in een mandje ontworpen voor
deze rollator.
c. De rugleuning moet altijd op zijn plaats bevestigd zijn en is niet ontworpen om uw totale lichaamsgewicht
te ondersteunen.
d. Bij het bereiken oÍ het oppakken van objecten plaats beide voeten stevig op de grond en knrel neer tussen
uw knieën.
e. NIET iets toevoegen aan uw lading as u zit.
De bovenstaande situaties zal leiden tot een verandering van de gewichtsverdeling en kan het toestel laten
kantelen, wat resulteert in eventueel letsel en/oÍ schade. Gebruik altijd uiterste voorzichtigheid bij het reiken
naar een oblect.

@ Gebruifsaanwijzing
De remmen moeten in de vergrendelde stand staan (parkeerrem) voordat U gaat zitten
Gebruik het zitje niet wanneer de rollator op een helling oÍ op een oneÍfen grond staat. Laat u niet voortduwen
wanneer u zit.
Deze rollator is alleen een loophulpmiddel en niet bestemd voor gebruik als transportmiddel.
Zorg ervoor dat u de juiste instructies krijgt van uw leverancier.
Het gebruiken van de remhendels
Bedien altijd beide remhandels aan beide kanten tegeliik,
Om te vertragen oÍ om de rollator tildelijk te stoppen.
Knijp in de remhendel met de vingers totdat de rollator
vertraagt oÍ stopt.
Om de wielen vast te zetten:
Duw met uw handpalmen de handremmen naar beneden
Bij vergrendeling voelt en hoort u een "klik".
De wielen zijn nu geblokkeerd.
Om remmen te ontgrendelen:
Trek met uw handpalmen de remmen weer omhoog
Bij ontgrendeling voelt en hoort u weer een "klik".
De wielen zijn nu weer vrij,

@ Gebruit<saanwijzing
Jaarlijkse controle:
Het verdient aanbeveling eens per jaar de rollator te laten smeren, alle schroeven en moeren aan te draaien,
de remkabels te controleren en af te stellen en de banden op slijtage te controleren. Htermee blijft de goede
werking van de rollator gegarandeerd. De rollator kan met een zacÈte vochtige doek worden schoongómaakt
Eventueel kan er een schoonmaakmiddel gebruikt worden. Schuurmiddelen Ën agressieve schoonmaak-
middelen tasten de kunststoÍ onderdelen en de laklaag aan.
Aanvullende technische gegevens:
Naam: 'GoGo Light". Type: 603051TAluminium rollator. Belastbaargewicht: 125 kg, Handgrepen instelbaar
tussen 81 en 92.5 cm. De rollator is 48,5 cm breed. Diameter van de wielen: lo cmlzitting:- iz,s * 3s "r.
Totaal gewicht: 8,4 kg. Anatomisch,handgrepen,. Remsysteem: direct op de wielen opvouwbaar.
Accessoires: Opbergmandje
(draagvermogen mandje 1 Okg,) Stokkenbakhouder, optioneel rollatortas.

@ CoCo Light Aluminium Rollator lnstruction Sheet
Max User
on,.orrnoll &É
E eett
E Backrest
El Handle Height Adjustment
I Shopping Basket
E Crutch Holder
I Folding Bar
E Kero Climber
A kerb climber a/so makes
manoeuvrabilill
over thresholds easier
IÍ Backrest lock
I Aluminium Frame
E Basket Support Tube
Il fasy to use backrest adjustment
lI Simpte Íolding Íunction
M fPn (synthetic rubber) wheels
Íor increased stabilitY and griP
Assembly lnstructions
. Remove all contents Írom the carton
. Push the Íolding bar El to lock the Rollator in the open position
. lnsert a handle with the pre-assembied lockrng loop brake into each handle tube. Ensure the brake cable
runs down the outside of the Írame
. Adjust each handle to the desired height, lining up the holes appropriately. Slide the bolts through the
holes Írom the inside oÍ the frame und-."ru* on the tightening knob until secure. Ensure the bolt heads
are properly countersunk within the holes
. Fold up the pushing handle E and insert into Írame receiver bracket III
. Attach the basket to the Íront of the using the vertical hooks
. Remove the protective plasttc covering from the tyres'

@ GoCo Light Aluminium Roilator lnstruction Sheet
Folding the Rollator
' To unÍold the walker push the handle on the Íront of the seat down until the seat is fully folded down
and locked. Make sure the walker is Íully extended (sitting down) until the clips on the undersrde oÍ the
seat are attached to the walker tube.
' To Íold the walker liÍt the handle at the front of the seat until the walker ís Íully Íolded.
Hand Brake Operation
Note: Always engage and disengage brakes on both sides.
' To apply the brakes, squeeze both brake handÍes. This can be used to slow or stop the Rollator.
To lock the brakes:
' Push your palms down on the hand brake. When the wheels lock you wíll Íeel and hear a "click".
The brakes are now iocked.
To unlock the brakes:
' Pull up on the brakes with your palms, on release, you will feel and you will hear a "click".
The brakes are now unlocked,
SaÍety Precautions
Read BeÍore Use
' Ensure the Rollator is fully open, the seat is down and clips on the undersjde of the seat are mounted into
the walker frames to secure the Rollator in the correct position.
' Ensure both handles are at the same height and that the tightening knobs are fully tightened.
Test the Rollator íor stability beÍore applying Íull weight to the handles.
' Test the brake mechanism. When lhe wheels are locked, the brake pad should prevent the wheels
from turning. lÍ the wheels turn while the brakes are locked, reÍer to point 4 of the Care and Maintenance
section for adjustment instructions. When the brakes are released, the wheels should turn Íreely.
' Check that the Rollator is Íree from damage and excess wear by carrying out the checks detailed
in the Care & Maintenance section.
. Do not leave the Rollator unattended without locking the brakes.
. Do not use the Rollator as a seat or in any type of motor vehicle.
. Always lock the brakes before sitting.
. Do not stop, turn or reverse on a ramp or incline.
. Do noÍ make sharp rurrs.
. Do not use the seat ii the walker on a slope or on uneven ground,
The brakes must be in the locked position (parking) before using the seat
Care & Maintenance:
' The rollator should b,e inspected beÍore each use to ensure rt is Íree Írom damage and excessive wear.
Check that:
. The handgrips are not loose or damaged.
. The brake cables are not damaged in any way.
. ïhe wheels are securely in place and are not damaged or excessively worn.
. The frame is not cracked or dented.
. The frame is secure, stable, and all nuts and bolts are tioht,

@ GoCo Light Aluminium Rollator lnstruction Sheet
lf you do Íind any wear or damage to your rollator, DO NOT USE.
. Check that all wheels and folding parts move freely.
. Keep the rollator clean by wiping with a damp cloth on a regular basis,
Do not use abrasive cleaning materials
SpeciÍications
. Name: GoGo Light Aluminium Rollator
. Maximum User Weight: 125k9 I 191/zs|
. Handle height; 810-925mm with 7 settings
. Frame Width: 485mm
. Backrest Height: 81Omm
. Seat Height: 565mm
. Overall size: 610x680x81Omm (min)
. Front wheel to Rear wheel: 490mm
. Total Weight: B.4kg
. Accessories: Storage Basket, Crutch Holder, Kerb Climber, Bell
Warranty
Patterson Medical Ltd warrants that the rollator is Íree Írom deÍects in material and workmanship.
This warranty shall remain in eÍÍect Íor one year Írom the date of original consumer purchase.
This warranty does not cover the Íollowing:
. Replacement parts supplied by anyone other than Patterson Medical Ltd or the distributor.
. Any Íailure oÍ the unit during tlre warranty period if the failure is not caused by deÍect in material
or workmanship or iÍ the Íailure is caused by unreasonable use.
Patterson lVedical Ltd is not liable Íor incidental or consequential injury or damage to property.
Should it be necessary to return the rollator, it is essential it is adequately packed to protect it in transit,
preÍerably in its original box; othenvise Patterson Medical Ltd cannot accept any responsibility Íor transil
damage to the unit.
This does not aÍÍect your statutory rights.
&ÉHï:r.
ManuÍactured Íor Patterson Medical Ltd.
Nunn Brook Road, Huthwaite,
Sutton-in-Ashfield, Nottinghamshire,
NG17 2HU, UK,
UK: Tel: 08444 124 330 Fax: 08448 730 1000
Wvw.pattersonmedical.co. uk
lnternational: Tel. +44 1623 448706
Fax. + 44 1623 448 784
Patterson Medical Products, lnc.
281 00 Torch Parkway Suite 700,
Warrenville, lL 60555-3938.
Tel: l-800-323-5547 TeleÍax: 1-800-547-4333
Patterson Medical Australia
Unit 3, 3 Basalt Road, Pemulwuy
NSW, Australia 2145.
Tel: 1300 473 422 íax I300 766 473
Patterson Medical France
Zone Industrielle de Montjoly,
I 1 Avenue de l'lndustrie - CS 40712
08013 Charleville-Mézières Cedex, France
Tel: 03 24 52 61 1 5 Fax. 03 24 52 90 34 z
PATTERSON
MEDICAL
71 216 lsl @ Patterson Medical Ltd 2014
Table of contents
Languages:
Other Days Mobility Aid manuals
Popular Mobility Aid manuals by other brands
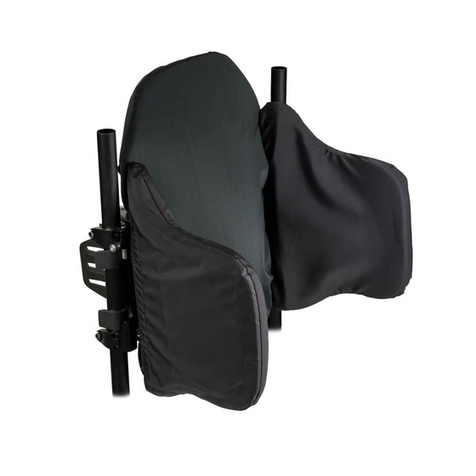
Sunrise Medical
Sunrise Medical Jay Focus Point owner's manual
Drive
Drive RTL11158KDR manual
Drive
Drive Ready Set Go operating instructions

human care
human care Svea 53211 Low user manual

Invacare
Invacare Court-Side Glides 6281JR Assembly, installation and operating instructions
Trulife
Trulife RM520300 Instructions for use
