DAYTEK M32 User manual
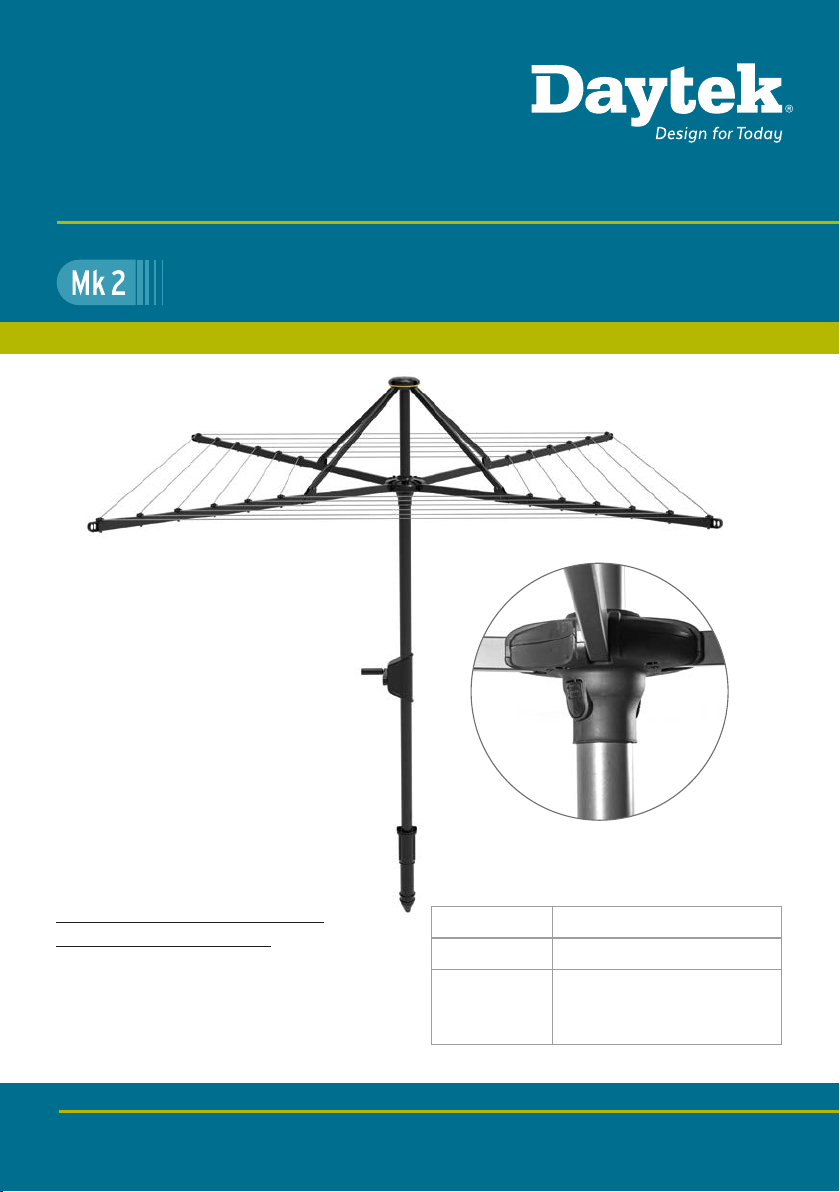
Rotary Clotheslines
PRODUCT MANUAL
100% Australian Owned Since 1954 daytek.com.au
Product Code
Date of purchase
Name & location
of supplier
R0619-V1
IMPORTANT – READ THESE INSTRUCTIONS
BEFORE USING YOUR CLOTHESLINE
Suitable for models
M32 / M38 / M42 / M48 / M52 / M58
2
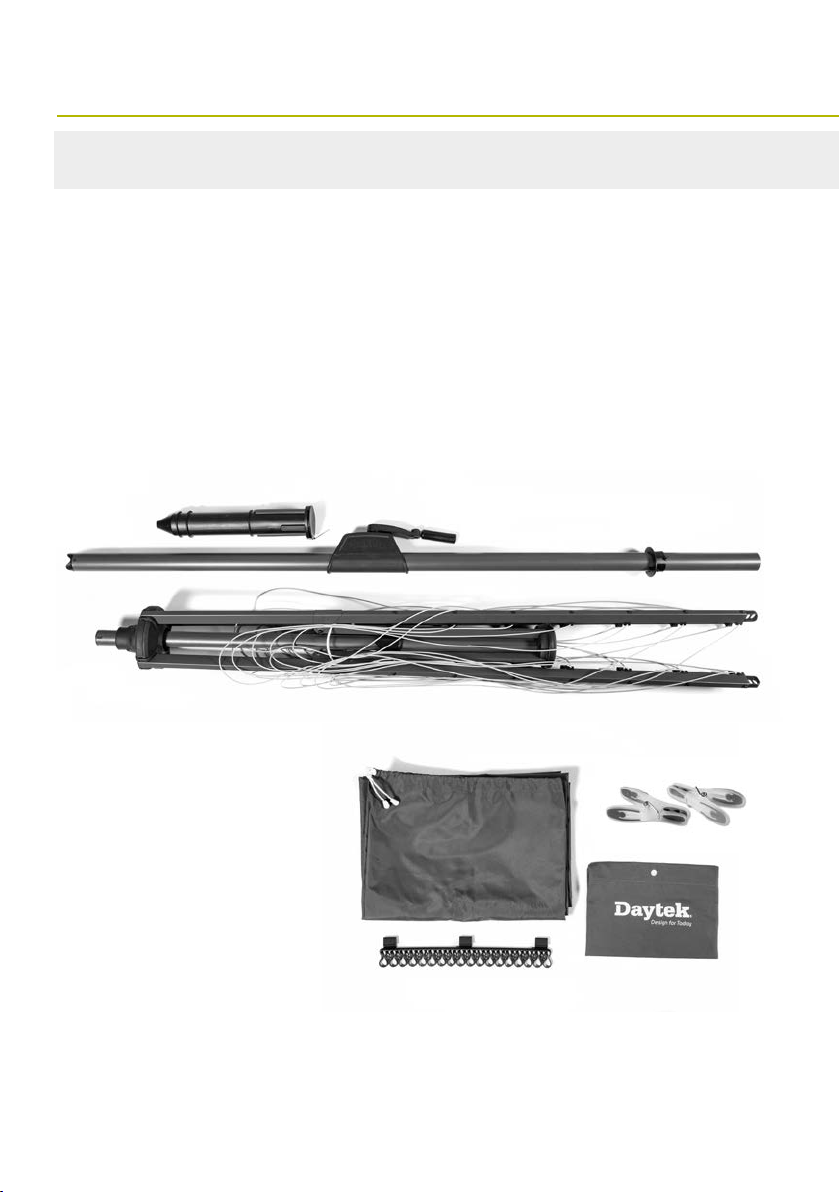
BEFORE YOU BEGIN
Please check that the carton contains all the
required parts before assembly.
Your carton should contain the following:
A – Main Tube Assembly
B – Hoist Tube Assembly
C – Ground Socket and Cap
D – Bonus Peg Bag
E – Bonus Pegs (12 pcs)
F – Bonus Rotary Storage Bag
G – Bonus Sock Holder
Note: We recommend two persons to install this product
Tools and materials required for installation:
• Medium aggregate screenings (crushed rock)
• 20kg bags of pre-mix concrete x 2
• Wooden or metal stakes 400mm long x 3
• Length of rope approximately 2 meters long x 3
• Spirit Level
B
C
D
E
F
G
A

3
600 450
3.0
METRES
MINIMUM
250
DIAM
425
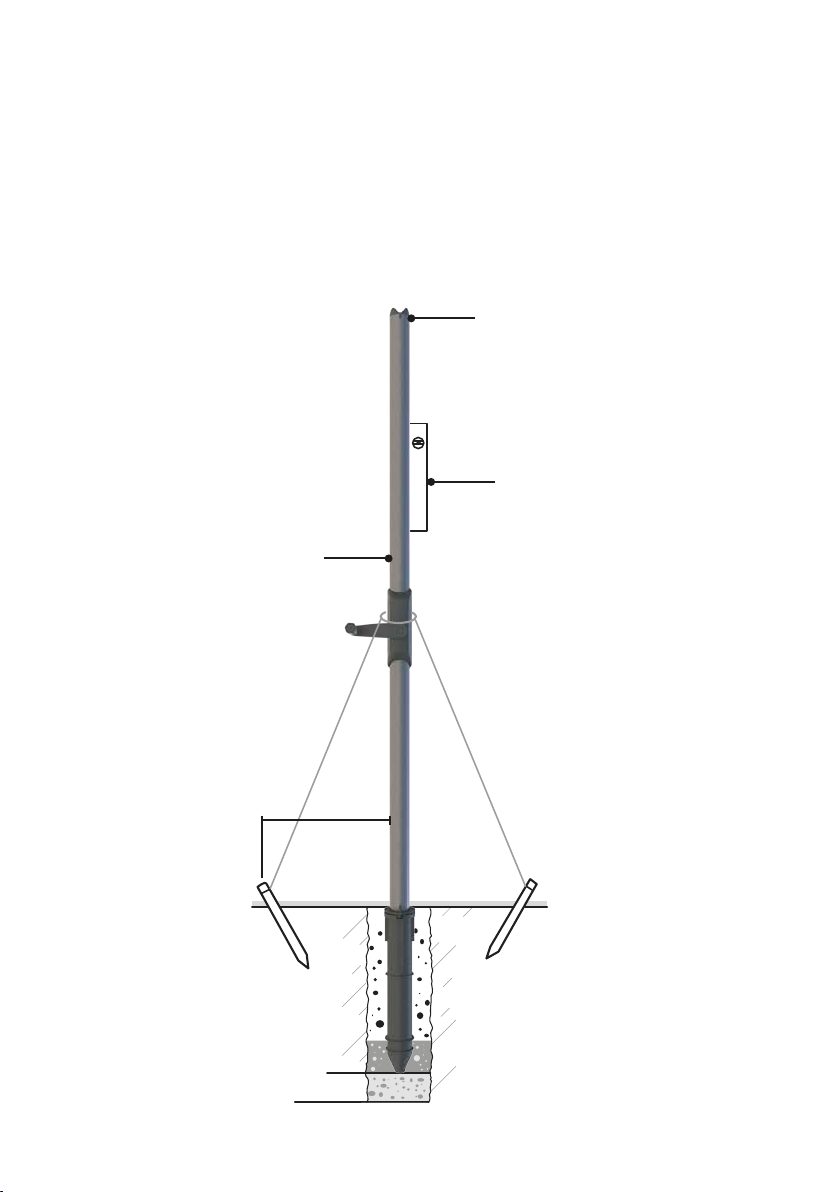
PREPARING THE SITE FOR YOUR ROTARY CLOTHESLINE
Preparing the ground socket
1. Make sure the selected installation position has a
minimum of 3 meters clearance on all sides from the
central location.
2. Excavate a hole 250mm in diameter x 600mm deep.
3. Back fill the hole with screenings (small crushed
rock) to 450mm from ground level. This is necessary
to drain rain water that enters via the socket.
4. Position the the ground socket inside the hole so
that it sits centrally and vertically. The bottom end of
the ground socket will rest on the screenings while the
top of the ground socket should reach the ground level.
Adjust the depth of the screenings as needed.
5. To retain the ground socket in the central position,
backfill with screenings to 425mm from ground level.
Ensure no rocks are inside the socket.
Positioning the main tube assembly
PIN
SLOT
6. Position 3 stakes spaced at an
equal distance around the hole
approximately 1 meter out. Insert
the stakes at at angle approximatly
300mm into the ground.
7. Insert the main tube assembly
into the ground socket making
sure the pin is positioned into
one of the slots. Secure by
engaging the locking ring.
(See Fig. 1 – 4)
SCREENINGS
1
3 4
2
4
10. Ensure the concrete is underneath the top
lip of the ground socket.
11. Re-check that the main tube assembly is
still vertical. Leave for 24 hours to set concrete
before assembling the hoist tube.
Securing the main tube assembly
8. Tie a length of rope from each stake to the main
tube assembly to secure it vertically. Check that
the tube is sitting vertically using a spirit level.
9. Prepare the pre-mix concrete and backfill the
hole with the concrete mix. Gently compact
the concrete.
MAIN TUBE
ASSEMBLY
WIND BRAKE
LOWER
SPIRIT LEVEL
1 METRE
5
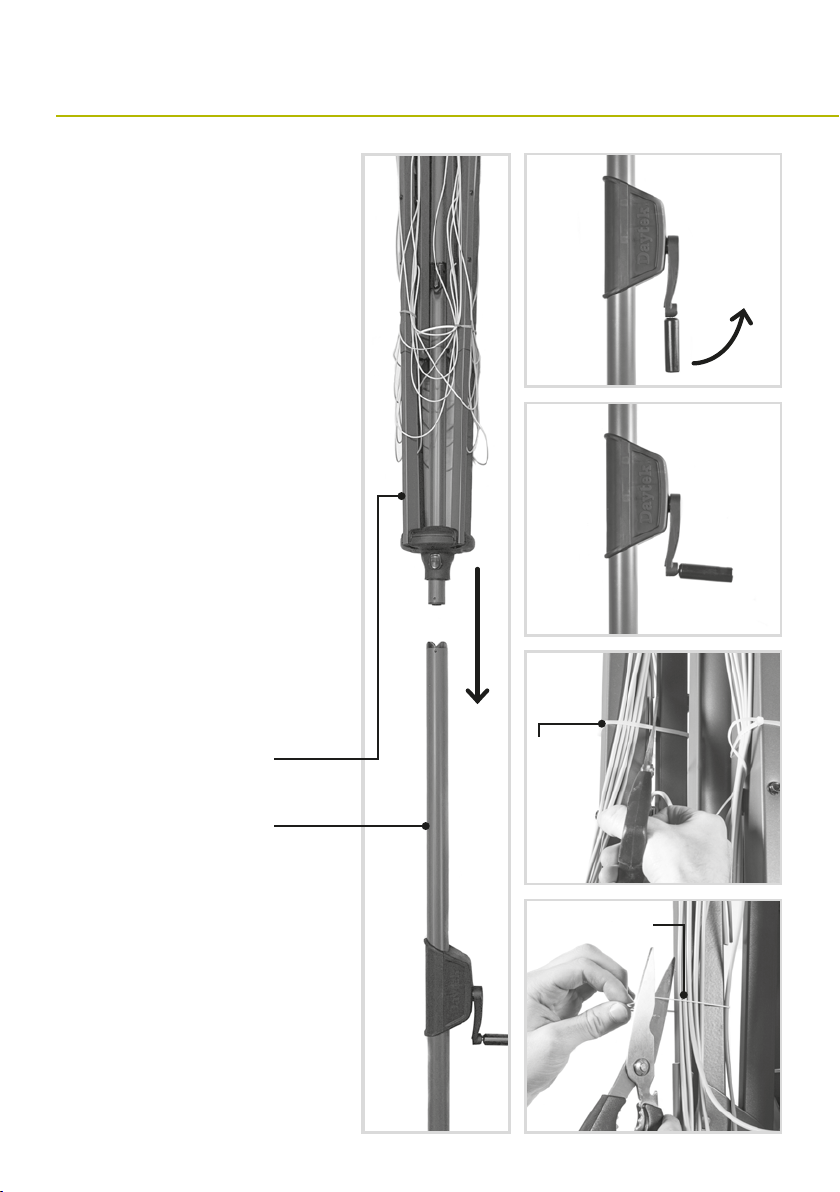
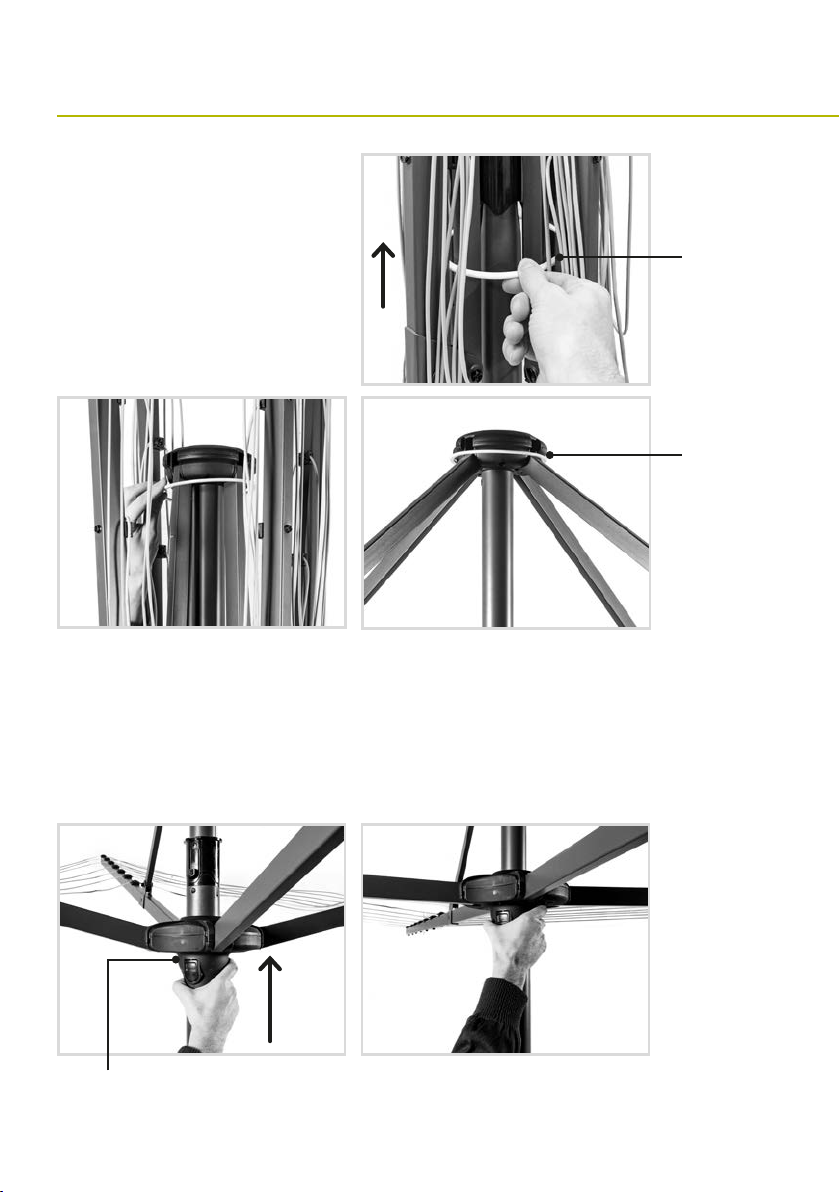
ASSEMBLING YOUR ROTARY CLOTHESLINE
1. Once the concrete is dry, remove
the cord and stabilising stakes.
2. Gently slide the hoist tube
assembly into the main tube
assembly until the units engage
together. The tube assemblies are
engaged when both the upper and
lower wind brake face meet.
(See Fig. 1)
3. Lock handle into final position by
pulling upwards on the handle grip.
(See Fig. 2 – 3)
4. Each clothesline arm is secured
with a plastic cable tie. Carefully
cut and remove each one making sure
not to cut or damage the clothesline
cord. (See. Fig. 4)
5. The clothesline cords are secured
to each arm with a rubber band.
Cut and remove these bands making
sure not to damage the clothesline
cord. (See. Fig. 5)
HOIST TUBE
ASSEMBLY
PLASTIC
CABLE
TIE
RUBBER
BAND
MAIN TUBE
ASSEMBLY
21
3
4
5
6
OPERATING YOUR ROTARY CLOTHESLINE
1. Slide the yellow ring upwards, this
allows the arms to be folded out to
horizontal position where the dual
latches will lock the arms in place.
(See Fig. 1 – 3)
2. Push the clothlesline hoist up into the open position. To do this,
hold the Slide and push upwards until the hoist “clicks” into the open
position. (See Fig. 4 – 5)
1
2
45
3
YELLOW
RING
YELLOW
RING
SLIDE
7
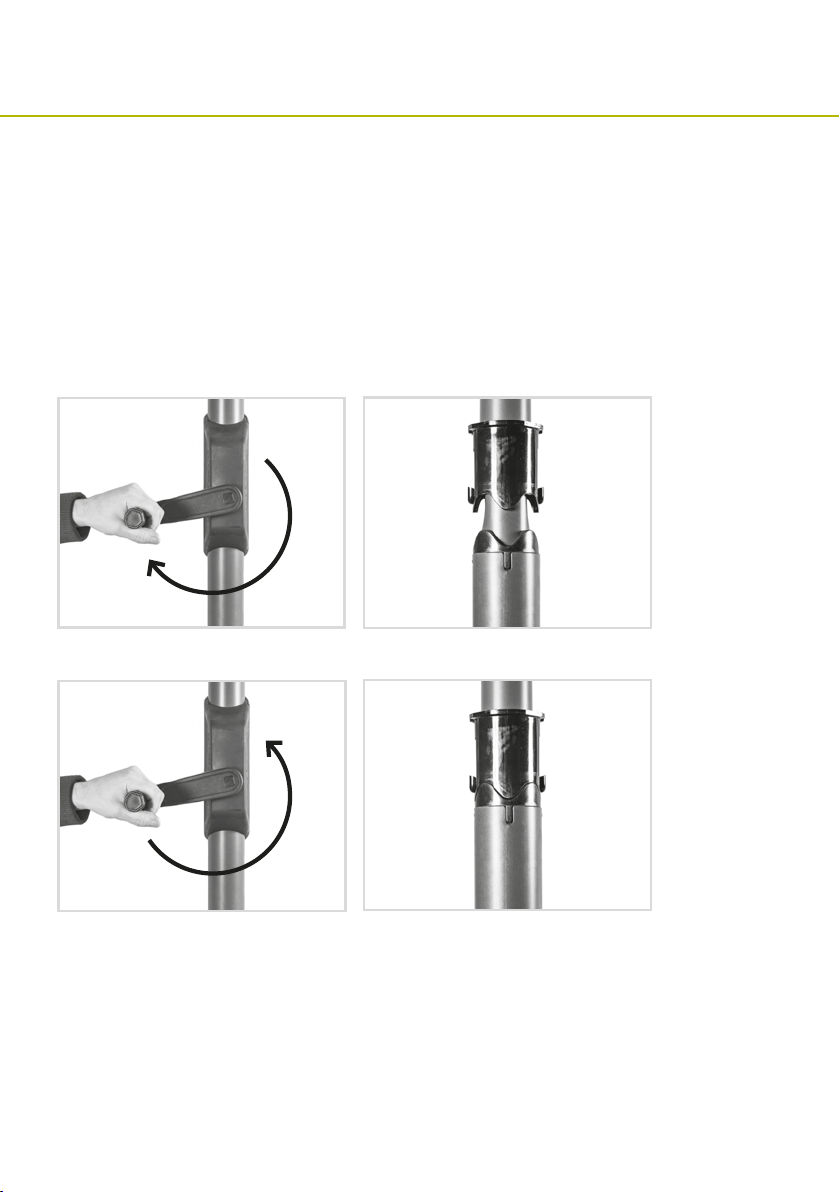
Note: There is a safety clutch within the gear
box. When the clothesline is in maximum lowest
or highest position the handle will rotate freely
(clicking sound), which prevents damage to the
gear box.
3. To raise the hoist for ‘free spinning’ wind
drying, simply rotate the handle in a
clockwise direction to disengage the wind
break. (See Fig. 6 – 7)
To activate the wind brake, turn the
handle anti-clockwise until the two
serrated plastic faces meet. This will lock
the clothesline head and prevent the hoist
from freely spinning.(See Fig. 8 – 9)
6
WIND BRAKE DISENGAGED
WIND BRAKE ENGAGED
7
8 9

8
FOLDING AWAY YOUR ROTARY CLOTHESLINE
1. Wind down the clothesline to the wind
break position.
2. Use one hand to push the release buttons
on the Slide whilst pulling down on the
Central Hub with your other hand. Once
the catch disengages you can move the Slide
downwards until all four arms are folded
vertically. (See Fig. 1 – 3)
3. Allow the yellow ring to drop down,
securing the arms into the folded position.
4. If the clothesline will be left unused for
an extended period of time you can utilise
the Rotary Storage Bag.
1
RELEASE
BUTTON
PULL DOWN LIGHTLY ON HUB
PRESS BUTTONS EACH SIDE OF HUB
2
3
9
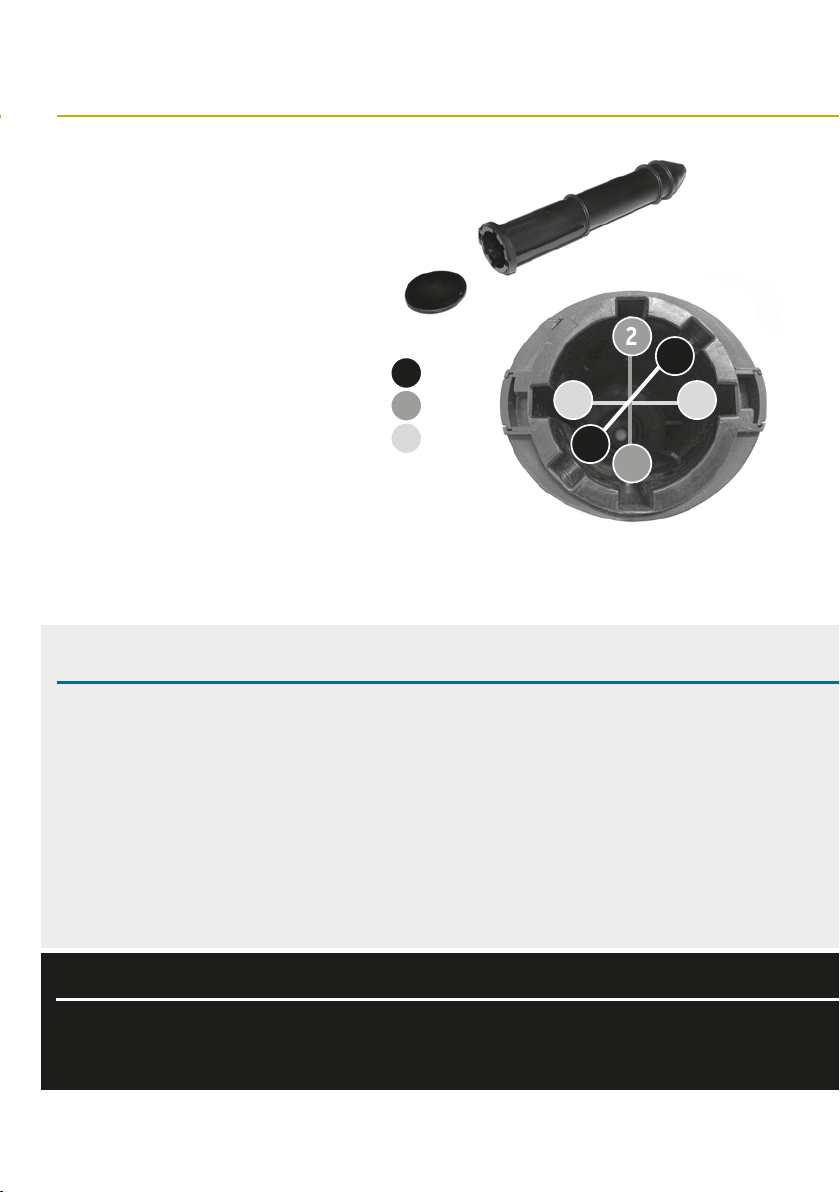
ADJUSTING THE HEIGHT OF YOUR ROTARY CLOTHESLINE
HELPFUL HINTS
IMPORTANT
The ideal height of the clothesline should be
approximately 50mm from the users head to
the underside of the horizontal arms.
To adjust the clothesline to higher position
simply remove the support ring from the
ground socket, lift the clothesline and rotate
to either slot 1, 2 or 3. Each position will
increase your clothesline height by 75mm.
With the slothesline at the required height
replace the support ring into the ground
socket to secure the clothesline.
• Engage the wind brake mechanism while hanging laundry. By pulling sideways on
the horizontal arms the clothesline will rotate to the next loading position.
• Hang washing starting from the inside line with small garments.
• Distribute the weight of the washing evenly on each line around the four quadrants
• After hanging the washing it is important to wind the line up off the wind brake for spin air drying.
• Located at the end of each horizontal arm is a clothes hanger loop.
Please ensure your clothesline is not used as a playing item by children swinging
on lines and main arms. Any damage from misuse will void the warranty.
1
3
2
HIGHEST
MEDIUM
LOWEST
1
2
2
1
33
10
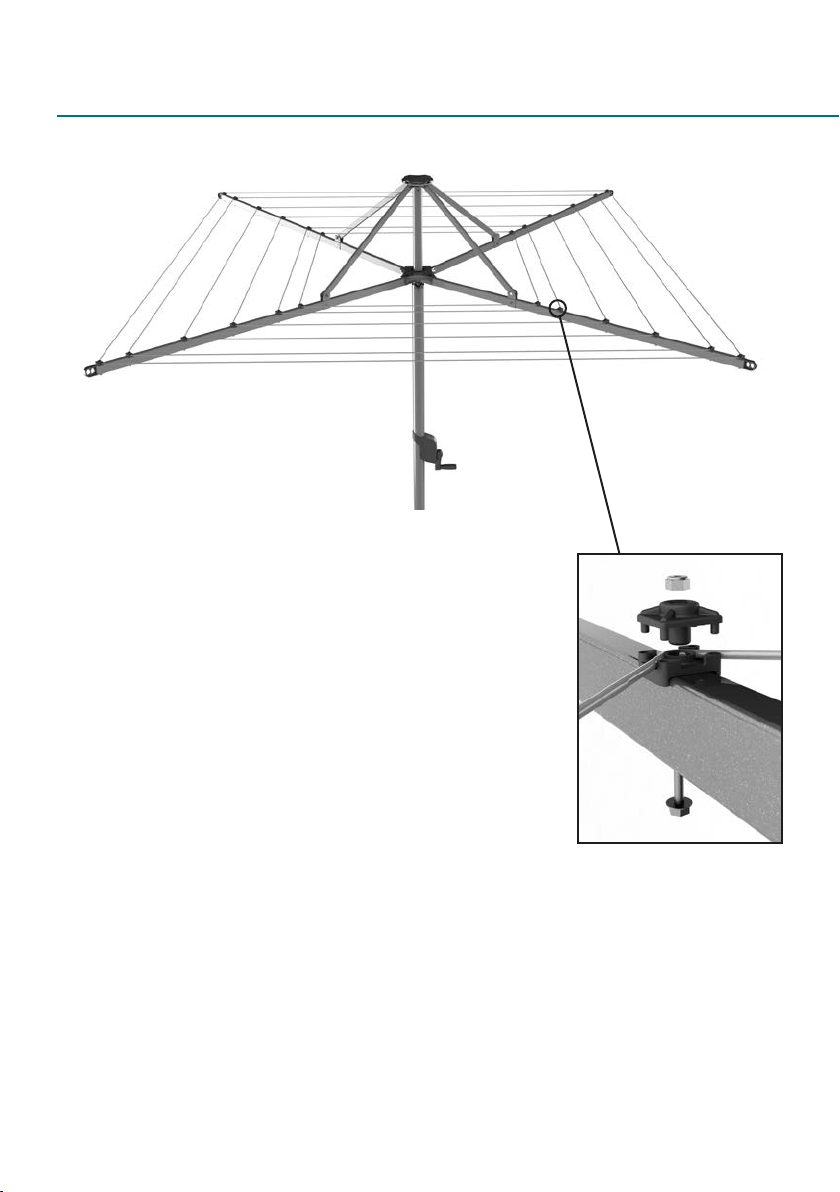
HOW TO RESTRING/REPLACE THE LINE ON YOUR DAYTEK ROTARY CLOTHESLINE
ARM 3
ARM 2 ARM 1 – LINE END
ARM 4
D
B
A
C
A. Tensioner Block Bottom –
recessed into the arm of the
clothesline.
B. Tensioner Block Top –
positioned on top of the
bottom block.
TO REPLACE A LINE ON YOUR DAYTEK ROTARY
CLOTHESLINE, YOU MUST REMOVE THE TENSIONER
BLOCK TOPS OFF THE AFFECTED LINE.
C. Bolt – head of bolt under
the arm of the clothesline.
D. Nut – seated in the top of
the line tensioner.
To remove the Tensioner Block Tops
3. Remove the line from the Tensioner Block.
4. Work your way around the clothesline
removing all four Terminal Blocks Tops
and the line.
1. Place your index finger on top of the Tensioner
Block and over the Nut to ensure that the Nut is
held in position.
2. Undo and loosen the bolt from under the arm of
the clothesline. Once the bolt is fully loose, you can
carefully remove the Tensioner Block Top & Nut.

11
HOW TO TENSION THE LINE ON YOUR DAYTEK ROTARY CLOTHESLINE
To attach a new line
1. Start by clamping one end of the new line into
ARM 1 as shown below (ARM 1 can be any arm
you choose).
2. Work your way around the clothesline
attaching the line at ARM 2, 3 & 4 as shown
below. Ensure line is pulled tight and clamped
in Tensioner Block before moving on to
next arm.
3. When you arrive back at ARM 1, remove the
Tensioner Block Top and clamp both line ends
into line tensioner as shown below, making
sure the lines are pulled tight.
4. Trim line ends leaving approximately 5cm.
1. At the required tensioning point, place your index
finger on top of the Tensioner Block Top and over
the Nut to ensure that the Nut is held in position.
2. Loosen the bolt from under the arm of the
clothesline.
3. Pull the line through the Tensioner Block to
required tension and re-tighten the bolt.
4. Repeat this process around the clothesline
working the slack cord towards the end of
the line.
ARM 1
STRING BOTH ENDS TERMINAL BLOCK TOP AFFIXEDSTRING ONE END
ARM 2, 3 & 4
TERMINAL BLOCK TOP AFFIXEDSTRING LINE

25 YEAR PRODUCT WARRANTY
directly. You must bear the cost of claiming the
warranty. This warranty is in addition to other rights
and remedies of the customer under law.
Where it is deemed necessary, Daytek Australia will
arrange for the inspection of your product.
Warranty exclusions
Defects caused by incorrect installation (including
poor drainage from ground socket), adjustment,
modification or misuse. Paint deterioration caused
by exposure to sea air where the product is installed
in coastal areas. Product damage or deterioration
due to abnormal environmental conditions including
storm damage, fire, wind, humidity and similar.
Damage to frame or line through accident or
negligence. Warranty does not cover bonus items.
The warranty covers domestic use only and does not
apply to commercial applications.
Our goods come with guarantees that cannot be
excluded under the Australian Consumer Law.
You are entitled to a replacement or refund for
a major failure and for compensation for any
loss or damage. You are also entitled to have the
goods repaired or replaced if the goods fail to be
acceptable quality and the failure does not amount
to a major failure.
If any part of this clothesline fails to operate
correctly due to faulty workmanship or defective
material Daytek Australia will repair or replace
free of cost within 25 years from the original date
of purchase (receipt of purchase required). The
PVC line cord is covered by a 2 year warranty from
the date of purchase. Any evidence of misuse or
incorrect adjustment will void the warranty. To claim
a product warranty, please contact Daytek Australia
Manufactured/Supplied by Daytek Australia Pty. Ltd.
77-81 Gower Street, Preston
Victoria 3072 Australia
T +61 3 9470 1755
F +61 3 9470 5381
E [email protected]om.au
daytek.com.au
CARE AND MAINTENANCE
If you are living within close proximity to a seaside
location, salt in the air will build up a thin layer on
your clothesline over time. To ensure longevity it is
important to regularly wipe down the surface of your
clothesline with a damp cloth.
Regularly check your clothesline for damage or
wear and tear. Any damaged part should be replaced
or repaired before using again. A full range of
spares are available through Daytek. Wipe away dust
and dirt regularly to prevent build up and ensure
smooth operation.
CONTACT DAYTEK
enquiry@daytek.com.au
daytek.com.au
facebook.com/daytekAU
www.productreview.com.au/listings/daytek
This manual suits for next models
5
Table of contents
Other DAYTEK Household Appliance manuals


