Daytona HELMETS BT User manual


INSTALLATION GUIDELINE
FOR DAYTONA A2
BLUETOOTH HEADSET
FOR DETOUR
3

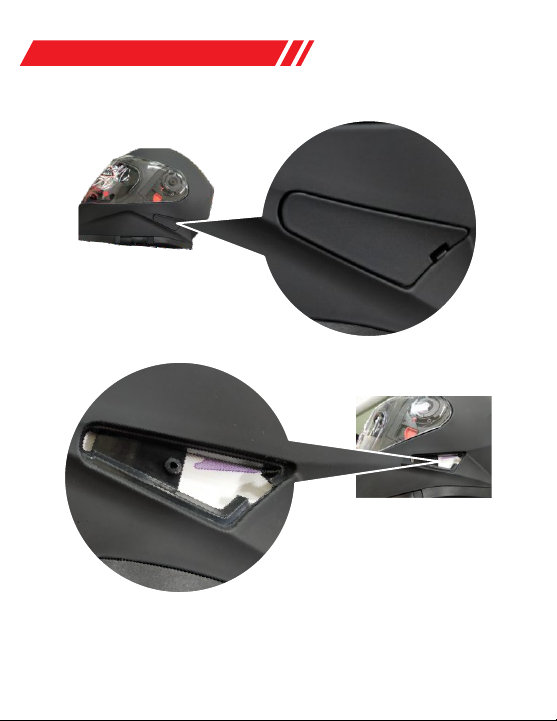
Remove the
bluetooth cover.
Make a hole in the marked area at the center of the white
sheet manually(use any sharp object)
EN
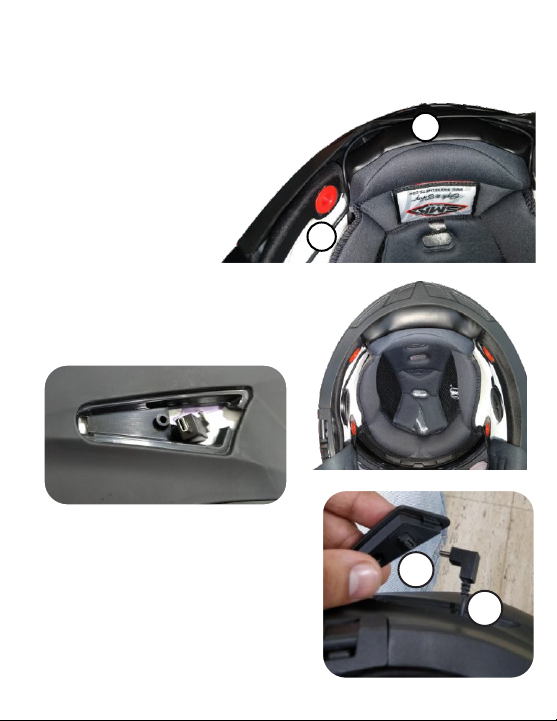
4

Remove the cheek pads (1) from the snap fasteners (2) by
pulling inwards. Pull the tab (3) for the snap fastener. (4)
Remove the chin strap from cheek pad hole (5). Repeat this
activity on the other cheek pad also.
Remove the side
cheek pads
1
4
5
23
5

6
A
E
B
D
C
This is how it looks after removal of
cheek pads. Now remove the grey
colored foam (6) from the cheek pad
Below are parts of bluetooth set.
(A) Bluetooth module
(B) 3M Tape
(C) Speaker Assembly
(D) Spare Mic Foam
(E) Screw
6

Now put the speaker assembly (9) in the Marked position(10)
that is in the cheek pad. Repeate this activity on both the cheek
pads (left and right)
LEFT RIGHT
10
Take the Speaker Assembly (7)
And paste the 3M Tape (8) on
the back of the speaker
9
8
7
7
11
12
This is how the cheek pad will look, with the Bluetooth
assembly slot in it.
This is how it look after the
fitment of the speaker assembly
from inside.
Take out the connector wire
(13) from the 3mm hole that
we have made manually in
th e whit e port ion an d now
connect that to the bluetooth
module female part(14).
13
14
The speaker assembly wire
(11) will gets hidden inside the
Neck Beading(12).
8

Linking/Pairing
To use the BT device, it’s necessary to pair it to the Bluetooth
device of your phone. While the device is switched off, hold the
control button (A) until the LED indicator begins flashing in Red
and Blue. The mobile phone will find the device under the
name SMK A-2. Select the SMK A-2 device and it will pair
automatically.
Use the Screw (E) to fasten the bluetooth module to the
helmet shell.
Switching ON/OFF
Switching on/off : press and hold the button (A) for a few
seconds until the speaker provides an acoustic signal and the
LED indicator C begins to flash. Blue flash means it is ON and
Red flash meas it is OFF.
Charging
The complete bluetooth system must be connected prior to
charging of the system.
9
Rimuovere lo
sportellino del Bluetooth.
Praticare manualmente un foro nell'area contrassegnata al
centro della parte bianca (utilizzare qualsiasi oggetto
appuntito).
IT
10
Table of contents
Languages:
Other Daytona HELMETS Headset manuals


