DDMALL AGS-P-100-4K User manual
4K Video Multiviewer User Manual
Model: AGS-P-100-4K

TABLE OF CONTENTS
Chapter 1. Product Overview
1.1 Safety Instruction............................................................................................................................. 1
1.2 Product Introduction.........................................................................................................................2
1.3 Product Appearance........................................................................................................................ 2
1.4 Product Applications........................................................................................................................ 3
Chapter 2. Installation Guidelines
2.1 Pre-installation Instructions.............................................................................................................4
2.2 Installation Steps.............................................................................................................................. 4
Chapter 3. Control Methods
3.1 IR Remote Control............................................................................................................................5
3.1.1 Introduction.................................................................................................................................... 5
3.1.2 IR Remote Controller....................................................................................................................5
3.1.3 Operation Instruction....................................................................................................................6
3.2 Front Panel Control..........................................................................................................................9
Chapter 4. FAQ
4.1 There is no picture in the output.................................................................................................. 10
4.2 How to select the layout template............................................................................................... 10
4.3 4K HDMI output display malfunction...........................................................................................11
4.4 VGA output windows appears black border...............................................................................11
4.5 HD resolution output without picture...........................................................................................12

1
Chapter 1. Product Overview
1.1 Safety Instruction
Thank you for purchasing AGS-P-100-4K Multiviewer. Please read the instructions carefully before you use
the device and save this manual for future reference.
Power
Please use only the power adapter and power cable
that comes with the device.
Turn off the Power
To prevent electrical damage, please turn off the
power before removing it.
Connections
Pressure including stepping on is not allowed on the
power cable, signal cable, and other cables to avoid
dangerous situations like leakage and short circuit.
Make sure all cables are well connected before
starting the device.
Ventilation
Air vents should be kept clean and unobstructed at
all times. Do not block any ventilation openings to
avoid over heat which may damage this product.
Working Environment
Avoid dust, excessive humidity, and temperature
extremes. Do not place this product in any wet area.
Maintenance
All the maintenance work should be completed by
professionals.
Repairing is not allowed without permission in order
to avoid the risk of electric shock.
Installation
The device should be installed on the stable work
surface. Standard rack, cabinet and chassis are
recommended.
Safety Precautions
1. Please do not open the chassis without the
licensed technician due to the high voltage parts
inside.
2. Do not use this product near by any heat source.
3. To ensure good open ventilation area, the front
and rear panel should have maintained at least
20cm of space.
4. Please unplug this product during the lightening
storms or when unused for a long period of time.
5. Please unplug this product and call the qualified
service person as the following situations:
* Power cord damaged or badly worn.
* Liquid spilled on the device.
* The device has been dropped and the chassis has
been damaged.
* The device appears malfunctioned or has changed
performance.

2
1.2 Product Introduction
Introduction
The AGS-P-100-4K is a hardware-based integrated 4K Multiviewer which supports four DVI/VGA plus one 4K
HDMI inputs and one 4K HDMI output. The four DVI connectors also support HDMI 1080p inputs when using
the HDMI to DVI adapter. Offer unparalleled flexibility, enhanced security, and real-time throughput with no
dropped frames, to provide users with a superb visual experience.
The AGS-P-100-4K Multiviewer features menu setting function, which allows users to control the device only
using the IR remote controller. With built-in five standard layouts templates, it can display four windows on a
single screen in different display modes. The performance is demonstrably superior to the industry standard.
Features
Support four DVI/VGA/HDMI 1080p and one 4K HDMI signal inputs.
Support one 4K HDMI output.
Automatic matching all kinds of 4K LCD display devices.
Compatible with multiple signal formats.
EDID management.
ESD protection.
Support 24/7 operation.
Rugged, compact and hardware-based integrated design.
Fluid, real-time video performance with no dropped frames and zero loss.
Layer display windows and adjust transparency of each video source display.
Plug and play performance. No user adjustment is required.
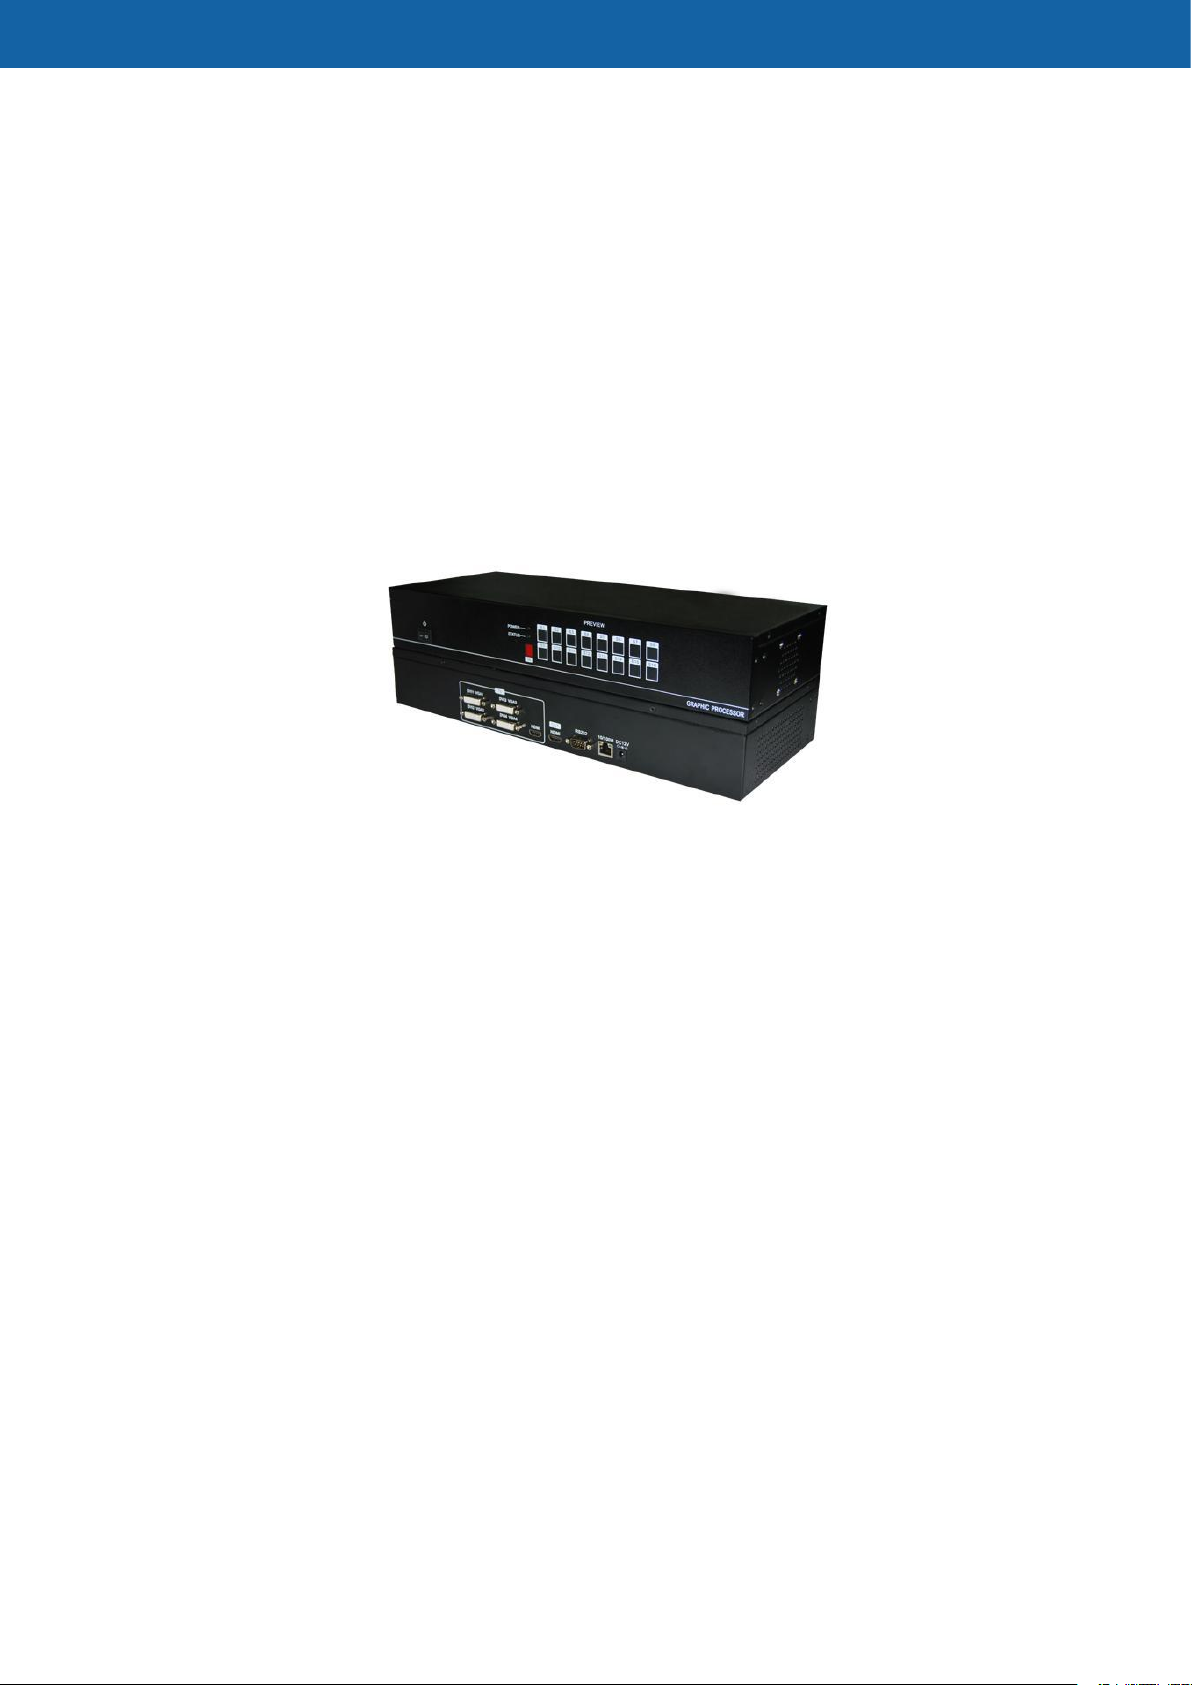
1.3 Product Appearance
The AGS-P-100-4K Multiviewer adopts integrated hardware design. The front view and rear view as shown in
Figure 1 and Figure 2 respectively.
Front View
Figure 1

3
Rear View
Figure 2
1.4 Product Applications
The AGS-P-100-4K Multiviewer is ideal for a range of multi-window display system applications that require
the capability to simultaneously display multiple video sources on one screen. Such as:
Video Conferencing
Distance Learning
Usability Labs
Control Rooms
Command Centers
Lecture Hall
House of Worship
Corporate Lobby Displays
Mission-critical Operations Centers
Debriefing Centers
Table of contents
Popular Conference System manuals by other brands

Jabbla
Jabbla Tellus 6 operating instructions

LY International Electronics
LY International Electronics H-9500 Series Installation and operating manual

RADVision
RADVision Scopia XT1000 user guide

AT&T
AT&T MERLIN LEGEND Reference

Polycom
Polycom RealPresence Group Series setup sheet

ProSoft Technology
ProSoft Technology AN-X4-AB-DHRIO user manual

Sony
Sony PCS-I150 Operation guide

Middle Atlantic Products
Middle Atlantic Products VTC Series instruction sheet

AVT
AVT MAGIC AC1 Go Configuration guide

Prentke Romich Company
Prentke Romich Company Vanguard Plus Setting up and using

Speakerbus
Speakerbus iD 712 user guide

Trelleborg
Trelleborg SafePilot CAT PRO user guide


