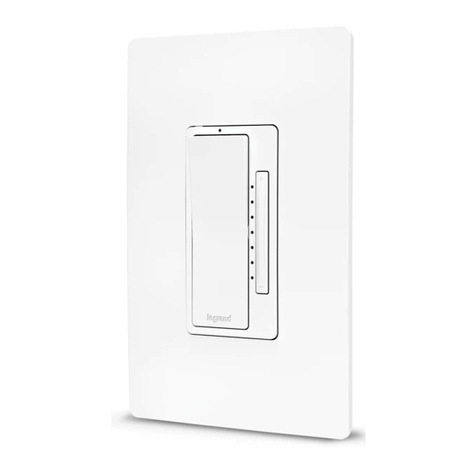
Deako Smart Dimmer User manual

Deako
Smart
Dimmer
Single Pole Smart Dimmer
Master Smart Dimmer
Remote Smart Dimmer

Get to know your
Deako Switch Main button
LED indicators
Dimmer control
Congure button
2233

LED COLOR WHAT IT MEANS
Blinking green Powering up
Blinking purple Linking mode
Blinking blue Pairing mode
Blinking white Pairing or Linking
LED COLOR WHAT IT MEANS
Solid white Pairing or Linking successful
Blinking red Error occured, try again
Solid red Factory resetting
LED keyLED key
4455

How many switches
control this light?
If two or more switches control
this light, TURN TO PAGE 12
2+ switches
If one switch controls this light,
CONTINUE TO PAGE 8
1 switch
6677

Insert a switch
1 2
Align the blue tab on the
backplate with the top of
the switch
While pressing the switch
inwards, push in the blue
tab
8899

Installation complete!
Now let’s get smart.
Pairing
Control your new smart switch by
downloading the Deako App.
1010 1111

What you’ll need
One remote dimmer for each
additional switch location
1+ remote dimmer
One master dimmer
1x master dimmer
1212 1313

Identify the switch type by looking at the sticker found on the back of
your switch.
You will either have a Master Smart Dimmer or Remote Smart Dimmer.
If you have a different type of switch, go to support.deako.com for more information
Switch types
9696669209165087
9696669209165087
1414 1515

1 2
If there is a switch installed
in the backplate you want to
upgrade, start by pulling the
corner of the faceplate
Pull the blue tab outwards to
release the switch
Remove existing dimmerRemove existing dimmer
1616 1717

3Locate the powered backplate
in the circuit by inserting a
Remote Smart Dimmer into a
backplate in the circuit
Align the blue tab on the
backplate with the top of the
switch
Insert Remote DimmerInsert Remote Dimmer
4While pressing the switch
inwards, push in the blue tab
If the backplate is powered,
the switch will ash green
If switch does not ash green, move to
the next location & repeat step 1
1818 1919

6Move to the next
powered backplate,
then repeat steps 1-5
for each switch in the
circuit until you get to
the last switch
5Wait until the switch stops
ashing green, then press &
hold the congure button
until it ashes purple
2020 2121

7On the last switch in the
circuit, insert the Master
Smart Dimmer
Insert Master switchInsert Master switch
8Wait until the switch stops
ashing green, then press &
hold the congure button
until it ashes purple
Once all switches in the
circuit are ashing purple,
continue to step 9
2222 2323

10 To test if they’ve been
successfully linked, press
each switch to conrm that
they control the light
Now you’re ready to pair
your switches with the
Deako App
9Once all switches in the circuit
are ashing purple, press & hold
the congure button on any
switch until it ashes white
Once the switches show solid white and
turn off, linking is complete
2424 2525

Troubleshooting
• Linking is only required for 3-way and 4-way wiring congurations
• If at any point a switch blinks red, factory reset it and try again
• To exit linking mode at any point, press & hold the congure button
for 10 seconds to factory reset each switch before retrying
• If you have dead-end or other nontraditional wiring in your home,
you can nd wiring and setup instructions at deako.com/wiring
Factory reset
Press & hold the congure
button for 10 seconds (the LED
will be appear solid red).
2626 2727

Boring legal stuff
NOTE: This equipment has been tested and found to comply with
the limits for a Class B digital device, pursuant to Part 15 of the FCC
Rules. These limits are designed to provide reasonable protection
against harmful interference in a residential installation. This
equipment generates, uses and can radiate radio frequency energy
and, if not installed and used in accordance with the instructions,
may cause harmful interference to radio communications.
However, there is no guarantee that interference will not
occur in a particular installation. If this equipment does cause
harmful interference to radio or television reception, which can
be determined by turning the equipment off and on, the user is
encouraged to try to correct the interference by one or more of the
following measures:
Reorient or relocate the receiving antenna.
Increase the separation between the equipment and receiver.
Connect the equipment into an outlet on a circuit different from
that to which the receiver is connected.
Consult the dealer or an experienced radio/TV technician for help.
This device complies with Part 15 of the FCC Rules. Operation is
subject to the following two conditions:
(1) this device may not cause harmful interference, and
(2) this device must accept any interference received, including
interference that may cause undesired operation.
FCC RF Radiation Exposure Statement Caution: To maintain
compliance with the FCC’s RF exposure guidelines, place the
product at least 20cm from nearby persons.
This device contains licence-exempt transmitter(s)/receiver(s)
that comply with Innovation, Science and Economic Development
Canada’s licence-exempt RSS(s). Operation is subject to the
following two conditions:
This device may not cause interference.
This device must accept any interference, including interference
that may cause undesired operation of the device.
CAUTION
To Reduce the Risk of Overheating And Possible Damage To Other
Equipment, Do Not Install To Control A Receptacle, A Motor-
Operated Appliance, Or A Transformer-Supplied Appliance
L’émetteur/récepteur exempt de licence contenu dans le présent
appareil est conforme aux CNR d’Innovation, Sciences et
Développement économique Canada applicables aux appareils
radio exempts de licence. L’exploitation est autorisée aux deux
conditions suivantes:
1. L’appareil ne doit pas produire de brouillage;
2. L’appareil doit accepter tout brouillage radioélectrique subi,
même si le brouillage est susceptible d’en compromettre le
fonctionnement.
ATTENTION
Pour éviter la surchauffe et ne pas endommager d’autres appareils,
ne pas utiliser pour contrôler une prise de courant murale ou un
appareil motorisé ou alimenté par transformateur.
To maintain compliance with the RF exposure guidelines, place the
product at least 20cm from nearby persons.
Pour rester en conformité avec les consignes d’exposition aux RF,
placez le produit à au moins 20 cm des personnes proches.
CAN ICES-3 (B)/NMB-3(B)
NON-MODIFICATION WARNING:
WARNING: Changes or modications to this device not expressly
approved by the manufacturer could void the user’s authority to
operate the equipment.
Google Play and the Google Play logo are trademarks of Google
LLC.
App Store® is a trademark of Apple Inc., registered in the U.S. and
other countries.
© 2021 Deako
1-Year Limited Warranty
Patents: deako.com/pat
4201 Roosevelt Way NE #100 Seattle, WA 98105, USA


support.deako.com
1-844-673-3256
Need help?Need help?
Table of contents
