deeper START User manual

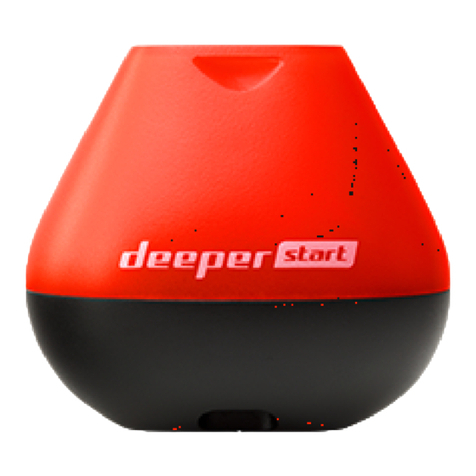
Deeper Smart Sonar START
Technical Specifications
Weight: 2.1oz / 60g
Size: 60 x 65 x 65-mm / 2.3 x 2.5 x 2.5in
Sonar Type: Single beam
Frequency (Beam cone): 120 kHz, 40°
Depth Range Max/Min: Max 165ft / 50m, Min 1.6ft / 0.5m
Sonar Scan rate: 10 scans per second
Operating Temperature: 0°C to 40°C / 32°F to 104°F
Internal Battery: Lithium Polymer, 3.7V Rechargeable, 850mAh
Power Supply input (for charging battery): 5V DC, 650mA max
Power Adapter (not included in the box, recommended): Input AC 110V/240V. Output Micro USB A, 5V
450mA
Wireless connection type:

Wi-Fi
Casting Range: Up to 165ft / 50m. Range depends on the OS and smartphone model
Battery Life: Up to 6 hours
Charging Time: 2.5 hours
How sonars work
Before you start using your Deeper device, it is important to understand some basic points about how sonars work.
1. Sonars scan in cones.
This means when you mark a fish or feature, it is somewhere within the cone sent down by your sonar (not
necessarily directly below your sonar). It also means that the deeper you scan, the wider the area you cover,
because the sonar cone gets bigger as it goes down.
2. Sonar displays constantly scroll

When your Deeper is in the water, the sonar will be scanning constantly. This means the display continually scrolls
from right to left, even if the sonar itself isn’t moving.
Read our page on how sonars workfor a detailed explanation of these points, plus lots more useful information that
will ensure you understand your device correctly.
Installing the Deeper App

1. Open App Store or Google Play on your smartphone or tablet, and search for Fish Deeper.
2. Download and Install the Deeper App
ⓘ The Deeper App works on a wide range of devices that use iOS or Android operating systems. To check if the
Deeper App will work on your device please go toCompatibility
Standard mode. Basic imaging (all models)
In Standard mode set to basic imaging, you will be shown the bottom and Fish Icons. In this mode, your Deeper
sends much less information to your phone. So, this mode can be useful for preserving battery life, improving the
connection range, and also for inexperienced anglers who just need to know bottom depth and where the fish are.
Logging in
To login to Lakebook™, go to maps.deepersonar.com. You can login using Facebook, Google or your My Deeper
username and password. It is the same user name and password you use for the Deeper App.
Charging and connecting
First unscrew the top cover to open the device – please always ensure the device is dry before opening it. Now
connect your Deeper Sonar to a USB power source using the cable included. For charging, please use a standard
smartphone or tablet charger, or connect the cable to your personal computer, your car’s power outlet, or the USB
outlet of another device.
When you connect your Deeper CHIRP+ to a power source, it automatically turns on. An orange light will flash in

intervals to show the device is charging. The number of flashes indicates the status of the battery.
One flash means charging just started and the battery is still empty.
Two flashes mean 25% charged
Three flashes mean 50% charged
Four flashes mean 75% charged
A green light means the battery is fully charged.
A blue light indicates that the temperature is too cold for charging. The lithium-ion battery cannot be
charged at temperatures below 3°C / 37.4°F. Please take your Deeper Sonar to room temperature conditions
and resume charging.
A red light means there is a problem with charging. In this case, first please try a different charger and
cable. Next, please leave the device charging for a longer period (over 1 hour). If the light is still red, please
contact Support.
Once your device is charged, screw the top cover back on, ensuring it is closed tightly so that the words ‘Water’
and ‘Proof’ align perfectly.
ⓘ Never put your Deeper in water when it is connected to the charger cable. This could damage the device and any
damage will not be covered by the warranty. Always ensure the top cover is firmly closed and the Water Proof
marks are perfectly aligned before putting your Deeper Sonar in water.
ⓘ Please note you can only connect to one Deeper Sonar at a time from your phone or tablet. And your Deeper
Sonar can only connect to one phone or tablet at a time.
Connection issues with Deeper’s Wi-Fi
Firstly, please bear in mind that the connection ranges of 100m / 330ft (PRO/PRO+) and 50m /165ft(START) are
maximum ranges and can only be achieved in perfect conditions and with a smartphone or tablet that has a strong
reception antenna. Conditions like bad weather or using an incorrect attachment point may reduce the connection
range.
To ensure a better connection range, first switch offMobile Dataon your smartphone / tablet, as this can affect

the strength of your Wi-Fi signal.Mobile datastrongly reduces the amount of information your device can send
via its Wi-Fi connection.
For iPhones and iPads, it is very important to turn offthe Wi-Fi assistfeatureas this feature can automatically
switch off the connection with your Deeper. You can find this feature in the settings menu of your device.
Some Android phones have a similar feature, although the name of it may vary depending on the model of the
phone. On Samsung phones, it is calledSmart network switch. Other Android phones may have a similar feature
with a different name. Please make sure that youturn offany settings that make your smartphone automatically
disconnect from Wi-Fi networks with a poor internet connection.Other possible names for this feature include:
Adaptive Wi-Fi / Auto Network Switch / Wi-Fi+.
If you’re using any VPN services that may require a Wi-FI connection it is better to turn them off. If you don’t, the
Deeper App may have difficulties connecting to the device automatically.
Do not to keep your smartphone or tablet on the ground while using the Deeper, as this can also reduce the
strength of the signal. To maximize connectivity you should use theDeeper Smartphone Mount.
Please also note that it is only possible to connect to the Deeper using one smart device at a time. This means it
will be impossible to connect to a Deeper Sonar if it is already connected to another phone or tablet. To switch off
all current connections, simply take the Deeper out of the water, wipe it and wait for 5 minutes for the unit to turn
off. Then, put it in the water again and connect.
If the device connects when on charge but does not connect when in the water, please check the water sensors on
the bottom (the two metal points on the bottom housing of your Deeper). You can clean them by roughly scrubbing
them with a sponge, or an electronic contact cleaner can be used if needed.
For the 3.0/PRO/PRO+ models only,make sure you are using the correct attachment point in order to ensure a
stable. When fishing from a dock or bridge, screw your attachment bolt to the middle attachment point. Use the
bottom attachment point if you're fishing from the shore. It is important that your Deeper does not tilt when being
trolled or reeled. When it tilts, it scans the water surface rather than the bottom, giving inaccurate readings, and
it’s Wi-Fi transmissions can be blocked, causing connectivity issues.
If these tips do not solve the issue, please reach out to theDeeper Support team.
Charging and connecting
First unscrew the top cover to open the device – please always ensure the device is dry before opening it. Now
connect your Deeper Sonar to a USB power source using the cable included. For charging, please use a standard

smartphone or tablet charger, or connect the cable to your personal computer, your car’s power outlet, or the USB
outlet of another device.
When you connect your Deeper PRO or PRO+ to a power source, it automatically turns on. An orange light will flash
in intervals to show the device is charging. The number of flashes indicates the status of the battery.
One flash means charging just started and the battery is still empty.
Two flashes mean 25% charged
Three flashes mean 50% charged
Four flashes mean 75% charged
A green light means the battery is fully charged.
A blue light indicates that the temperature is too cold for charging. The lithium-ion battery cannot be charged at
temperatures below 3°C / 37.4°F. Please take your Deeper Sonar to room temperature conditions and resume
charging.
A red light means there is a problem with charging. In this case, first please try a different charger and cable. Next,
please leave the device charging for a longer period (over 1 hour). If the light is still red, please contactSupport.
Once your device is charged, screw the top cover back on, ensuring it is closed tightly so that the words ‘Water’
and ‘Proof’ align perfectly.

ⓘ Never put your Deeper in water when it is connected to the charger cable. This could damage the device and any
damage will not be covered by the warranty. Always ensure the top cover is firmly closed and the Water Proof
marks are perfectly aligned before putting your Deeper Sonar in water.
ⓘ Please note you can only connect to one Deeper Sonar at a time from your phone or tablet. And your Deeper
Sonar can only connect to one phone or tablet at a time.
Charging and connecting
Connect your Deeper Sonar to a USB power source using the cable included. For charging please use a standard
smartphone or tablet charger or connect the cable to your personal computer or the USB outlet of another device
(outlets must meet USB standards and have a voltage level of 5V).
When you connect your Deeper START to a power source, it automatically turns on. The light shown indicates the
charge status of the battery:
An orange blinking light means that the fishfinder is charging. The number of flashes shows the battery status:
One flash means charging just started and the battery is still empty.
Two flashes mean 25% charged
Three flashes mean 50% charged
Four flashes mean 75% charged
A constant light means the battery is fully charged.

If the light blinks rapidly without stopping there is a problem with charging. In this case, please follow these 2 steps.
1. Check the temperature. If it is 0°C / 32°F or lower, please try charging your Deeper START in room
temperature conditions.
2. If you still see a rapidly blinking light, please contact Support.

Welcome to Deeper
At Deeper, our mission is to give you incredible experiences when you are fishing. So, we want to make sure you
get the most from your Deeper Sonar. Our user guides and manuals will help you set up, maintain and get the best
performance from your Deeper. Plus, you will discover the full range of functions and features your sonar has to
offer. And if you have any further questions, oursupport teamis on hand 24/7 to assist you.
Deeper Sonar models
Deeper Smart Sonar PRO

Technical Specifications
Weight: 3.5oz / 100g
Size: 65mm / 2.5in in Diameter
Sonar Type: Dual Beam
Frequency (Beam cone): 290 kHz, 15° and 90 kHz, 55°
Depth Range Max/Min: Max 260ft / 80 m, Min 2ft / 0.5m
Sonar Scan rate: Up to 15 scans per second
Operating Temperature: -20°C to 40°C / -4°F to 104°F
Internal Battery: Lithium Polymer, 3.7V Rechargeable, 850mAh
Power Supply input: Micro USB B type, 5V DC, 450mA max
(for charging battery)
Power Adapter Input: AC 110V/240V. Output Micro USB, 5V 450mAh
Wireless connection type: Wi-Fi
Casting Range: Up to 330ft / 100m. Range depends on the OS and smartphone model
Battery Life: Up to 6 hours
Charging Time: 2 hours

Basics for shore fishing with your Deeper
Casting out
-Attachment points: For shore fishing, make sure you attach your line to the bottom attachment point of the 3
attachment points on your Deeper (this does not apply to the Deeper START, which only has one attachment
point). Using one of the other attachment points will result in the sonar sitting in the water at an incorrect angle.
- Line: All our sonars are tested to cast using line from 6lbs / 2.7kg test monofilament up to 20lbs / 9kg test
braided line. Always ensure your line is in good condition - not frayed or worn – before casting out your Deeper
Sonar.
- Rods: Deeper Sonars are suitable for casting with heavy action and medium action rods. With heavy action rods
you can cast your Deeper overhead. With medium action rods, cast your Deeper using a side cast technique.
Reeling in
When reeling in your Deeper Sonar, the most important point to remember is to retrieve it at a slow, steady pace.
Here’s why:
- Reel in slowly: Reeling in too quickly can cause your Deeper to rock from side to side. If this happens, the sonar
readings will be less reliable. For example, if the sonar is tilted to one side, the sonar signal will have to travel
further before it hits the bottom. This will result in the depth being shown as deeper than it actually is.
- Reel in steadily: Retrieving your device at a steady, continuous speed is also important. Remember that your
sonar is constantly scanning. This means if your device is stationary, the bottom will appear flat on your screen
because the sonar is just repeatedly sending the same depth reading. If you start reeling in your sonar and the
bottom remains flat on your display, then you know it really is a flat bottom. As the depth changes, for example if
you are reeling in over a drop off, it is important to keep a steady speed. If you slow down your reeling speed, the
slope will appear more gradual on your display. Speed up, and it will appear steeper. By maintaining a steady
speed, you will get an accurate indication of how steep the depth change really is.

Pairing with the mobile device
Deeper sonar turns on automatically when it is in water or connected to a power source. When it’s out of water or
not being charged, it switches off automatically to save battery life.
To use the Deeper sonar, you will need to Download the app from App Store or Google Play. You will see a register
screen when you first launch the app. Only registered users will get all the features that application can offer.
Pairing with an Android mobile device:
Be sure that your Deeper Sonar is switched on (either connected to a power source or in the water);
Open Settings in your smartphone or tablet and turn on Wi-Fi;
Find your Deeper sonar in the Wi-Fi devices list and click to pair it;
When you are asked for the password, enter 12345678
Turn Off the Smart Network Switch function (if available on your device)
Your Deeper CHIRP+ is now connected with your mobile device - you might seeInternet may not be available
displayed, or something similar. Don’t worry,this is normal.It simply means that your mobile device’s Wi-Fi
connection is now being used for your Deeper sonar and not the internet.

Pairing your Deeper CHIRP+ with an iPhone or iPad
If you use an iPhone or iPad, follow these steps:
Be sure that your Deeper Sonar is switched on (either connected to a power source or in the water);
OpenSettingsin your mobile device, then openMobile Dataand make sure that theWi-Fi Assist
function is turned off. This is important because when this function is active, the connection with your
Deeper sonar may be unstable.
Then openSettingsin your mobile device, thenWi-Fiand turn it on.
Find your Deeper PRO or PRO+ in the list of available Wi-Fi networks and click to pair it.
When you are asked for the password, enter12345678
Your Deeper CHIRP+ is now connected with your iPhone or iPad - you might seeInternet may not be available
displayed, or something similar. Don’t worry,this is normal.It simply means that your mobile device’s Wi-Fi
connection is now being used for your Deeper sonar and not the internet.
You can try your sonar at home, but you probably won’t see fish accurately
If you put your Deeper CHIRP+ in a fish tank, cup, bucket, bathtub, or similar container at home you will be able to
turn the device on and pair it with your mobile device. But most likely the device won’t be able to scan properly –
you will probably just see an empty screen and the status message:Too shallow or too deep.
If your CHIRP+ is set to Narrow CHIRP (7°), you may even see “phantom” fishes and other strange readings on the
screen.
This is normal, Deeper sonar is designed for scanning in wide open waters like rivers, lakes, and the sea. In small,
shallow and enclosed waters the sonar tries to scan, but receives too many sonar returns from the bottom and
walls of your tank and cannot make an accurate reading. Read more aboutHow Sonars Work
Standard mode. Detailed imaging (CHIRP+)

Bottom: When set to detailed imaging, your Deeper can help you determine whether the bottom is hard or soft.
When the sonar pulses sent from your Deeper are reflected by the bottom, a hard bottom will return a stronger
signal than a soft bottom.
When using Day screen color mode, the bottom may be displayed as: yellow (hardest bottom), red (medium) and
blue (softest). The bottom will always give the strongest signal return of any object; therefore, it will have the most
intensive color. The bottom is shown as a continuous, intensely colored line running across the bottom of the
screen.
Second sonar return: You may also see a second sonar return: this is caused when the sonar signal bounces
between the bottom and the surface of the water and back again. Hard bottoms will show a strong second return,
while soft bottoms will show a very weak one or none at all.
Fish Icon: Fish Icons are displayed in three different sizes. The classification of fish by size depends on many
variables, with weight being only one of them. This means Fish Icons do not always accurately reflect an actual
fish’s size. If you want to judge more accurately the fish’s actual size, you should choose Detailed Smart Imaging
and untick Fish Icons. With these settings you can judge quite accurately the size of a fish, although identifying the
fish can be more difficult at first. Read more on this topic here.
Water surface: Along the top of the screen, you will see a blue water surface line with a grouping of intense
colors. This area is surface clutter, which can be caused by waves or other sonar interference on the surface of
the water. Surface clutter is the blind zone, where the sonar will not detect any fishes or underwater objects.
The length of surface clutter depends the beam angle and frequency used. The higher the frequency – the smaller
the surface clutter is, and the less depth Deeper will need to operate.
When using Narrow CHIRP beam (675 kHz), surface clutter zone will be stretching down to 0.15m (0.5 ft) from the
surface of water. No fish or underwater objects will be detected in that area. Deeper sonar will display “too shallow
or too deep” error message if the actual depth of water is less than 0.15m (0.5 ft).
Mid CHIRP (290 kHz) will have a surface clutter zone of 0.6m (2 ft) and will not detect any fishes or underwater
objects in that area.
Wide CHIRP (100 kHz) will have a surface clutter zone of 0.8m (2.6 ft) and will not detect any fishes or underwater
objects in that area.
Weed: Weed beds and vegetation are shown in green.
Schools of fish: Deeper sonars will clearly show schools of bait fish, which will be represented as clouds of
different shapes and sizes. Their exact appearance will depend on the number of fish, and the speed of your boat if
you are trolling.

Logging in to My Deeper
Your My Deeper account is the same for the Deeper App, our website and Lakebook. If you already have a My
Deeper account, just login the first time you open the application. If you don’t have a My Deeper account yet, you
will have to register. Registered users have all of their scans and maps saved to their account, so no data gets lost
when they close the Deeper App.
The first time you launch the Deeper App, the registration screen will automatically open. ClickRegister, then
complete the short registration form. Alternatively, you can sign in using your Facebook or Google account.
Once you have registered, you will remain logged in on your device. If you do need to logout or login again, go to
Settings>Accounts. If you use the Deeper App on a different device, you will need to login again.
ⓘPlease read thePrivacy policyfor more information about your data.

Standard mode. Detailed imaging (PRO series)
Bottom:When set to detailed imaging, your Deeper can help you determine whether the bottom is hard or soft.
When the sonar pulses sent from your Deeper are reflected by the bottom, a hard bottom will return a stronger
signal than a soft bottom. On your smartphone or tablet screen, the bottom may be displayed as: orange (hardest
bottom), brown (medium) and black (softest). The bottom of the water will always give the strongest signal return
of any object; therefore, it will have the most intensive color. The bottom is shown as a continuous, intensely
colored line running across the bottom of the screen.
Second sonar return:You may also see a second sonar return: this is caused when the sonar signal bounces
between the bottom and the surface of the water and back again. Hard bottoms will show a strong second return,
while soft bottoms will show a very weak one or none at all.
Fish Icon:Fish Icons are displayed in three different sizes. The classification of fish by size depends on many
variables, with weight being only one of them. This means Fish Icons do not always accurately reflect an actual
fish’s size. If you want to judge more accurately the fish’s actual size, you should chooseDetailed Smart Imaging
and untickFish Icons. With these settings you can judge quite accurately the size of a fish, although identifying the
fish can be more difficult at first. Read more on this topichere.
Water surface:Along the top of the screen, you will see a blue water surface line with a grouping of intense
colors. This area is surface clutter, which can be caused by waves or other sonar interference on the surface of the
water.
Weed: Weed beds and vegetation are shown in green.
Schools of fish:Deeper sonars will clearly show schools of bait fish, which will be represented as clouds of
different shapes and sizes. Their exact appearance will depend on the number of fish, and the speed of your boat if
you are trolling.
Viewing and analyzing your maps and scans
Once you are logged in, on the left side of the screen you will see a list of the locations where you have used your
Deeper.

If you did not name the sessions, they will be listed as Untitled. Click on a location to view your data. Lakebook will
show both sonar scans - on the bottom of the screen- and bathymetric mapping data – shown on the map.
Bathymetry will only be shown if the scan was made in Boat Mode or Onshore GPS Mode.
You will see that your maps and scans are grouped by location (all scans are grouped by the water body ).
Once you have selected the location and sessions you want, you are ready to start analyzing them. What you see
on screen will vary depending on the fishing mode you used for scanning at that location:
- ForStandard ModeandIce Fishing Mode, you will see a split screen. On the top half there is a map with pins
marking the different locations where you scanned. The bottom half shows the scans themselves.
- ForBoat ModeandOnshore GPS, you also see a split screen. This time the Bathymetric map you created is shown
on the top half, and the scans that were recorded while you were mapping are shown on the bottom half.
Scrolling your scans
You can scroll through your scans from right to left. Use the scroll bar at the bottom of the screen or click on the
scan and move your mouse.
For scans made usingBoat ModeandOnshore GPS mode, you will notice that an arrow icon is shown on the map
itself. This icon shows where the scanning data you are looking at now was made. As you scroll through your scan,
the icon will move on the map. This enables you to locate exact points on the map where you marked a fish or
located some good structure. You can also click on a particularly interesting point on the bathymetric map and see
the sonar scan in that precise area.
You also have the option to add or remove fish icons from your scans.
Instant depth and GPS data
When analyzing your bathymetric maps, simply click on any part of the map you have created. A pop-up box will
appear with the GPS coordinates and depth at that exact spot.
Other useful display tools
-Zoom: In the top right of the screen there is a plus / minus icon. Use this for zooming in or out.

-Map settings: Below the zoom icon is a menu for changing your viewing settings. Click on this then select either
Map (for a simple map display) or Satellite (for a satellite image). In the Map view you can add or remove terrain. In
the Satellite view you can add or remove labels.
-Distance measurement: Below the map settings menu there is a ruler icon. Click this and you can now measure
distances – just click one spot and then another, and you will get a distance reading between the two.
-Removing menu from display: If you want to see you map and scan in full, without the left hand menu bar
displayed, simply press the x in the top right corner of the menu bar.
Connection issues with the Deeper 3.0’s Bluetooth
connection
Firstly, please bear in mind that the connection range of 40 m (130ft.) is the maximum range the Deeper 3.0 can
achieve, and this range is only achievable in very good conditions and a smartphone / tablet that has a strong
reception antenna. Conditions like bad weather, or using an incorrect attachment position, may reduce the
connection range.
First, check that you are holding your smartphone correctly and not covering its Bluetooth antenna. Positioning of
the Bluetooth antenna may vary depending on the model of your smartphone / tablet. Do not keep your
smartphone on the ground or in your pocket and remove any smartphone cases.
Make sure that your Deeper App is up to date. If you’re using the latest version of the app and it fails to connect to
your Deeper even though you have successfully established a Bluetooth connection previously, please follow these
steps:
Remove (Forget) Deeper from your smartphone's Bluetooth devices.
1. Restart your phone;
2. Connect your Deeper to a charger;
3. Pair your Deeper with your smartphone again.
Please also note that it is only possible to connect to your Deeper using one smart device at a time. This means it
will be impossible to connect to a Deeper Sonar if it is already connected to another phone or tablet. To switch off
all current connections, simply take the Deeper out of the water, wipe it and wait for 5 minutes for the unit to turn
off. Then, put it in the water again and connect.
If these tips do not solve the issue, please reach out to theDeeper Support team.
Pairing with the mobile device
Deeper sonar turns on automatically when it is in water or connected to a power source. When it’s out of water or
not being charged, it switches off automatically to save battery life.
To use the Deeper sonar, you will need to Download the app from App Store or Google Play. You will see a register
screen when you first launch the app. Only registered users will get all the features that application can offer.

Pairing with an Android mobile device:
Be sure that your Deeper Sonar is switched on (either connected to a power source or in the water);
Open Settings in your smartphone or tablet and turn on Wi-Fi;
Find your Deeper sonar in the Wi-Fi devices list and click to pair it;
When you are asked for the password, enter 12345678
Turn Off the Smart Network Switch function (if available on your device)
Your Deeper PRO or PRO+ is now connected with your mobile device - you might seeInternet may not be
availabledisplayed, or something similar. Don’t worry,this is normal.It simply means that your mobile device’s
Wi-Fi connection is now being used for your Deeper sonar and not the internet.
Pairing your Deeper PRO or PRO+ with an iPhone or iPad
If you use an iPhone or iPad, follow these steps:
Be sure that your Deeper Sonar is switched on (either connected to a power source or in the water);
OpenSettingsin your mobile device, then openMobile Dataand make sure that theWi-Fi Assist
function is turned off. This is important because when this function is active, the connection with your
Deeper sonar may be unstable.
Then openSettingsin your mobile device, thenWi-Fiand turn it on.
Find your Deeper PRO or PRO+ in the list of available Wi-Fi networks and click to pair it.
When you are asked for the password, enter12345678
Your Deeper PRO or PRO+ is now connected with your iPhone or iPad - you might seeInternet may not be
availabledisplayed, or something similar. Don’t worry,this is normal.It simply means that your mobile device’s
Wi-Fi connection is now being used for your Deeper sonar and not the internet.
You can try your sonar at home, but you probably won’t see fish accurately
Other manuals for START
3
Table of contents
Other deeper Sonar manuals
Popular Sonar manuals by other brands
Furuno
Furuno COLOR SCANNING CSH-23F/24F Operator's manual
Chasing
Chasing DISTANCE LOCK SONAR user manual
Tritech
Tritech StarFish quick start guide
Impact Subsea
Impact Subsea ISS360HD Installation & operation manual

Edgetech
Edgetech 2300 USER HARDWARE MANUAL

JW Fishers
JW Fishers SSS-100K PC Operation and maintenance manual
Teleflex
Teleflex TFX128 Operation manual
Simrad
Simrad forwardscan user guide

Klein Marine Systems, Inc.
Klein Marine Systems, Inc. HydroChart 5000 Operation and maintenance manual

Lowrance
Lowrance X-70A 3D operation instruction

Wassp
Wassp WMB-3250 installation manual
Furuno
Furuno CI-68 installation manual

