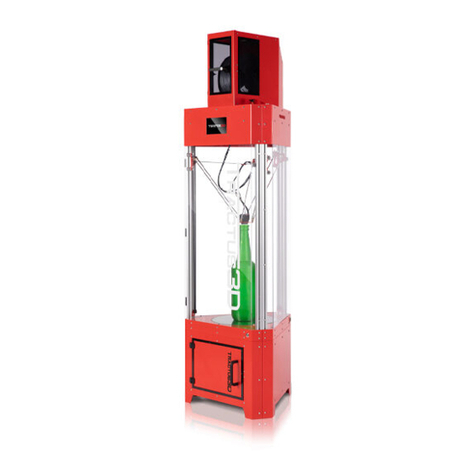
Deezmaker Bukito User manual

!!!!!!
2/19/!14!!p.!1!
Bukito Flight Check: What to do before starting to print for the first
time. Version 3.0 Beta, Feb. 19, 2014.
Table of contents
Plug!in!Power!and!USB!............................................................................................................................!1!
Systems!check.!............................................................................................................................................!2!
Check!Your!Endstops!................................................................................................................................!3!
Check!your!heater!......................................................................................................................................!3!
Aligning!(“tramming”)!the!platform.!.................................................................................................!3!
Test!extrusion.!.............................................................................................................................................!4!
_______________________________________________________________
Plug in Power and USB
•Open Repetier Host (see “Software Downloads” at bukobot.com).
Go to Printer settings. Select:
•Mac: “usbmodem_bukito1”
•Windows: COM(Number)
•Linux: USB(Number)
For Mac and Linux there are no drivers required.

!!!!!!
2/19/!14!!p.!2!
For Windows, install teensyduino driver and set options to the following values:
In all cases if you have a dropdown menu item “reset on connect,” set it to DISABLED.
Attach your USB cable to your computer. Be sure there is no micro-SD card in the micro-SD slot. (The
micro-SD card will override the USB).
Systems check.
Switch to “Print Panel” (“Manual Control” in newer Windows versions). Put x and y axes near endstops.
Click the positive 10 for the X axis. Extruder should move toward the right. Click the positive 10 for the Y
axis. Platform should move toward the front. Click the positive 1 for the Z axis as extruder should be at or
near the top after building.

!!!!!!
2/19/!14!!p.!3!
Check Your Endstops
Locate the blue reset button near the USB connector and be ready to press it if an endstop does not
function. Click the “Stop Motor” button in Repetier host to make sure the motors are not engaged, then
manually push the extruder to the right end. Click the “Home X” button in Repetier host, then tap the X
endstop switch. The extruder should begin moving left and stop when you hit the button. When it stops, it
will reverse a few millimeters, then move to the left again more slowly for a few more millimeters. If the
extruder does not stop when you tap the the endstop switch, check that the stop is not obstructed. If it
works, click “Home X” again to ensure that the X carriage properly touches the endstop when it gets to the
left end.
Repeat this procedure with the Y axis, starting by moving the platform manually to the front.
Click the “Stop Motor” button in Repetier host again and make sure that your Z axis is at least a few inches
above its endstop so that you have time to react if the axis does not stop, turning these screws by hand if
necessary. Unlike the other axes, Z has enough mechanical advantage to potentially break things if it does
not stop, but is also moves much more slowly.
Click “Home Z”, then test the Z endstop again as above. Be sure to keep your finger on the reset button in
case the endstop does not function.
Lift your Z axis to 100mm using the jog controls.
Check your heater
Switch to temperature curve view. Set temperature to 60 and turn on the extruder heater.
Check to see that the extruder 1 temperature (thin red line) starts moving up (it should be pretty fast)
If it doesn't start to rise after a few seconds, see the “troubleshooting” documentation. Turn your extruder
off.
Assuming it did work, continue with the setup.
Aligning (“tramming”) the platform.
The term “tram” means to make your platform parallel to the X/Y plane of the machine. This does not need
to be level (perpendicular to gravity), and in fact your machine should be able to print upside-down.
Tighten your three platform mounting adjustment nuts until the springs are fully compressed, then home
your Z axis. Click “Stop Motor” to make sure your X and Y motors are disengaged and turn off the power
switch.
Move the extruder and platform by hand until the nozzle is over the glass nearest one of the adjustment
screws, and loosen that nut until the nozzle just touches.

!!!!!!
2/19/!14!!p.!4!
To check the height, slip a piece of paper under the nozzle to use as a feeler gauge (post-it notes work
particularly well for this if you put the sticky side up and stick your fingers to it). The nozzle should just
barely press the paper against the platform and resist when you try to move the paper around, but should
not grip it firmly. Move the extruder and platform to one of the other screws and repeat this procedure until
all three have been adjusted.
Test extrusion.
Heat your extruder to 210C if you are going to test with PLA, or 240 if you are going to test with nylon.
Straighten the end of your filament and push it into the hole by the filament drive gear (see assembly
instructions.) You can insert filament two ways. First you can squeeze the idler lever with one hand to
compress the spring on the filament drive assembly and push in the filament with the other hand.
Alternatively you can push filament down the tube by turning the knurled knob on the end of the drive
gear.
Continue feeding by hand until you feel resistance (you should have inserted about 350 mm of filament.)

!!!!!!
2/19/!14!!p.!5!
Set the extrude length to 10mm and press “extrude” when the temperature curve display in Repetier Host
indicates that it has reached the target temperature.
Click “extrude” a few more times until plastic starts coming out of the nozzle. If your machine was pre-
assembled, there may already be PLA in the nozzle that may not match the color of what you put in. If this
happens, just continue extruding until the old plastic is flushed out and the plastic coming out is the same
color as what's going in. Some people like to save their printer's first test extrusion, or “noodle”, as a
keepsake.
Your machine is configured to automatically extrude a few millimeters of filament every 30 seconds if you
leave it idling while hot. This is to prevent plastic from sitting hot in the nozzle too long and burning or
oozing out and leaving the nozzle un-primed. For the next step, you want your nozzle hot so that the metal
is fully expanded, but you don't want any plastic coming out, so retract the plastic 10mm.
You may have to slightly adjust the tramming when the machine is hot. Repeat the procedure above if your
prints seem to have trouble sticking to the platform.
See the Repetier Host documentation about how to take an .stl file, slice it and run it through the system.
You're done and ready to start printing in 3D!
!
Other manuals for Bukito
4
Table of contents
Other Deezmaker 3D Printer manuals

