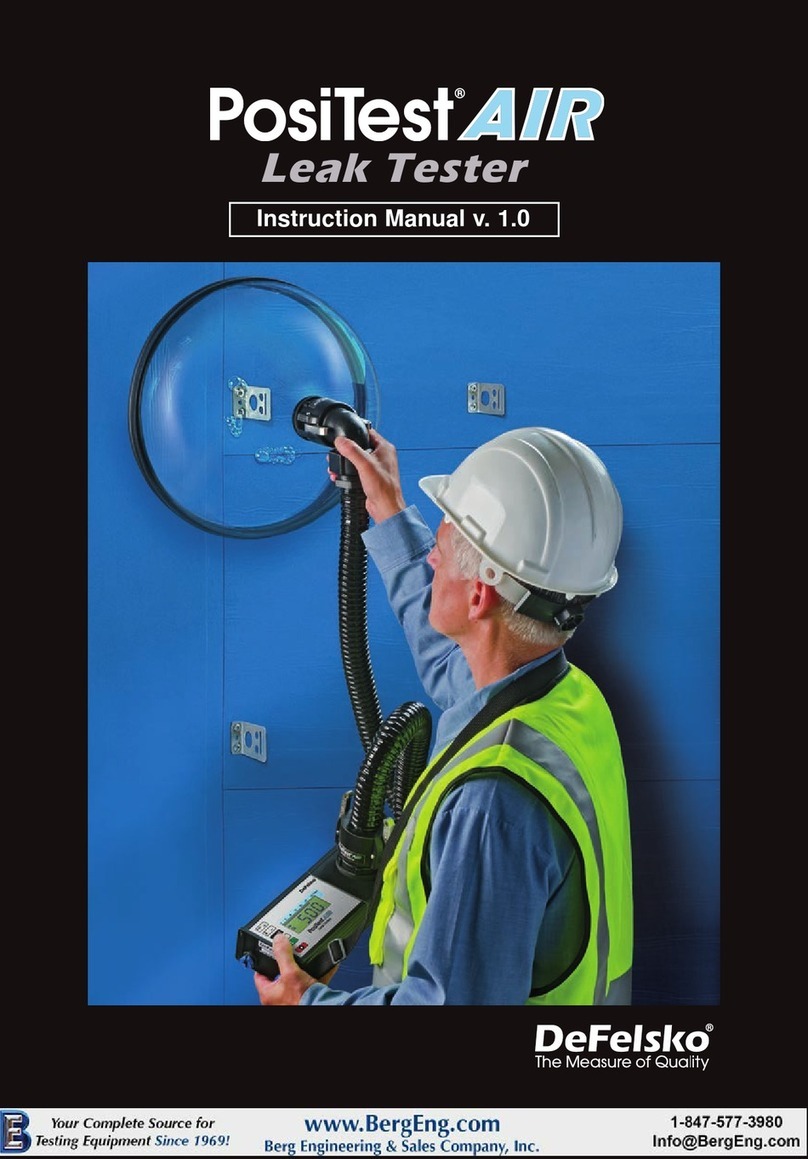
DeFelsko PosiTest AIR User manual

Instruction
Manual v. 1.0

Introduction
Introduction
The portable, hand-operated PosiTest AIR Leak Tester tests the air
barrier integrity of single, two-ply and liquid membrane systems, including
air barriers, roofing systems, waterproofing and ground liners by locating
leaks.
In accordance with ASTM E 1186, the PosiTest AIR will indicate whether
leaks exist in the test area. It is a simple pass/fail test.
The PosiTest AIR can be utilized during construction and
post-construction. The practice consists of applying a leak detection liquid
(PosiTest AIR Test Solution) to the test specimen surface, sealing a
transparent chamber around the specimen and depressurizing the
chamber with a fan.
The location of an air leak is indicated by bubbling of the Test Solution.
An estimate of the relative size of the leak can be made based on the size
and speed with which the bubbles form.
Basic steps for performing a test with a PosiTest AIR:
Prepare for t e Test (pg. 3)
- Clean the test area.
- Set Mode of Operation - Automatic (default) or Manual
Perform Test (pg. 4)
- Apply Test Solution to test area.
Test Solution must be applied correctly. (pg. 4)
- Place test chamber firmly over test area.
- Initiate test and observe test area for bubbles;
determine pass or fail.
- Store test result in memory. (optional)
Page 1
Quick Start
Quick Start
The PosiTest AIR powers up and displays dashes when the
button is pressed. To preserve battery life, the instrument powers
down after 5 minutes of no activity or by holding for 2 seconds.
IMPORTANT:

Page 2
PosiTest AIR Leak Tester Kit Contents
- PosiTest AIR tester body
- igh impact, transparent, polycarbonate test chamber
- 5' (1.5 m) hose with quick disconnect couplings
- AC Power Supply
- (4) - 8 ounce (237ml) bottles of Test Solution each with dauber applicator
- Nylon carrying case with shoulder strap
- USB cable & PosiSoft 3.0 Desktop Software (available as download)
- Instruction Manual
- Certificate of Calibration traceable to N.I.S.T.
PosiTest
PosiTest AIR
AIR Test Solution
Test Solution
Every PosiTest AIR comes complete with (4) bottles of Test Solution.
The Test Solution is applied to the test area prior to initialization of the test.
The Test Solution has been specially formulated not to have any adverse
effects on waterproofing, roofing, air barrier membranes or the
PosiTest AIR unit. Do not use on spun polyolefin building wrap.
Additional Test Solution can be purchased by contacting your distributor.
All residual test solution should be removed from the test area
once testing has been completed. Wipe the test area with a clean,
dry cloth to remove the test solution.
NOTE:

Preparing for t e Test
Clean t e Test Areas
Ensure that the test area is free of dirt, dust and debris. The test area
should not be hot (from torching), frosted or extremely wet.
Slight dampness around the test area will not compromise the results of
the test. The area being tested should be free of ice, which may act to
“plug” the leak.
Page 3
The PosiTest AIR has two modes of operation:
Automatic (default) and Manual
To view current operation mode, press .
Press again to switch between operation modes.
Automatic Mode Testing: (default and most commonly used mode)
The PosiTest AIR automatically depressurizes the test chamber at a
selected rate until the selected pressure limit has been achieved.
Common test parameters:
Pressure Differential Limit: 500 Pa
Rate of Depressurization: 25 Pa/sec
Press to display the current Pressure Differential Limit.
Press repeatedly to select Limit in increments of 100 Pa
(maximum of 900 Pa).
Manual Mode Testing:
The PosiTest AIR test chamber is manually depressurized using the
and buttons. Manual mode is ideal for quick spot checks
of multiple test areas.
Set Mode of Operation
Press to display the current Rate of Depressurization.
Press repeatedly to select Rate in increments of 5 Pa/sec
(maximum of 30 Pa/sec).

3. Initiate t e Test
Press to ready the PosiTest AIR for the test. Press it again to
begin test.
In Automatic Test Mode (pg. 3) the PosiTest AIR will automatically
increase fan speed until the set Pressure Differential Limit is reached or
the button is pressed.
In Manual Test Mode (pg. 3) the user manually adjusts fan speed to
depressurize test chamber as test is being performed. Press and hold
, to increase or to decrease fan speed.
During the test, if the solution around the test area bubbles,
a leak is resent.
For best results, test solution must be a lied correctly.
Rotate dauber as test solution is being applied over test area.•
Do not overapply or the solution will form a froth or foam.•
2. Place t e Test C amber over t e Test Area
Place and hold the test chamber firmly against test area to ensure
continuous contact with the substrate. Achieving a perfect seal between
the test chamber and test surface is not necessary. The PosiTest AIR
will adjust for any extraneous leakage that occurs.
Page 4
Performing t e Test
Performing t e Test
1. Apply Test Solution
Using the included dauber applicator, thoroughly
cover the prepared test area with a thin film of
Test Solution.
IMPORTANT:

Page 5
Careful observation is important as bubbles of
different sizes can form anywhere within the test area
where solution is present. Bubbles may also form
and pop quickly. A very large leak may not form a
bubble, but rather blow solution away.
When a leak has been identified, the test can be halted by pressing the
button. In Automatic mode, the PosiTest AIR will automatically
stop when the pre-selected pressure limit is reached.
Let the pressure within the test chamber decrease before removing it
from the test surface. The test area can then be marked for further repair,
or the bubble can be photographed if documentation is required for the
particular job.
Upon completion of the test, the maximum pressure differential and
duration of the test will flash on the display.
4. Store Test Result (optional)
Press upon completion of the test. The PosiTest AIR will display
“PASS”.
Press to store a PASS result.
Press to store a FAIL result.
In addition to the PASS/FAIL result, the rate of depressurization,
maximum pressure differential and test duration is stored in memory.
Press repeatedly, to review test results stored in memory.
To remove all stored data:
Press and hold the button, then press the button.
The icon on the display will disappear.
Accessing Stored Test Results
Stored test results can be downloaded using the supplied USB cable and
PosiSoft 3.0 Deskto Software (available for download at
www.defelsko.com/posisoft). Test results are not erased from memory
after downloading.

Page 6
Power Source: Built-in rechargeable NiM battery (> 200 tests with full charge)
The symbol will appear when remaining battery power is below 35%.
The built-in rechargeable NiM batteries** are charged using the included
AC power supply. Ensure batteries are charged prior to use.
The symbol will blink while the instrument is charging and disappears when
fully charged. The charging process will take 2-3 hours depending on remaining
battery power.
The included AC power supply can be used to power the instrument while
charging is in progress.
The USB port will NOT charge or power the PosiTest AIR. The USB connection
will drain battery power when connected for an extended period of time.
**Do not attem t to remove or re lace the internal NiMH battery ack. In the
unlikely event ower issues are ex erienced, lease contact your dealer or
DeFelsko for technical su ort assistance.
Power Supply / Low Battery Indicator
NOTES:
Tec nical Data
Tec nical Data
Conforms to: ASTM E 1186 and others.
Specifications: Resolution: 1 Pa Accuracy: ±(10% + 10 Pa)
Calibration
Calibration
The PosiTest AIR Leak Detector is shipped with a Certificate of
Calibration showing traceability to a national standard. For organizations
with re-certification requirements, the PosiTest AIR Leak Detector may
be returned at regular intervals for calibration. DeFelsko recommends
that our customers establish the instrument calibration intervals based
upon their own experience and work environment. Based on our product
knowledge, data and customer feedback, a one year calibration interval
from either the date of calibration, date of purchase or date of receipt
is a typical starting point.
PosiTest AIR Storage Temperature: -22° to 149° F (-30° to 65° C)
Operating Temperature: 5° to 122° F (-15° to 50° C)
PosiTest AIR
Test Solution
Storage Temperature: -22° to 149° F (-30° to 65° C)
Operating Temperature: -22° to 149° F (-30° to 65° C)

DeFelsko’s sole warranty, remedy, and liability are the express limited warranty,
remedy, and limited liability that are set forth on its website:
www.defelsko.com/terms
www.defelsko.com
© DeFelsko Corporation USA 2013. All Rights Reserved
This manual is copyrighted with all rights reserved and may not be reproduced or transmit-
ted, in whole or part, by any means, without written permission from DeFelsko Corporation.
DeFelsko, PosiTest and PosiSoft are trademarks of DeFelsko Corporation
registered in the U.S. and in other countries. Other brand or product names are trademarks
or registered trademarks of their respective holders.
Protection provided by the equipment may be impaired if the equipment is used in a manner
not specified by the manufacturer.
Every effort has been made to ensure that the information in this manual is accurate.
DeFelsko is not responsible for printing or clerical errors.
Returning for Service
There are no user serviceable components. Any service must be performed by
DeFelsko Corporation.
If you need to return the Instrument for service, please fill out and include the
Service Form located at www.defelsko.com/support.
Be sure to describe the problem fully and include your company name, company
contact, telephone number and fax number or email address.
Limited Warranty, Sole Remedy and Limited Liability
Page 7

Manual de
Instrucciones v. 1.0
Detector de Fugas

Introducción
Introducción
El detector manual de fugas portátil manual PosiTest AIR prueba
la integridad de la barrera de aire de los sistemas de membrana simple,
membrana doble y membrana líquidos incluyendo barreras de aire,
sistemas de techado, revestimientos impermeabilizantes y de suelo
localizando fugas.
De acuerdo con la norma ASTM E 1186, el PosiTest AIR indicará si
existen fugas en el área de prueba. Es una sencilla prueba
de pasa/no pasa.
El PosiTest AIR puede emplearse durante y después la construcción.
La práctica consiste en aplicar un líquido de detección de fugas
(Solución de Ensayo PosiTest AIR) a la superficie de la muestra
de prueba, sellando una cámara transparente alrededor de la muestra y
despresurizando de la cámara con un ventilador.
La ubicación de una fuga de aire se indicará mediante el burbujeo
de la solución de ensayo. Puede estimarse el tamaño relativo de la fuga
según el tamaño y la velocidad con la que se forman las burbujas.
Los pasos básicos para realizar una prueba con PosiTest AIR son:
Preparación de la Prueba (Pág. 3)
- Limpie la zona de prueba.
- Ajuste el modo de funcionamiento - Automático (predeterminado)
o Manual
E ecución de la Prueba (Pág. 4)
- Aplique la solución de ensayo en el área de prueba.
La solución deberá aplicarse correctamente.(Pág. 4)
- Sujete con firmeza la cámara de ensayo en el área.
- Inicie la prueba y observe las burbujas en el área;
determine el pasa o no pasa.
- Almacene el resultado de la prueba en la memoria. (opcional)
Página 1
Inicio Rápido
Inicio Rápido
Si pulsa el botón , el PosiTest AIR se encenderá y mostrará
guiones. Para preservar la vida de la batería, el instrumento se apagará
después de 5 minutos de inactividad o al pulsar durante
2 segundos.
IMPORTANTE:

Página 2
Contenido del Equipo de Detección de Fugas PosiTest AIR
- Cuerpo del PosiTest AIR
- Cámara de ensayo de policarbonato transparente de alta resistencia
- Manguera de 5' (1,5 m) con acoplamientos de desconexión rápida
- Fuente de alimentación
- 4 botellas de 8 oz (237 ml) de solución de ensayo con su correspondiente
aplicador dauber
- Estuche de nylon con correa para el hombro
- Cable USB y Software PosiSoft 3.0 Cliente (disponible como descarga)
- Manual de Instrucciones
- Certificado de Calibración con trazabilidad al N.I.S.T.
Solución de Ensayo PosiTest
Solución de Ensayo PosiTest AIR
AIR
Cada PosiTest AIR se suministra completo con (4) botellas de la solución de
ensayo. La solución de ensayo se aplicará en el área de prueba antes de
iniciar la prueba.
La solución de ensayo se ha formulado especialmente para no tener ningún
efecto adverso sobre la impermeabilización, techados o membranas de
barrera de aire o sobre la unidad PosiTest AIR. No lo use en películas
envolventes de poliolefina para construcción.
La solución de ensayo adicional se puede adquirir con su distribuidor.
Deberá retirarse toda la solución de ensayo del área de prueba
una vez que las pruebas se hayan completado. Limpie el área de prueba
con un paño limpio y seco para eliminarla.
NOTA:

Preparación Para la Prueba
Limpie las áreas de Prueba
Asegúrese de que el área de prueba esté libre de suciedad, polvo y
escombros. El área de prueba no deberá estar caliente (del soplete),
congelada o extremadamente húmeda. Los resultados de la prueba no
se verán afectados por poca humedad alrededor del área de prueba.
El área deberá estar libre de hielo que podría taponar la fuga.
Página 3
El PosiTest AIR tiene dos modos de funcionamiento:
Automático (por defecto) y Manual
Para ver el modo de funcionamiento actual pulse .
Pulse de nuevo para cambiar entre los modos de funcionamiento.
Prueba en Modo Automático: (Por defecto y el modo más utilizado)
El PosiTest AIR despresurizará automáticamente la cámara de ensayo
a una velocidad seleccionada hasta que se haya alcanzado el límite
de presión seleccionado.
Parámetros de ensayo comunes:
Límite de presión diferencial: 500 Pa
Tasa de despresurización: 25 Pa/seg
Pulse para mostrar en pantalla el límite de presión diferencial
actual. Pulse el botón repetidamente para seleccionar el límite
en incrementos de 100 Pa (máximo de 900 Pa).
Prueba en Modo Manual:
La cámara de ensayo PosiTest AIR se despresuriza manualmente
utilizando los botones y . El modo manual es ideal para
verificar con rapidez varios puntos de inspección en mutiples áreas
de prueba.
A uste del Modo de Funcionamiento
Pulse para mostrar la tasa de despresurización actual.
Pulse repetidamente para seleccionar la tasa en incrementos
de 5 Pa/seg. (máximo de 30 Pa/seg.).

3. Inicie la Prueba
Pulse para preparar el PosiTest AIR para la prueba. Pulse de
nuevo para iniciar la prueba.
En Modo de prueba automático (Pág. 3) el PosiTest AIR aumentará
automáticamente la velocidad del ventilador hasta alcanzar el límite
de la presión diferencial configurado o se pulse el botón .
En Modo de prueba manual (Pág. 3) el usuario podrá ajustar
manualmente la velocidad del ventilador para despresurizar la cámara
mientras realiza la prueba. Mantenga pulsado para aumentar o
disminuir la velocidad del ventilador.
Durante la prueba, si la s lución genera burbujas alreded r
de la z na de prueba, hay una fuga.
Para btener l s mej res resultad s, la s lución de ensay deberá
aplicarse c rrectamente.
Gire el aplicador Dauber según se vaya aplicando la solución •
de ensayo en el área de prueba.
No aplique en exceso o la solución formará espuma más o burbujas•
pequeñas.
2. Coloque la Cámara de Ensayo Sobre el área de Prueba
Coloque y mantenga la cámara de ensayo firmemente contra el área
de prueba para asegurar un contacto continuo con el sustrato.
No será necesario forma un sello perfecto entre la cámara de ensayo y
la superficie de ensayo. El PosiTest AIR se compensara en caso
de existir una fuga del exterior.
Página 4
Realización de la Prueba
1. Aplique la Solución de Ensayo
Con el aplicador Dauber incluido, cubra
completamente el área de prueba con una fina
película de solució.
IMPORTANTE:

Página 5
La observación cuidadosa es importante ya que se
pueden formar burbujas de diferentes tamaños en
cualquier lugar dentro del área de prueba donde
la solución esté presente. Las burbujas también
podrán formarse y estallar rápidamente. Puede que
una fuga muy grande no forme burbujas sino que
levante desalojará bruscamente la solución.
Cuando se haya identificado una fuga, la prueba podrá interrrumpirse
pulsando el botón . En modo automático, el PosiTest AIR se
detendrá automáticamente cuando se alcance el límite de presión
preseleccionado.
Deje que baje la presión dentro de la cámara de ensayo antes de retirarla
de la superficie de prueba. Podrá marcar el área de prueba para su
reparación o fotografiar la burbuja si se requiere documentación para un
trabajo en particular.
Al finalizar la prueba, la presión diferencial máxima y la duración
de la prueba parpadearán en la pantalla.
4. Almacenamiento de los Resultados de la Prueba (Opcional)
Pulse tras finalizar la prueba. El PosiTest AIR mostrará “PASS”.
Pulse para almacenar un resultado de pasa.
Pulse para almacenar un resultado de no pasa.
Además del resultado de PASA/NO PASA, la tasa de despresurización,
la presión diferencial máxima y la duración de la prueba se almacenarán
en la memoria.
Pulse de manera repetida para revisar los resultados almacenados
en la memoria.
Para eliminar todos los datos almacenados:
Mantenga pulsado el botón y luego pulse .
El icono de la pantalla desaparecerá.
Acceso a los Resultados de Pruebas Almacenados
Los resultados de pruebas almacenados pueden descargarse utilizando
el cable USB con el P siS ft 3.0 Deskt p S ftware
(descarga disponible en www.defelsko.com/PosiSoft). Los resultados no
se borrarán de la memoria después de la descarga.

-22° to 149° F (-30° to 65° C)
Página 6
Alimentación: Batería recargable de NiM (> 200 pruebas con carga completa).
El símbolo aparecerá cuando la carga sea inferior al 35%.
Las baterías recargables NiM ** se cargarán con el cargador incluido
Asegúrese de que las baterías estén cargadas antes de su uso.
El símbolo parpadeará mientras el aparato se está cargando y desapare-
cerá cuando esté completamente cargado. El proceso de carga durará unas
2 o 3 horas dependiendo de la potencia de la batería restante.
El cargador incluido podrá utilizarse para alimentar el instrumento mientras
la batería esté cargando.
El puerto USB no se utilizará para alimentar o cargar el PosiTest AIR.
La conexión USB consumirá la energía de la batería cuando se conecte durante
un período prolongado de tiempo.
**N intente quitar reemplazar el paquete intern de la batería NiMH.
En el p c pr bable cas de experimentar pr blemas c n la fuente
de energia, p r fav r póngase en c ntact c n su distribuid r la
asistencia técnica DeFelsk .
Alimentación / Indicador de Batería Ba a
NOTAS:
Datos Técnicos
Datos Técnicos
Cumple con: ASTM E 1186 y otros.
Especificaciones: Resolución: 1 Pa Precisión: ±(10% + 10 Pa)
Calibración
Calibración
El detector de fugas PosiTest AIR se entrega con un certificado de
calibración que muestra la trazabilidad según norma nacional.
Para organizaciones con necesidades de nueva certificación,
los detectores de fugas PosiTest AIR podrán devolverse a intervalos
regulares para su calibración. DeFelsko recomienda que sean
los usuarios quienes según su experiencia y condiciones de trabajo,
determinen la periodicidad con que necesitarán calibrar sus medidores.
Debido a nuestro conocimiento del producto, los datos y la colaboración
de nuestros clientes, recomendamos empezar con un intervalo de
calibración de un año a contar desde la fecha de la última calibración,
la fecha de compra del medidor o la fecha de entrega del mismo.
PosiTest AIR -22° to 149° F (-30° to 65° C)
5° to 122° F (-15° to 50° C)
PosiTest AIR
Soluc. ensayo
Temperatura de
almacenamiento:
Temperatura de
funcionamiento:
Temperatura de
almacenamiento:
Temperatura de
funcionamiento:

La única garantía, solución y obligación de DeFelsko son la garantía limitada
expresa, la solución y la obligación limitada expuestas en su sitio web:
www.defelsko.com/terms
www.defelsko.com
© DeFelsko Corporation USA 2013. Reservados todos los derechos.
Este manual está protegido por copyright. Todos los derechos de este manual están
reservados y no podrá ser parcial o totalmente reproducido o transmitido por ningún medio
sin el consentimiento previo por escrito de DeFelsko Corporation.
DeFelsko, PosiTector y PosiSoft son marcas comerciales de DeFelsko Corporation
registradas en los EE.UU. y en otros países. Otras marcas o nombres de productos
son marcas comerciales o registradas de sus propietarios respectivos.
La protección proporcionada por el equipo podría resultar afectada si se utiliza de una
manera que el fabricante no haya especificado.
Se han tomado todas las precauciones posibles para asegurar la precisión de toda
la información contenida en este manual. DeFelsko no aceptará responsabilidad por
errores tipográficos o de impresión.
Devolución Para Reparaciones
No hay componentes que el usuario pueda reparar. Las reparaciones deberá
realizarlas DeFelsko Corporation.
Si necesita devolver el instrumento para su reparación, por favor complete e
incluya el Formulario de servicio que encontrará en www.defelsko.com/support.
Asegúrese de describir detalladamente el problema e incluya el nombre de su
compañía, contacto, número de teléfono y número de fax o dirección de correo
electrónico.
Garantía Limitada, Solución única y Responsabilidad Limitada
Página 7

Gebrauchsanweisung
v. 1.0
Dichtheitsprüfgerät

Einfü rung
Einfü rung
Das tragbare, handbetriebene Dic t eitsprüfgerät PosiTest AIR testet die
Luftschrankenintegrität einzelner, zweilagiger und flüssiger
Membransysteme, einschließlich Luftschranken, Dachsysteme,
Imprägnierungen und Bodenauskleidungen durch Auffinden von Leckagen.
In Übereinstimmung mit ASTM E 1186 gibt PosiTest AIR an, ob Leckagen im
Testbereich bestehen. Es ist ein einfacher Positiv/Negativ-Test.
Das PosiTest AIR kann während des Baus und danach verwendet werden.
Das Verfahren besteht darin, eine Leckagenermittlungsflüssigkeit
(Testlösung PosiTest AIR) auf die Oberfläche der Testfläche aufzutragen,
eine transparente Kammer zur Abdichtung der Testfläche aufzusetzen und
den Druck aus der Kammer mit einem Entlüfter abzulassen.
Eine Luftundichtigkeit (Leckage) wird durch Blasenbildung der Testlösung
angezeigt. Eine Schätzung der relativen Größe der Leckage kann auf der
Grundlage der Größe und Geschwindigkeit vorgenommen werden, mit der
sich die Blasen bilden.
Grundschritte zur Durchführung eines Tests mit einem PosiTest AIR:
Vorbereitung des Tests (S. 3)
- Testbereich reinigen.
- Betriebsart einstellen - Automatisch (Standard) oder Manuell
Test durc fü ren (S. 4)
- Testlösung auf Testbereich auftragen.
Testlösung muss korrekt aufgetragen werden. (S. 4)
- Testkammer fest über dem Testbereich anbringen.
- Test einleiten und Testbereich auf Blasen beobachten;
positives oder negatives Ergebnis bestimmen.
- Testergebnis speichern. (optional)
Seite 1
Sc nellstart
Sc nellstart
Das PosiTest AIR schaltet sich ein und zeigt Striche an, wenn die Taste
gedrückt wird. Um die Lebensdauer der Batterien zu verlängern,
schaltet sich das Gerät nach 5 Minuten automatisch aus oder indem man
2 Sekunden lang gedrückt hält.
WIC TIG:

Seite 2
Lieferumfang des Dic t eitsprüfgerät PosiTest AIR
- Grundgerät PosiTest AIR
- Transparente Polycarbonat-Testkammer mit hoher Schlagfestigkeit
- Schlauch 1,5 m mit Schnellkupplungen
- Wechselstromzufuhr
- 4 Flaschen mit je 237 ml Testlösung, jeweils mit Applikator
- Nylon-Tragetasche mit Schulterriemen
- USB-Kabel & Desktop-Software PosiSoft 3.0 (als Download verfügbar)
- Bedienungsanleitung
- Auf N.I.S.T. zurückführbares Kalibrierzertifikat
Testlösung PosiTest
Testlösung PosiTest AIR
AIR
Jedes PosiTest AIR wird komplett mit 4 Flaschen Testlösung geliefert.
Die Testlösung wird vor der Durchführung des Tests auf den Testbereich
aufgetragen.
Die Testlösung wurde speziell so entwickelt, dass sie keine nachteiligen
Auswirkungen auf die Imprägnierung, Bedachung, Luftschrankenmembrane
oder das Gerät PosiTest AIR hat. Nicht auf Polyolefin-Vliesstoffen
verwenden.
Zusätzliche Testlösung beziehen Sie über Ihren ändler.
Verbleibende Testlösung sollte vom Testbereich entfernt
werden, sobald die Tests abgeschlossen sind. Wischen Sie den
Testbereich mit einem sauberen, trockenen Tuch ab, um die Testlösung
zu entfernen.
INWEIS:

Vorbereitung des Tests
Testbereic e reinigen
Stellen Sie sicher, dass der Testbereich frei von Schmutz, Staub und
Ablagerungen ist. Der Testbereich sollte nicht heiß (z.B. durch
Beflammung), gefroren oder extrem nass sein. Eine leichte Feuchtigkeit
um den Testbereich beeinträchtigt die Testergebnisse nicht.
Der getestete Bereich sollte frei von Eis sein, das die Leckage
„verstopfen“ kann.
Seite 3
Das PosiTest AIR hat zwei Betriebsarten:
Automatisch (Standard) und Manuell
Um die aktuelle Betriebsart anzusehen, drücken Sie .
Erneut drücken, um zwischen den Betriebsarten zu wechseln.
Testen in der automatischen Betriebsart:
(Standard- und meistverwendete Betriebsart)
Das PosiTest AIR lässt automatisch den Druck von der Testkammer in
einem gewählten Verhältnis (Rate) ab, bis der gewählte Druckgrenzwert
erreicht wurde.
Gebräuchliche Testparameter:
Druckdifferentialgrenzwert: 500 Pa
Druckablassrate: 25 Pa/sec
Drücken Sie , um den aktuellen Druckdifferentialgrenzwert
anzeigen zu lassen. Mehrmals drücken, um den Grenzwert in Schritten
von 100 Pa zu wählen ( öchstwert 900 Pa).
Testen in der manuellen Betriebsart:
Der Druck aus der Testkammer des PosiTest AIR wird mit den Tasten
und manuell abgelassen. Die manuelle Betriebsart ist
ideal für schnelle Punktprüfungen mehrerer Testbereiche.
Betriebsart einstellen
Drücken Sie , um die aktuelle Druckablassrate anzuzeigen.
Mehrmals drücken, um die Rate in Schritten von 5 Pa zu wählen
( öchstwert 30 Pa/sec).
Other manuals for PosiTest AIR
3
Table of contents
Languages:
Other DeFelsko Test Equipment manuals

DeFelsko
DeFelsko PosiTest AIR User manual

DeFelsko
DeFelsko PosiTest DT User manual

DeFelsko
DeFelsko PosiTector SST User manual

DeFelsko
DeFelsko PosiTector 200 User manual

DeFelsko
DeFelsko PosiTector SPG User manual

DeFelsko
DeFelsko PosiTector UTG User manual

DeFelsko
DeFelsko PosiTest AT User manual

DeFelsko
DeFelsko PosiTest AT-A User manual

DeFelsko
DeFelsko PosiTector SHD Verifier User manual

DeFelsko
DeFelsko PosiTest AT-A User manual